
A proxy is necessarily a system that sits between your computer, and the computer you want to connect to. By using a proxy server, the web traffic runs through the proxy server on its way to the target address on a different server. The request then returns through the target server via the same proxy server showing the website to you.
Here are a few things that proxy can do for you.
- The first benefit and the one that everyone gets attracted towards is that it hides your real IP address from any websites or servers that you visit. That way, that server cannot figure out your real location. If you really like this one, I think you’re up to some sneaky stuff. Just try not to get to prison.
- Next, you can use it to add or break rules of your network! You can visit some websites that may have been blocked by your network administrator, or add websites to a ‘blacklist’ that you don’t want the network users to visit.
- Finally, proxies also ‘cache’, or essentially store some amount of data from the websites that are visited. What does this do? Well, if you visit a website and the data from it is stored, and you visit it next time, your system can show the website directly from the stored data! A connection to the server won’t even be required.
So that’s basically what a proxy does. As a result of all this, it makes your system and network much more secure, fast, and reduces the response time.
Squid Proxy Server
Now that we have understood the deal with proxies, let’s talk about Squid. Squid Proxy Server is a full-featured proxy that is really popular in the Linux community. That is because it has everything that could possibly be wanted from a program of its kind.
Squid supports all major protocols. First one, the HTTP (Hyper-Text Transfer Protocol), which brings you the websites that you visit. Next, FTP (File Transfer Protocol), which is responsible for all kinds of downloads and uploads. Moreover, it caches data of SSL (Secure Sockets Layer). It is the protocol that ensures a secure connection. Finally, it also caches DNS (Domain Name System) data, which fetches the IP address of the websites that you visit. This makes the response time faster even further.
This might be a bit overwhelming for beginners, but if you notice through the descriptions, it basically covers everything that you do on the internet.
Now let’s begin with the installation.
Install and configure Squid Proxy in Ubuntu, Debian, and Mint
Step 1 – Installing and starting services.
First, update your system. This is not absolutely essential, but its good practice.
sudo apt-get update
Now install Squid.
sudo apt-get install squid
Now you need to start and enable the service. So, enter these codes:
sudo systemctl start squid
sudo systemctl enable squid
Now for the testing (again good practice):
sudo systemctl status squid
The output should look something like this.
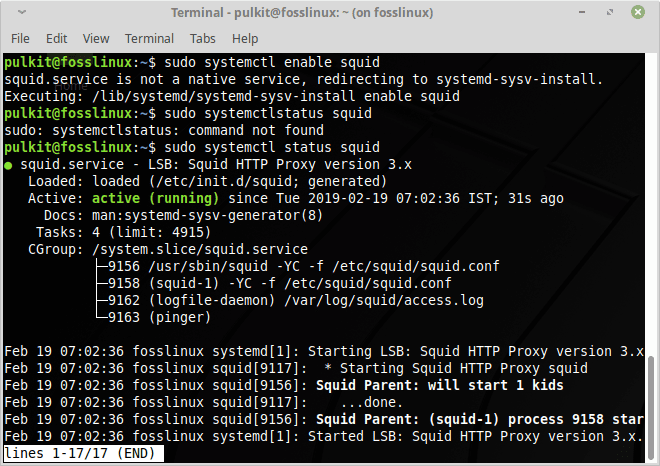
This is what the status check looks like in Linux Mint.
I wish it were this easy. But it’s not. By default, Squid’s settings are not configured properly, so we will have to configure it before we can use it. So let’s see what things need to be done.
Step 2 – Changing the default port
Now open the Squid configuration file with whatever text editor you’re comfortable with. For Ubuntu, the default is Gedit, for Mint Xed. I recommend using Gedit. If you don’t have it, you can install it using the following command:
sudo apt-get install gedit
Now to open the file:
sudo gedit /etc/squid/squid.conf
Sample output

This is what the Squid configuration file looks like. Don’t read too much of it, it will boggle your mind.
Now look up, or better yet, use the find feature to find the line that has ‘http_port 3128’. You can use the find feature by pressing CTRL + F in Gedit (and most of the other graphical text editors). The default port of Squid is 3128 and it is recommended to change it otherwise your system could be a bit vulnerable to attacks.
So replace the 3128 with the port that you want. Make sure to look up that port number on the internet, otherwise you might overlap some other important protocol’s port. We are using 8888 as an example.
Sample output
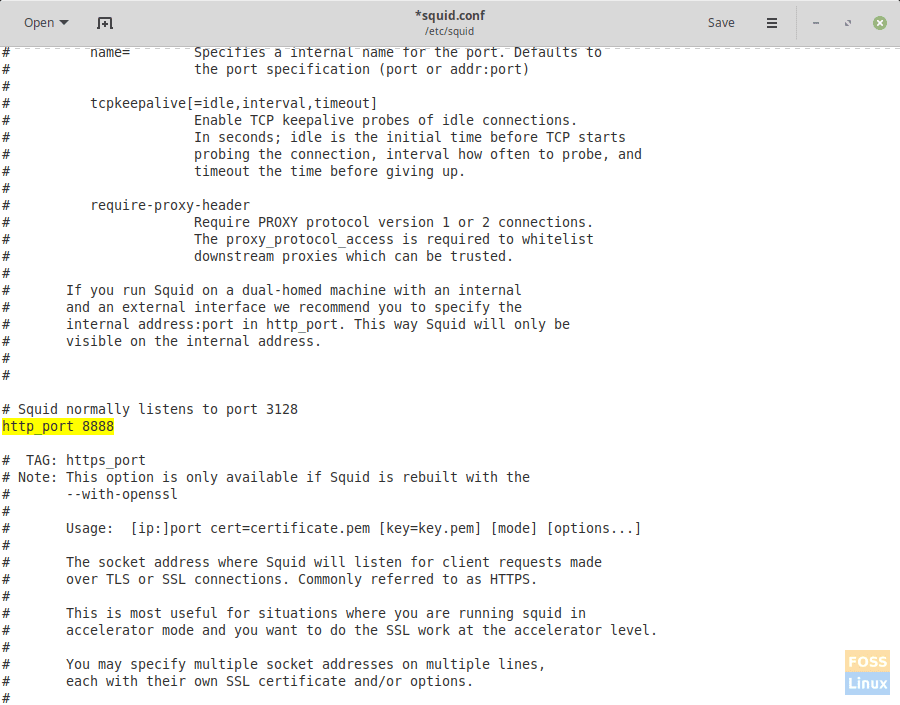
Changing the HTTP Port is highly recommended.
Step 3 – Controlling Access Control Lists
So much for the easy part. Now we have to add rules to the configuration files that will determine which users are allowed to access the system and which are not.
We will first specify the network range. Find a line using the keywords ‘acl localnet’. This must be what comes up:
Sample output
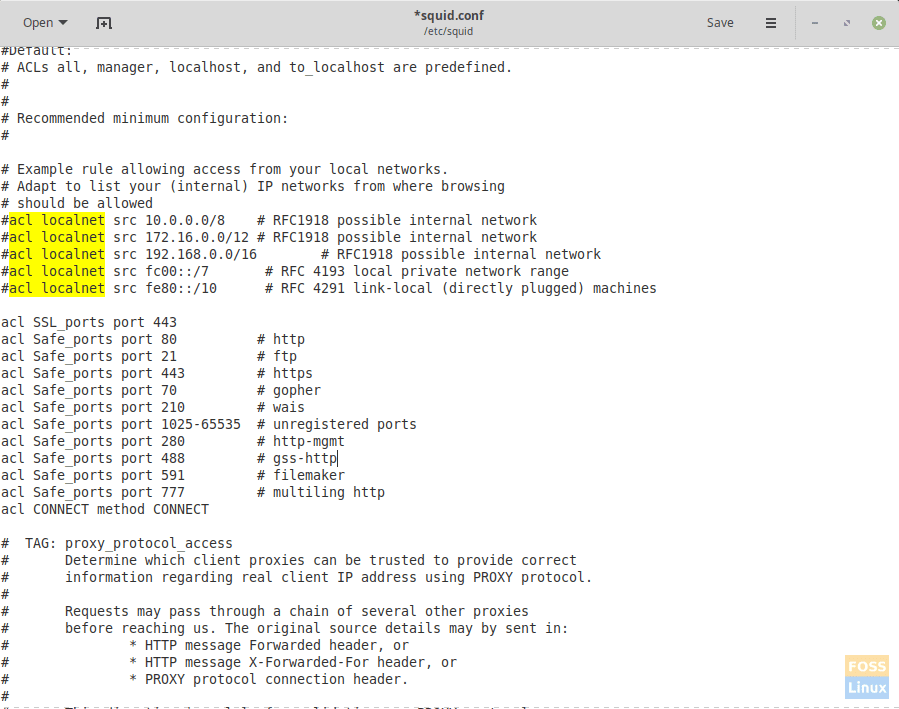
‘acl localnet’ part of the configuration file.
To find out what your network range is, fire up another terminal and write:
sudo ifconfig
So from your IP address, replace the last part with ‘0’, and that is your network range. For example, my IP address is 192.168.43.161. So my network range is 192.168.43.0. In the line, I have to add 192.168.43.0/24. This includes all devices in this sub-network.
Now below all the lines starting with ‘acl’, add a line that adds your network range.
acl mint src 192.168.43.0/24
I have used the username ‘mint’. You can use anything for it. Now we provide access to the username ‘mint’.
http_access allow mint
This should do it. Now save the file.
Sample output
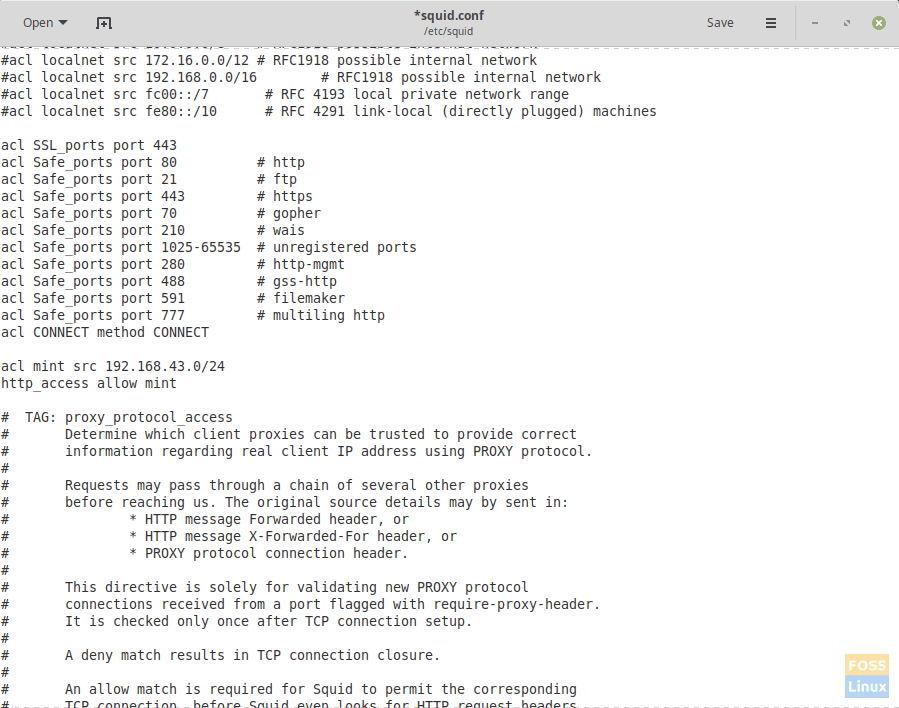
Now the .conf file has been configured. *Phew*!
Now we restart the Squid service.
sudo systemctl restart squid
This should enable the users of the sub-network to use the proxy.
And viola! You have successfully installed the proxy. This is basically it for installing the proxy, and blacklisting websites, allowing and disallowing certain users, and other advanced functions. How did your installation go? Do let us know your feedback in the comments below.