
Tmux is a Linux package that allows you to multitask between terminal windows. Terminal Multiplexing is an acronym that is based on the notion of sessions. It may be isolated from a screen and run in the background before reattaching. Tmux is a terminal multiplexer that may be substituted for the GNU screen. You can create a Tmux session and then open many windows within it. Each window inhabits the entire screen and is separated into rectangular panes. Users can start a new process, switch to another, and disconnect from and rejoin an existing one.
There will be no icon associated with Tmux after installing it. It will not display as a distinct program; instead, we must launch it from the Gnome Terminal. We will demonstrate how to do this later on in this tutorial guide. We assume by now you have Tmux installed on your operating system, as we shall be brushing through in this guide. If you have not installed it, please look at How to install and use Tmux on Linux, which contains detailed know-how for installing Tmux on your Linux OS.
First, before we start, we shall briefly show how to install Tmux on your Linux OS:
Installing Tmux on Linux
Tmux software packages are available from the official repositories of major operating systems such as Linux, macOS, and Windows Subsystem for Linux (WSL). To install Tmux on Ubuntu 22.04, just utilize the package manager or Software Center, as demonstrated below:
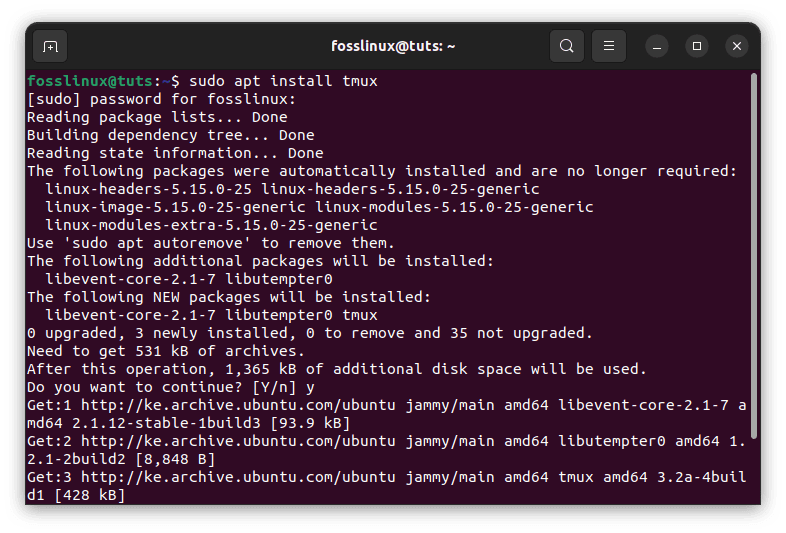
- To install Tmux using the terminal package manager, use the following command:
sudo apt install tmux
Install Tmux
- To install Tmux using Software Center, launch it, search for Tmux, and then click Install as illustrated in the image below:
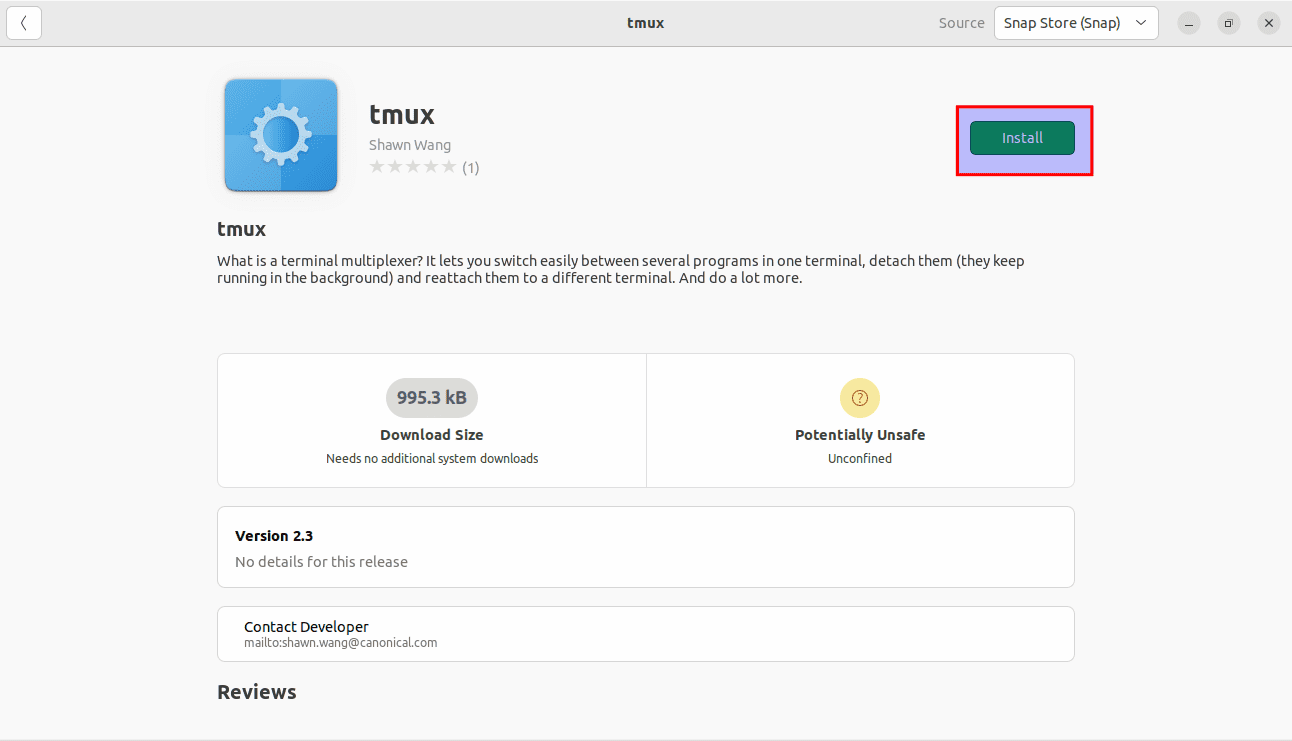
Install Tmux via the software center
Once Tmux has been installed, proceed to the next phase, where we shall launch it on our Linux OS.
How to launch Tmux on Linux
Once Tmux is installed, we must utilize the Gnome terminal to access it. When using the ‘tmux’ command, you may receive the following error:
"open terminal failed: missing or unsuitable terminal: xterm-256color"
Enter “export TERM=xterm” on the terminal to resolve this problem. Run the “tmux” command again; this time, the error should not appear. Another option is to run Tmux via the ‘XTERM’ terminal. On our Ubuntu 22.04 machine, this functioned.
Once you fix that error and launch Tmux, it is time to proceed and learn how to rename a session in Tmux.
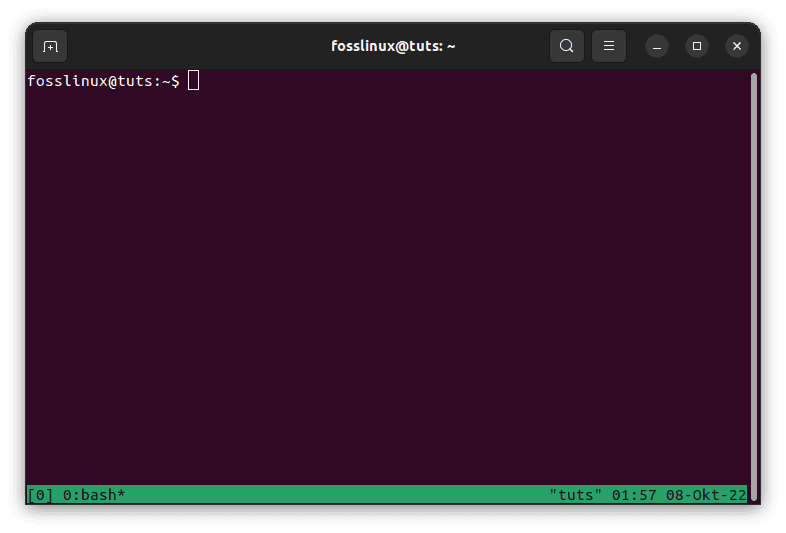
Tmux new screen
How to rename a session in Tmux
To communicate with a Tmux terminal, we have three options.
- Using the Prefix keys: Tmux uses a prefix key combination, which is by default “CTRL+b.” This prefix is tailed by one or two more keys that Tmux will interpret for a specific operation. As an illustration, we can leave a session by pressing [Prefix+d].
- Using the command mode: To enter the command mode, hit the prefix keys followed by the colon. This will send the commands straight to the Tmux terminal (:). We may type the Tmux instructions at the command prompt that appears at the bottom of the terminal.
- Using the command line: You can use Tmux commands from a terminal or shell prompt that is not Tmux. The term “tmux” comes before these instructions.
By default, tmux names each new session that you start with a number value. This is not entirely obvious, especially when using multiple tmux sessions. Of course, you may use tmux new -s sesh to launch a named tmux session. However, having the option sometimes to rename either the specified name or the default name is useful. When first using Tmux, most users fail to give their current session a name.
However, when the number of sessions grows along with the workflow, it is difficult to recall which session you were in and what services were active in it. It is wise to name each session from the beginning to prevent misunderstanding. However, you may still give a session a name or modify an existing name if you neglected to do so when you first created it. Today, we’ll show you just how to achieve this. So let’s get going.
We shall illustrate two distinct ways one can choose to rename a Tmux session in Linux. If method one fails to do the trick for you, don’t hesitate to try out the other method that will be provided in this article guide.
Method 1: Renaming a session’s name Using the ‘tmux rename-session’ command
Use the following syntax to rename a session from a shell prompt using the Tmux “rename-session” command:
tmux rename-session -t old-session-name new-session-name
To show off this command, let’s first establish a new Tmux session called “Fosslinux_tuts_1”:
tmux new -s Fosslinux_tuts_1
Use the following command format to rename this session to “Fosslinux_tuts_2.
tmux rename-session -t Fosslinux_tuts_1 Fosslinux_tuts_2
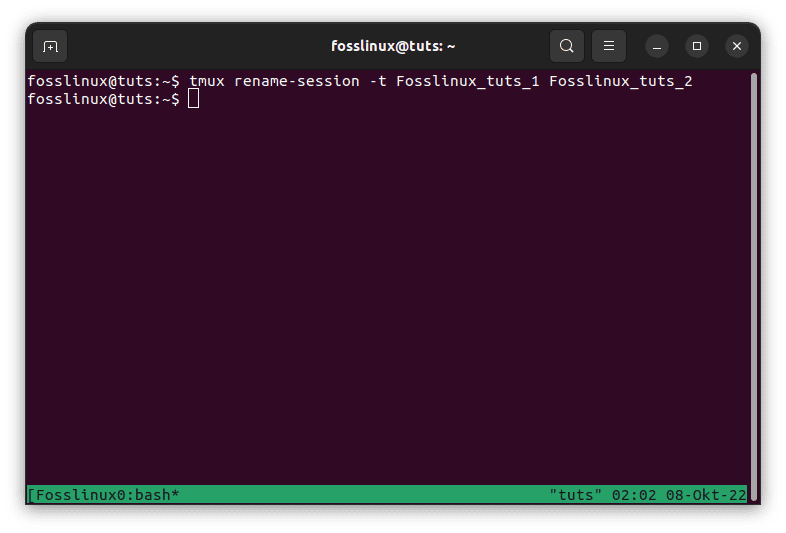
Rename Tmux
Alternatively, we may utilize the Tmux command line. Press “Prefix + :” and enter the following command:
tmux rename-session -t Fosslinux_tuts_1 Fosslinux_tuts_2
Execute the ‘tmux ls’ command to confirm the modifications made above:
tmux ls

Run the Tmux ls command
Method 2: Renaming a Tmux Session Using Prefix + $ Key Combination
In this section, we shall rename session 2 “Fosslinux_tuts_2” to “Fosslinux_tuts_3. To do so, click the “Ctrl + b” keyboard combination prefix followed by the “$” symbol. To validate the changes made, we shall employ the famous ‘tmux ls’ command:
tmux ls
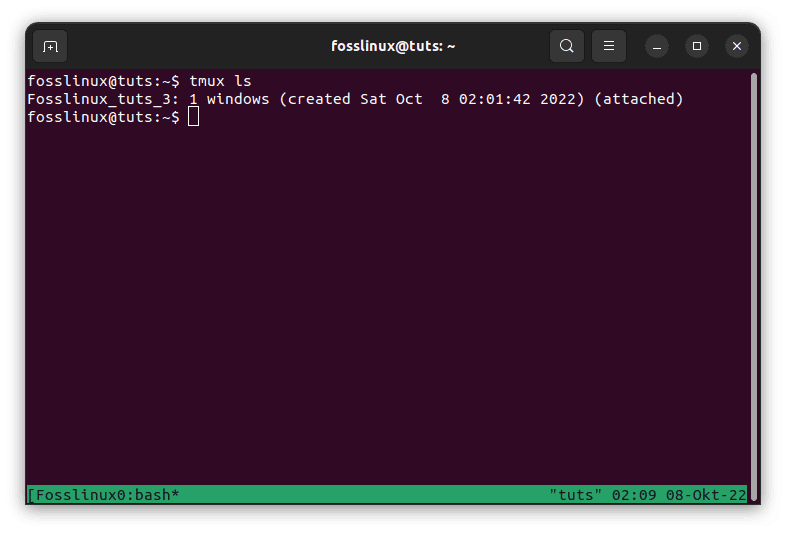
Confirm renamed session
In the screenshot displayed below, the brownish highlight line prompts us to input the new session name.
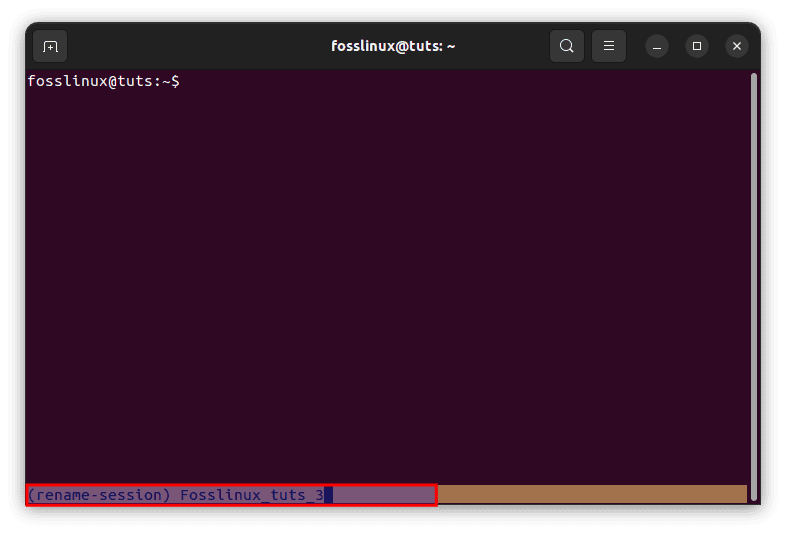
Rename Tmux session
Type in your desired session name. For illustration purposes, I typed “Fosslinux_tuts_3” and clicked “Enter” on my keyboard to effect the changes made.
By now, your session name will have been changed successfully. To check the changes made, run the tmux ls command as shown in the snapshot below:
tmux ls
Confirm renamed session
Additional tips
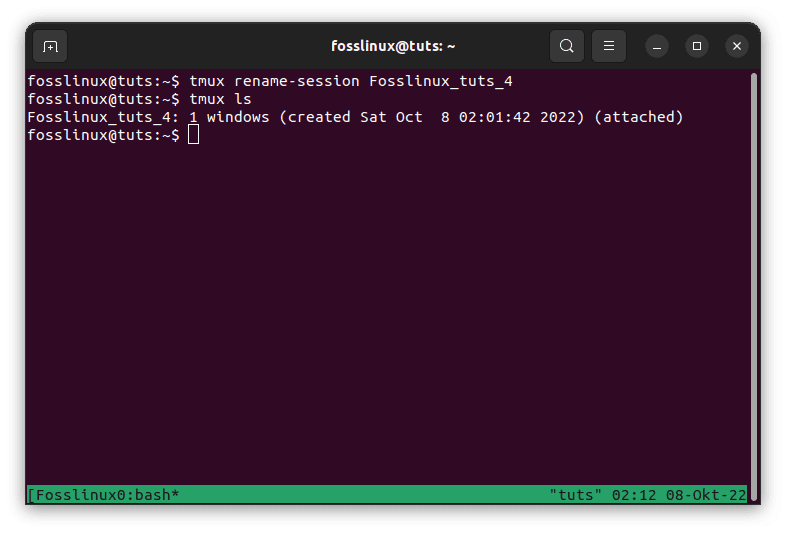
You can omit the name of the current session when you are already in the one you wish to rename. If you don’t use the -t option to indicate a destination, Tmux will presume that your current session needs to be renamed. For instance, let’s see what happens when we execute the following line of code:
tmux rename-session new_name
Example:
tmux rename-session Fosslinux_tuts_4
The above command will rename the current Tmux session, which in our case, is “Fosslinux_tuts_3”. Therefore from this illustration, it is evident that you can save valuable time by changing the current session without including its name in the code to be executed.
Rename current session
That’s it. You have successfully learned how to rename a Tmux session in Linux.
Conclusion
This brief article covered the installation of Tmux and how to launch and rename a Tmux session. It is vital to name your Tmux session during the creation phase, but if you miss it, don’t worry since you can refer to this article guide and learn how to rename your current Tmux session. I hope you enjoyed reading this tutorial article guide.