
Fish shell, also known as Friendly Interactive Shell, is a user-friendly shell designed for interactive use in Unix-like operating systems. Fish shell provides many features and customization options, such as syntax highlighting, autosuggestions, and tab completions.
In this article, we will guide you through the process of installing and using Fish shell on Ubuntu.
Installing Fish Shell on Ubuntu
There are multiple ways to install Fish shell on Ubuntu. Here are some of the most commonly used methods:
Method 1. Install Fish Shell using the apt package manager (Recommended)
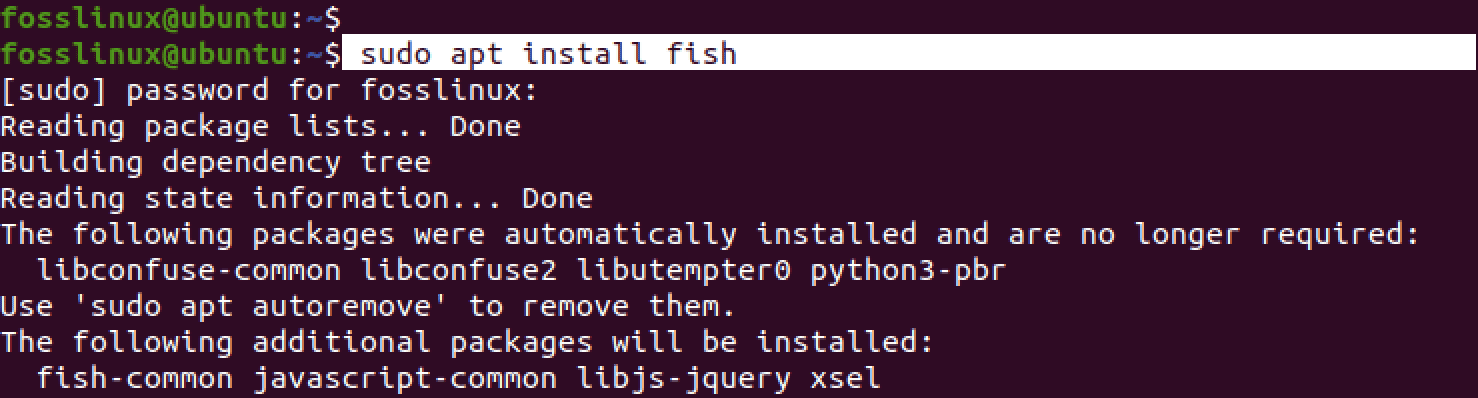
The apt package manager is the most straightforward way to install Fish shell on Ubuntu. Run the following command in your terminal:
sudo apt update
sudo apt install fish
This will install the latest version of Fish shell from the Ubuntu repositories.
Install Fish Shell
Method 2. Install Fish Shell Using PPA
If the version of Fish shell available in the Ubuntu repositories is not up-to-date, you can add the Fish shell PPA (Personal Package Archive) to your system and install the latest version. To do this, run the following commands:
sudo apt-add-repository ppa:fish-shell/release-3
sudo apt update
sudo apt install fish
This will install the latest version of Fish shell from the PPA.
Method 3. Install Fish Shell by building from Source
If you prefer to build and install Fish shell from source, you can download the source code from the Fish shell website and compile it on your system. Here are the steps to do that:
sudo apt install build-essential cmake
wget https://github.com/fish-shell/fish-shell/releases/download/3.3.1/fish-3.3.1.tar.gz
tar -xzf fish-3.3.1.tar.gz
cd fish-3.3.1
cmake .
make
sudo make install
This will compile and install the latest version of Fish shell on your system.
Using Fish Shell
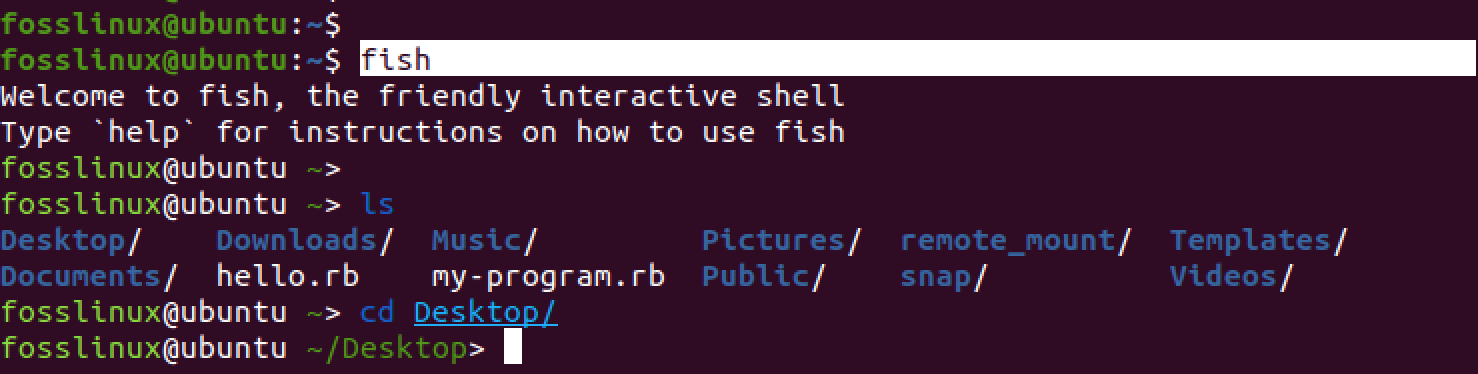
Once Fish shell is installed on your Ubuntu system, you can start using it by opening a terminal and typing the command below in the command prompt.
fish
This will launch the Fish shell, and you can start using its features and customization options.
Start Fish Shell
Fish Shell features
After executing the “fish” command, there are a few changes that you will notice on the terminal when you try executing commands. These include:
1. The prompt
When you start the Fish shell, you will notice that the prompt looks different from the default Bash prompt. The Fish prompt is usually a simple “>” symbol followed by a space. However, you can customize the prompt to display different information, such as the current directory, username, hostname, or Git branch, by using the “set” command with the “fish_prompt” variable.
For example, if you want to display the current directory in the prompt, you can run the following command:
set fish_prompt "%c> "
This will display the prompt’s current directory followed by a “>” symbol.

Show the current directory in the prompt
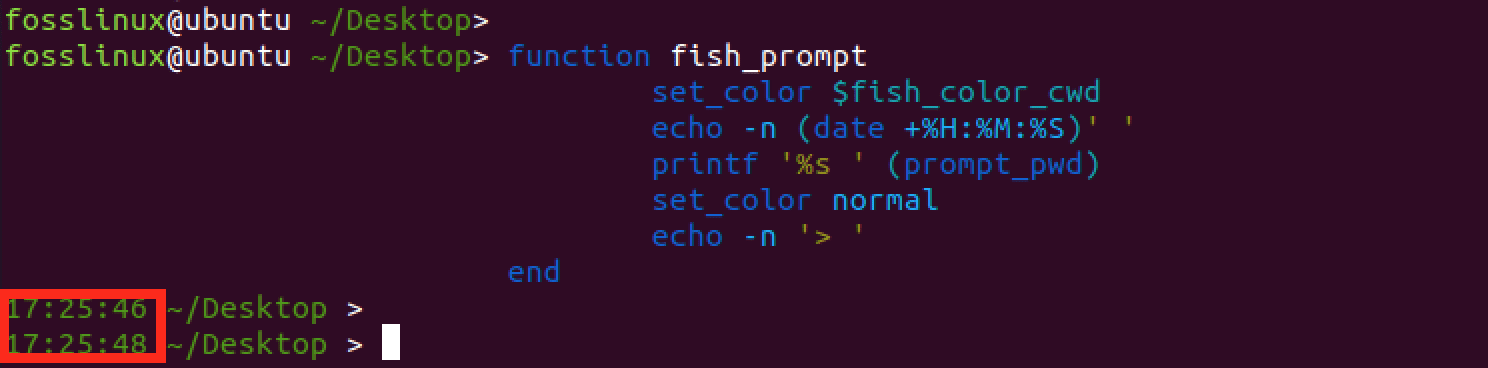
If you want to display the current time on the prompt, you can use the “date” command with the “fish_prompt” variable to display the current time in the desired format.
Here’s an example command that you can use to display the current time in the “HH:MM:SS” format:
function fish_prompt
   set_color $fish_color_cwd
   echo -n (date +%H:%M:%S)' '
   printf '%s ' (prompt_pwd)
   set_color normal
   echo -n '> '
end
This command defines a Fish shell function called “fish_prompt” that sets the prompt to display the current time followed by the current directory and a “>” symbol. The “set_color” commands set the color of the directory information to match the Fish shell theme.
Change Fish Shell prompt
2. Welcome message:
When you start the Fish shell for the first time, you will see a welcome message giving you some information about it and its features. The welcome message includes some helpful tips and commands that you can use to get started with Fish shell.

Fish welcome message
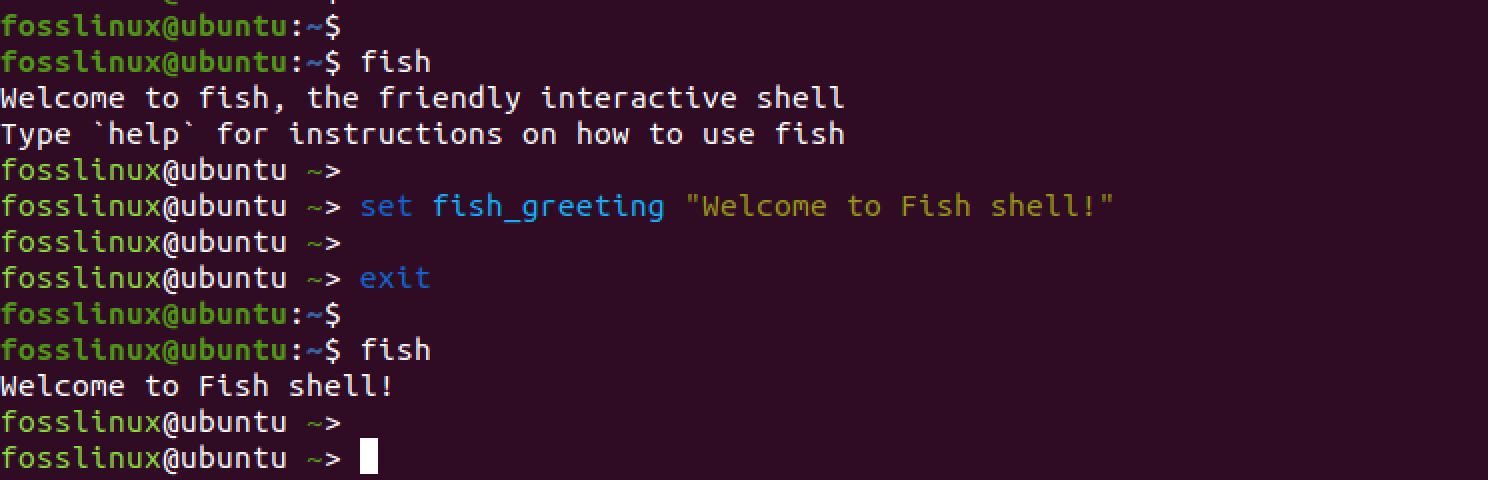
You can modify or disable the Fish welcome message by modifying the “fish_greeting” variable.
You can modify the greeting by setting the “fish_greeting” variable to the desired message. For example, to set the greeting to “Welcome to Fish shell!”, you can run the following command:
set fish_greeting "Welcome to Fish shell!"
This will set the “fish_greeting” variable to the specified message, displayed every time you start a new Fish shell session.
Fish shell welcome message
To disable the greeting altogether, you can set the “fish_greeting” variable to an empty string:
set fish_greeting ""
This will remove the greeting message from the Fish shell startup.

Disable Fish Shell welcome message
3. Syntax highlighting:
Fish shell provides syntax highlighting for commands and their arguments. This means that commands and their arguments are highlighted in different colors to make them easier to read and understand.
For example, if you type a command such as “ls -l,” the “ls” command will be highlighted in one color, and the “-l” option will be highlighted in another color.

Syntax highlighting
You can enable syntax highlighting in Fish shell by running the following command:
set fish_syntax_highlighting
5. Autosuggestions
Fish shell provides an autosuggestions feature, which suggests commands and arguments based on your previous commands and the contents of your command history. For example, if you type “git co” and press the tab key, Fish shell will suggest the “checkout” command based on your previous use of Git.

Autosuggestions
You can enable autosuggestions in the Fish shell by running the following command:
set fish_autosuggestions
6. Tab completions
Fish shell provides tab completions, which means it completes commands and arguments as you type them. For example, if you type “ls /u” and press the tab key, Fish shell will complete the path “/usr” based on the contents of your file system.
You can enable tab completions in Fish shell by running the following command:
set fish_complete_path
These are just a few of the many features and customization options that Fish shell provides. By using these features, you can make your terminal experience more user-friendly and efficient.
Setting Fish as your default shell
Use the command below to set Fish as your default shell.
chsh -s /usr/bin/fish
This command uses the “chsh” (change shell) utility to set the default shell for your user account to Fish shell. The “-s” option specifies the path to the Fish shell executable /usr/bin/fish on Ubuntu.
You will be prompted to enter your password to confirm the change. Enter your password and press Enter.

Set Fish Shell as the default shell
Once the change is confirmed, log out of your current session and log back in to start a new session with Fish shell as your default shell. To verify that Fish shell is now your default shell, run the following command:
echo $SHELL
This command should output the path to the Fish shell executable, which confirms that Fish shell is now your default shell.

Verify shell
Switching to Bash Shell
If you no longer want to use Fish shell as your default shell and switch back to Bash, you can do so by running the command below.
chsh -s /bin/bash
This command uses the “chsh” (change shell) utility to set the default shell for your user account to Bash shell. The “-s” option specifies the path to the Bash shell executable, “/bin/bash” on Ubuntu.
You will be prompted to enter your password to confirm the change. Enter your password and press Enter.

Switch to bash
Once the change is confirmed, log out of your current session and log back in to start a new session with Bash shell as your default shell.
Conclusion
Fish shell is a user-friendly shell designed for interactive use in Unix-like operating systems. With its syntax highlighting, autosuggestions, and tab completions features, Fish shell provides many customization options. The installation process of Fish shell on Ubuntu is simple and can be done through multiple methods.
Once installed, users can use its features and customization options, such as customizing the prompt, modifying the welcome message, enabling syntax highlighting, and autosuggestions to enhance their terminal experience.