
Solid-state drives (SSDs) and hard disk drives (HDDs) are the backbone of any computer system, and it’s crucial to monitor their health to prevent data loss and hardware failure. One excellent utility to help you achieve this is Smartmontools. This open-source toolset is available for Linux and provides a wealth of information on your HDDs or SSDs. In this article, we’ll dive into using Smartmontools in Linux to maintain and troubleshoot your drives, keeping them in top shape.
What is Smartmontools?
Smartmontools is a set of command-line utilities designed to work with the Self-Monitoring, Analysis, and Reporting Technology (SMART) system built into most modern HDDs and SSDs. The two primary components of Smartmontools are smartctl and smartd. We will dig deeper into each of these tools a bit later in this article. Let’s first install smartmontools in our Linux system.
Installing Smartmontools
Smartmontools is available in most Linux distributions’ repositories. To install it, run the appropriate command for your distribution:
- Debian/Ubuntu: sudo apt-get install smartmontools
- Fedora: sudo dnf install smartmontools
- CentOS/RHEL: sudo yum install smartmontools
For this article illustration, I’m installing it on my Pop!_OS Linux distro.
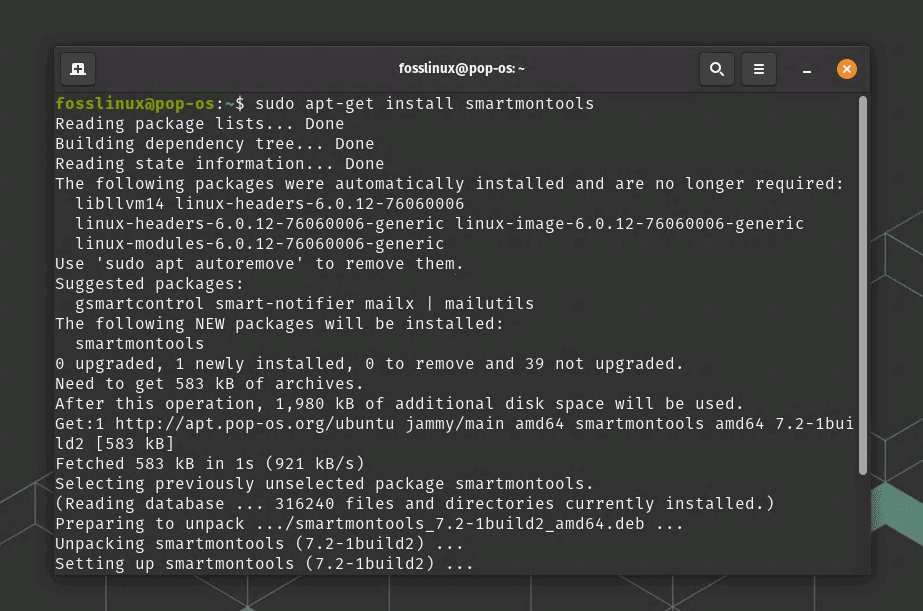
Installing smartmontools on Pop!_OS
That’s it! Now that smartmontools are installed on your Linux system let’s use it.
Checking Drive Health with Smartctl
You can use smartctl to obtain information about your drives. However, you need to identify the device name for your HDD or SSD before you can do that.
List all available drives: Use the lsblk or sudo fdisk -l command to see a list of connected drives and their device names.
sudo fdisk -l
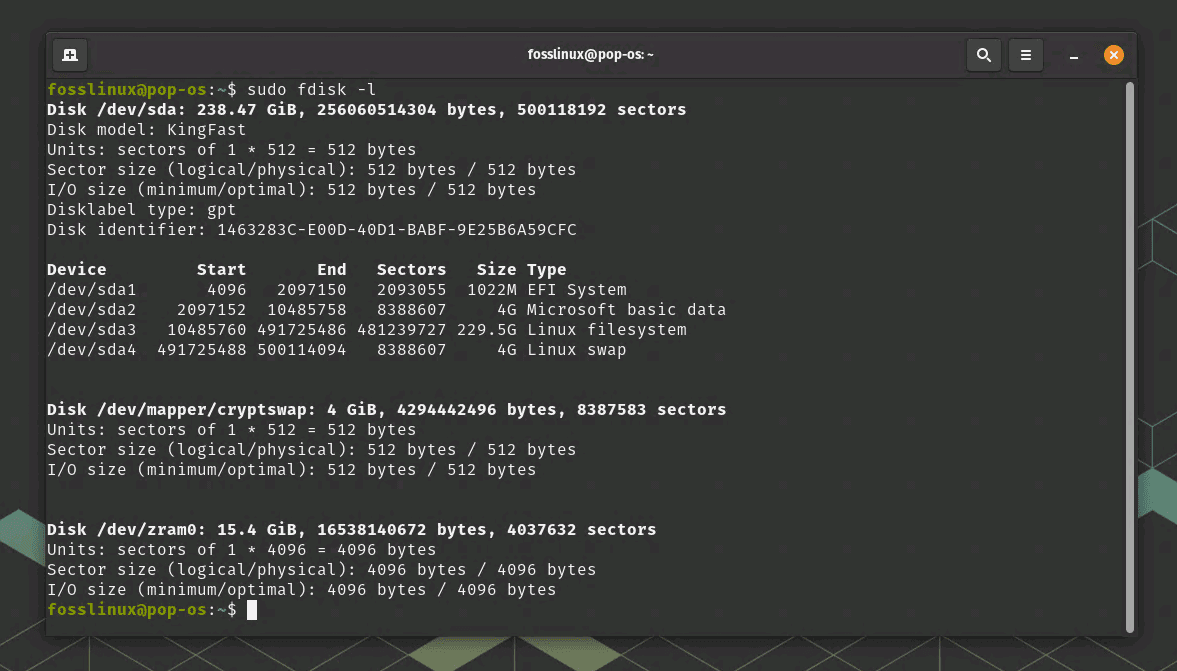
Hard disk drive or SSD details
1. smartctl
It’s a command-line tool allows you to retrieve SMART data from drives, perform self-tests, and more. I think the best way to explain this tool’s usage is through a practical example. Let’s see a scenario when you want to check a specific drive’s overall health, temperature, and power-on hours. We’ll assume the drive’s device name is “sda”. Follow these steps:
First, enable SMART on the drive by running the following:
sudo smartctl -s on /dev/sda
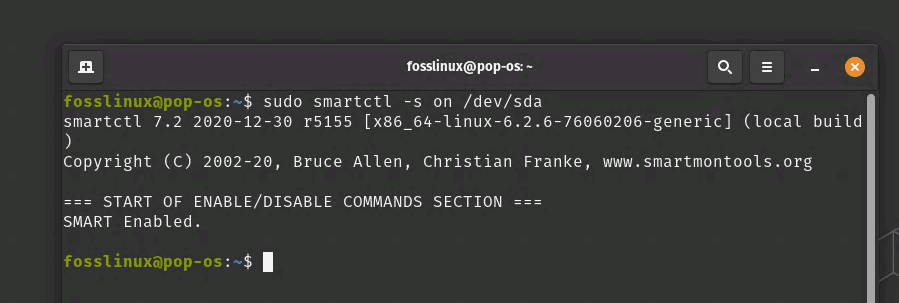
SMART enabled
Next, display all available SMART data using the -a flag:
sudo smartctl -a /dev/sda
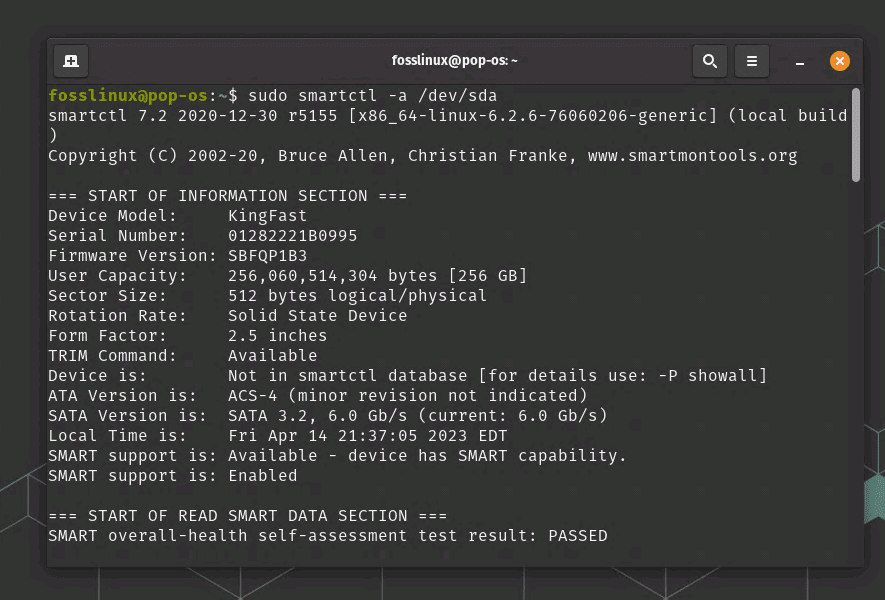
Displaying all SMART data
Review the output to find relevant information about the drive’s health. In this case, we’re looking for three specific attributes:
Attribute ID 194: Temperature_Celsius (Drive temperature)
Attribute ID 9: Power_On_Hours (Total hours the drive has been powered on)
Attribute ID 5: Reallocated_Sector_Ct (Number of bad sectors that have been remapped)
For example, in the output, you might see something like this:
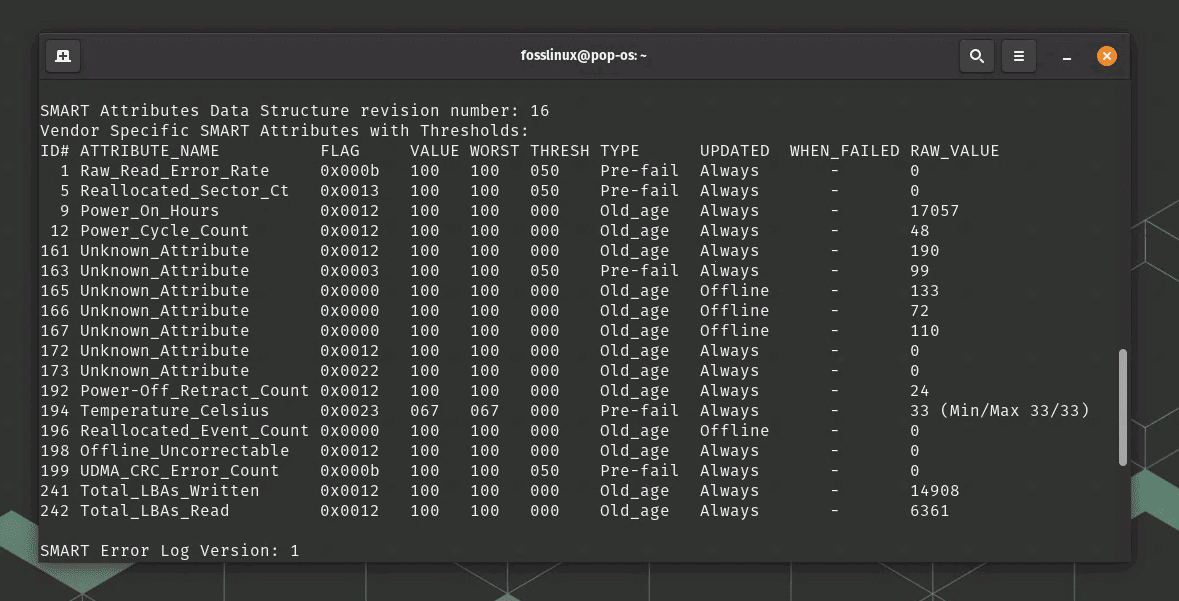
Drive Health Data from my Pop!_OS system
Interpret the results:
- The drive temperature is 33°C with a minimum recorded temperature of 33°C and a maximum of 33°C.
- The drive has been powered on for a total of 17857 hours.
- There are no remapped (bad) sectors as the RAW_VALUE for Reallocated_Sector_Ct is 0.
Remember that the exact values and attributes you see might differ depending on your drive model and manufacturer. Always consult the manufacturer’s documentation to better understand your drive’s SMART attributes.
Running Self-Tests and Analyzing Results
Now that we have obtained basic health information about our drive let’s perform a short self-test to ensure everything functions correctly. SMART self-tests are an excellent way to check for issues in your drives proactively.
Smartctl supports three types of self-tests:
- Short: A brief test that takes a few minutes to complete.
- Long: A comprehensive test that can take several hours.
- Conveyance: Specific to ATA drives, it checks for damage incurred during transportation.
Run a short self-test on the drive:
sudo smartctl -t short /dev/sda
You’ll receive a message like this:
START OF OFFLINE IMMEDIATE AND SELF-TEST SECTION
Please wait 2 minutes for the test to complete.
The duration of the test may vary depending on the drive model. For short tests, it usually takes just a few minutes. Wait for the specified time, and then check the test results:
sudo smartctl -l selftest /dev/sda
The output will show the test results, similar to the following:
SMART Self-test log structure revision number 1
Num Test_Description Status Remaining LifeTime(hours) LBA_of_first_error
# 1 Short offline Completed without error 00% 17058 -
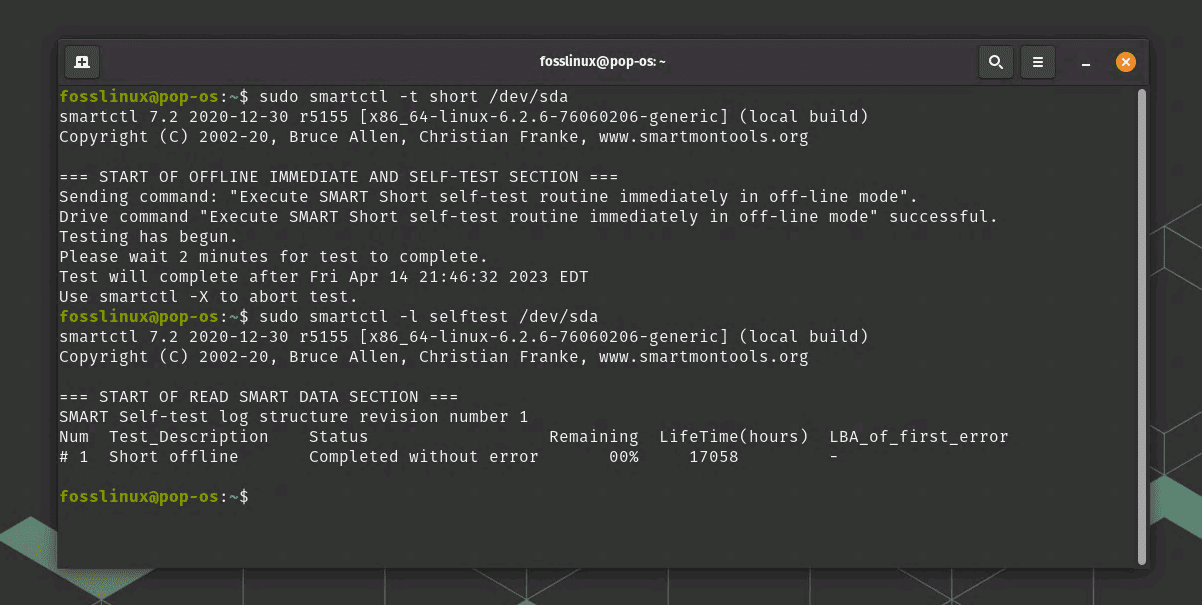
Running short self-test
In this example, the short self-test was completed without errors, which is a good sign that the drive is functioning correctly.
If you want to monitor your drive’s health regularly, consider setting up a cron job to automate running self-tests and emailing you the results. For instance, to run a short self-test every month and email the results to you@example.com, add the following line to your crontab (edit it using crontab -e):
0 0 1 * * sudo smartctl -t short /dev/sda && sleep 180 && sudo smartctl -l selftest /dev/sda | mail -s "SMART Self-test Results" you@example.com
This cron job will run the short self-test on the first day of every month at midnight, wait for 180 seconds (3 minutes) to ensure the test is complete, and then send the results to your email address.
By utilizing smartctl in this manner, you can monitor your HDDs or SSDs effectively, ensuring that you have an early warning system to detect any potential issues before they lead to data loss or hardware failure.
Run an extended self-test:
Running an extended test with smartctl is similar to running a short test, but the long test is more comprehensive and takes longer to complete. To run a long self-test on your drive, follow these steps:
First, ensure that SMART is enabled on the drive. In this example, we’ll assume the drive’s device name is “sda”:
sudo smartctl -s on /dev/sda
Initiate the long self-test on the drive:
sudo smartctl -t long /dev/sda
You’ll receive a message like this:
Starting extended offline self-test. Please wait 150 minutes for the test to complete.
The duration of the test may vary depending on the drive model. For long tests, it can take several hours to complete.
Wait for the specified time, and then check the test results:
sudo smartctl -l selftest /dev/sda
The output will show the test results, similar to the following:
SMART Self-test log structure revision number 1
Num Test_Description Status Remaining LifeTime(hours) LBA_of_first_error
# 1 Extended offline Completed without error 00% 2118 -
In this example, the long self-test was completed without errors, indicating that the drive was functioning correctly.
Remember that the long self-test can take significant time, so it’s best to schedule it during periods of low system activity or when you don’t need to use your computer. You can also set up a cron job to automate running long self-tests and emailing the results, just like short tests.
2. smartd
smartd is a daemon that runs in the background, monitoring the SMART data from your drives and executing specified actions if an issue is detected. Here’s an example of using smartd to monitor an SSD or HDD, sending an email notification if a problem is detected.
First, ensure that SMART is enabled on the drive. In this example, we’ll assume the drive’s device name is “sda”:
sudo smartctl -s on /dev/sda
Create a configuration file for smartd. We’ll create a file named /etc/smartd.conf for this purpose:
sudo nano /etc/smartd.conf
Add the following line to the configuration file, replacing your@email.com with your actual email address:
/dev/sda -a -o on -S on -s (S/../.././02|L/../../6/03) -m your@email.com
This line tells smartd to monitor the /dev/sda drive with the following options:
- -a: Monitor all SMART attributes.
- -o on: Enable automatic offline tests.
- -S on: Enable automatic attribute saving.
- -s (S/../.././02|L/../../6/03): Run a short self-test every day at 2 AM and a long self-test every Saturday at 3 AM.
- -m your@email.com: Send an email notification to the specified email address if an issue is detected.
Save the configuration file and exit the text editor (e.g., in nano, press Ctrl + X, then Y, and finally Enter).
Configure smartd to start automatically at boot. This process may vary depending on your Linux distribution:
For Debian/Ubuntu systems:
sudo systemctl enable smartd
For CentOS/RHEL systems:
sudo chkconfig smartd on
Start the smartd service:
For Debian/Ubuntu systems:
sudo systemctl start smartd
For CentOS/RHEL systems:
sudo service smartd start
Now, smartd is running in the background, monitoring the specified drive for issues. If a problem is detected, it will send an email notification to the specified email address, allowing you to take appropriate action to protect your data and hardware.
Keep in mind that smartd can monitor multiple drives. To do so, add a similar line for each drive in the /etc/smartd.conf file, changing the device name accordingly (e.g., /dev/sdb, /dev/sdc, etc.).
Troubleshooting tips
- If smartctl reports an issue, back up your data immediately to prevent data loss.
- Some drives may require vendor-specific tools to access SMART data. Consult the drive manufacturer’s documentation for more information.
- If SMART data indicates a high number of bad sectors, consider replacing the drive, as it may be nearing the end of its life.
- If you encounter permission issues while using smartctl, ensure you’re running the command with administrative privileges (using sudo).
- Not all drives support SMART self-tests. If you run into issues running a self-test, consult your drive’s documentation to determine its compatibility.
Conclusion
Monitoring and maintaining the health of your HDDs or SSDs is crucial for the overall performance and stability of your computer system. Smartmontools offers a powerful and flexible solution for Linux users to keep tabs on their drives’ health. By using smartctl and smartd, you can access valuable SMART data, run self-tests, and even automate monitoring tasks.
In my opinion, every Linux user should be familiar with Smartmontools and use it regularly to ensure their drives remain in optimal condition. Remember, staying vigilant and proactive is the key to preventing catastrophic hardware failure and data loss. With Smartmontools by your side, you’ll have the information you need to make informed decisions about your drives’ health.
So, go ahead and give Smartmontools a try. Your drives will thank you for it!