
I am writing this article today to share with you some insights on ssh-agent, a handy little tool that I am sure you have heard of, or maybe you have even used it. This post aims to help those who are new to it, or perhaps need a little assistance with setting it up on their Ubuntu system. We’ll dive into how to install and use ssh-agent, peppered with practical examples. Let’s get started.
A Brief Introduction to ssh-agent
ssh-agent is one of my most favourite tools to use when I work with secure shell (SSH). It is an authentication agent that holds private keys used for public key authentication. With ssh-agent, you do not need to enter your passphrase every time you want to connect to a remote host via SSH. That’s quite the timesaver, isn’t it?
My like for ssh-agent mostly stems from the convenience it offers. When juggling multiple tasks, I don’t like being pestered for credentials again and again. Yet, I am fully aware of the need for robust security in today’s digital landscape. ssh-agent wonderfully meets these criteria. But note that, it’s not an all-encompassing solution. Always use it as part of a broader security strategy.
Installing ssh-agent on Ubuntu
For those already running Ubuntu, you might be in for a pleasant surprise. ssh-agent comes pre-installed on most Ubuntu distributions! So, pat yourselves on the back, my FOSSLinux Ubuntu users. One of the reasons to like your Ubuntu, more!
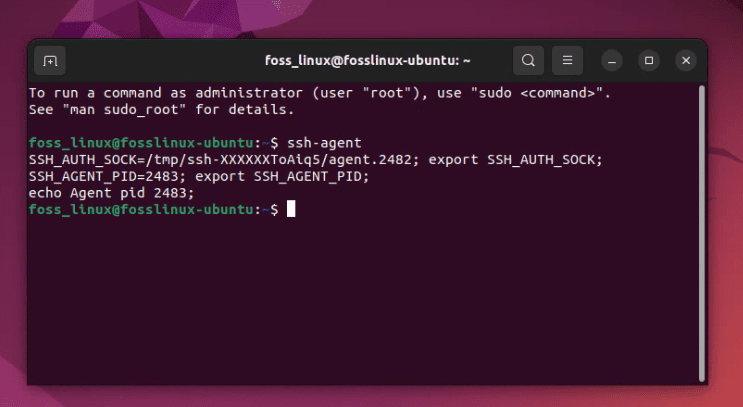
To verify if ssh-agent is installed on your system, you would open a terminal and type:
ssh-agent
Checking SSH Agent Installation
This command should return a couple of lines of shell commands. These lines set certain environment variables used by ssh-agent. If you see these, it means ssh-agent is installed on your system.
However, if you get an error or ssh-agent is not installed, don’t panic. You can easily install it by installing the openssh-client package. In your terminal, type:
sudo apt update
sudo apt install openssh-client
After the installation completes, you can verify again by running the ssh-agent command.
Using ssh-agent
Now that ssh-agent is up and running on your Ubuntu machine, let’s get to the good stuff – using it! I have to say, there’s a sense of magic in seeing your connections authenticate smoothly without that pesky passphrase prompt.
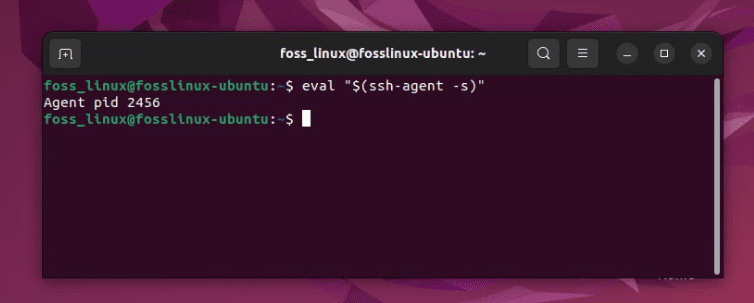
First, you’ll need to start the ssh-agent in the background:
eval "$(ssh-agent -s)"
Starting SSH agent
This command starts ssh-agent, and the eval part ensures that the environment variables are set in the current shell.
Next, add your SSH private key to the ssh-agent. Assuming your private key is in the default location (~/.ssh/id_rsa), you can add it to the ssh-agent using:
ssh-add ~/.ssh/id_rsa
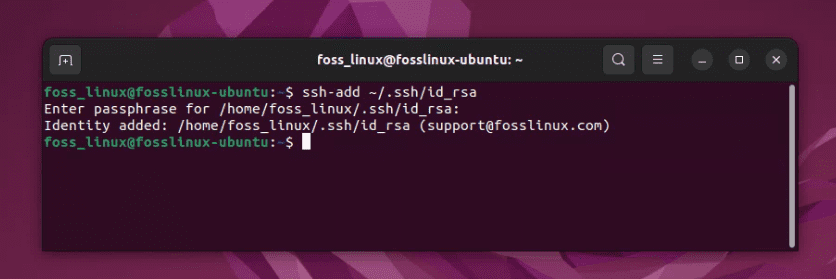
Adding SSH Private Key to SSH Agent
You will be asked to enter your passphrase one time here, after which ssh-agent will remember it. But wait, are you getting an error something like this:
/home/user/.ssh/id_rsa: No such file or directory
Ah, it looks like the SSH key pair isn’t in the default location (~/.ssh/id_rsa). That can happen if you haven’t generated an SSH key pair yet or if it’s located in a different path.
Generating an SSH key pair
If you haven’t already generated an SSH key pair, here’s how you can do it:
ssh-keygen -t rsa -b 4096 -C "your_email@example.com"

Generating SSH key on Ubuntu
This command starts the key generation process. By default, the keys are stored in the ~/.ssh/ directory, and the private key is named id_rsa. If you want to use a different name or location, you can specify that when you generate the keys.
When you execute the command, it will ask for a location to save the keys and a passphrase. If you press enter without typing a name, it will use the default location (~/.ssh/id_rsa). Remember, the passphrase is optional, but it’s recommended for added security.
Using a different path
If you know that the SSH keys exist but are not in the default path, you will need to provide the path to your private key when adding it to ssh-agent. For example, if your private key is in ~/.ssh/my_keys/my_key, you would add it to ssh-agent like this:
ssh-add ~/.ssh/my_keys/my_key
If you’re unsure where your private key is located, you can use the find command to search for it:
find ~/ -name id_rsa 2>/dev/null
This command will search your home directory (~/) for a file named id_rsa and print its location. The 2>/dev/null part suppresses error messages.
Remember, replace id_rsa with the name of your private key file if you used a different name when generating your SSH keys.
Now, you can make an SSH connection to a remote server without having to type your passphrase:
ssh user@hostname
Voila! You’re in, passphrase-free.
A practical example of using an SSH key
let’s dive into a practical example of using ssh-agent.
Step 1: Generating an SSH Key Pair
To use ssh-agent, you first need to generate an SSH key pair if you don’t already have one. This pair will contain your private key (kept secret on your local machine) and a public key (shared with the server). You can generate a new SSH key pair by running:
ssh-keygen -t rsa -b 4096 -C "your_email@example.com"
During this process, you’ll be asked to enter a passphrase. This passphrase protects your private key.
Step 2: Copying the Public Key to the Server
Next, you will need to add your public key to the ~/.ssh/authorized_keys file on your server. You can do this manually or use the ssh-copy-id command. Replace “user” and “hostname” with your server username and IP address or domain:
ssh-copy-id user@hostname
Now, you should be able to log in to the server with your key pair. But, you’ll notice you still need to type in your passphrase every time you log in, which is where ssh-agent comes into play.
Step 3: Starting ssh-agent and Adding Your Key
Let’s start the ssh-agent in the background:
eval "$(ssh-agent -s)"
Next, add your SSH private key to the ssh-agent:
ssh-add ~/.ssh/id_rsa
You will need to enter your passphrase one last time when adding your key to the ssh-agent. But from here on, ssh-agent will remember it for you.
Step 4: Logging into the Server
Now, try logging into the server again:
ssh user@hostname
You’ll see that you’re not asked for your passphrase this time. The ssh-agent has taken care of that for you!
Step 5: Practical Application
Now, imagine you’re working on a project where you need to frequently push your code changes to a remote Git repository on a server. Instead of entering your passphrase every time you push, ssh-agent handles that, making the process smoother.
This is just one example of how ssh-agent can make daily tasks less tedious. From managing remote servers to working with version control systems, ssh-agent is a fantastic tool to have in your toolkit. Remember, it’s essential to secure your private keys, whether you’re using ssh-agent or not. Always store them safely and consider encrypting any backup copies you make.
Pro Tips
Now, let me share a few pro tips that I’ve collected over my years of using ssh-agent.
Auto-start ssh-agent
If you’re like me, you’ll be using SSH frequently. Therefore, starting ssh-agent every time you open a terminal can get tedious. To auto-start ssh-agent whenever you start a terminal, you can add the eval "$(ssh-agent -s)" command to your shell’s profile script.
For bash users, the file is ~/.bashrc. For Zsh users, it is ~/.zshrc.
echo 'eval "$(ssh-agent -s)"' >> ~/.bashrc
Auto-add Keys
Adding keys each time can be a drag too. You can create a shell script to add your keys automatically when the ssh-agent starts.
#!/bin/bash
eval "$(ssh-agent -s)"
ssh-add ~/.ssh/id_rsa
Save the above lines in a file, say start_agent.sh, make it executable with chmod +x start_agent.sh, and run this script instead of the usual ssh-agent command.
Keep Your Keys Safe
Remember, convenience should never compromise security. If your private keys are not secure, ssh-agent’s benefits become moot. Always ensure your keys are kept in a safe location with the right permissions (read and write for the owner only).
chmod 600 ~/.ssh/id_rsa
Parting Thoughts
There you have it – a comprehensive guide on installing and using ssh-agent on Ubuntu. I genuinely hope this guide proves beneficial for you. While ssh-agent is quite nifty and has made my life easier, I encourage you not to rely solely on it for security. It is a convenience tool, not a security tool.
Remember, it’s the seemingly minor conveniences like ssh-agent that collectively make the Linux environment such a joy to work with. However, the flip side is that they can also lead to bad habits if used thoughtlessly. So, use ssh-agent, but use it wisely.
Stay tuned for more FOSS Linux guides where we dissect, install, and navigate more such Linux tools!