
File Transfer Protocol or FTP it is a protocol used to move files between computers. The FTP uses the client/server model. The server is always listening and waiting for FTP requests from other remote clients. When the server receives a request, it establishes a connection and handles the login.
During this tutorial, we are going to cover installing the FTP server and will show you some examples of how to upload and download single and multiple files.
Install FTP on Ubuntu
Before starting in the installation process of FTP, we need to ensure that the system is up-to-date using the following commands:
sudo apt update
sudo apt upgrade
Next, let’s install the FTP server.
Step 1. Install the vsftpd package using the below command.
sudo apt-get install vsftpd
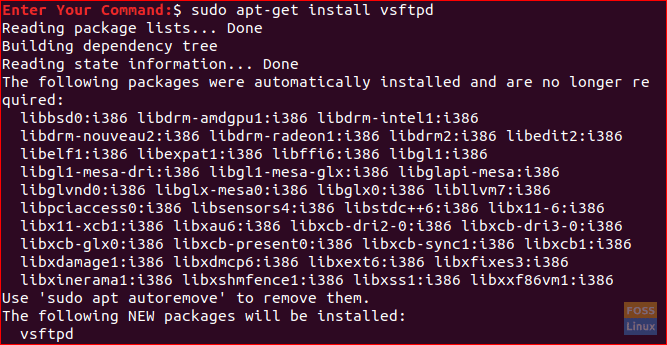
Install The vsftpd Package On Ubuntu
Step 2. Check the vsftpd status.
sudo service vsftpd status

Check The vsftpd Service Status
As you can see from the above screenshot that the FTP server is active and running successfully.
Step 3. In case you need the vsftpd service to run automatically when the system starts up, you can use the command:
sudo service vsftpd enable
Now let’s move to the next section.
Configure The Firewall
After installing the required FTP server package, we need to perform some more configurations on the firewall.
Step 1. One of the basic configurations is adding a rule for the SSH, and this will prevent you from being locked out of by the server.
sudo ufw allow ssh
As you can, the output of the previous command will be something like the below screenshot:

Add A Rule For The SSH
Step 2. Now let’s open the 20 and 21 ports for FTP.
sudo ufw allow 20/tcp
The output of the previous command should be something like the below screenshot:

Add Rule For Port 20
sudo ufw allow 21/tcp
You may find the rule already added as the below output:

Add A Rule For Port 21
Step 3. Also lets open the ports for the passive FTP.
sudo ufw allow 40000:50000/tcp

Add Rule For Passive FTP Port
Step 4. Now let’s enable the firewall if it is not already enabled.
sudo ufw enable

Enable Firewall
To ensure that all of the previous rules have been added successfully, you can check the status of the firewall by running the below command:
sudo ufw status
Configure the vsftpd Configuration File
Some other few configurations needed to be done by editing the vsftpd configuration file which is found in “/etc/vsftpd.conf.”
Step 1. First and before editing the vsftpd configuration file, we need to take a backup from this configuration file.
sudo cp /etc/vsftpd.conf /etc/vsftpd.conf.backup-copy
Step 2. Open the vsftpd configuration file using your favorite editor; here we are going to use the vi editor.
sudo vi /etc/vsftpd.conf
Step 3. After opening the configuration file, you can search for the below settings, uncomment them and ensure that they have the right value.
write_enable=YES --> Allow the FTP users to write files to the FTP server.
chroot_local_user=YES --> Prevent the FTP users from browsing outside their own home directory.
local_enable=YES --> Allow local users to login through FTP.
local_umask=022 --> Give the correct permissions to the uploaded files/directories.
There are a lot of settings in the vsftpd configuration file you can check them and decide which is best for you.
Step 4. After editing the vsftpd configuration file, save and quit it.
Step 5. Now we need to restart the vsftpd service to enable all the previous changes.
sudo service vsftpd restart
Test The FTP Server
To test the FTP server, you need to connect from another machine using the FTP client which is already installed on most of the Linux systems. In case the FTP client is not installed, you can install it using the command as follows:
sudo apt-get install ftp
Step 1. From the client machine, connect to the FTP server.
ftp 192.168.1.5
where the above IP is the FTP server machine IP.
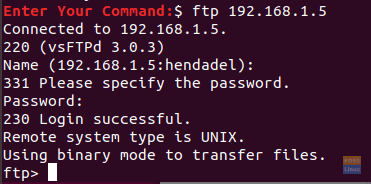
Connect to Remote FTP Server
As you can see from the previous screenshot when you try to login to the FTP server, by default, it suggests the local user that you can use to login. After you enter the username and password, you will get the successful login message.
Step 2. Now let’s try out some commands, check your current directory.
pwd
Check Your Current Working Directory
As you can see from the previous output, the “/” here means the home directory of the local user logged in which in our case is “hendadel.”
List the content of the current directory.
ls
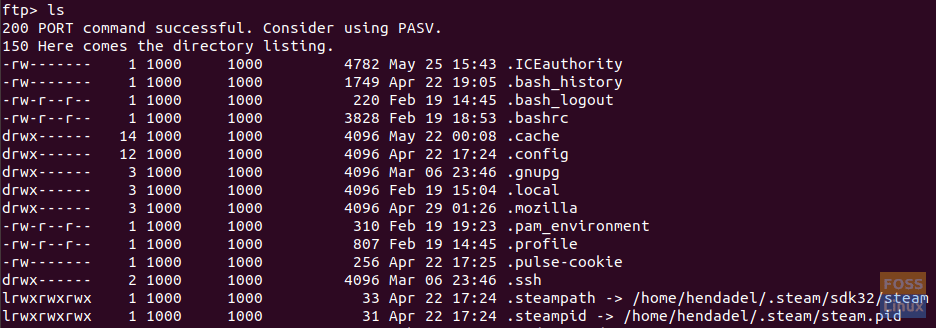
Sample Output Of The ls Command
Step 3. From the FTP server machine, try to create a directory and create some files in it like the below screenshot.
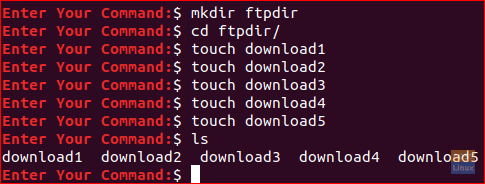
Created a directory called ftpdir
Step 4. From the FTP client machine, move to the newly created directory and list its content to download it on the client machine.
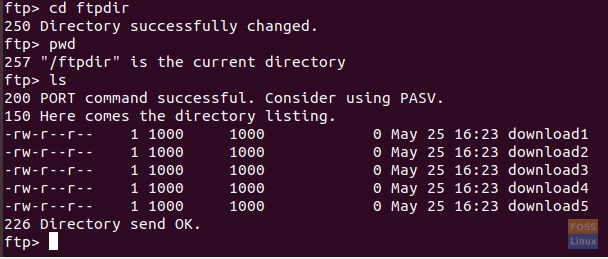
Go to the ftpdir to download the listed files
Step 5. Now let’s download a single file.
get download1

Download Single File From The Remote FTP Server
As you can see from the previous screenshot, the file has been downloaded successfully. You can find the downloaded file in your client’s machine logged in user home directory like below.
Check The Downloaded File
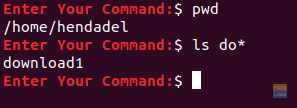
Step 6. To download multiple files from the FTP server.
mget download*

Download Multiple Files
And you can check the downloaded files as shown previously.

Check The Downloaded Files
Step 7. From the client FTP machine, while you are connected to the FTP server create a directory like the below screenshot.

Create Directory To Upload Files to FTP Server
Move from your current directory to the newly created directory.
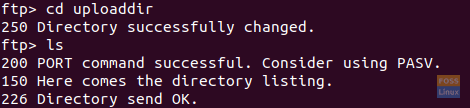
From FTP Server Move to The uploaddir
Step 8. Now let’s upload one single file to the FTP server.
put upload1

Upload One Single File To The FTP Server
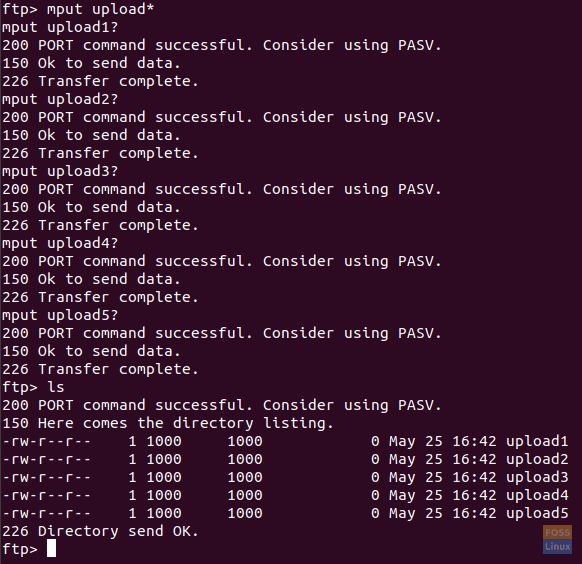
Step 9. To upload multiple files to the FTP server.
mput upload*
Upload Multiple Files To The FTP Server
From the FTP server machine, you can check the uploaded files as below.
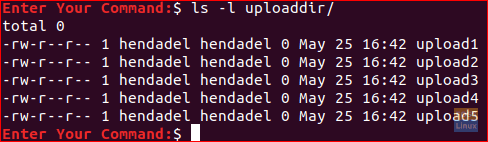
Check uploaded files
That ends this tutorial where we have installed the FTP server and used it to upload and download files. For any further assistance, please leave a comment and we will be glad to help you.