
When it comes to “file transfers”, there are myriad ways to do it. We already covered a decent amount of methods, including transferring files between the Windows and Linux systems, FTP, or File Transfer Protocol to move files between various machines over the network. If you are looking for a more secure way of transfer data over the web, then you have to look at SFTP.
SFTP Vs. FTP
SFTP, which is short for Secure File Transfer Protocol, is a great protocol that is used to establish a secure and encrypted connection to transfer files safely. This is possible because SFTP uses an encrypted type of fingerprint technology to verify host keys before any data transfer has begun. On the other hand, FTP offers no encryption of any kind and is not recommended for use on an insecure network such as the cloud.
Another area where SFTP shines is due to a simpler client-side firewall. Only port 22 will need to be open to send and receive data, which implies firewall configurations can be simpler and improves file sharing security. FTP protocol needs to open multiple channels for the data transfer to take place.
Additional Layer of Security
Additionally, and for more security, we recommend enabling the chroot feature on specific user accounts. The idea behind the chroot is that it depends on isolating some applications, files and putting them in something like a jail to detach them from the rest of your machine directories. Hence, if a user account has the chroot feature enabled, then he or she is the only one that has access to the content of his or her directories, applications, and files.
Setting up SFTP server on Linux
In this tutorial, we will walk you through setting up the SFTP on your Ubuntu machine. This guide is divided into the following sections:
- Create an SFTP Group and User.
- Install SSH Daemon.
- Configure SSH Daemon.
- Login To SFTP using Command-Line or Graphical User Interface.
However, before starting, you need to make sure that your machine is updated using the following commands. The below commands are for updating Ubuntu and derivatives. If you are on other Linux distribution, please update your system before proceeding further.
sudo apt update
sudo apt upgrade
1. Creating an SFTP Group and User
First, let’s create a new group and user that you can use to login with SFTP.
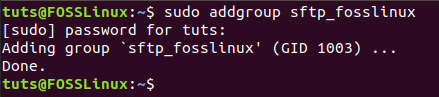
Step 1. Create a new group named sftp_fosslinux as following:
sudo addgroup sftp_fosslinux
Add New SFTP Group
Step 2. Create a new user named “sftpfossuser” and add it to the previously created group.
sudo useradd -m sftpfossuser -g sftp_fosslinux
Add New SFTP User
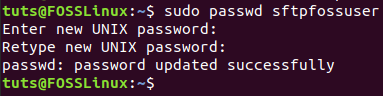
Step 3. Add a password to the new SFTP user.
sudo passwd sftpfossuser
Set Password For New SFTP User
Step 4. Now, grant the new SFTP user complete access to their new home directory as follows:
sudo chmod 700 /home/sftpfossuser/
Grant Full Access to New SFTP User On their Home Directory
Now you are ready to install SSH and configure it.
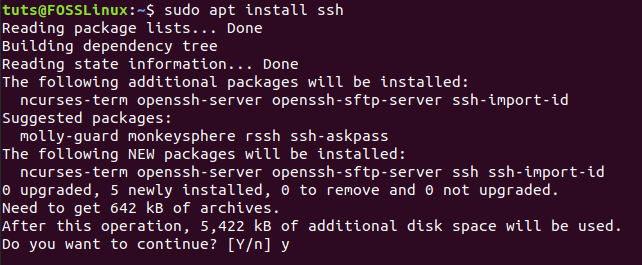
2. Installing SSH Daemon
For the SFTP to work correctly, you can install SSH or OpenSSH server. If none of them is already installed on your machine, then use the following command to install the SSH server:
sudo apt install ssh
Install SSH Package
3. Configuring SSH Daemon
After the SSH installation is complete, open the SSHD configuration file to edit some configurations.
Step 1. Open the SSHD file using your favorite editor.
sudo vi /etc/ssh/sshd_config
Open SSHD Configuration File
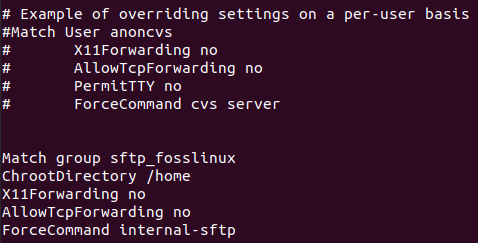
Step 2. Now scroll down to the end of the configuration file and add the next few lines:
Match group sftp_fosslinux
ChrootDirectory /home
X11Forwarding no
AllowTcpForwarding no
ForceCommand internal-sftp
Save and close the SSHD configuration file.
Edit SSHD Configuration File
The previous configurations mean to allow users in the sftp_fosslinux group to access and use their home directories via the SFTP. Even more, it will prevent any other normal SSH access to those files.
Step 3. Now let’s restart the SSH service to apply previous changes.
sudo systemctl restart ssh

Restart SSH Service
4. Log in to SFTP
Using Command-Line Method
You can use the command line terminal to test your login to the SFTP locally.
Step 1. From the terminal, log in using the command:
sftp sftpfossuser@127.0.0.1

Login Using SFTP
Step 2. Next, your SFTP username and password will be needed.

SFTP Connected Successfully
Step 3. Move to the SFTP user home directory and try to create a new directory as following:
cd sftpfossuser
ls
Move to SFTP User Home Directory
mkdir sftpdir
ls

Create New Directory Using SFTP
To exit the SFTP connection just type:
exit
Exit SFTP Connection
Using Graphical User Interface Method
In case you need to log in with SFTP using a graphical application, then you can use the default Nautilus Ubuntu file manager.
Step 1. From the “Activities” menu, browse and select the Nautilus file manager.
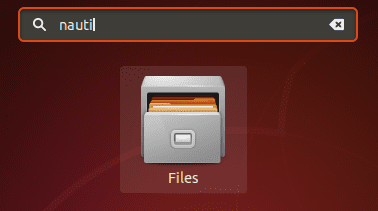
Open Default Nautilus File Manager
Step 2. In the Nautilus file manager, from the left panel, choose “Other Locations.”
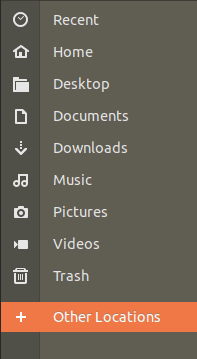
Select Open Locations
Step 3. In the bottom bar, connect to local SFTP using the command below:
sftp://127.0.0.1
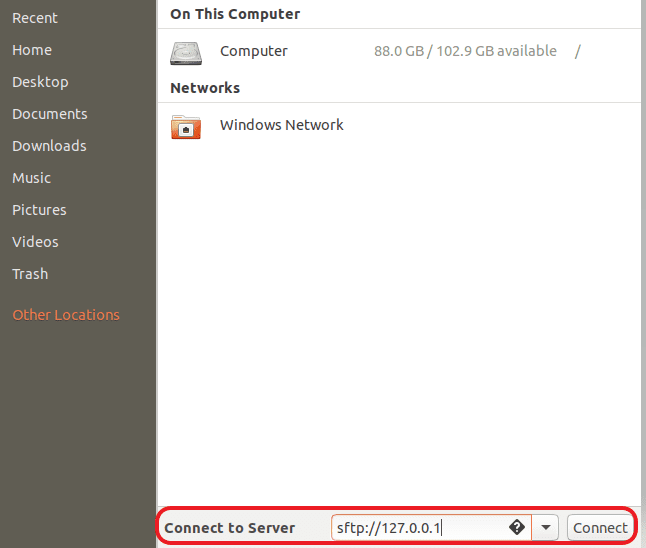
Connect To Server
Step 4. Enter the SFTP username and password.
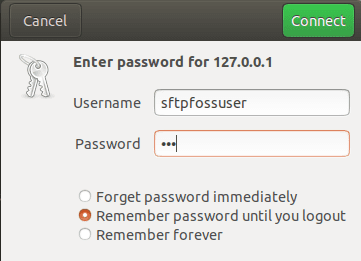
Login With SFTP Created User
Step 5. After successful login, you will be able to see your SFTP user home directory.
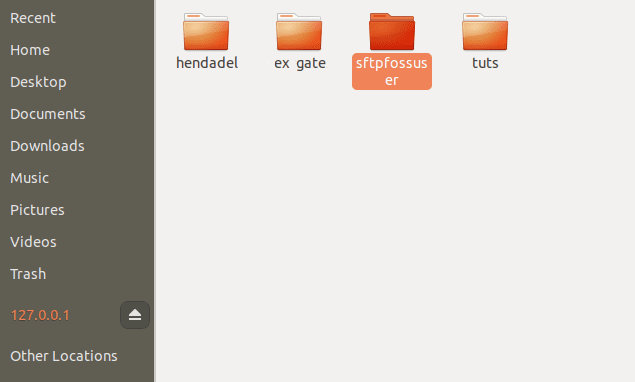
Select Your SFTP User Home Directory
Step 6. As you can notice, you will see the previously created directory.
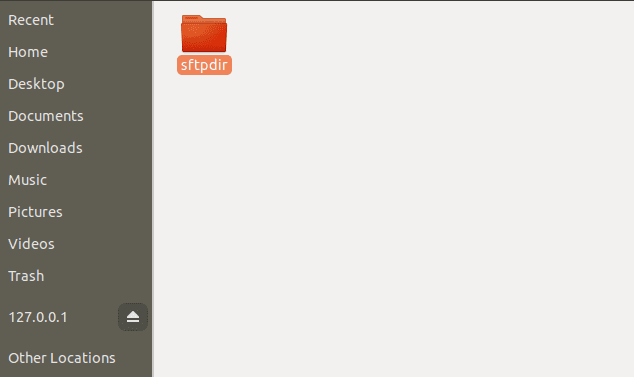
Welcome To SFTP User Home Directory
Conclusion
If you have come this far, congratulations! you have installed SFTP and made a successful login! I hope you enjoyed this tutorial. SFTP is excellent when you need a secure file transfer because the files are encrypted during the transfer.
3 comments
Tutorial does not work without adding `PasswordAuthentication yes` to the /etc/ssh/sshd_config. Without this you will get Permission denied (publickey).
how to use without password ,using public key file, to login
“On the other hand, FTP offers no encryption of any kind and is not recommended for use on an insecure network such as the cloud.”
This is incorrect; almost all FTP installations use FTPS, which is encrypted and just as safe as SFTP. The days of unencrypted FTP are long over.