Manjaro is a tremendous Linux-based distro in that it comes with a multitude of desktop options. The developers officially support three different flavors of Manjaro. These flavors are differentiated by the desktop environment that they come with, namely KDE Plasma, Xfce, or GNOME.
But you can also install any other Linux-supported DE (desktop environment) you like, or better yet, download the community-supported version of Manjaro that comes with your choice of DE like Budgie, LXQT, LXDE, Cinnamon, and more.
So that means you are not bound to the only desktop that a Linux-based distro comes with pre-packaged, and you can choose to install any other supported DE you like. And the beauty of Linux is that you can easily manage more than one desktop in your distro with the help of a display manager like GDM3, LightDM, etc.
However, in this article, the spotlight is on Budgie, which is a great desktop option and works well with Manjaro Linux. One of the few noteworthy features of Budgie includes the simple yet elegant design, clever integration tricks, ease of use, and customization on multiple layers.
You can get Budgie with Manjaro in two different ways. You can install it on your Manjaro installation if you have already opted for a version with any other desktop. You can also download the community version of Manjaro that comes with Budgie right out of the box. We will cover both methods in this guide today.
So without further ado, let’s get right into it and install Budgie on your Manjaro Linux installation.
Install Budgie as an additional DE on Manjaro Linux
If you are new to Linux and somehow do not feel comfortable using the terminal, you can install Budgie on Manjaro using GUI. We will cover both methods here as both options have their pros and cons. Using GUI may be easier for new users; however, installing Budgie using CLI or Terminal is also not that difficult.
Whichever your preference may be, the end goal is the same, and rest assured, we have tested both these methods, and there is no difference in the outcome. Budgie works fine after installing it via GUI as well as CLI.
Install Budgie using GUI on Manjaro Linux
Installing the Budgie desktop environment via the graphical user interface is a simple process, and listed below are all the steps detailing how it is done. The default software manager of Manjaro works excellent for this purpose.
1. Open the software installer. You can use it to remove or add software.
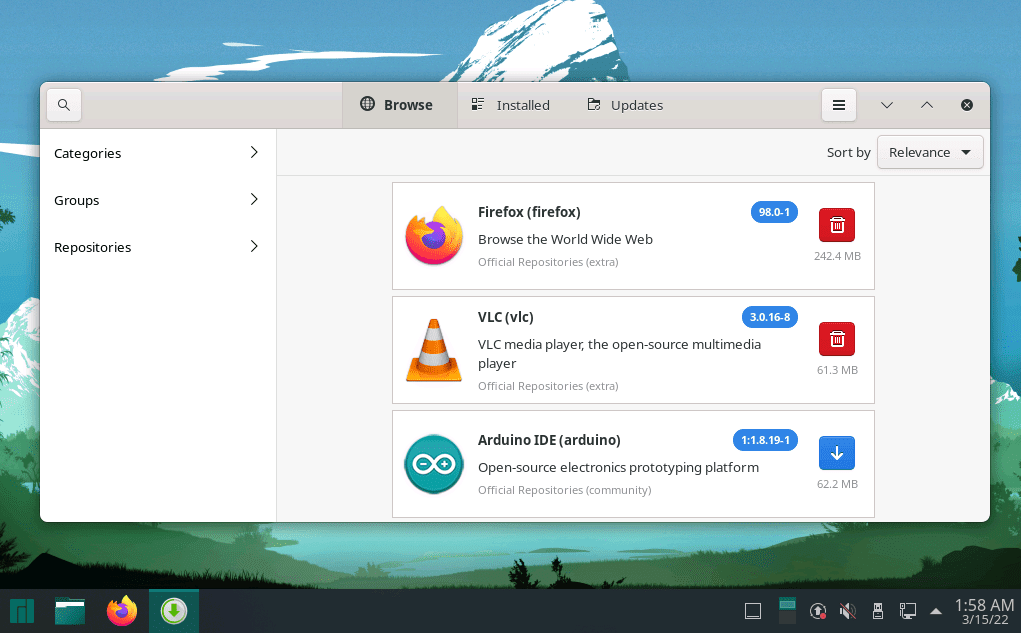
Software installer
2. On the search icon, click and type in “budgie” in the search field.
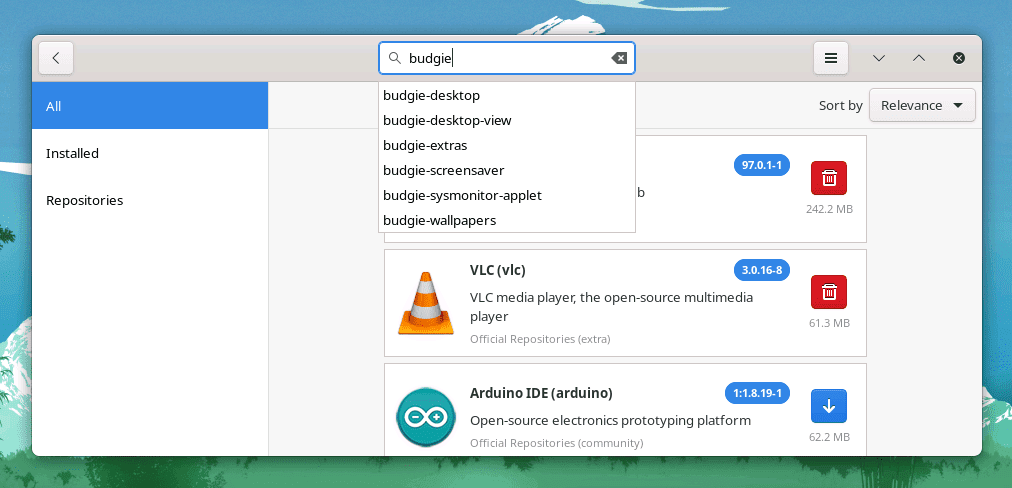
type budgie
3. Click on the first option that says “budgie-desktop” and click on the down arrow button as depicted below.
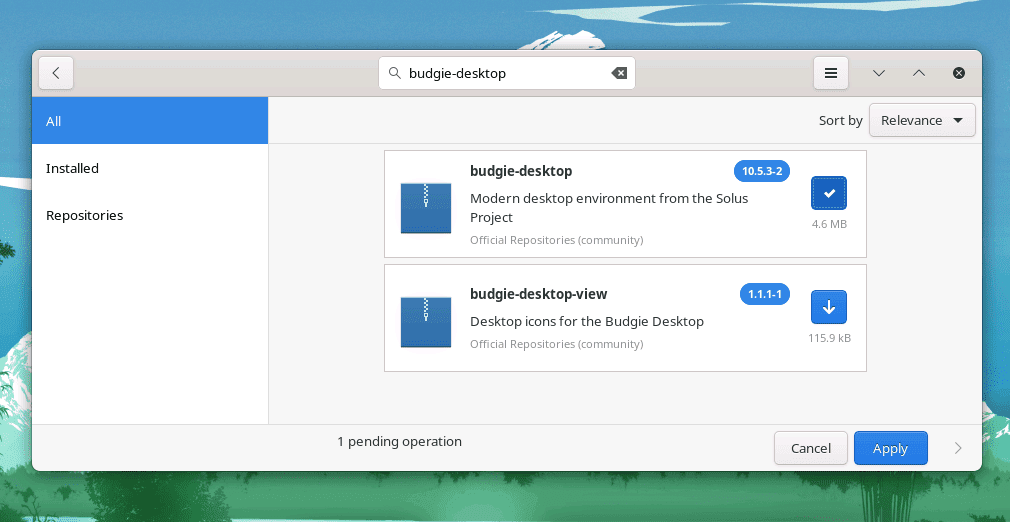
budgie desktop
Budgie and other Budgie-related applications will be listed therein. Click on “Apply” after selecting “budgie-desktop” and let the DE get installed.
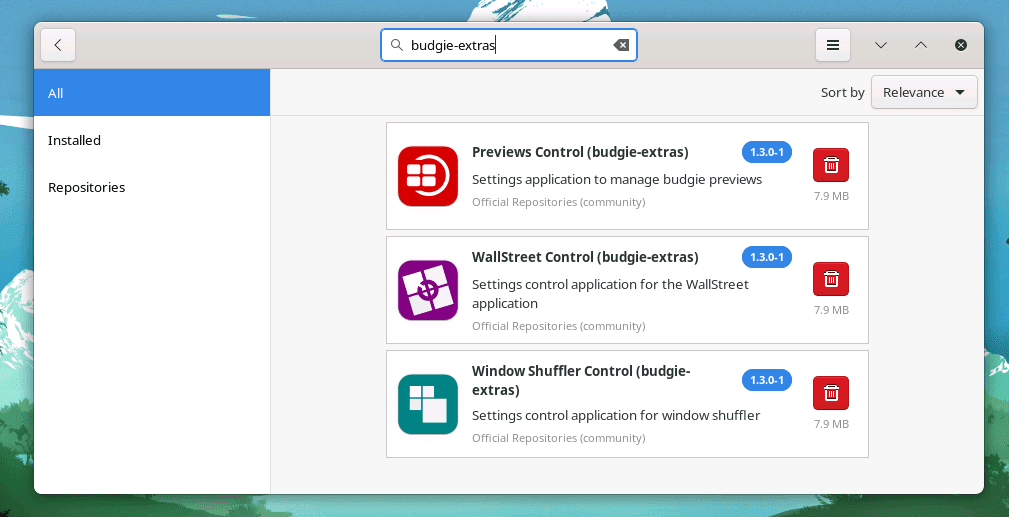
4. Install Budgie extras
Now you need to install some additional features that Budgie boasts.
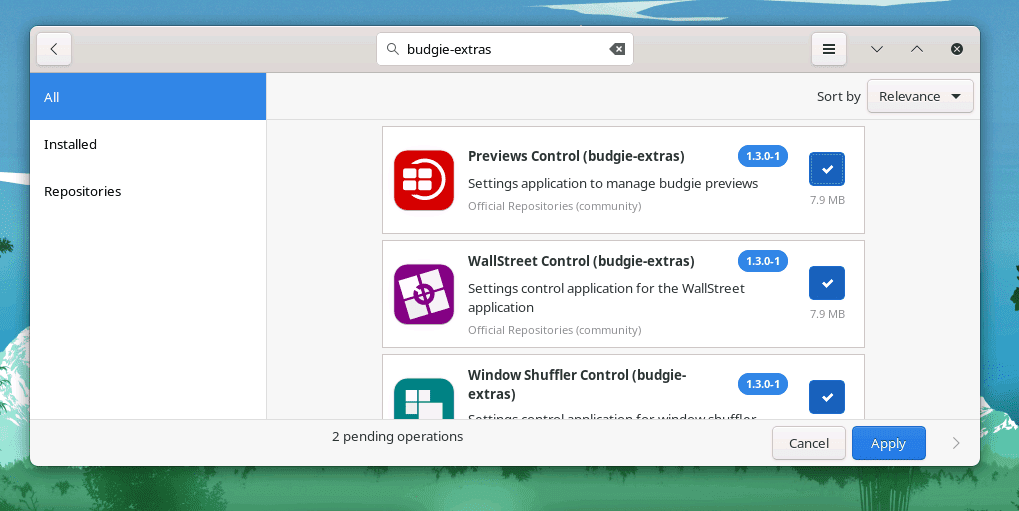
budgie-extras
These will ensure that you have a wonderful experience with the budgie desktop. Essentially, you will find the desktop environment more functional because of these extras.
budgie-extras installed
After these are installed, the icon will change, as shown above.
5. Install Manjaro Budgie settings and Budgie wallpaper
Now you need to install some critical Budgie settings to allow the newly installed desktop to run without any issues on Manjaro.
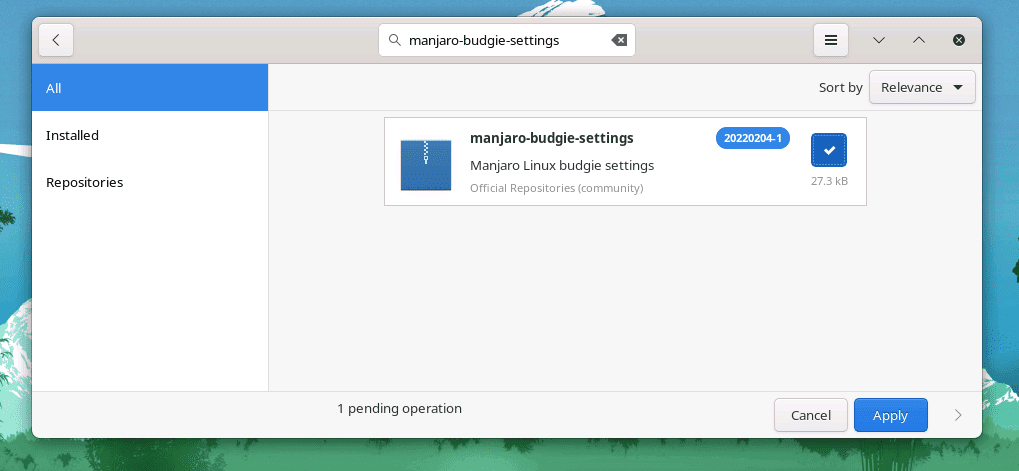
manjaro-budgie settings
Type “manjaro-budgie-settings” and click on the icon for installation.
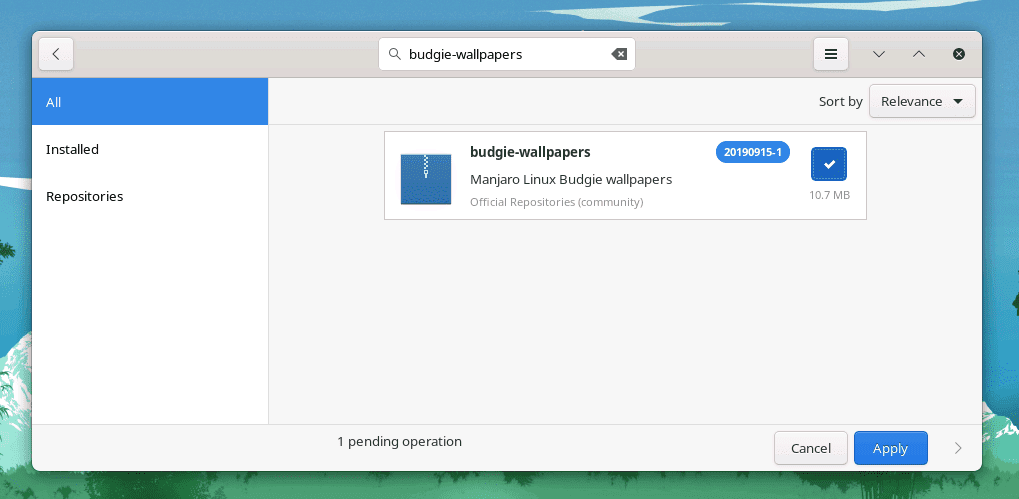
budgie-wallpapers
Now type “budgie-wallpapers” and click on the icon again for installation.
6. Reboot
Now you need to reboot the system.
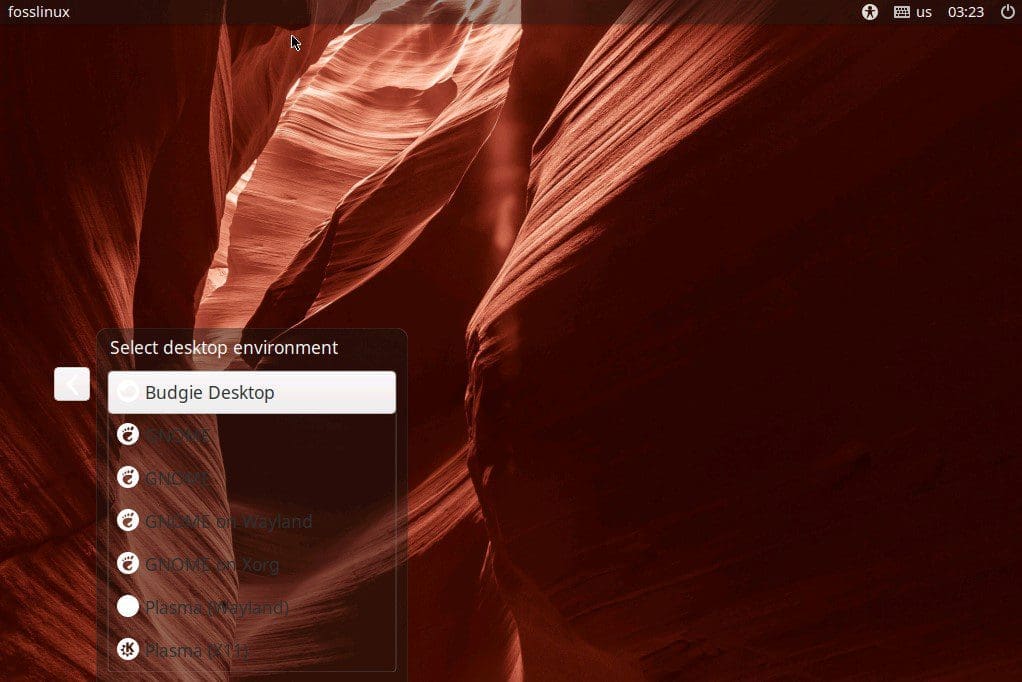
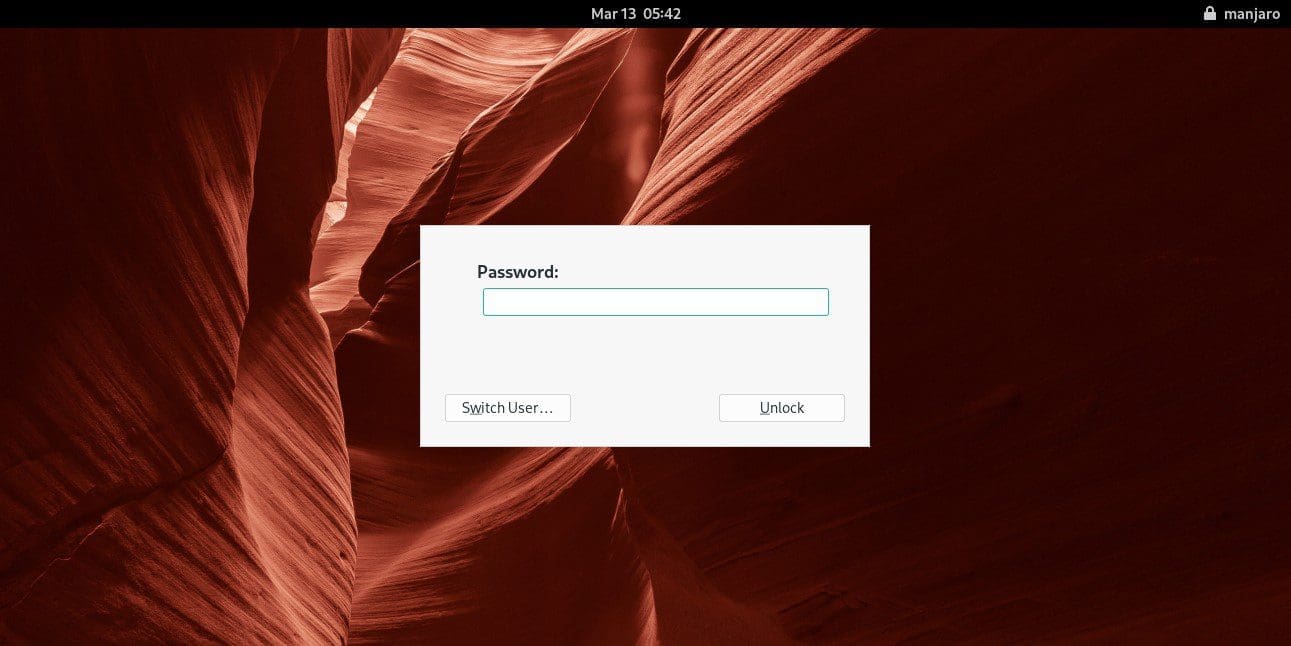
Login page after successful Budgie installation
After restarting, you will see the Budgie option in the list of all the DEs on the login page, as shown above.
7. Login into your new desktop
Budgie deskop after login
Congratulations! You have successfully installed Budgie on your Manjaro Linux installation using GUI. The floor is now yours to edit and customize this desktop to your heart.
Install Budgie via Terminal on Manjaro Linux
Installing Budgie using terminal is not difficult as some might think, and you will see that too after going through the process. You can install the Budgie desktop and all the relevant components required for Budgie to function by following the steps detailed below.
Please note that we have a Manjaro installation with KDE Plasma desktop, and we will be using the Konsole terminal to install Budgie but do not worry. You can follow the same steps if you have any other flavor of Manjaro installed on your system.
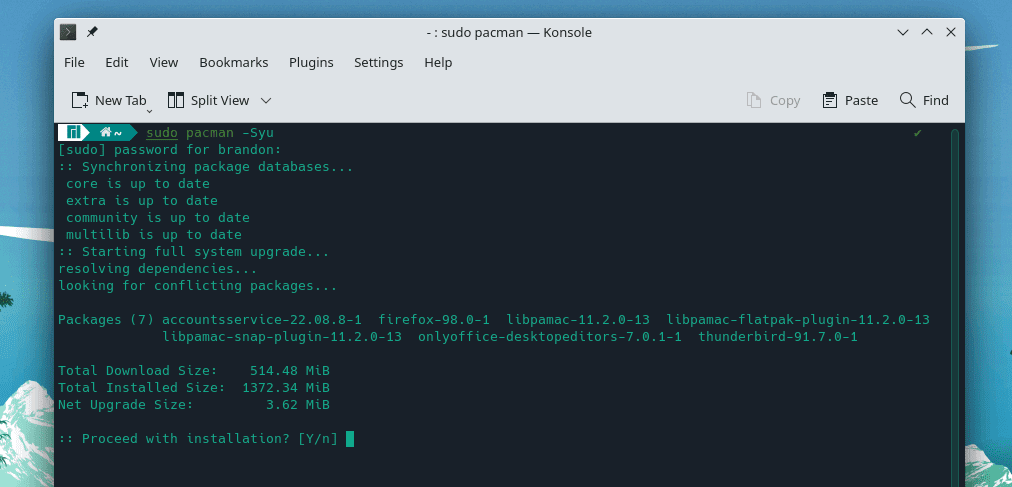
1. First, we need to update the Manjaro Linux as a good practice.
sudo pacman –Syu
sudo Pacman -Syu
Type “y” and press ENTER to let the system get updated.

sudo pacman -Syu complete
Make sure to let the process complete. Depending on a few things like your internet speed and the number of packages that require an update, it may take some time.
2. After the update has been completed, run the following command to install Budgie.
sudo pacman -S budgie-desktop network-manager-applet gnome-control-center gnome-wallpapers

Install Budgie and the relevant utilities
This command will install the Budgie desktop and the network manager app, GNOME control center, and GNOME screensaver. But wait, we are not entirely done yet. Follow these steps below to install some essential components Budgie requires to function correctly.
3. Install GNOME terminal Nautilus
sudo pacman -S gnome-terminal nautilus budgie-extras dconf-editor

Install GNOME terminal Nautilus
This step is optional but recommended as the Nautilus is a superb terminal application.
4. install the display manager LightDM
You need to install a display manager to allow your distro to manage the additional Budgie desktop we have just installed successfully.
sudo pacman -S lightdm lightdm-slick-greeter lightdm-settings
This will install LightDM display manager which works well when adding Budgie as the additional desktop environment on Manjaro.

Install LightDM
Again type “y” and press ENTER to let the display manager be installed. After it is done installing, you need to enable it, and you can do so with the help of the following command.
5. Enable LightDM as the default display manager
systemctl enable lightdm.service –force
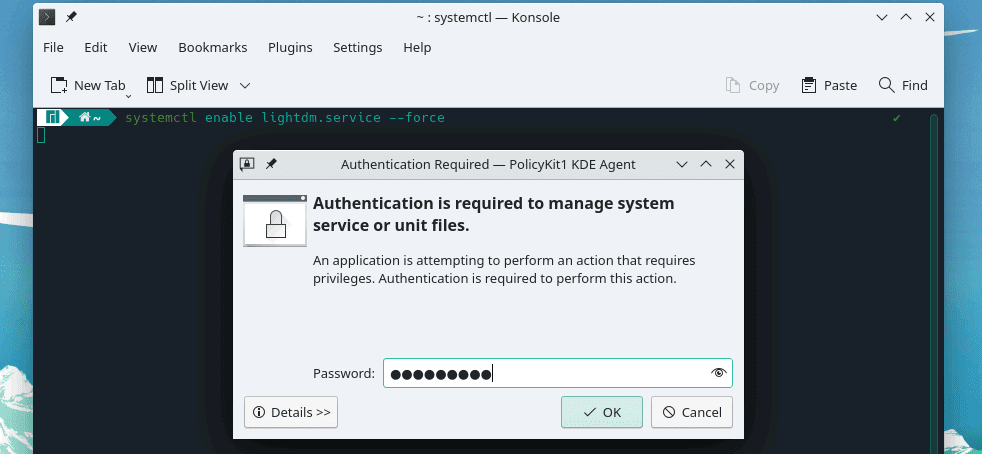
Enable LightDM and authenticate with admin password
It will prompt you for the admin password. Press ENTER after typing in the password, and LightDM will be enabled as the default display manager on your Manjaro installation.
6. Install the Budgie settings for Manjaro
Now that the display manager is installed, you now need to download and install the theme of Budgie to make the look and feel of the new desktop natural.
sudo pacman -S manjaro-budgie-settings manjaro-settings-manager papirus-maia-icon-theme

Budgie settings
This will install all the relevant settings of Budgie for Manjaro and allow the new desktop to run correctly on the distro. Now, all you need to do is reboot the system.
7. Reboot
Login page after successful Budgie installation
Select Budgie Desktop and enter your password to log in.
Budgie deskop after login
Congratulations! You have successfully installed Budgie using the Terminal on Manjaro Linux.
Downloading and installing the Community version of Manjaro with Budgie desktop
If you want to do a fresh installation of Manjaro Linux with the Budgie desktop pre-loaded, you can download the community-supported version of the distro by clicking here.
Disclaimer: While this method may be ideal for some users, we want to let you know that we ran into a password bug during the installation. It prompted us for the password after installation, and no matter whichever password we entered, there was an error.
Password bug
If this happens to you, do not panic; just shut down and turn on the system after a few minutes, and it will resolve the bug.
After downloading the community-supported version of the Manjaro Budgie edition, you need to burn it on a physical storage device. You can do so with the help of an ISO burning tool like balenaEtcher.
Now follow the steps listed below for a successful installation.
1. Boot up your system after plugging in the storage device with burned ISO image file of the Manjaro Budgie edition.

Budgie Welcome UI
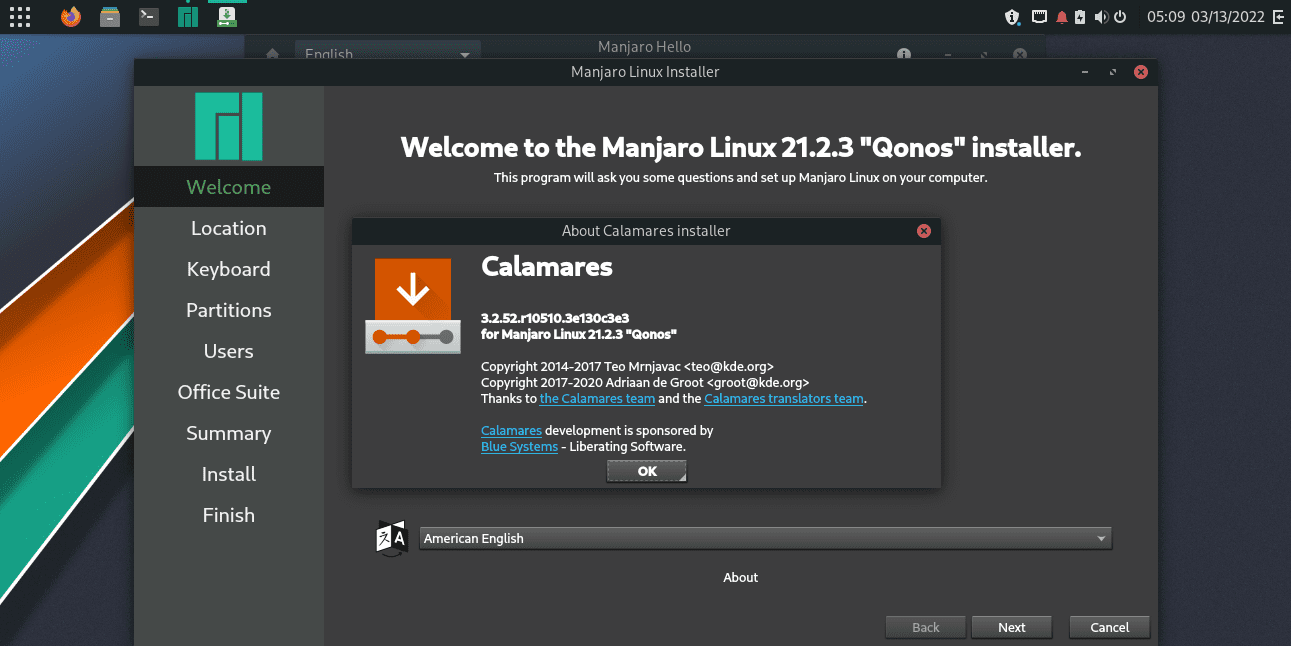
You will be greeted by the launcher interface, as shown above. Select “Launch Installer” to let the installation begin.
2. Select your Language
Language select
3. Select your region
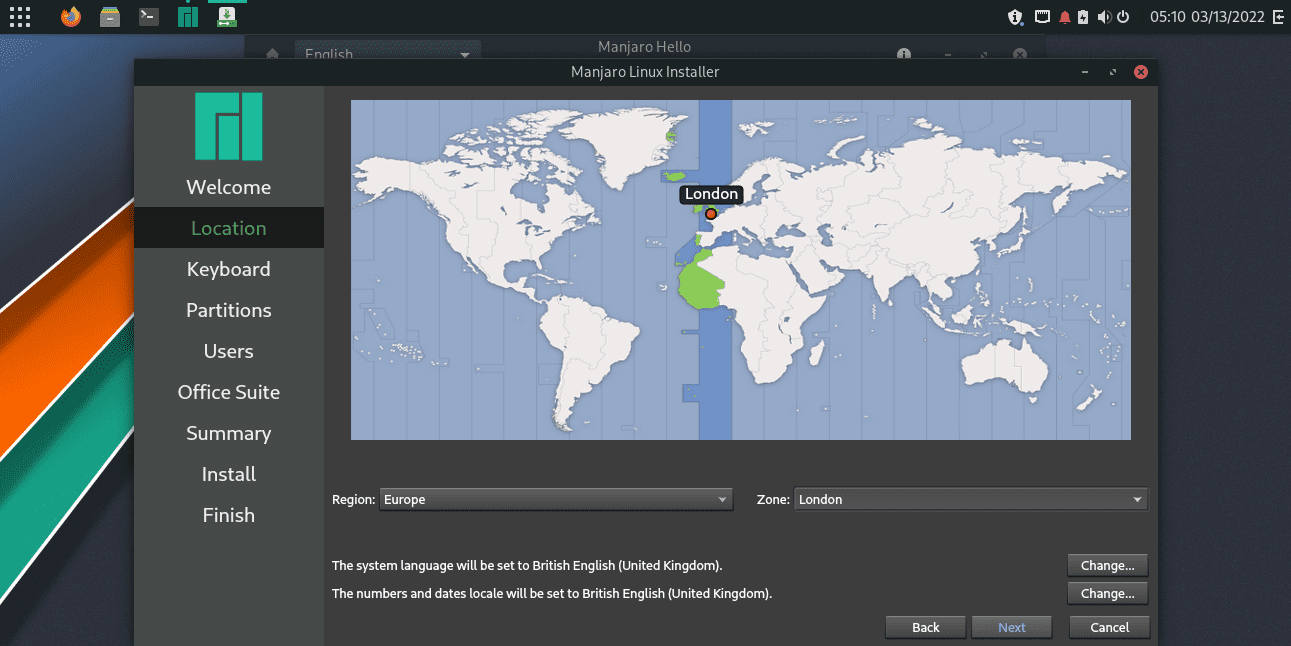
Region select
4. Select your choice of keyboard layout
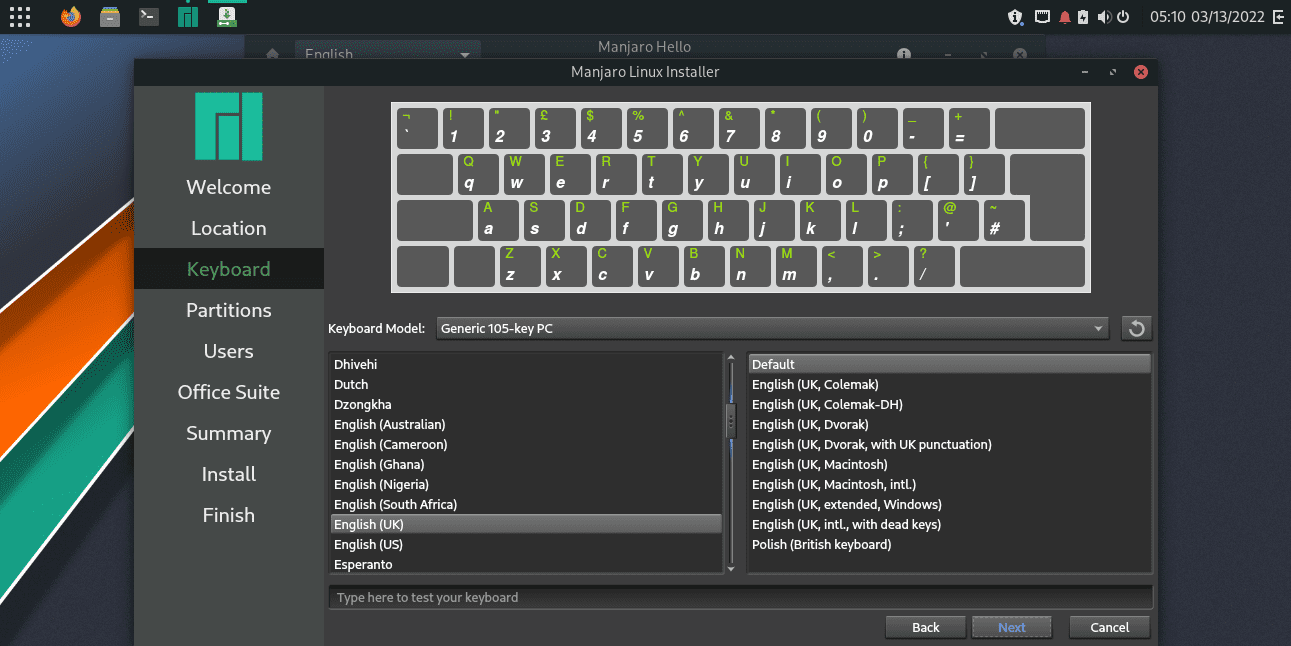
Keyboard preference
5. Partition the drive
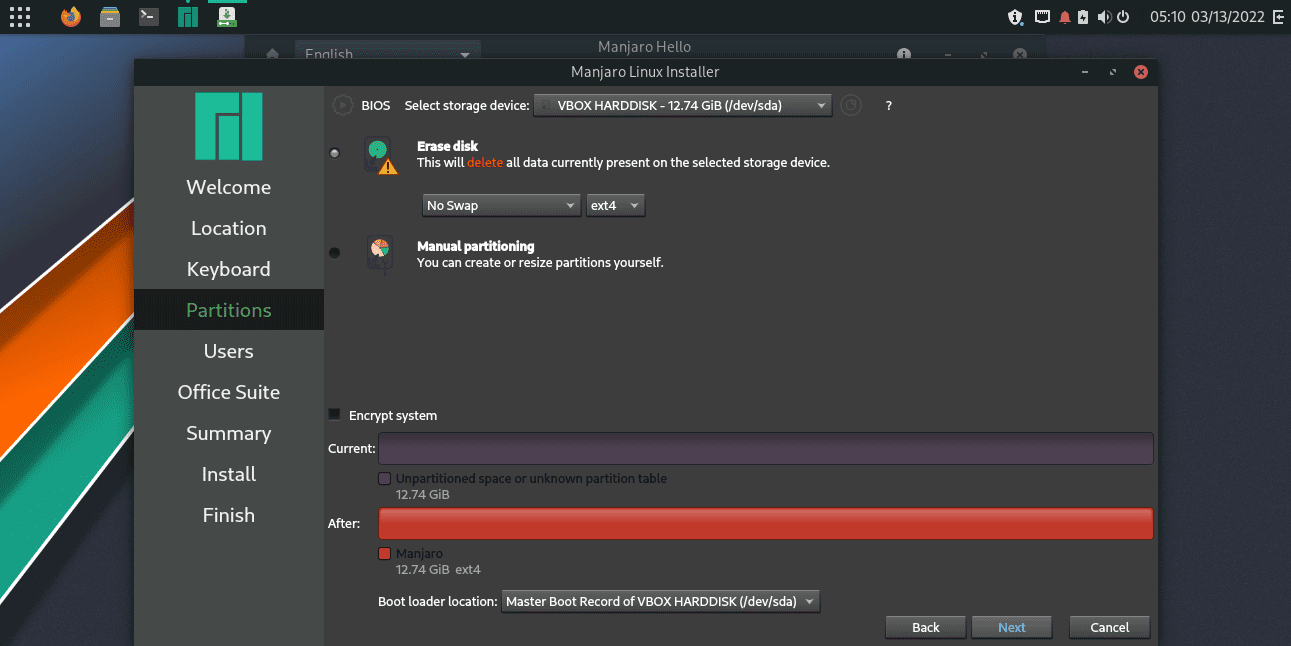
Partition menu
This will allow you to set up one or more partitions of your storage drive. You can leave the setting by default if you want a single drive.
6. Setup user account and password
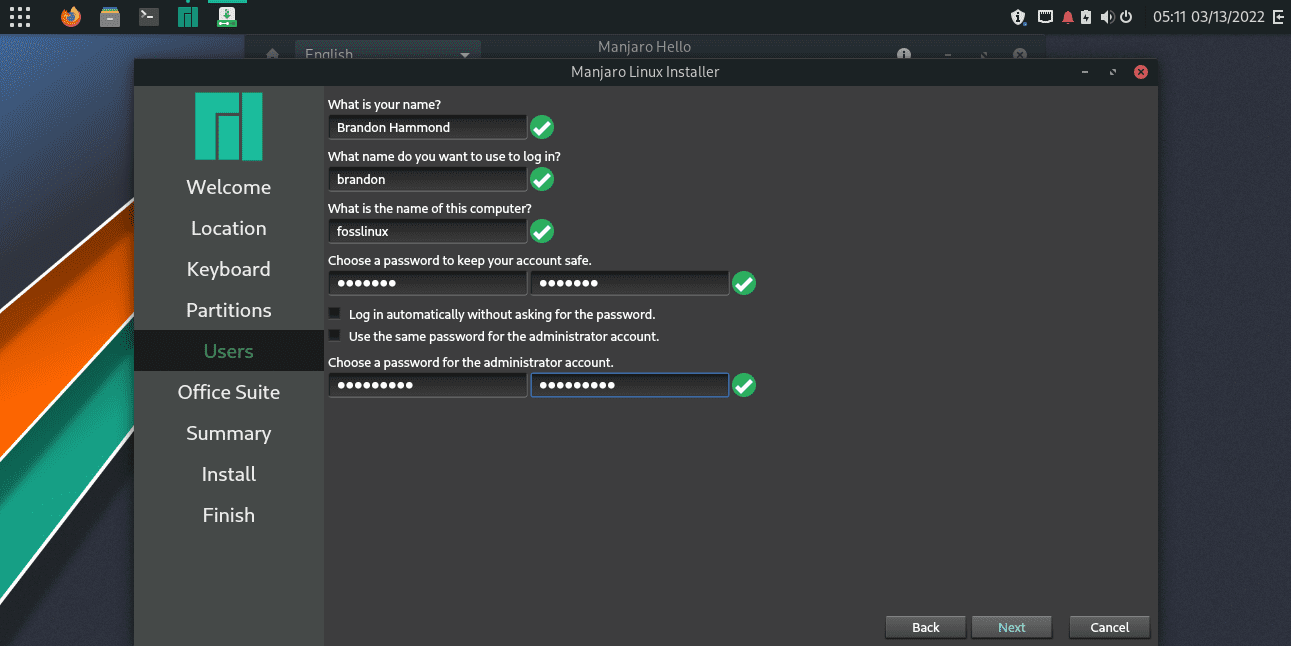
User accounts and password setup
7. Choose Office Suite software
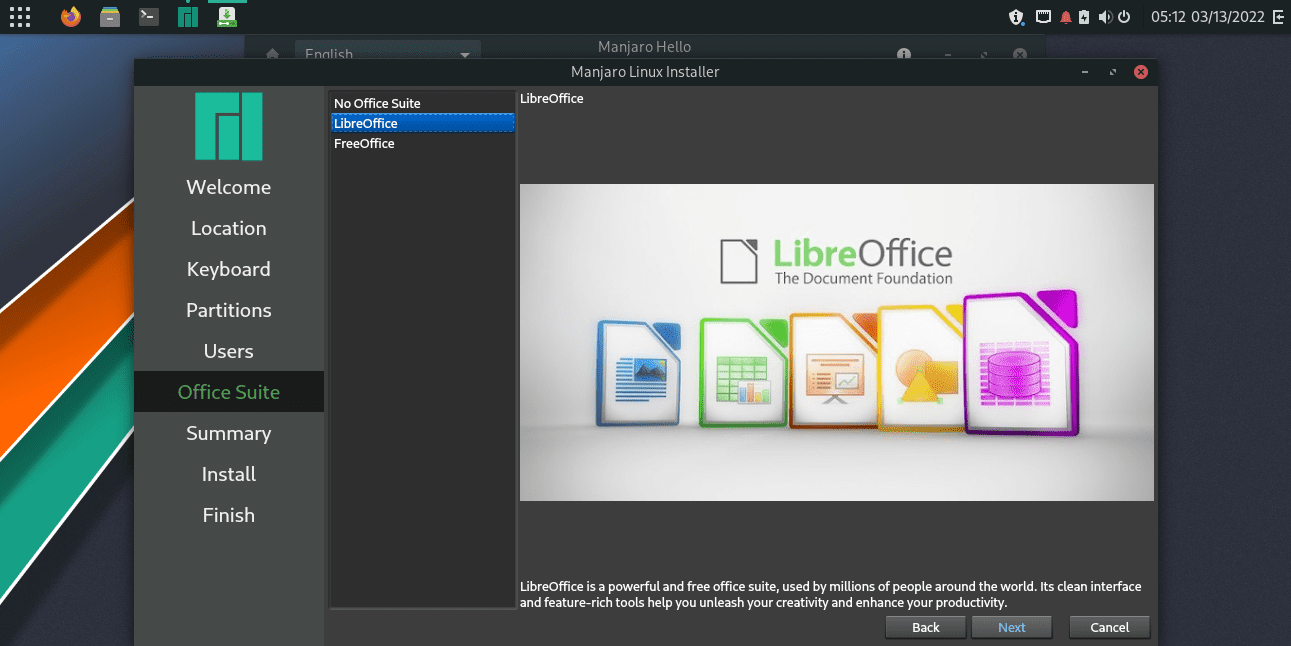
Office Suite selection
We recommend that you go with LibreOffice as it comes loaded with so many features, and if you plan to do any professional work on your system, it will be more than good enough. It is also recommended for new Linux users due to the compatibility and UI similarities with MS Office.
8. Double check the details to make sure everything is in order
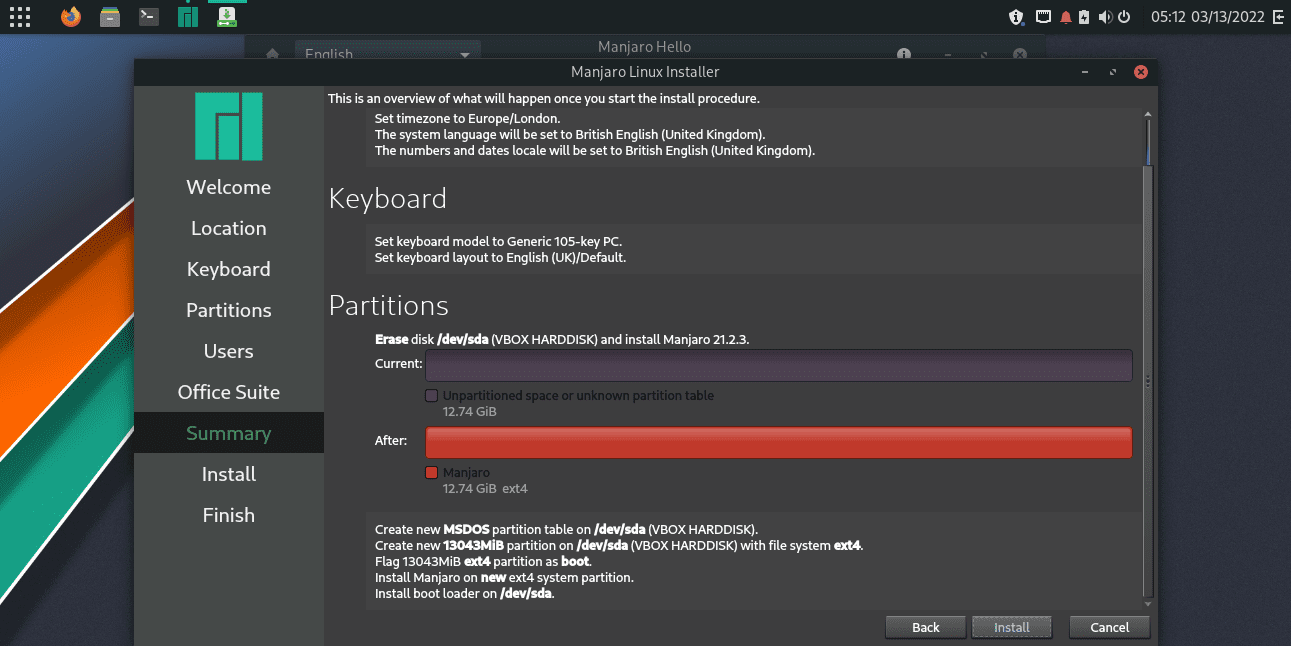
Review details
9. Click on Install and let the installation complete
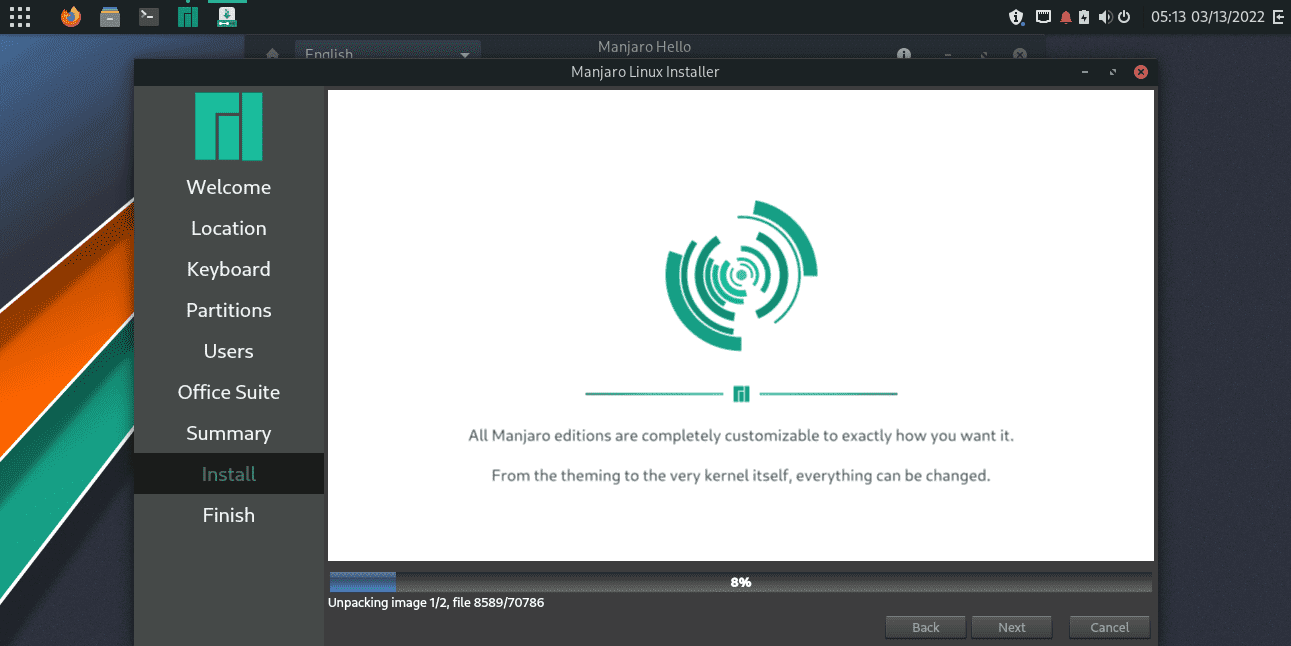
Installation process
The installation will not take long as it is not internet-based, and if you have an SSD as your storage drive, the process will take only a few minutes.
10. Reboot
All you need to do is reboot and log in to your newly installed Manjaro distro with Budgie desktop.
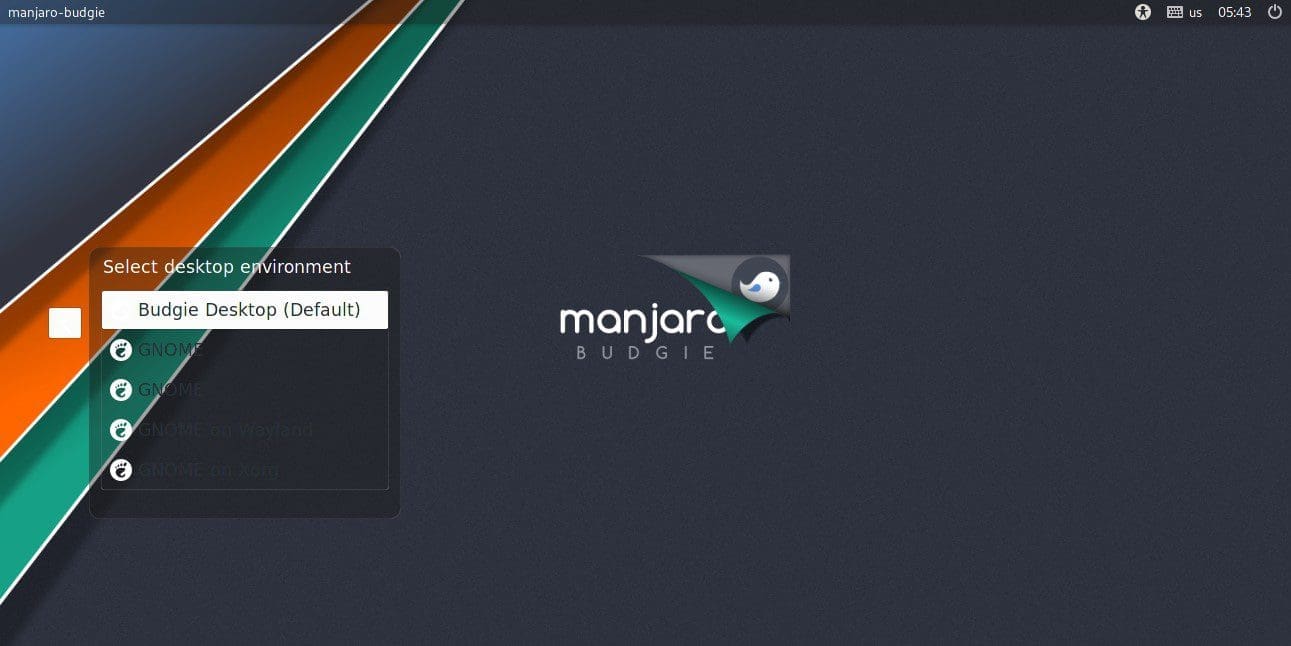
Manjaro Budgie Login
Budgie will be selected by default as the desktop option.
11. Login
Enter your password that you set up during the installation and press ENTER.
Manjaro Budgie desktop after login
Congratulations! Now you can customize it the way you like, and we hope you want how elegant it looks while being resource-friendly and easy to use.
Final thoughts
We have covered three different methods to experience Budgie desktop on the Manjaro Linux distro. We hope you also have a great time with the feature-rich desktop environment. Let us know in the comments down below if this guide was helpful to you or if you ran into any obstacles during the process. We would love to hear your feedback and help you out if you need it.