
Do you have multiple machines running several operating systems? Then you may face issues while transferring files to and fro between those machines. It is a not a great feeling to waste your time troubleshooting file transfer issues.
Hence, we suggest to create a folder and then share it with all the systems connected to the local network. In this tutorial, we walk you through the process of setting up a folder in your local network for being able to share its content across Windows and Linux systems. Its only one-time installation with few little configurations and your files should be ready to share across your different machines.
We shall use a popular tool Samba.
Setting up Samba Server to share files across Linux, Windows, and Mac OS X systems
Samba is a opensource tool that can help you to share the files and printer across cross platforms including Linux, Windows, and Mac over a network.
This tutorial guides you on how to install and configure Samba, to enable file sharing between Ubuntu and Windows. However, first we need to prepare our environment as follows:
Step 1 – Setting up Ubuntu and Windows Hosts
On Ubuntu, put your Ubuntu IP and hostname in the /etc/hosts file. Also, add a record for the Windows IP and hostname.
sudo vi /etc/hosts
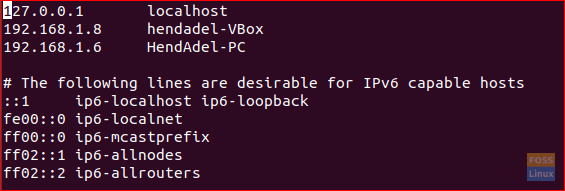
Ubuntu Hosts File
On Windows, put your machine IP and hostname. Also, add a record for your Ubuntu IP and hostname.
notepad C:\\Windows\System32\drivers\etc\hosts
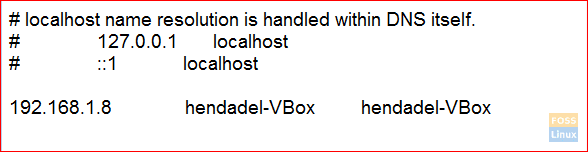
Windows Hosts File
Step 2 – Configure domains
Both machines must be in the same domain, check the default Windows workstation domain using the next command.
net config workstation
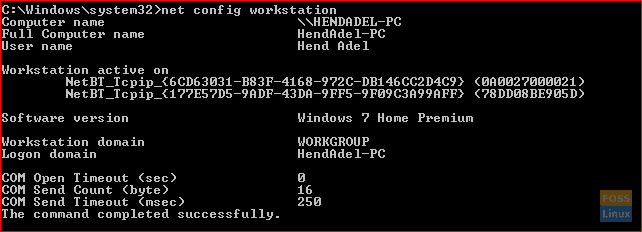
Windows Current Domain
As you can see from the previous screenshot, the Windows domain is WORKGROUP.
Step 3 – Enable File Sharing on Windows
Enable File Sharing on Windows, open cmd with administrator privileges and run the next two commands.
netsh advfirewall firewall set rule group="File and Printer Sharing" new enable=Yes
netsh advfirewall firewall set rule group="Network Discovery" new enable=Yes
The output should be like below:
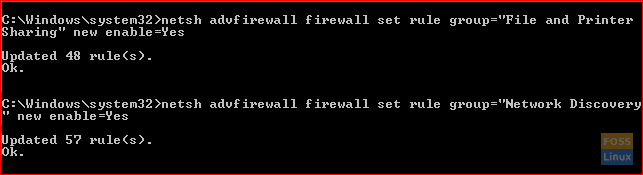
Enable File-sharing and Network Discovery
Step 4 – Install Samba on Ubuntu
Ensure that your Ubuntu updated.
sudo apt-get update
sudo apt-get upgrade
Run next command to install Samba on Ubuntu.
sudo apt-get install samba samba-common python-glade2 system-config-samba
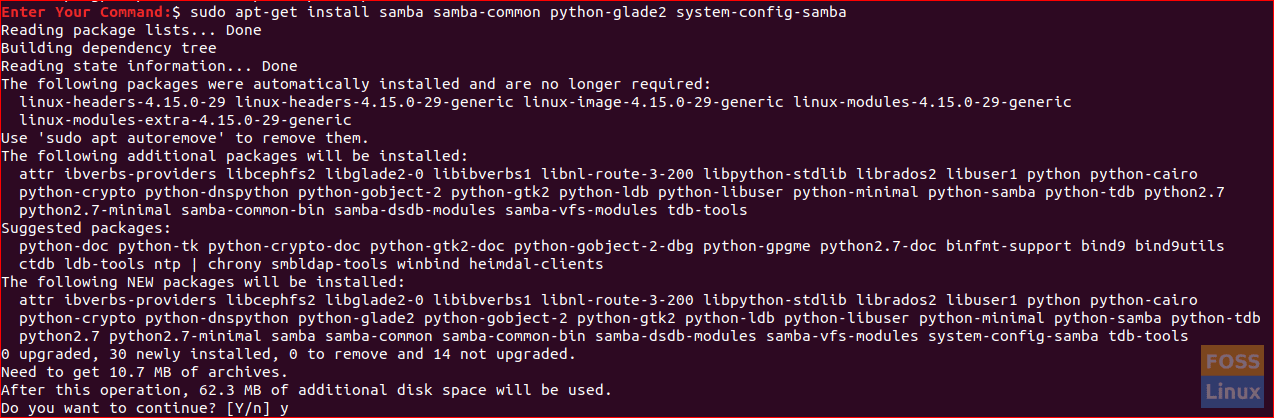
Install Samba
Check if the Samba installation was successful.
whereis samba
The output should like below:

Verify Samba Installation
Step 5 – Setup Public Shared Folder on Ubuntu
Create a public directory on Ubuntu for sharing.
sudo mkdir -p /home/hendadel/sambashare
Set the directory permissions so that anyone can read/write to it.
sudo chown -R nobody:nogroup /home/hendadel/sambashare/
sudo chmod -R 0775 /home/hendadel/sambashare/

Create a Shared Directory
Step 6 – Copy and setup Config file
Copy Samba default configuration file to be a backup file in case any error happens in the future.
sudo cp /etc/samba/smb.conf /etc/samba/smb.conf.backup
Edit Samba configuration file
sudo vi /etc/samba/smb.conf
Add the next lines to Samba configuration file:
[global]
workgroup = WORKGROUP
server string = Samba Server %v
netbios name = hendadel-VBox
security = user

[SambaShare]
Comment = Samba Shared Directory
path = /home/hendadel/sambashare
writable = yes
guest ok = yes
read only = no
force user = nobody
Edit Samba Config File
Check the Samba configuration file using the next command.
testparm
The output should be like this:
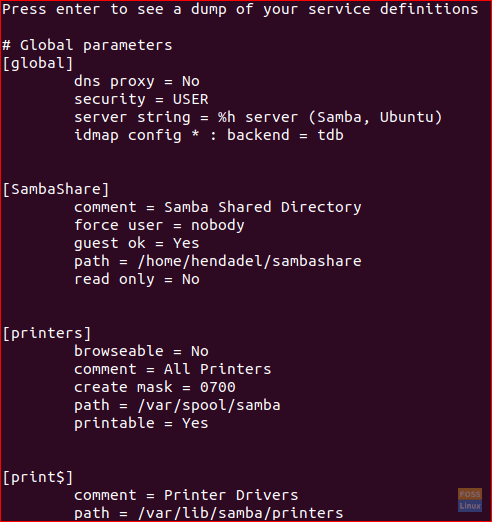
Samba Configuration File Check
Step 7 – Restart Samba Service.
sudo service smbd restart
Restart Samba Services
Step 8 – Access Samba Share on Windows
Now from your Windows machine, open run and use the following command to open Ubuntu shared folder.
\\192.168.1.8\sambashare
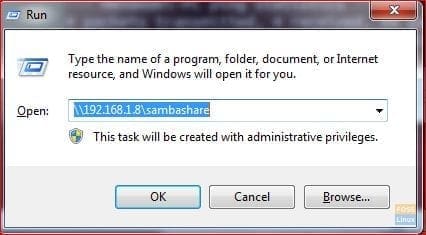
Open Shared From Run
The shared folder should like this:
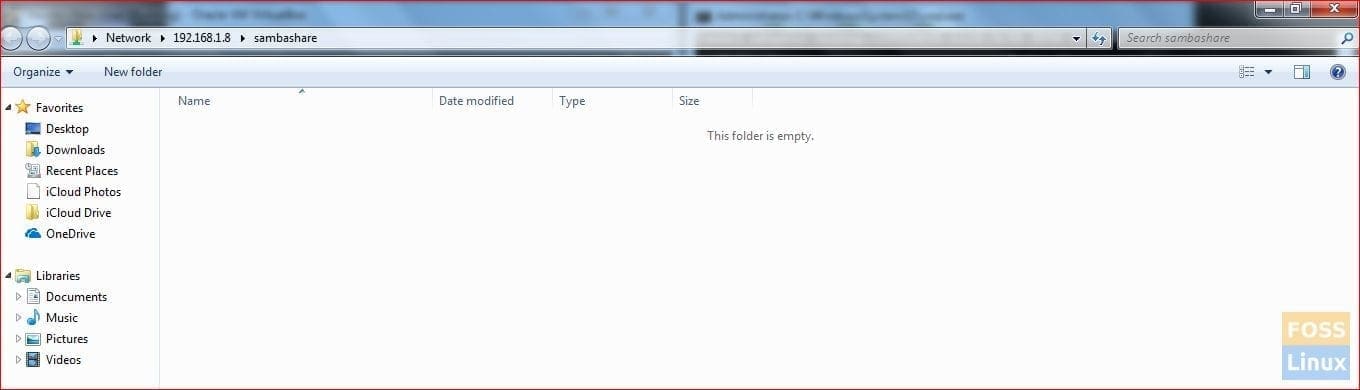
Shared Folder From Windows
You can now create folders or files inside the shared directory from your Windows machine and check if they created in Ubuntu too.
First, create a test folder from Windows:
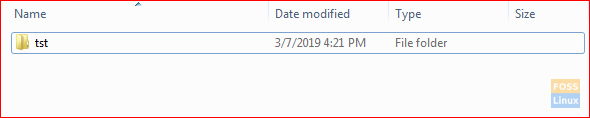
Create Test Folder
Check the created folder from Ubuntu:

Check Created Folder
Step 9 – Set Private Shared Directory
Previously, we had a public folder for all network members. What if you need to share a folder with some specific users, or in other words users who have username and password only can access the shared directory.
First, we need to create a group, add users and members to this group and only members of this group should have access to the shared directory.
Create a group:
sudo addgroup smbgroup

Create a Group
Add your Ubuntu user to the smbgroup.
sudo usermod -aG smbgroup hendadel
Give a password for the samba user.
sudo smbpasswd -a hendadel

Add user to group
Now, create a directory to share in private.
sudo mkdir -p /home/hendadel/sambaprivate/
Set permissions to the previous directory, so that only root and members of smbgroup access the shared directory.
sudo chown -R root:smbgroup /home/hendadel/sambaprivate/
sudo chmod -R 0770 /home/hendadel/sambaprivate/

Change Permissions
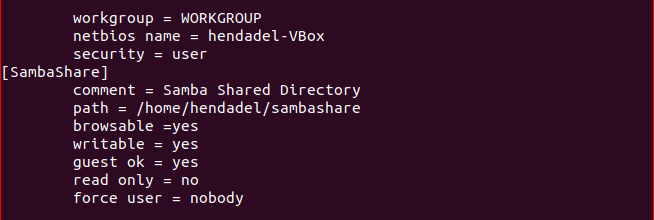
Edit Samba configuration file to add the new created directory.
sudo vi /etc/samba/smb.conf
Add the below:
[SambaPrivate]
path = /home/hendadel/sambaprivate
valid users = @smbgroup
guest ok = no
writable = yes
browsable = yes
The configuration file should be as follows:

Edit Samba Config File
Restart Samba service.
sudo service smbd restart
Check the Samba configuration file:
testparm
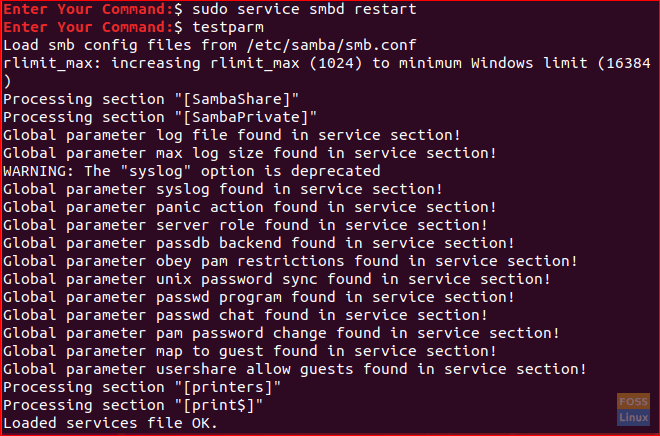
Restart Service and Check Configurations
Check the two created folders from Windows machine.
\\192.168.1.8\sambashare
Windows should ask you for username and password like the below screenshot.
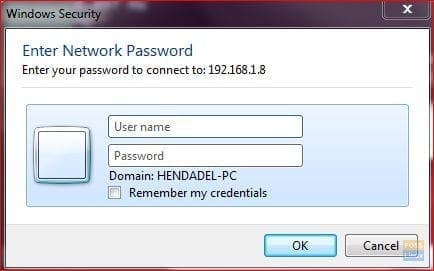
Enter Username and Password
After entering your credentials, you should see the shared directories as below.
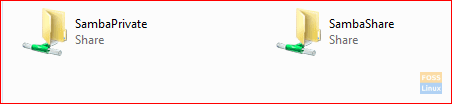
Check Shared Folders
Finally, I hope you enjoyed this tutorial. Moreover, for any further questions, leave us a comment, and we will be glad to help you.
5 comments
Hey, when I try to access the private file from windows it says I do not have permission.
I created a user in smbgroup
and followed all the steps
Great guide. Could you include a sample smb.service template?
Would be great since many distros are using systemd.
If am completely misinformed, please correct me and tell me how to get this running automatically at boot. Currently running Debian Buster on a Raspberry Pi 4B.
Total newbie here.
I am installing Ubuntu Server for the sole purpose of sharing files. I have been following everything well until:
“sudo apt-get install samba samba-common python-glade2 system-config-samba”
I am getting the message “E: unable to locate package python-glade2” and “E: unable to locate package system-config-samba”. whereis samba results in “samba:”
Do I need a different apt repository? Or what?
Thanks,
Ken
Responding to my own question, I found this:
Python2 support
—————
Samba 4.11 will not have any runtime support for Python 2.
If you are building Samba using the ‘–disable-python’ option
(i.e. you’re excluding all the run-time Python support), then this
will continue to work on a system that supports either python2 or
python3.
To build Samba with python2 you *must* set the ‘PYTHON’ environment
variable for both the ‘configure’ and ‘make’ steps, i.e.
‘PYTHON=python2 ./configure’
‘PYTHON=python2 make’
This will override the python3 default.
Except for this specific build-time use of python2, Samba now requires
Python 3.4 as a minimum.
Can I simply substitute 3.4 for the 2 in the argument?
how to adapt this tutorial to include a remote file server?