
Ubuntu is a well-known operating system based on Linux, favored for its user-friendly interface, security, and stability. One crucial task for system administrators is to manage users and groups on the system. This guide covers the fundamentals of Ubuntu user and group management, including creating and deleting users, adding and removing users from groups, and setting user permissions. Regardless of your experience with Ubuntu, this guide equips you with the necessary knowledge and tools to manage users and groups efficiently.
Managing users and groups from the command-line
The Terminal/command line is one of the most powerful utilities that ships with all Linux systems. You can use it to create, edit, delete files, create and delete users, install applications, and more. This section will look at managing users and groups from the command line.
1. Add a New User
One of the most popular methods of adding new users from the command line is the useradd command. When used to create a new user, this command adds new entries to these four files – /etc/passwd, /etc/shadow, /etc/group and /etc/gshadow.
Execute any of the commands below to add a new user, depending on your requirements.
- Add a new user without a home directory
sudo useradd johndoe
- Add a new user with a home directory
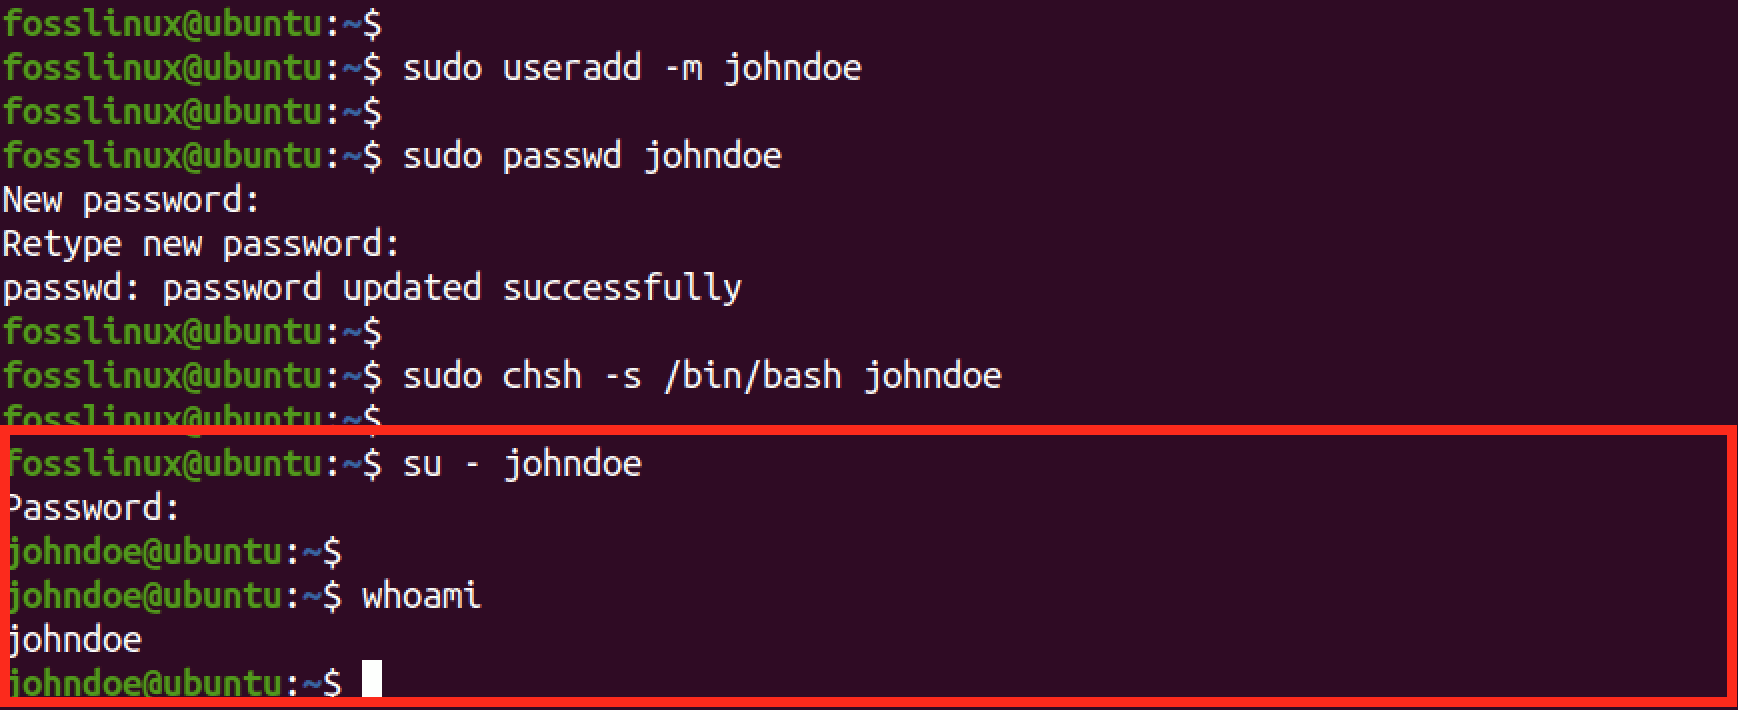
sudo useradd -m johndoe
- Add a new user with a custom home directory
sudo useradd -m -d my-custom-dir johndoe
We will create a new user with a home directory for this post. Next, create a password for the new user using the command below.
sudo passwd <new-user-name>
Once done, you will need to set the user’s default shell. The default shell determines the command-line interface that the user sees when they log in. By default, Ubuntu uses the Bash shell. Execute the command below.
sudo chsh -s /bin/bash johndoe
Tip: If you don’t set the user’s default shell, they will only see a dollar sign on their Terminal prompt.
You can log in with the new user from the Terminal with the command below. Again, please keep note of the hyphen.
su - <user-name>
e.g
su - johndoe
Add a New User
You can view more information about the new user you just created using the grep command on the /etc/passwd file. See the command below.
sudo grep <user-name> /etc/passwd
e.g
sudo grep johndoe /etc/passwd

Grep :etc:passwd File
2. Change the Login Name of a User
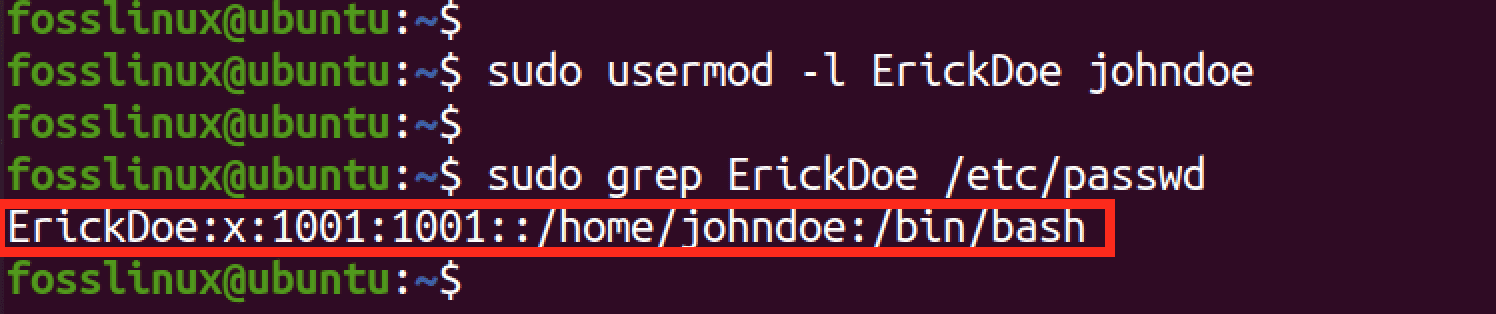
When you create a new user using the useradd command, for example, useradd jane, the login name of this user will be “jane.” Luckily, you can change the login username using the usermod command, as shown below.
sudo usermod -l <new-username> <old user-name>
e.g
sudo usermod -l ErickDoe johndoe
You can verify this change by grepping the /etc/passwd file as shown below.
sudo grep ErickDoe /etc/passwd
Change login username
3. Change the User ID of a User
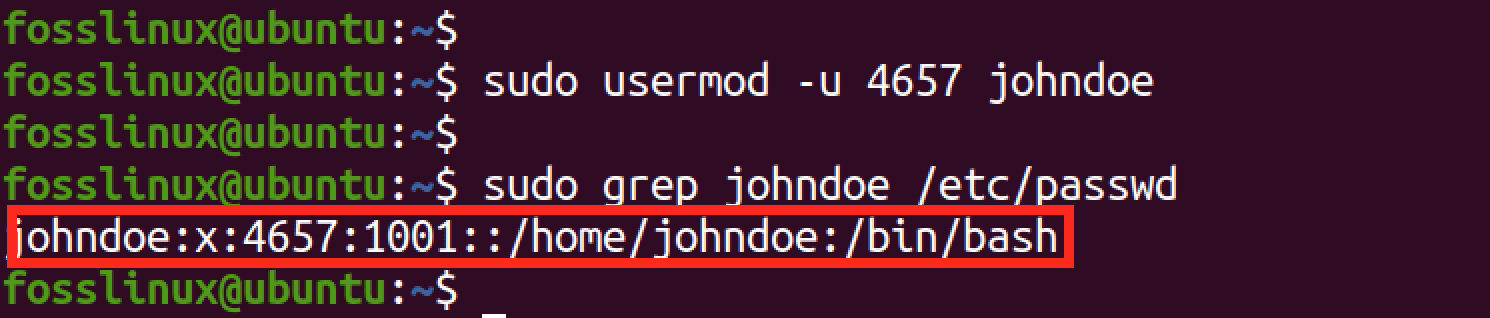
The system automatically assigns a unique ID to any user you create using the useradd command. For example, you can see that the new user we created above was given the ID of 1001. You can change this ID using the usermod -u command shown below.
sudo usermod -u 4657 johndoe
As shown below, you can verify the new user ID using the grep command on the /etc/passwd file.
Change User ID
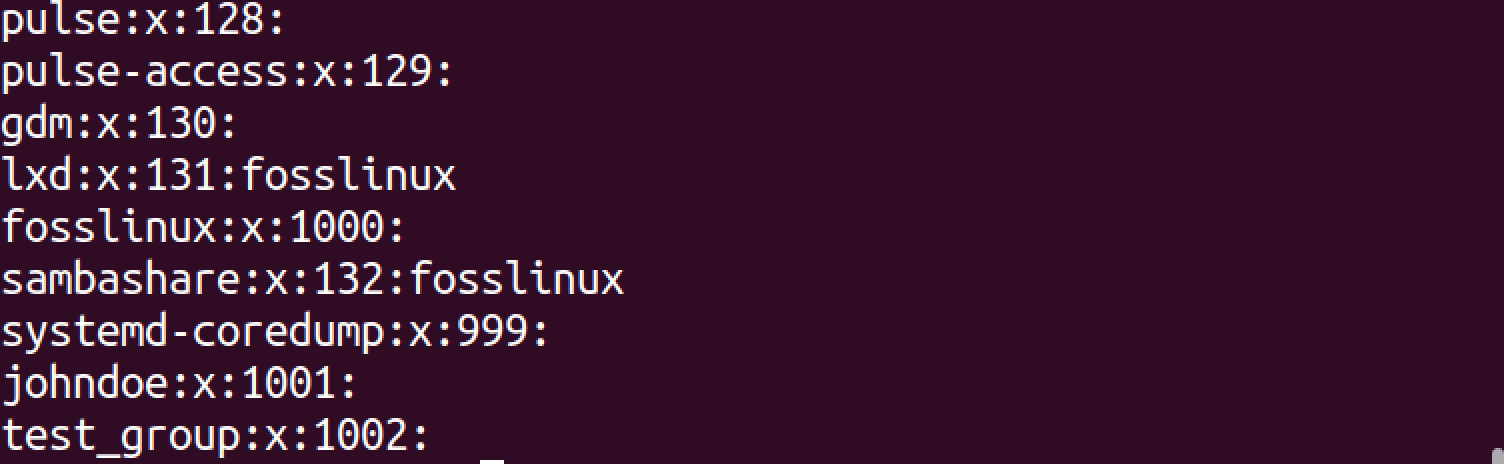
4. View all the Groups a User Belongs to
You must check the file to view all the groups in a system. This file contains information about all the groups on the system, including the list of users who belong to each group.
groups
View all groups
Use the syntax below to view all the groups a user belongs to.
groups <username>
e.g
groups fosslinux

View User Group’s
Tip: When you run the groups command alone; it only shows the groups your current user is a member of. It does not show all the groups that exist in the system.
6. Add a New Group
You can use the addgroup or groupadd commands to add a new group. For example, the commands below will create a new group, “test_group,” on your system.
sudo addgroup test_group
Or,
sudo groupadd test_group

Add new group
You can verify if the group was successfully created by running the grep command on the /etc/group file, as shown below.
sudo grep <new-group-name> /etc/group
e.g
sudo grep test_group /etc/group
5. Understanding the /etc/group File
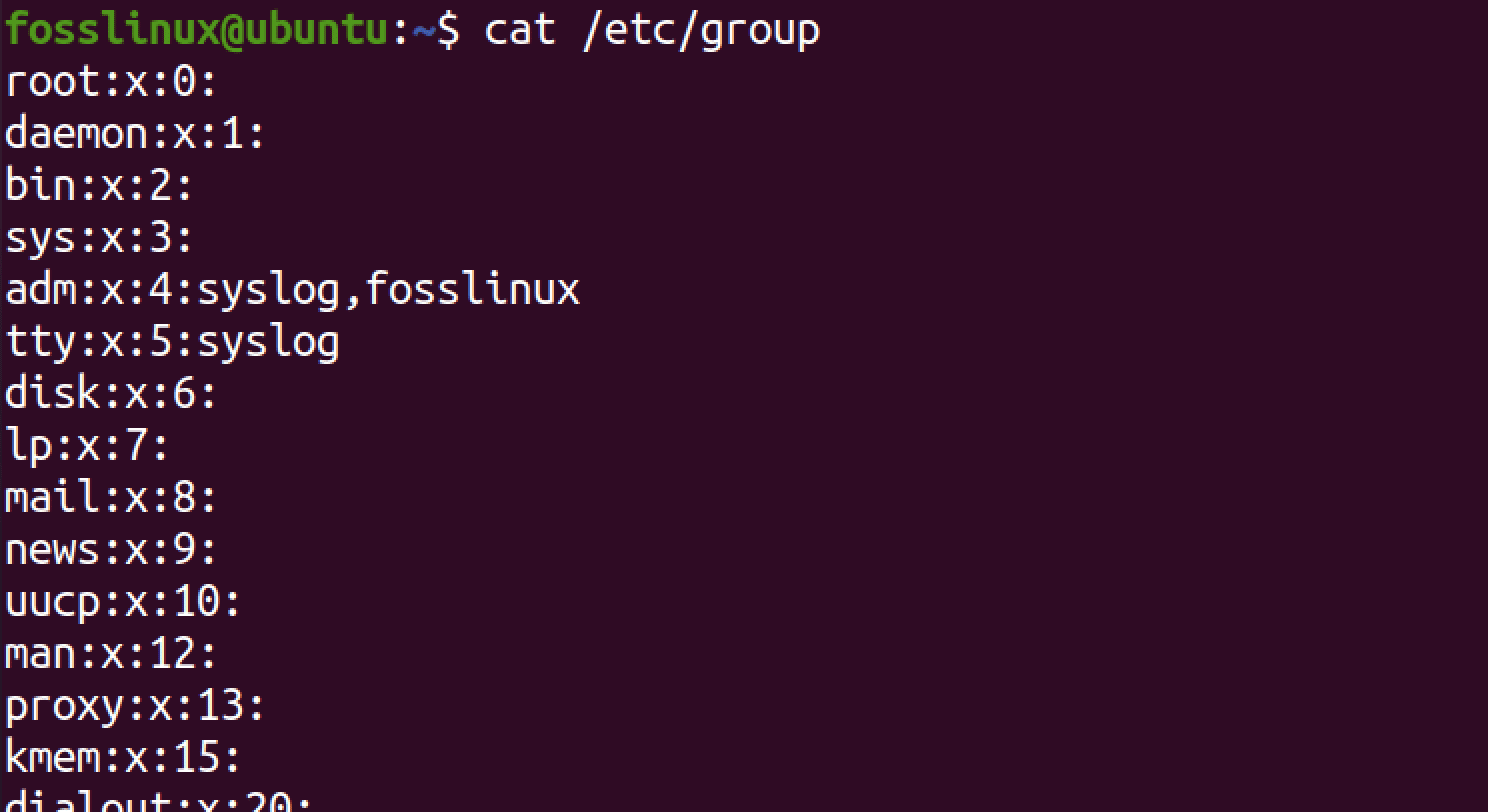
The /etc/group the file is a system file that contains information about all the groups on a Linux system. It is a plain text file and can be viewed using a text editor or command line tools like cat, less, or grep. Each line in the /etc/group file represents a single group and is organized in a specific format.
etc-group file
Here’s an example line from the /etc/group file:
test_group:x:1001:user1,user2,user3
Each field in this line is separated by a colon (:) character and contains the following information:
- Group name: This is the name of the group. In this example, the group name is test_group.
- Group password: This field is rarely used and is usually left blank. It is represented by an “x” in this example.
- Group ID: This is a unique numeric identifier assigned to the group. In this example, the group ID is 1001.
- Group members: This is a comma-separated list of usernames for members of the group. In this example, the group has three members: user1, user2, and user3.
Here are some key points to keep in mind about the /etc/group file:
- Each line in the /etc/group file represents a single group.
- Only users of the sudo group can edit the /etc/group file or use the groupadd, groupmod, and groupdel commands to manage groups.
- Various system utilities and programs read the/etc/group file to determine group membership and access permissions. For example, when a user logs in to the system, it checks their group membership to determine what resources they can access.
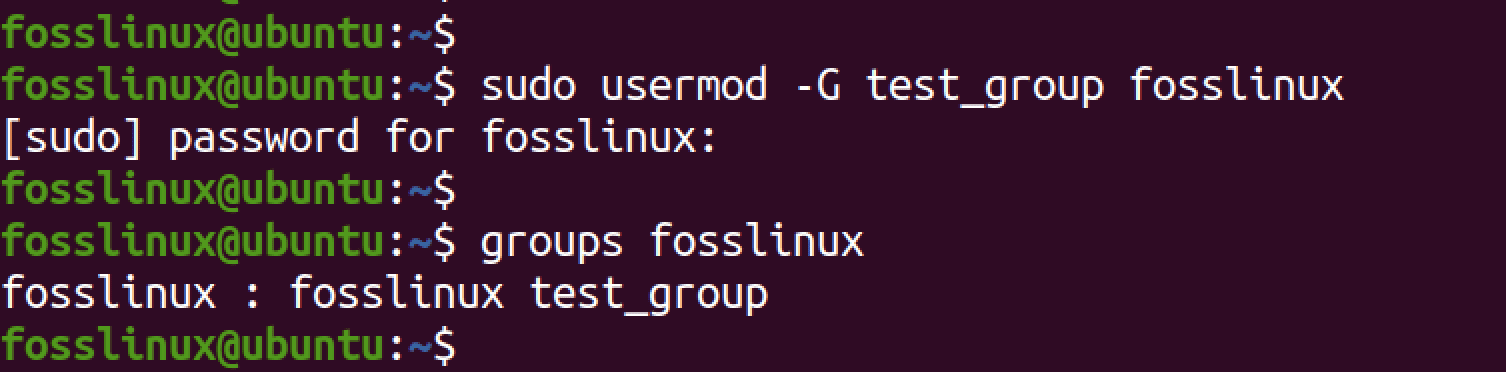
6. Add a User to a Group
To add a user to a group, use the usermod -G command as shown below.
sudo usermod -G test_group fosslinux
In the above command, we add the user fosslinux to the test_group. Then, using the syntax below, you can verify if a user was successfully added to a group.
groups fosslinux
Add user to a group
7. Add a user to the sudoers group
In Ubuntu, users of the sudoers group are allowed to use the sudo command to run commands with administrative privileges. Use the syntax below to add a user to the sudoers group on Ubuntu.
sudo usermod -aG sudo <username>
e.g,
sudo usermod -aG sudo johndoe
Replace the username with the name of the user you want to add to the sudoers group. You can verify if a user was added to the target group using the command below.
groups <username>
e.g,
groups johndoe

Add user to sudoers
8. Change the password of a user
You can set/ change the password of any user on the system using the passwd command. For example, to change the password of the new user we added – johndoe – we will use the syntax below.
sudo passwd johndoe
You will see a prompt to enter and retype the new password.
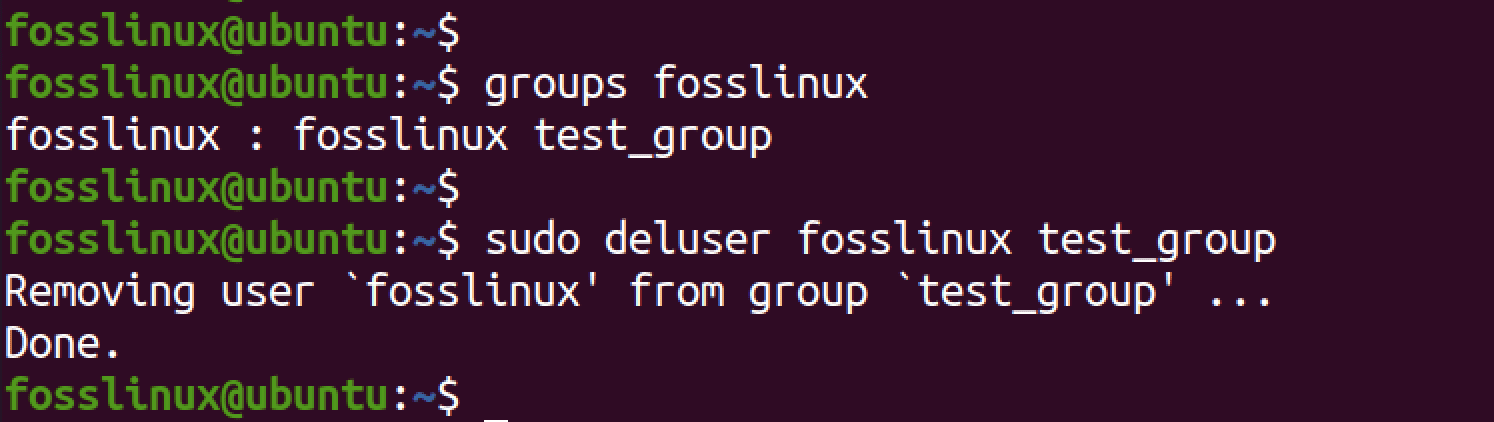
9. Remove a User from a Group
To remove a user from a group on Ubuntu, you can use the deluser command as shown below.
sudo deluser <username> <groupname>
For example, we will use the command below to remove the user fosslinux from the test_group.
sudo deluser fosslinux test_group
Delete the user from a group
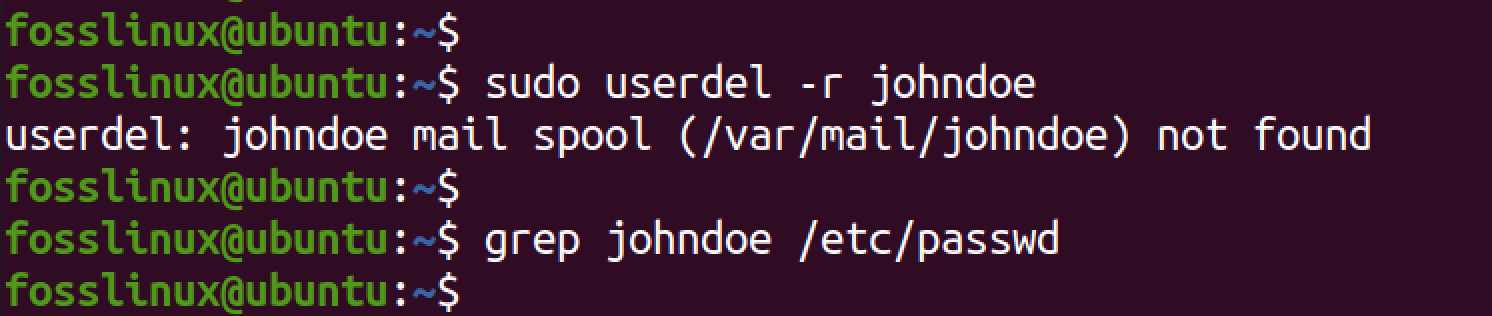
10. Delete a User
If you have an account, you are not using; it’s highly recommended that you delete it to minimize any security risks of somebody accessing it. You can quickly delete a user using the userdel command, as shown below.
sudo userdel johndoe
If you want to delete a user together with their home directory, add the -r parameter as shown below.
sudo userdel -r johndoe
Delete a user
10. Delete a Group
You can use a groupdel or delgroup command to delete a group on Ubuntu. For example, to delete the group test_group, we will use the command below.
sudo groupdel test_group
Or,
sudo delgroup test_group

Delete group
Managing File Permissions
File permissions in Linux and other Unix-based operating systems determine who can access a file and what they can do with it. These permissions are set for each file and directory on the system and are used to control access to sensitive files and system resources.
There are three basic types of file permissions in Linux:
- Read permission (represented by the letter “r”): This permission allows the user to read the contents of a file but not modify or delete it.
- Write permission (represented by the letter “w”): This permission allows the user to modify a file’s contents and delete or rename it.
- Execute permission (represented by the letter “x”): This permission allows the user to execute a file if it is a program or script.
- No permission set (-): You will see a hyphen symbol if no permissions are set for a particular user.
These permissions are set separately for three different groups of users:
- The owner of the file or directory
- The group that the file or directory belongs to
- Other users who are not the owner or members of the group
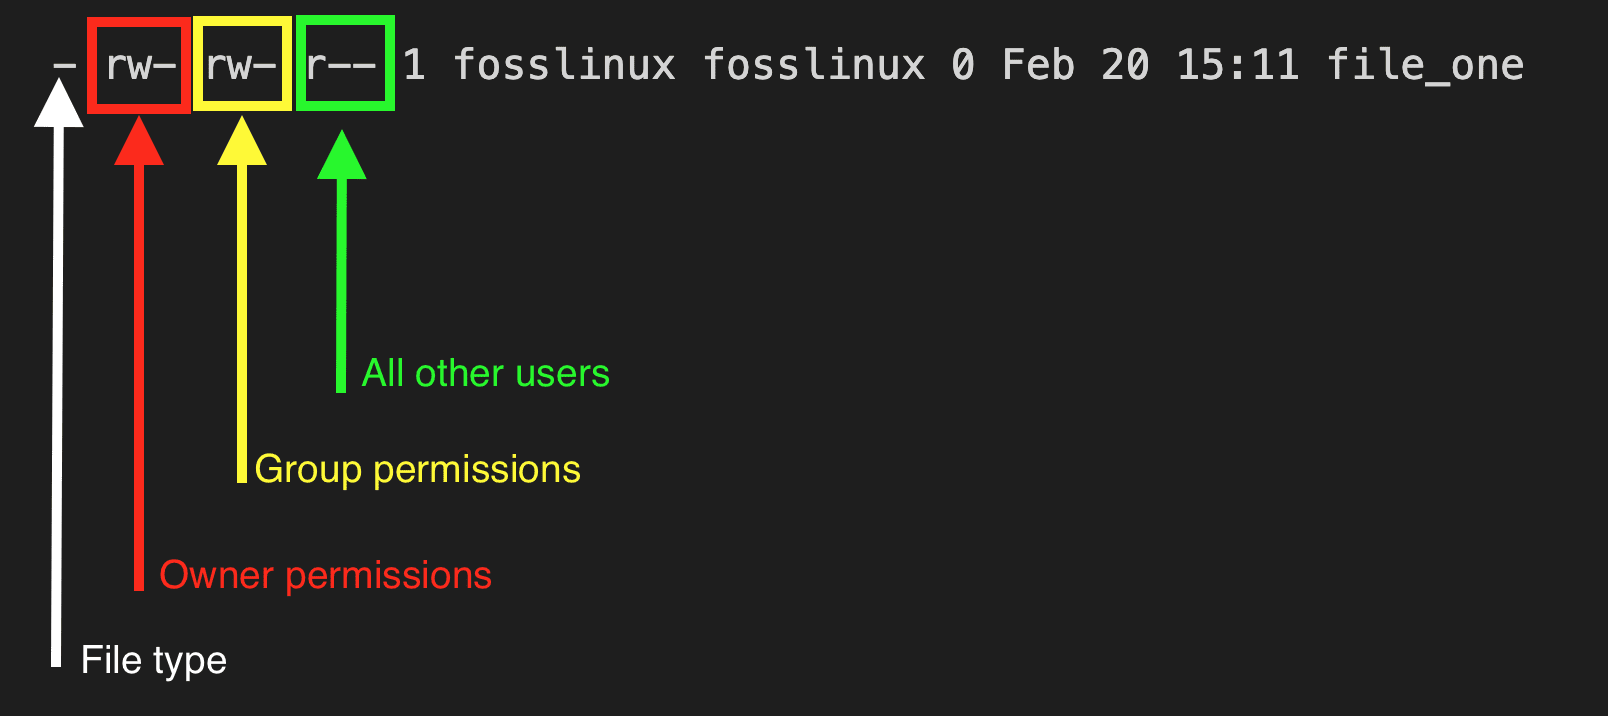
File permissions are represented by a series of ten characters, which can be viewed using the ls -l command in Linux. For example, let’s use the touch command to create a dummy file “file_one” and then use the ls -l command to view the permissions set on this file.

File Permissions
Let’s look at the output above in detail.
-rw-rw-r-- 1 fosslinux fosslinux 0 Feb 20 15:11 file_one
User file permissions
- rw-rw-r–: This is the file’s permission mode, which specifies who can read, write, or execute the file. The first three characters (rw-) indicate that the file’s owner (fosslinux) has read and write permissions, the next three characters (rw-) indicate that members of the file’s group (fosslinux) also have read and write permissions, and the last three characters (r–) indicate that all other users can only read the file.
- 1: This indicates the number of hard links to the file. In this case, there is only one hard link.
- fosslinux: This is the file’s owner.
- fosslinux: This is the file’s group.
- 0: This is the file’s size in bytes.
- Feb 20 15:11: This is the file’s last modification date and time. In this case, the file was last modified on February 20th at 15:11.
- file_one: This is the name of the file.
Use the table below to set file permissions in Linux.
| Command | Description |
|---|---|
| ls -l | Outputs the file type and the file permissions needed to access the target file. |
| chown root /u | In this command, the ownership of /u is transferred to the root user. |
| chown user:group file_name | The user and group privileges linked to file_name are changed. |
| chmod 777 [file_name] | Everyone access the file called file_name will have read, write, and execute permissions. |
| chmod 755 [file_name] | The owner of the file called file_name will have read, write, and execute permissions while other users will only have read and execute permissions. |
| chmod 766 [file_name] | The owner of the file called file_name has complete access to it while group and other users can only read and execute. |
| chown [user] [file_name] | The ownership of the file called file_name is assigned or changed to a new owner called user. |
| chmod -c -R | Assign a file the read, write, and execute permissions. |
| touch -a -t | Useful in creating or modifying a file timestamp. |
| chown -c -R | Useful in changing the ownership of an assigned or owned file. |
| chgrp -c -R | Useful in changing the group permission of a file. |
You can use the chmod command followed by the three-digit code corresponding to the desired permissions.
For example, to set the file permissions to read and write for the owner and read-only for the group and others, you would use the following command:
sudo chmod 644 file_one

644 File permissions
This command sets the file permissions to -rw-r–r–, corresponding to octal code 644.
Similarly, to set the file permissions to read, write, and execute for the owner and read-only for the group and others, you would use the following command:
sudo chmod 744 file_one

744 file permissions
This command sets the file permissions to -rwxr–r–, corresponding to octal code 744.
Managing Users and Groups From the Graphical Interface
Ubuntu provides a graphical user interface for managing users and groups. Here are the steps to manage users and groups from the graphical interface:
Step 1: Open the “Settings” application by clicking on the “Activities” button in the top-left corner of the screen and searching for “Settings.”

Settings Application
Step 2: After opening the Settings app, click on the “search box” and type “users” to open the “Users” management window.

Users
Here, you will see all the users in your system. There is only one user for this post – “fosslinux.” You cannot perform any operation on this window until you “unlock” it. This notification is at the top, as shown in the image below.
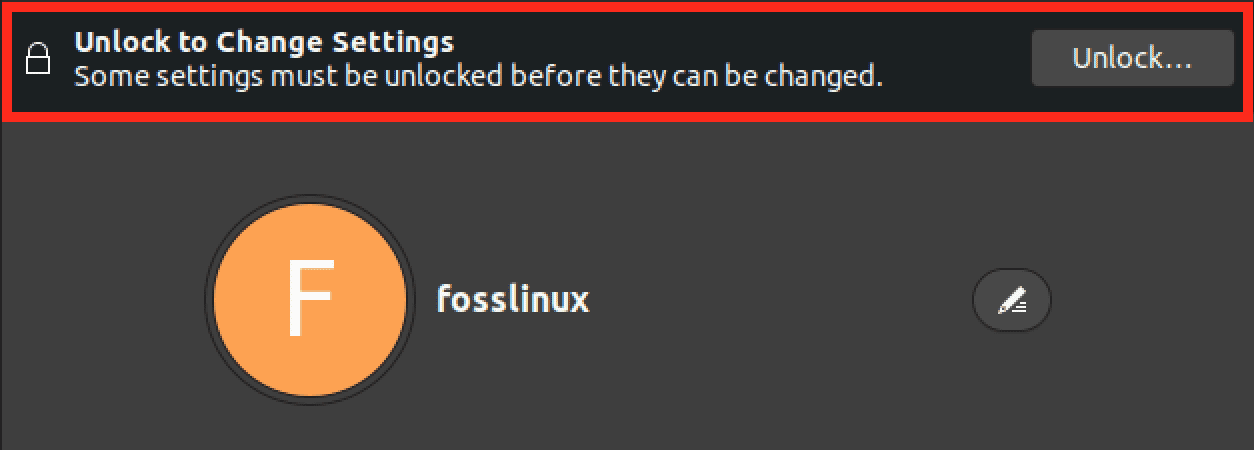
Unlock User Settings
Step 3. Click the “Unlock” button to enable editing on this window. You will see a prompt to enter the administrator password.
Note: If you are typing the correct password and still getting the error message “Sorry, that didn’t work. Please try again,” that means the current user is not an administrator. You can make a user an admin by adding them to the sudoers file with the command below.
sudo usermod -aG sudo <user-name>
e.g,
sudo usermod -aG sudo fosslinux
Step 4. Use the “Add User” button to add a new user.
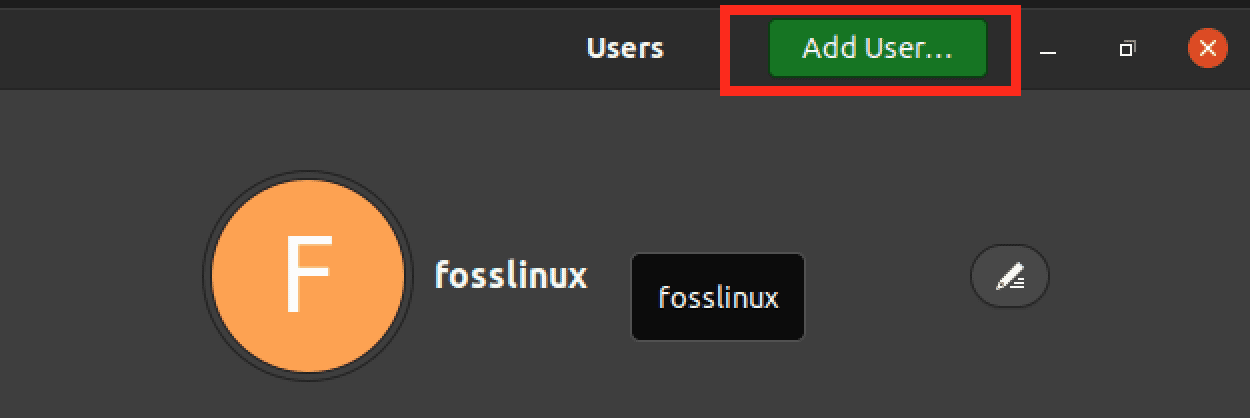
Add user
You will see a pop-up window where you can set,
- Full names
- Usernames
- Account type (standard or administrator)
- Password: You can set up the password here, or the new user can create their password when they first log in.
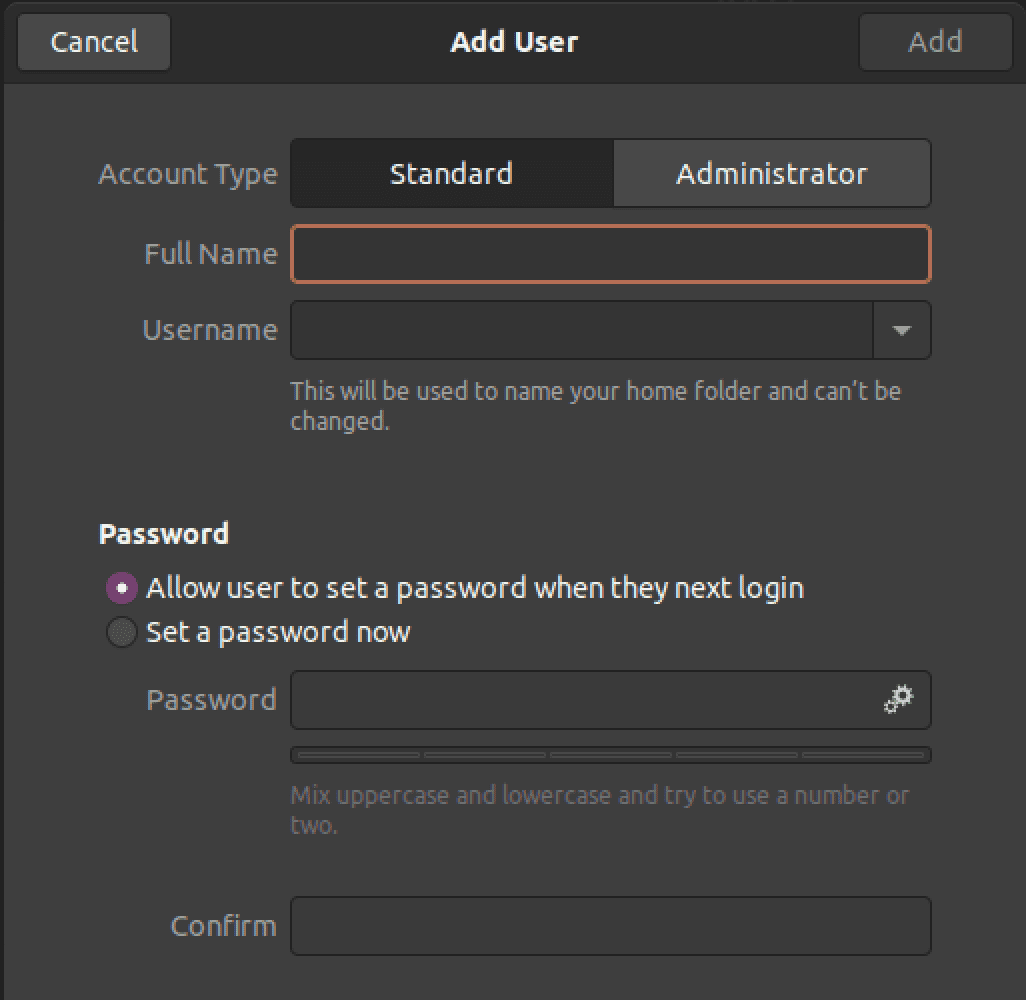
Setup a new user
Step 5. Select the user and use the red “Remove User” button at the bottom of the window to remove a user.
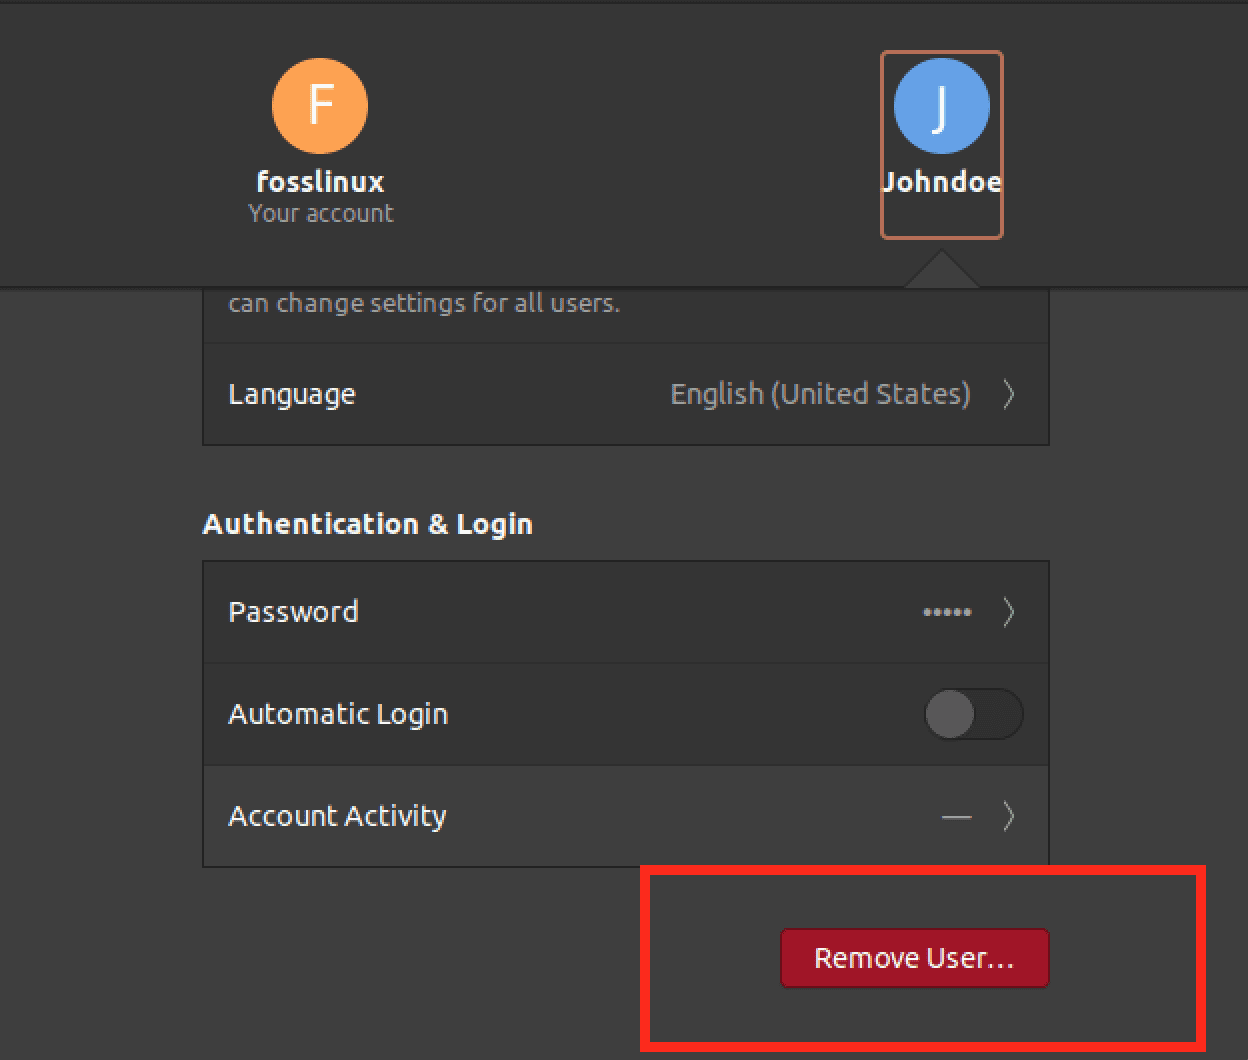
Delete User
Wrapping up
Managing users and groups in Ubuntu can initially seem daunting, but it can be a straightforward process with the right tools and knowledge. By following the steps outlined in this guide, you can easily create, modify, and delete users and groups on your Ubuntu system. Always exercise caution when making changes to user accounts, and test your configurations thoroughly before implementing them in a production environment. With these tips and best practices in mind, you’ll be well on your way to effectively managing users and groups in Ubuntu.