
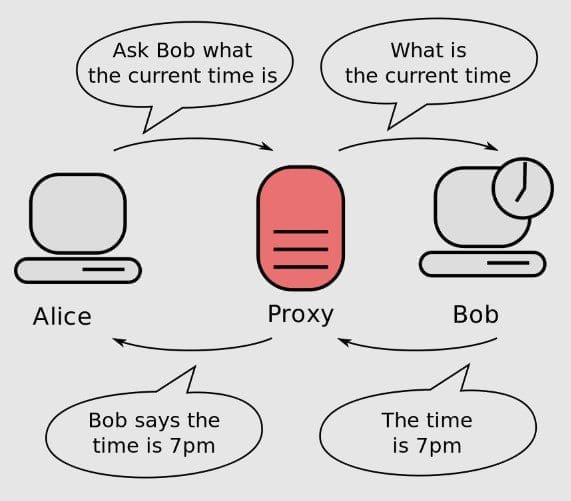
You may have often encountered situations where access to certain websites or online services is restricted for various reasons, such as geographical location, company policy, or content regulations. In such cases, a proxy server provides an effective solution by allowing access to restricted content anonymously. It acts as an intermediary between the user and the internet, forwarding requests from the local device to the destination website and returning responses from the web page.
In this article, we have explored the use of proxy servers in Linux Mint, a popular Linux distribution, and guide users through installing, configuring, and employing proxy servers in this kernel-based system. Secure Shell (SSH) is a widely used protocol for secure remote access to servers and network devices. Go through our beginner’s guide to the SSH server in Fedora.
Understanding proxy servers
A proxy server acts as a transitional stop between a client device and a server on the internet. When a client device sends a request to access a website or other online resource, the proxy server intercepts it. It evaluates whether to allow or block it based on the proxy’s configuration.

Proxy server
Proxy servers can serve several purposes, including improving security by blocking access to malicious websites or filtering out inappropriate content, improving performance by caching frequently accessed resources, and providing anonymity by masking the IP address of the client device.
The basic functionality of a proxy server involves intercepting and evaluating requests, forwarding requests to the appropriate server, and sending responses back to the client’s device. In addition, many offer advanced features, including encryption, load balancing, and traffic shaping to improve network performance further. FTP, or the File Transfer Protocol, is the most widely used network protocol for transferring files and data between two systems over a network. FTP does not encrypt traffic by default, which is not a secure option and can result in an assault on a server. Here is how you can install an FTP server on Linux Mint.
Types of proxy servers
Several types of proxy servers are available, each with unique features and functionalities. This section will discuss different types of servers and their characteristics.
HTTP Proxy Server: This is the most common proxy server used to handle web traffic. An HTTP server works by forwarding the requests made by the user to the internet and then receiving the responses from the internet and forwarding them back to the user. These are used in corporate environments to control internet access, and cache frequently accessed web pages to improve browsing speed.
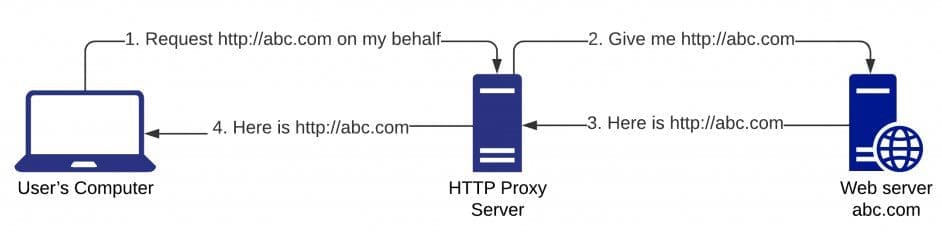
HTTP proxy server
SOCKS Proxy Server: SOCKS (Socket Secure) proxy server operates at the transport layer of the OSI model and can handle any traffic, including email, instant messaging, and file transfer protocols. They are typically used for applications that do not support HTTP proxies.
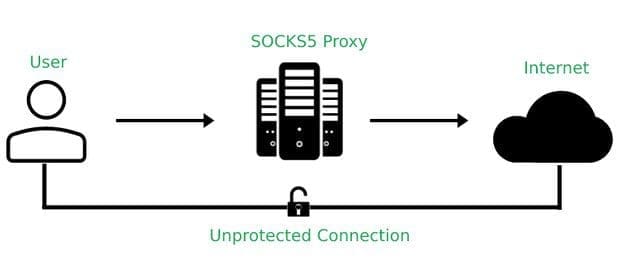
SOCKS proxy server
Transparent Proxy Server: A transparent proxy server is an intercepting proxy that does not require any configuration on the client’s part. It intercepts all traffic passing through and forwards it to the destination. These types of servers are commonly used in internet service provider (ISP) networks for content filtering.
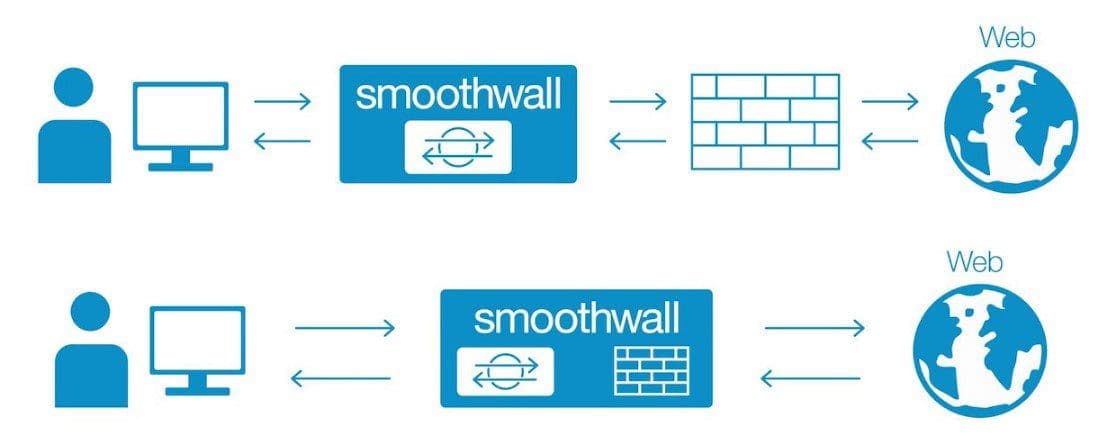
Transparent proxy server
Reverse Proxy Server: A reverse proxy server sits between the internet and the web server, forwarding requests to the appropriate backend. It is often used to load balance traffic between multiple web servers or to provide a layer of security by hiding the actual identity of the server itself.
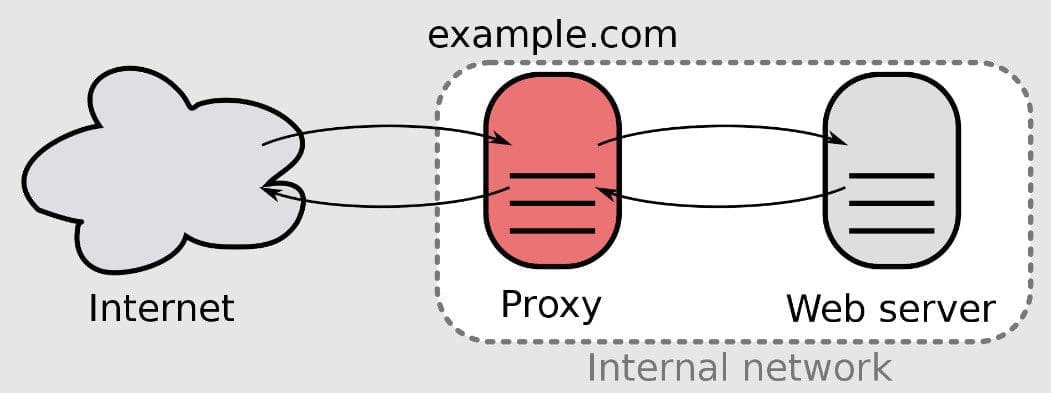
Reverse proxy server
Anonymizing Proxy Server: An anonymizing proxy server provides anonymity to users by hiding their IP address and other personal information. These are commonly used by individuals who want to access content not available in their country or to protect their privacy while browsing the internet.
Anonymizing proxy server
The choice of the proxy server to use depends on the user’s or organization’s specific needs. It is important to understand these different types for making an informed decision when selecting one to use yourself.
Installing proxy server in Linux Mint
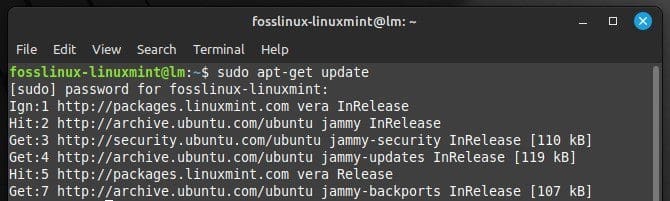
Open the Terminal by pressing “Ctrl + Alt + T” on your keyboard. Run the following command to update the package list:
sudo apt-get update
Updating the package list
Next, install the Squid proxy server package by running the following command:
sudo apt-get install squid

Installing Squid proxy server
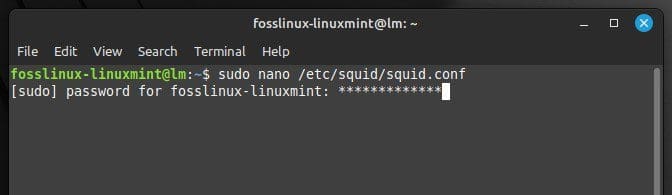
Once the installation is complete, open the Squid configuration file:
sudo nano /etc/squid/squid.conf
Opening the Squid configuration file
In the configuration file, locate the line that begins with “http_port” and uncomment it by removing the “#” symbol at the beginning. Then, replace the default port number (3128) with the port number you want to use. For example, if you’re going to use port 8080, the line should look like this:
http_port 8080

Using port 8080 as the default
Save the changes by pressing “Ctrl + O” and then exit the editor by pressing “Ctrl + X”.
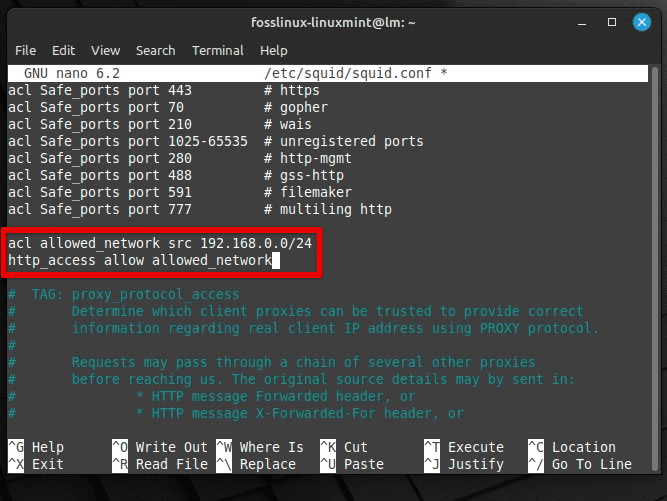
Next, add any necessary access control rules to the configuration file. To allow access to the proxy server only from a specific IP address range, you can add the following lines:
acl allowed_network src 192.168.0.0/24
http_access allow allowed_network
Adding control rules to the configuration file
Save changes to the configuration file and exit the editor. Finally, restart the Squid service for the changes to take effect. You can do so by running the following command in the terminal:
sudo systemctl restart squid
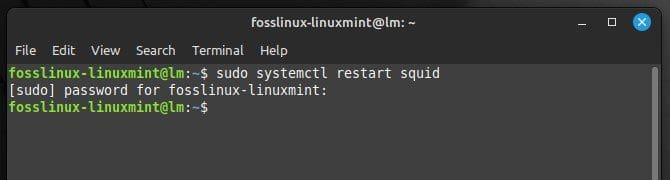
Restarting the Squid service
With that, you have successfully installed a proxy server on Linux Mint.
Configuring proxy server
To configure a proxy server in Linux Mint, you have to modify your system’s network settings. Open the Network Settings window. Click on the network icon in the system tray, then select “Network Settings” from the drop-down menu. Alternatively, you can directly open the “Network” option from the “System Settings” menu.
Access the Proxy settings. In the Network Settings window, select the “Proxy” option from the tabs located at the top. This will open up the proxy settings page.
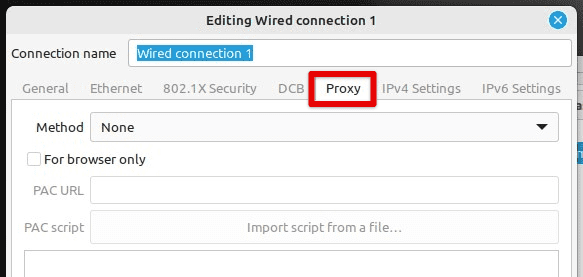
Proxy tab in network settings
On the proxy settings page, you will see several configuration options. The first is to enable or disable the server. To enable the proxy server, toggle the switch at the top of the page to the “On” position.

Enabling the server
Next, you must specify the method you will use for the proxy. Click on the drop-down menu next to the “Method” section and select “Automatic”. If you are unsure which type of proxy server you are using, consult the network administrator.
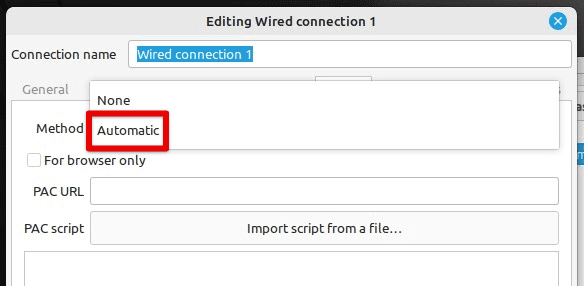
Specifying the proxy method
After selecting the proxy type, enter the IP address or hostname of the server and the port number in the respective fields. You may also need to enter your username and password if the server requires authentication.
Once you have entered the required information, click the “Apply” button to save the changes. Your proxy server settings should now be configured, and any applications that use the system proxy settings will automatically use the configured server.
Note: Sometimes, you may need to restart your system for the changes to take effect.
Setting up proxy authentication
When using a proxy server in Linux Mint, you may need to set up authentication to access specific resources or services. Open the terminal by pressing “Ctrl + Alt + T” on your keyboard or searching for “Terminal” in the applications menu.
Edit the environment variables. Type the following command in the terminal to do so:
sudo nano /etc/environment
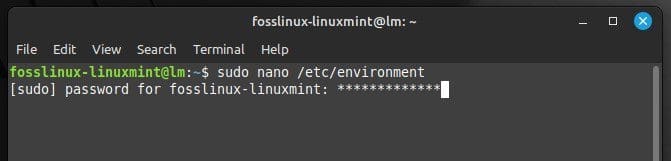
Editing the environment variables
Add the following lines at the end of the file, replacing “fosslinux” and “password” with your username and the actual password.
http_proxy=http://fosslinux:password@proxy-server:port/

https_proxy=https://fosslinux:password@proxy-server:port/

ftp_proxy=ftp://fosslinux:password@proxy-server:port/
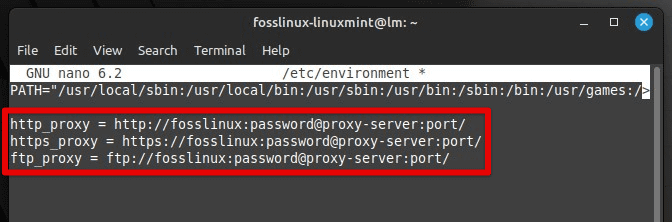
Editing the environment variables with proxy server ports
Reload the environment variables. Run the following command in the terminal to do so:
source /etc/environment
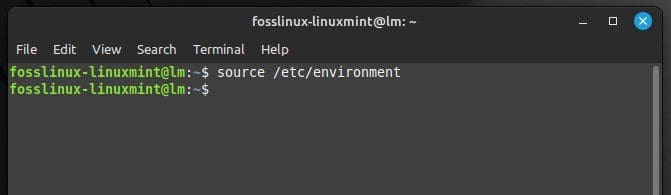
Reloading the environment variables
Note: If the proxy server requires a different type of authentication, such as NTLM or Kerberos, you may need to use a different tool or method to set up the authentication.
Testing proxy server connection
It is important to test the connection to ensure the proxy server has been set up as required. Open a terminal window by pressing “Ctrl + Alt + T” or clicking on the terminal icon in the taskbar located at the bottom.

Opening the Linux Mint terminal
In the terminal window, run the following command to test the connection to a website using the proxy server. Replace “192.168.0.14” with the IP address of your proxy server and “8080” with the port number used by the server.
curl https://www.google.com --proxy 192.168.0.14:8080
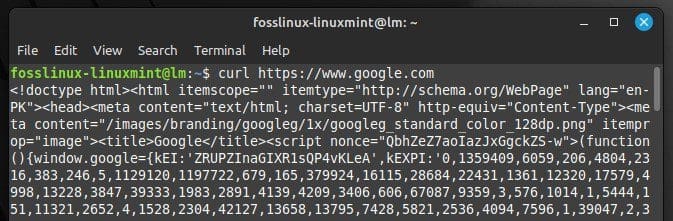
Testing the proxy server connection
If the connection is established correctly, you should see the website’s HTML code displayed in the terminal window. You may need to check the server configuration and try again if there is an error. You can also test the connection using a web browser. Open your web browser and try to access a website. The website should load normally. If not, try installing the server one more time.
Testing the proxy server is crucial for ensuring your internet traffic is routed through the intended route. If not, you will be accessing the web with your original IP address, just like in regular browsing sessions.
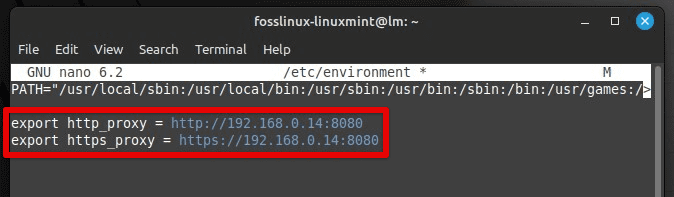
Using a proxy server with command-line tools
Set up the proxy server in the environment variable:
export http_proxy=http://192.168.0.14:8080

export https_proxy=https://192.168.0.14:8080
Setting up a proxy server in environment variables
Replace “192.168.0.14” with the actual IP address of the proxy server and “8080” with the port number used by the server. You must include the username and password in the URL if it requires authentication.
You can also use the command line tools to download a file with the proxy server. This is done with the wget command. If all settings are correctly configured, wget will use the server to download files from the requested webpage.
wget http://www.google.com
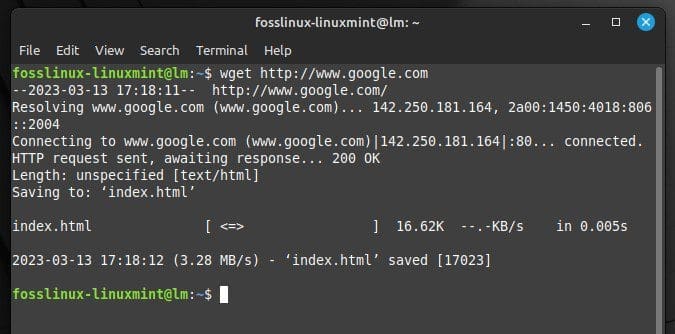
Downloading a file with proxy server
Note: Not all command line tools support the http_proxy and https_proxy environment variables. If you encounter issues with a particular tool, review its documentation or contact the developers.
Conclusion
Proxy servers provide a practical solution for accessing restricted online content anonymously. Proxy servers help users bypass geographical or policy restrictions and protect their privacy by acting as intermediaries between the user and the internet. This article covered their basics, the types of proxy servers, and how to install, configure and use them in Linux Mint.
Just like Linux Mint, Ubuntu’s package management system makes it very simple to install, upgrade, or remove software from the system. However, some packages have many configuration directories and need extra effort to uninstall. Learn how to uninstall MySQL server in Ubuntu properly.