
Secure Shell, commonly known as SSH, is a protocol for secure data communication, remote shell services, or command execution, as well as other encrypted network services between two-networked PCs that it connects through a secure channel over an insecure network. It ensures a secure communication link between two systems using a client-server architecture and permits users to log into server host systems remotely. Contrary to other communication protocols like Telnet, rlogin, or FTP, SSH encodes the login session, making the connection challenging for intruders to collect encoded passwords.
This protocol specification distinguishes two major versions, referred to as SSh-1 and SSH-2. It was explicitly designed as a replacement for Telnet and other insecure remote shell protocols like the Berkely rsh and rexec protocols, which transfer info, notably passwords, in plaintext, rendering them susceptible to interception and disclosure using packet analysis. The encryption utilized by SSH is intended to give confidentiality and integrity of data over an unsecured network, like the internet.
The SSH program is intended to replace old-fashioned, less secure terminal apps used to log into remote hosts, like Telnet or rsh. An interlinked program called SCP(secure, contain, and protect) replaces bygone programs that copy files between hosts, like RCP(remote procedural call). Since these older versions of apps don’t encode passwords transmitted between the client and the server, avoid them whenever possible. Using secure approaches to log into remote systems lowers the risk for both the client system and the remote host.
Fedora comprises the general OpenSSH package, the OpenSSH server, and client, openssh-clients packages. Remember, the OpenSSH packages need the OpenSSL package openssl-libs, which sets up a couple of important cryptographic libraries, enabling OpenSSH to offer encoded communications.
Why should you use SSH?
Potential intruders have several tools at their reach, enabling them to intercept, disrupt, and re-route network traffic to gain access to a system. Generally, these threats can be categorized below:
Interception of communication between two systems
The intruder can be somewhere on the network between the communicating parties, copying any info passed between the communicating parties. He may intercept and store the information or alter it and send it to the intended recipient.
This intrusion is usually carried out using a packet sniffer, a relatively common network utility that handles each packet flowing via the network and gets to analyze its content.
Impersonation of a particular host
In this instance, an attacker’s system is set up to pose as the intended recipient of a transmission. If this strategy goes through, the user’s system remains unaware that it communicates with the wrong host.
This attack can be carried out using DNS poisoning or IP spoofing. In the first case, DNS poisoning, the intruder utilizes a cracked Domain Name System server to point client systems to a maliciously duplicated host. In the second scenario, IP spoofing, the intruder sends falsified network packets that appear to be from a trusted host.
Both techniques intercept potentially sensitive info, and if the interception is made for malicious reasons, the results can be disastrous. These security threats can be minimized if SSH is utilized for remote shell login and file copying. This is so that the SSH client and server may prove their identities using digital signatures. To add on, all communication between the client and server systems is encoded. Any attempt to spoof the identity of either side of a communication does not work because each packet is encoded using a key only known by the local and remote systems.
Let us look at SSH’s main features.
Main features of SSH
- Nobody can pretend to be the intended server.
- After an initial connection, the client can ascertain that it is connecting to the same server it had connected to previously.
- No one can capture the authentication info.
- The client transmits authorization/authentication info to the server using a strong encoding.
- No one can intercept the communication.
- All the data sent and received during a session is transferred using robust encoding, rendering intercepted transmissions extremely challenging to decrypt and read.
Additionally, it also offers the following options:
- It provides a safe way to use graphic applications over a network.
- The client can forward X11(X Windows System) apps from the server via X11 forwarding. Disabling the X11 SECURITY extension restrictions by setting the ForwardX11Trusted option to yes or using SSH with the -Y option can compromise your security.
- It offers a way to secure otherwise insecure protocols
- All data sent and received over the SSH protocol is encrypted. An SSH server can be a conduit for safeguarding otherwise insecure protocols like POP and increasing overall system and data security communications by using a method known as port forwarding.
- It can be utilized in a secure channel creation.
- The OpenSSH server and client can be set up to create a tunnel akin to a virtual private network (VPN) for traffic between the server and client machines.
- It has support for Kerberos authentication.
- OpenSSH servers and clients can be set up to authenticate using the Generic Security Services Application Program Interface (GSSAPI) implementation of the Kerberos network authentication protocol.
SSH Protocol versions
Currently, SSH is available in two versions: version 1 and version 2. SSH version 2, which includes a strengthened key exchange algorithm and is not susceptible to the known vulnerability in version 1, is used by the OpenSSH suite in Fedora.
Here are the events that take place for an SSH connection to be established.
The following series of events aid in protecting the integrity of SSH communication between two hosts:
- A cryptographic handshake is created so the client can ascertain whether or not it communicates with the appropriate server.
- A symmetric cypher is used to encode the transport layer of the connection between the client and the remote host.
- The client validates its identity with the server.
- Over the encrypted connection, the client communicates with the remote host.
The transport layer
The transport layer’s primary responsibility is to enable safe and secure communication between two hosts at the time of authentication and during subsequent communication. The transport layer achieves this by handling the encoding and decoding of data and providing integrity protection of data packets as they are sent and received. Also, the transport layer offers compression, speeding the transfer of info.
After an SSH client contacts a server, vital info is exchanged so that the two systems can correctly construct the transport layer. The following thing/steps take place during this exchange:
- The key exchange algorithm is determined.
- The public key signature algorithm is determined.
- The symmetric encoding algorithm is determined.
- The message authentication algorithm is determined.
- Keys are exchanged.
During the key exchange, the server locates itself to the client with a peculiar host key. If the client has not communicated with this specific server before, the server’s host key is unknown and does not connect. OpenSSH then notifies the user that the authenticity of the host cannot be established and prompts the user to accept or reject it. The user must independently ascertain the new host key before accepting it. On subsequent connections, the client’s saved version is compared to the server’s host key, giving confidence that the client is indeed communicating with the anticipated server. Before a connection may be made, the user must delete the client’s saved information if, in the future, the host key no longer matches.
SSH is intended to function with nearly all types of public key algorithms or encryption formats. Once an initial key exchange creates a hash value used for exchanges and a shared secret value, the two systems immediately start generating new keys and algorithms to protect validation and future data sent over the connection.
Once a specific volume of information has been sent using a particular key and algorithm (the precise volume depends on the SSH implementation), encoding algorithm, and configuration), another key exchange occurs, creating another set of hash values and a new shared secret value. Even if an attacker can figure out the shared secret value and hash, this information is only significant for a brief period.
Authentication
After the transport layer has generated a secure tunnel to pass information between the two systems, the server tells the client the different authentication approaches supported, like typing a password or using a private key-encoded signature. The client then tries to validate itself to the server using one of these supported methods.
SSH servers and clients can be set up for all types of authentication, giving every side the optimal amount of control. The server can decide which encoding methods it supports based on its security model, and the client can select the order of authentication methods to try from the available options.
Channels
Once you successfully authenticate the SSH transport layer, several channels are opened through a technique called multiplexing. Each channel handles communication for diverse terminal sessions and forwarded X11 sessions.
Both servers and clients can create a new channel. After which, each channel is assigned a different number on each end of the connection. When the client tries to open a new channel, the client sends the channel number along with the request. The server keeps this info and directs communication to that channel. This is done so that the different types of sessions don’t affect one another and so that when a particular session ends, its channels can be closed without disrupting the primary SSH connection.
Channels also support flow control, allowing them to send and receive data in an orderly manner. This way, data is not over the channel until the client gets a message that the channel is open.
The characteristics of each channel are negotiated by the client and server spontaneously, depending on the type of service the client requests and the way the user is interlinked to the network. This permits great flexibility in handling remote connections without changing the protocol’s basic infrastructure.
This guide will use the YUM and DNF package managers to set up our Fedora system.
How to setup and start an SSH server in Fedora
Step 1: Install SSH server on Fedora
To install the OpenSSH server on our Fedora machine, we will issue the following commands on our terminal:
sudo yum install openssh-server
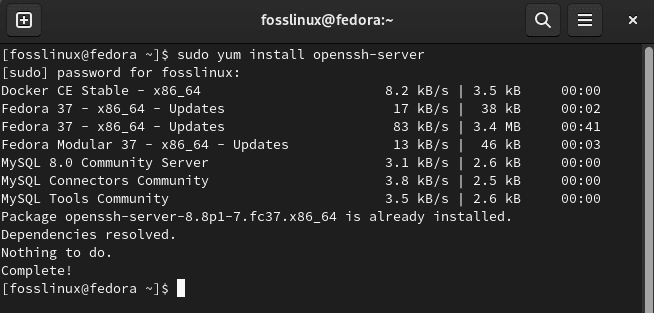
Install ssh server
or
sudo dnf install openssh-server

Install ssh using dnf
let’s now enable ssh.
Step 2: Enable ssh in Fedora
After the setup is done, the second step is to enable the SSH in Fedora so that it spontaneously gets started every time:
systemctl enable sshd
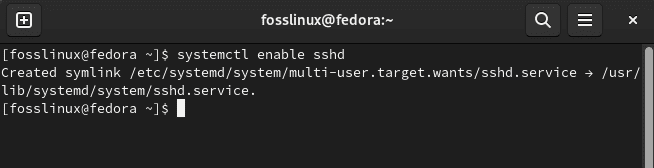
Enable ssh
Upon running the above command, you will be requested to authenticate. Type in your PC’s password and hit the “Authenticate” button; everything should proceed as planned.
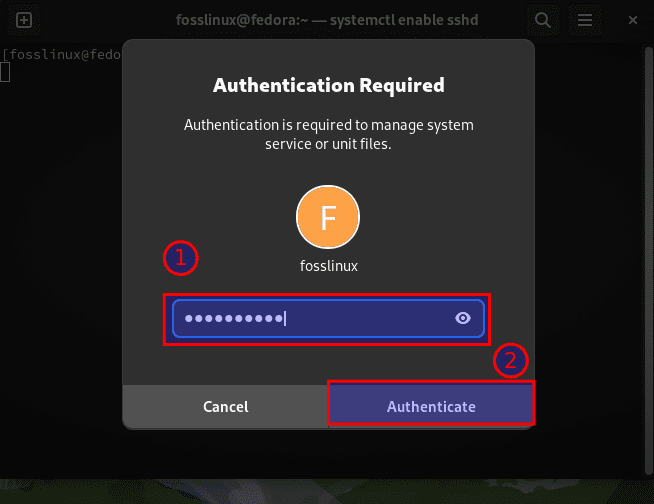
Authentication window
Step 3: Start ssh service on Fedora
After you are done enabling ssh, run the command to start the SSH service on your OS; thus, you can connect it from some remote system:
systemctl start sshd
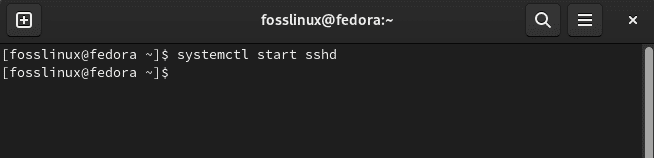
Start sshd
Also, here, you are required to authenticate before the system starts the sshd.service:
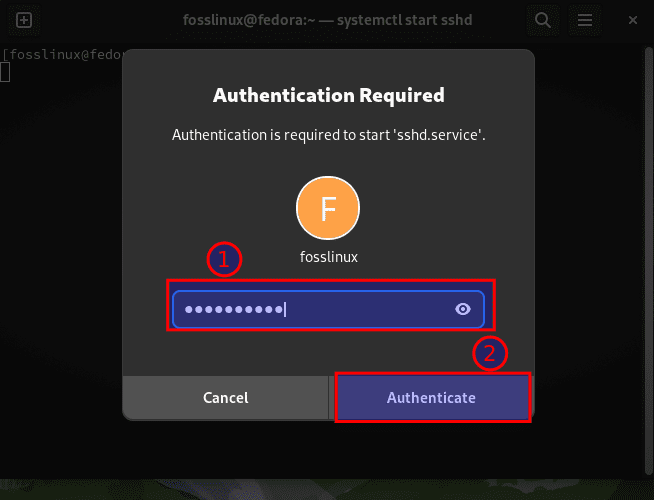
Authenticate
Once it is ready, check the SSH server status by issuing the following command:
sudo systemctl status sshd
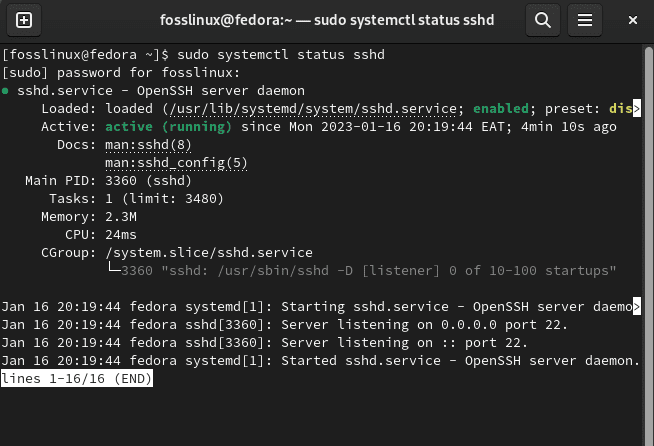
Check Status
A green active (running) alert should confirm that the ssh server status is running and not inactive.
Check that port 22 is opened successfully
Now use the following command to set that the SSH default port 22 has been opened successfully and listening to all the IP addresses:
netstat -ant | grep 22
The result of the above command will look like the snapshot below:
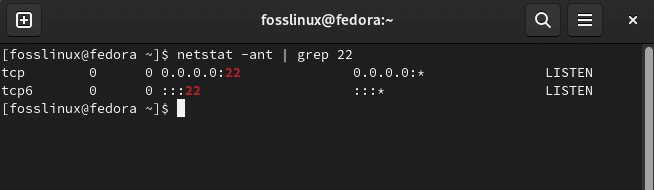
Port 22 listening to all IP addresses
You should now see port 22 open for new incoming connections using the following command:
sudo ss -lt

Incoming connections
Step 4: Connect from the remote system
To connect to SSH installed Fedora Linux from Windows or Linux, open a command terminal and use the following syntax:
ssh@[username][yourserevr IP address]
Where:
ssh fosslinux@172.16.6.128
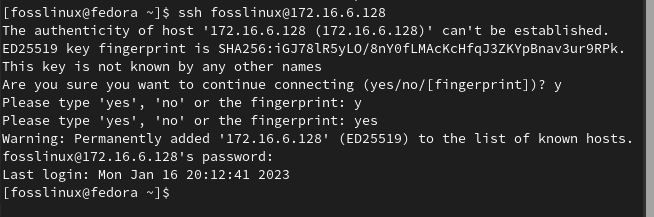
Connect
And that should be able to set up and start an SSH service in Fedora.
Final Thoughts
As complicated as it may seem, setting up an SSH server on the Fedora version of Linux can be pretty straightforward if you adhere to the outlined steps in this guide. With a couple of commands well covered and listed in this guide, you should be able to realize an effective ssh server. Furthermore, the guide has given the most candid approaches to setting up, starting, and checking SSH’s server status and connecting it from a remote system. With a proper configuration, an SSH server can safely exchange data between two PCs over an untrusted network.