
SonarQube is an open-source platform for continuous inspection of code quality. It is used to perform automatic reviews with static analysis of code to detect bugs, code smells, and security vulnerabilities on more than 20 programming languages.
Here we are going to install and configure SonarQube 7.9.x LTS with Oracle JAVA 11, PostgreSQL 10.x, Nginx, and Let’s Encrypt certificates.
Installing and configuring SonarQube on CentOS
Execute the following commands using the root user.
1. Update System
yum update
2. Disable SELinux
Open SELinux configuration and edit the file:
vim /etc/sysconfig/selinux
Change “SELINUX=enforcing” to “SELINUX=disabled”.
Save and exit the file.
3. Set hostname to the server
vim /etc/hostname
If vim is not available, install vim command first.
yum install vim -y
Then reboot the system.
reboot
4. Prerequisite
You can check the official document for complete information.
- Java (Oracle JRE 11 or OpenJDK 11)
- PostgreSQL 10 or 9.3–9.6
Hardware Requirements
- Server with 2GB or plus RAM
- Systems setting for Linux
vm.max_map_count is greater or equals to 262144
fs.file-max is greater or equals to 65536
the user running SonarQube can open at least 65536 file descriptors
the user running SonarQube can open at least 4096 threads
5. Add System settings
Edit “sysctl.conf” file:
vim /etc/sysctl.conf
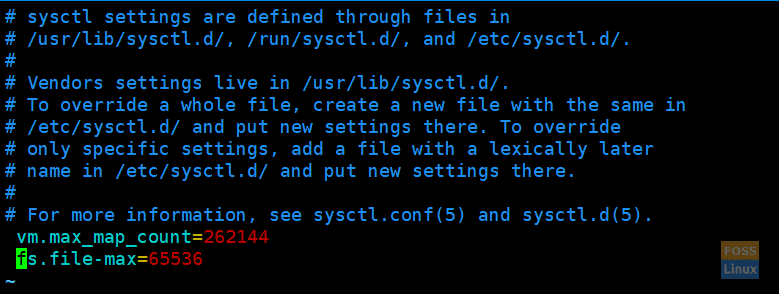
Add the following lines:
vm.max_map_count=262144
fs.file-max=65536
Sysctl Values
Save and exit the file.
6. Install Oracle Java 11
Download Oracle JDK 11 from here.
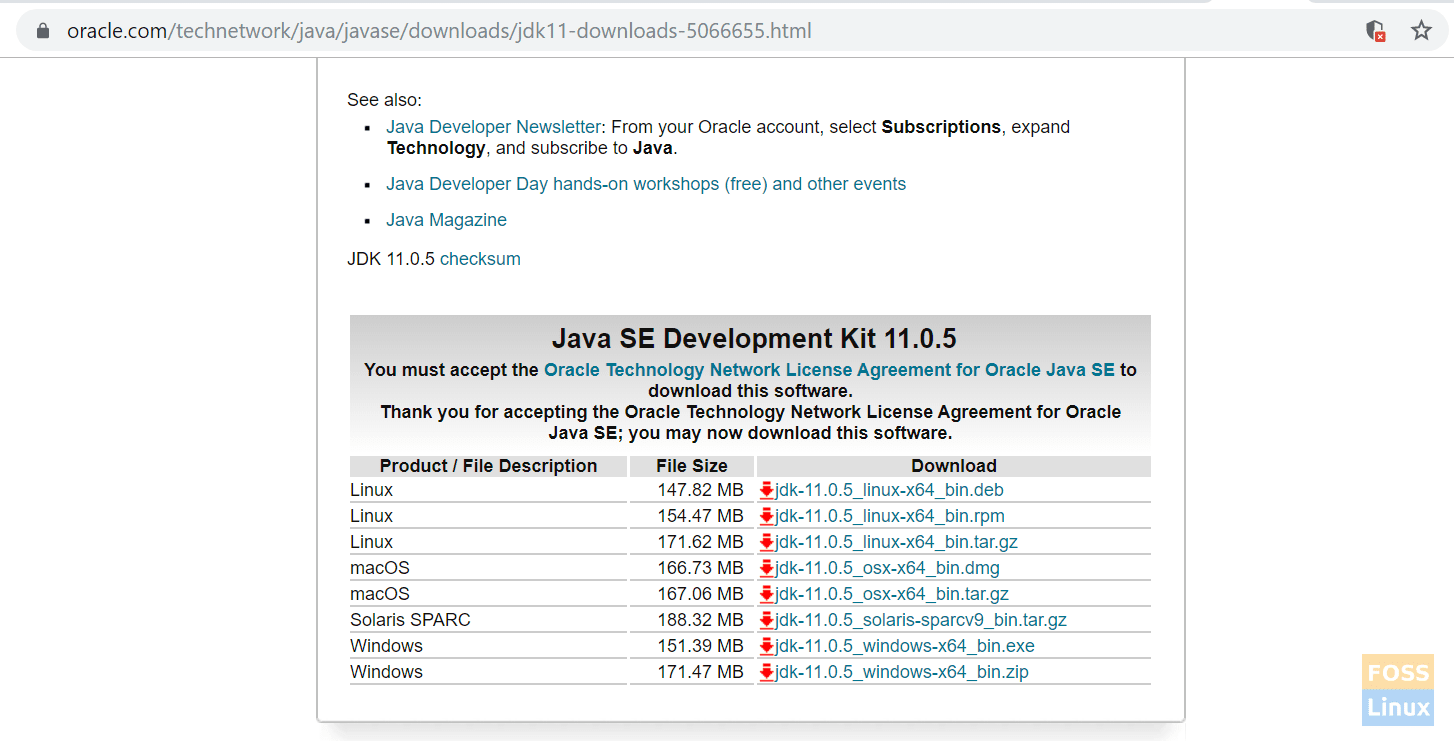
Oracle JAVA
Before you download, it will redirect to the oracle login. If you have an account, use it or create a new one.
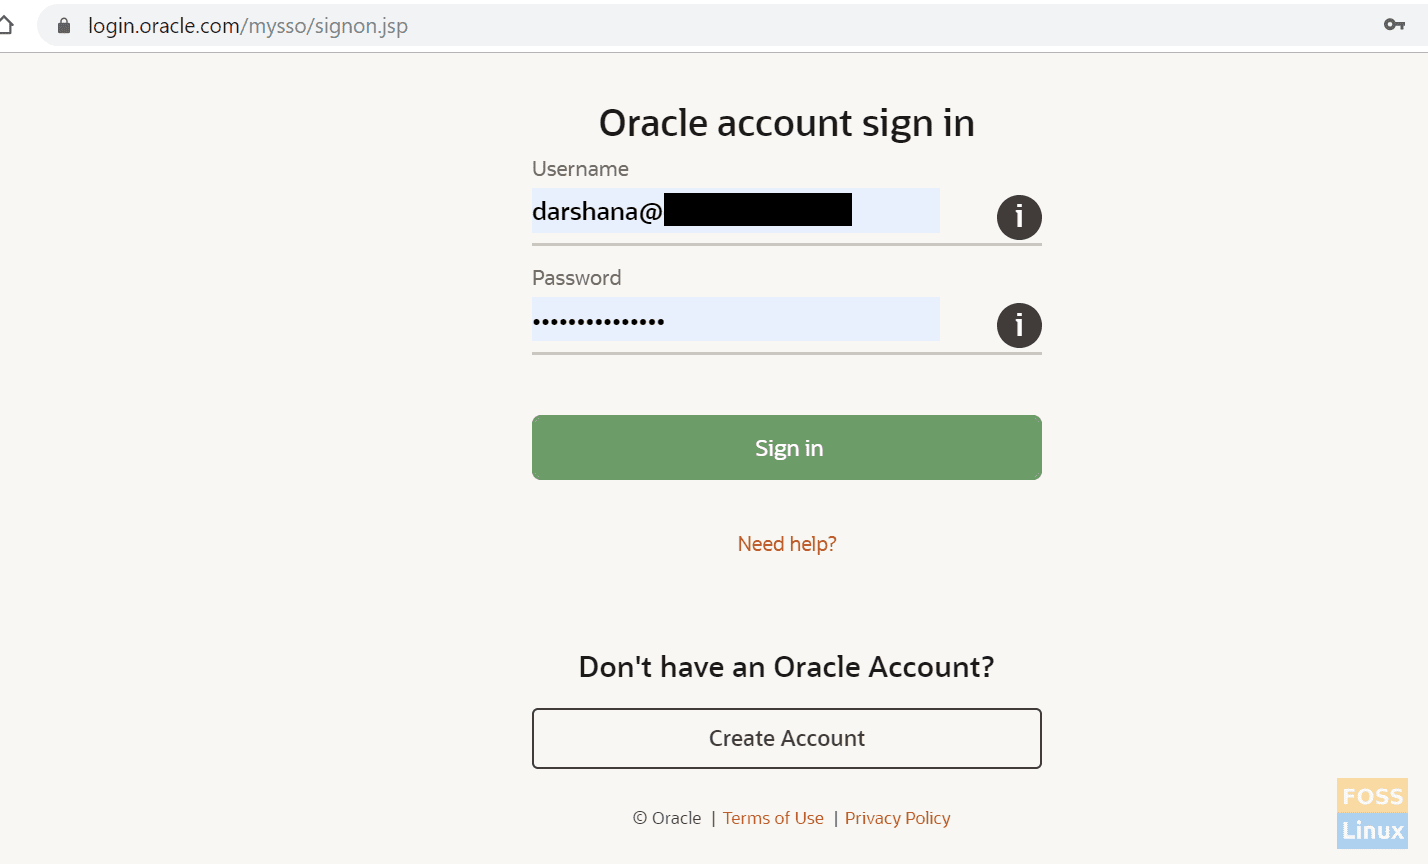
Oracle Login
You can download the rpm package to your machine and upload it to the sonar server.
OR you can use the following steps:
a) You can copy the download link from web browser downloads.
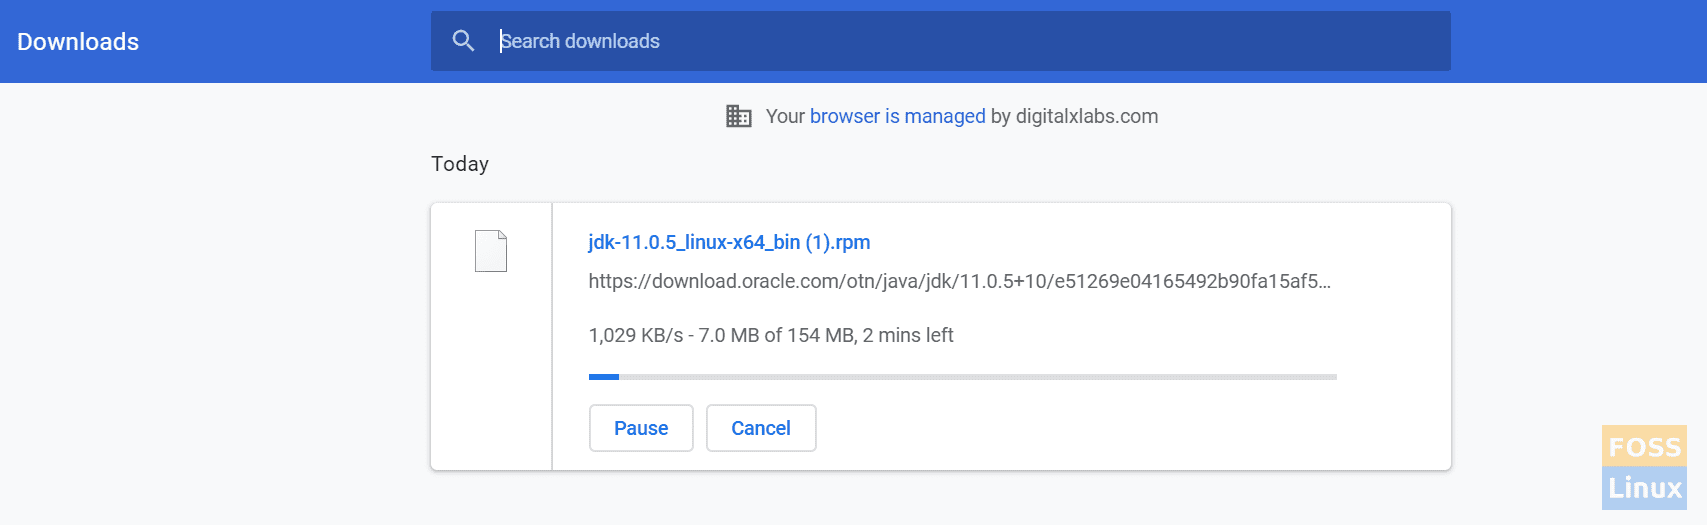
Copy Download Link
b) Then go to your server and download using the “wget” command.
wget https://download.oracle.com/otn/java/jdk/11.0.5+10/e51269e04165492b90fa15af5b4eb1a5/jdk-11.0.5_linux-x64_bin.rpm?AuthParam=1573886978_5511f6acaa0b321333446e8e838c1045

download using wget
c) If “wget” command is not available in your system to install it using the following command:
yum install wget -y
Rename the downloaded file.
mv jdk-11.0.5_linux-x64_bin.rpm\?AuthParam\=1573886978_5511f6acaa0b321333446e8e838c1045 jdk-11.0.5_linux-x64_bin.rpm
Install Oracle JDK:
yum localinstall jdk-11.0.5_linux-x64_bin.rpm

Install Oracle JDK
Java installed in the following location:
cd /usr/java/
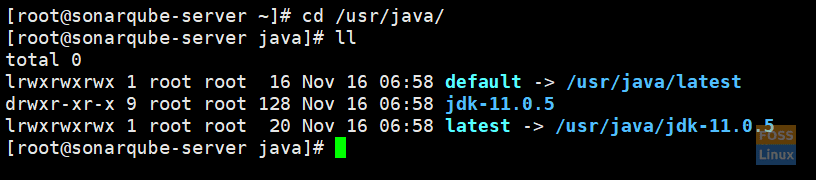
Java Installed Location
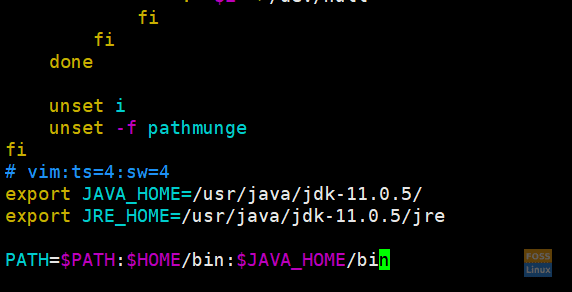
Add java environment variables:
vim /etc/bashrc
Add following lines to end of the file:
export JAVA_HOME=/usr/java/jdk-11.0.5/
export JRE_HOME=/usr/java/jdk-11.0.5/jre

PATH=$PATH:$HOME/bin:$JAVA_HOME/bin
Add Environment Variables
Save and exit the file and check the java version.
java -version

Check Java Version
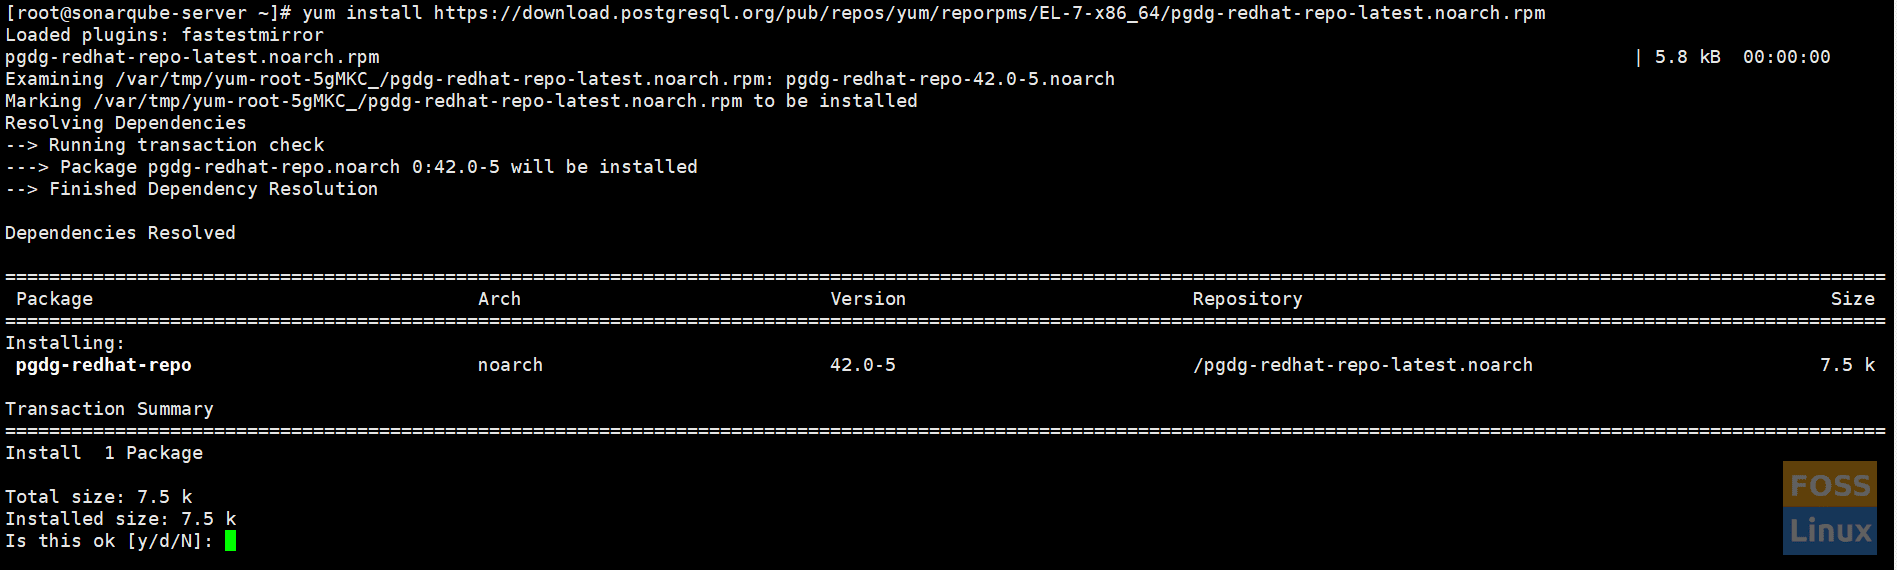
7. Install PostgreSQL 10
You can see downloads for Redhat based distributions here.
Install repository first:
yum install https://download.postgresql.org/pub/repos/yum/reporpms/EL-7-x86_64/pgdg-redhat-repo-latest.noarch.rpm
Install repository
Install server:
yum install postgresql10-server postgresql10-contrib

Install postgresql10
Initialize the database:
/usr/pgsql-10/bin/postgresql-10-setup initdb

Initialize Database
Modify pg_hba.conf file; change “peer” to “trust” and “idnet” to “md5”.
vim /var/lib/pgsql/10/data/pg_hba.conf
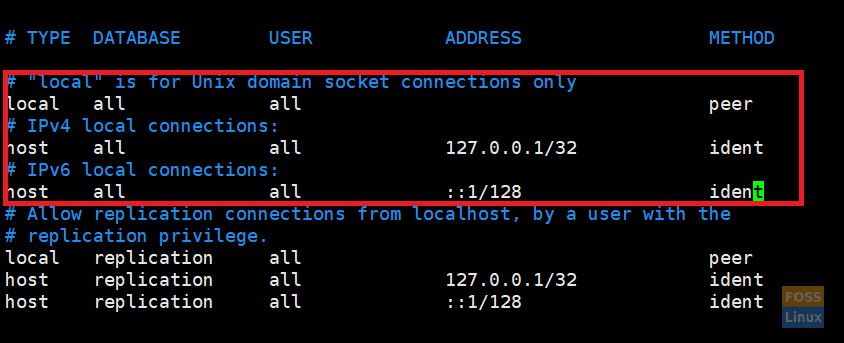
Change file
After the modification is done, the file should be as follows:
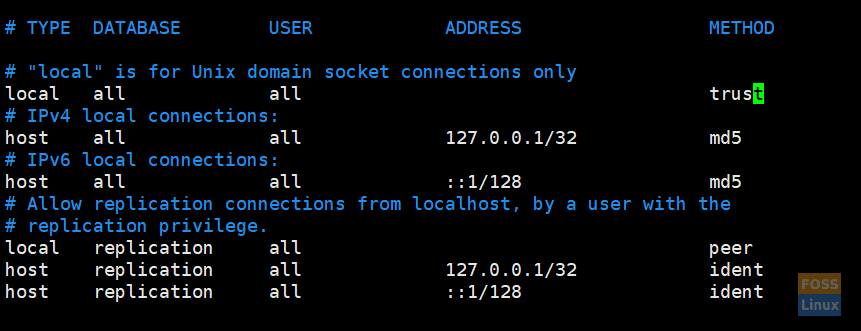
After Modification
To start service and set on boot, enable PostgreSQL on system boot:
systemctl enable postgresql-10
Check service status and start it.
systemctl status postgresql-10
systemctl start postgresql-10
Change the default password of the Postgres user:
passwd postgres
Switch to the Postgres user.
su - postgres
Create a new user.
createuser sonar
Switch to PostgreSQL shell.
psql
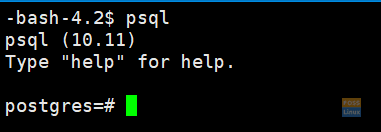
PostgreSQL shell
Set a password for the newly created user for the SonarQube database:
ALTER USER sonar WITH ENCRYPTED password 'd98ffW@123?Q';
Create a new database for the PostgreSQL database.
CREATE DATABASE sonar OWNER sonar;
Exit from the psql shell.
\q
Exit from the “postgres” user.
exit
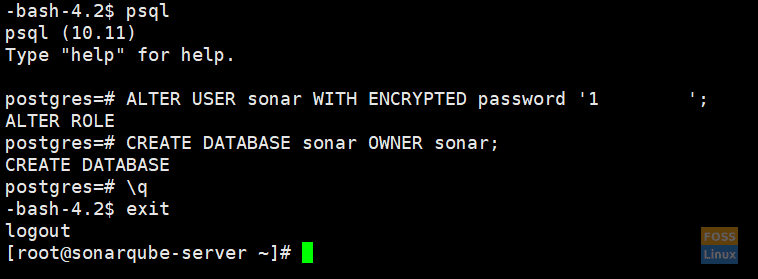
User and Database
8. Download and configure SonarQube
We are going to download the package in to “opt” directory. So change directory
cd /opt
Here we are going to use 7.9.x LTS version and can be download here
I. Download Latest LTS version
wget https://binaries.sonarsource.com/Distribution/sonarqube/sonarqube-7.9.1.zip
II. Then unzip
unzip sonarqube-7.9.1.zip
If unzip command not available. Install unzip.
yum install unzip -y
III. Rename folder
mv sonarqube-7.9.1 sonarqube
IV. Modify “sonar.properties file”.
vim /opt/sonarqube/conf/sonar.properties
Find the following lines. Then uncomment and modify values.
sonar.jdbc.username=sonar
sonar.jdbc.password=d98ffW@123?Q
sonar.jdbc.url=jdbc:postgresql://localhost/sonar
sonar.web.host=127.0.0.1
sonar.web.port=9000
sonar.web.javaOpts=-server -Xms512m -Xmx512m -XX:+HeapDumpOnOutOfMemoryError
sonar.search.javaOpts=-server -Xms512m -Xmx512m -XX:+HeapDumpOnOutOfMemoryError
Configuring the Elasticsearch storage path:
sonar.path.data=/var/sonarqube/data
sonar.path.temp=/var/sonarqube/temp
Save and exit the file.
V. Create a user for sonar
useradd sonar
Set password:
passwd sonar
VI. Modify folder permissions
chown -R sonar:sonar /opt/sonarqube
Create the following folders and grant permission:
mkdir -p /var/sonarqube/data
mkdir -p /var/sonarqube/temp
chown -R sonar:sonar /var/sonarqube
VII. Setting up Sonarqube as a service
vim /etc/systemd/system/sonarqube.service
Add the following content to file:
Unit]
Description=SonarQube service
After=syslog.target network.target

[Service]
Type=forking
ExecStart=/opt/sonarqube/bin/linux-x86-64/sonar.sh start
ExecStop=/opt/sonarqube/bin/linux-x86-64/sonar.sh stop
LimitNOFILE=65536
LimitNPROC=4096
User=sonar
Group=sonar
Restart=on-failure

[Install]
WantedBy=multi-user.target
Reload “systemctl” daemon and enable sonar on system boot.
systemctl daemon-reload
systemctl enable sonarqube.service
Start service and check its status.
systemctl start sonarqube.service
systemctl status sonarqube.service

Sonar Status
VIII. logfile location
cd /opt/sonarqube/logs/
- SonarQube service log
tail -f /opt/sonarqube/logs/sonar.log
- Web Server Logs
tail -f /opt/sonarqube/logs/web.log
- ElasticSearch logs
tail -f /opt/sonarqube/logs/es.log
- Compute Engine logs
tail -f /opt/sonarqube/logs/ce.log
9. Configure reverse proxy
Install Nginx, start service, and enable on system boot.
yum install -y nginx
systemctl start nginx
systemctl enable nginx
10. Configure SSL
Enable epel repo and install certbot.
yum install – y epel-release
yum install certbot python2-certbot-nginx
Run the following command to get a certificate and have Certbot edit your Nginx configuration automatically to serve it, turning on HTTPS access in a single step.
certbot --nginx
Command will ask questions . Then add needed details according to that.
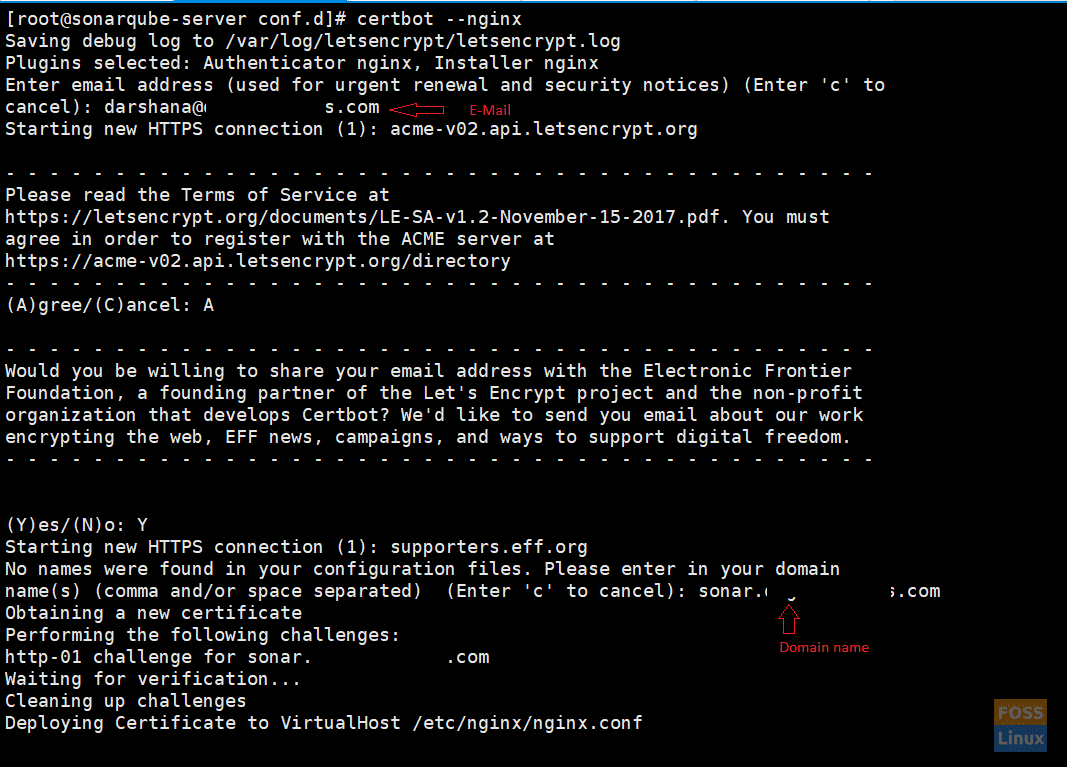
Certbot
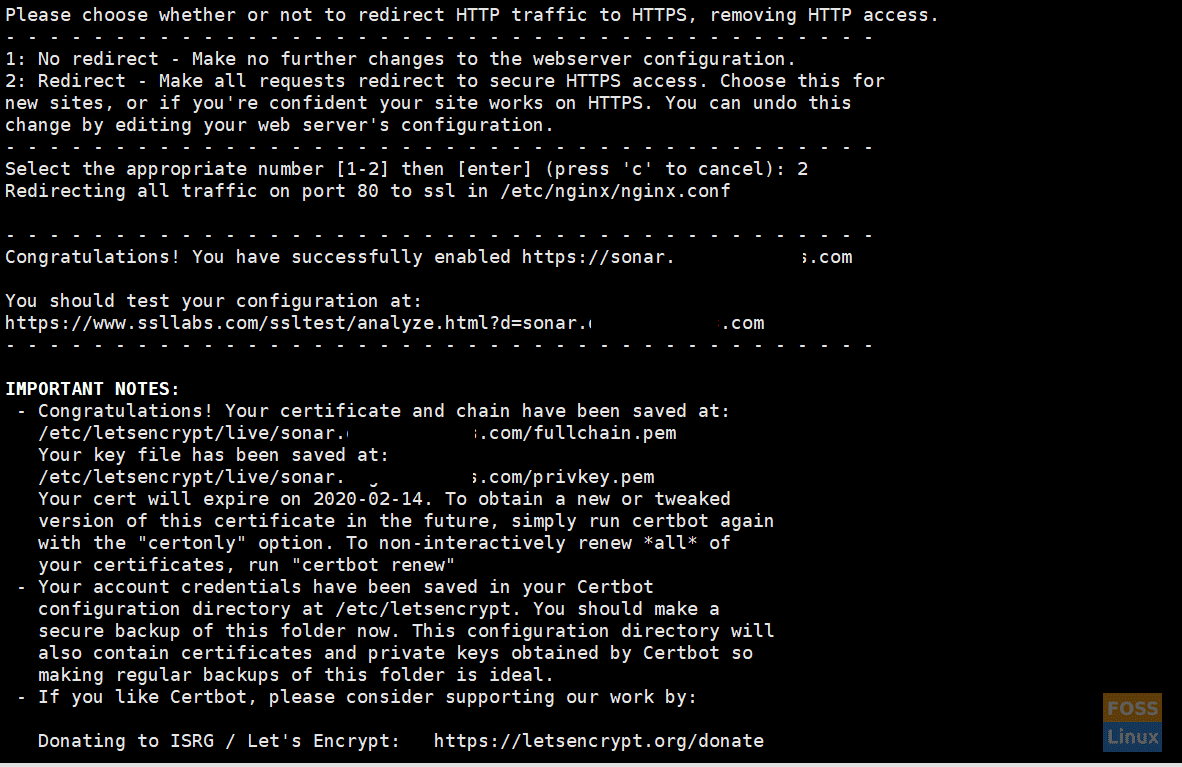
Certbot Configurations
After installation is done, open nginx.conf.
vim /etc/nginx/nginx.conf
You should see certbot SSL configuration.
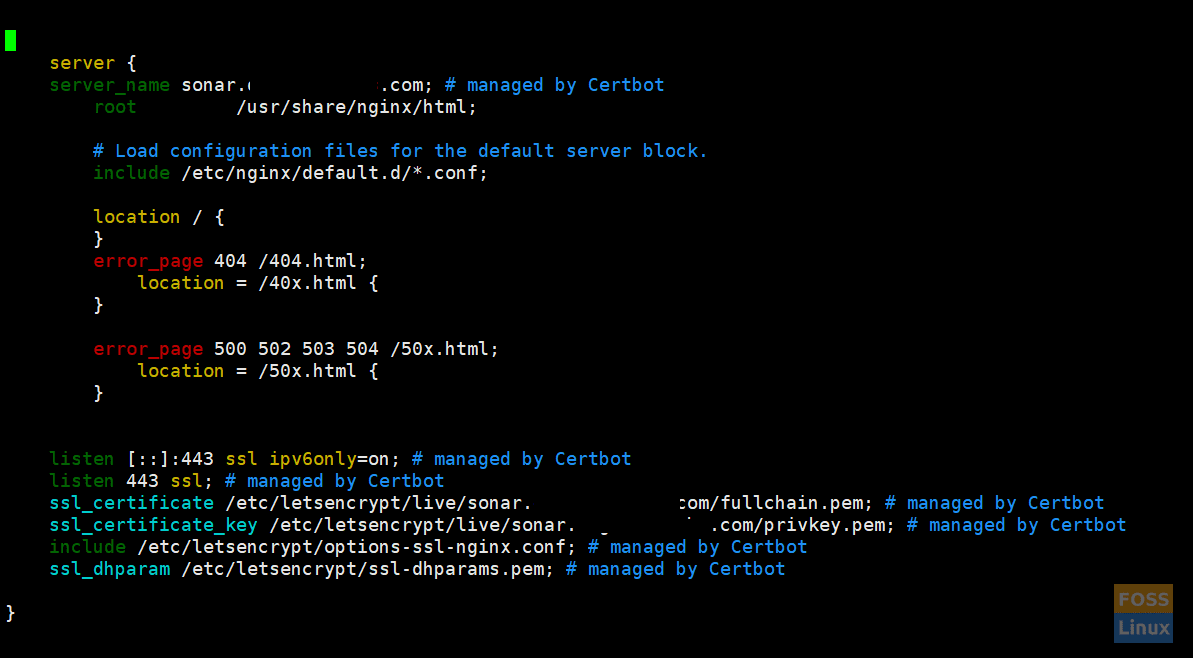
After SSL configuration
Then add the following contents to a Location Blocks.
location / {

proxy_pass "http://127.0.0.1:9000";
proxy_http_version 1.1;
proxy_set_header Upgrade $http_upgrade;
proxy_set_header Connection 'upgrade';
proxy_set_header Host $host;
proxy_cache_bypass $http_upgrade;

}
Save and exit the file. The modified file looks like below:
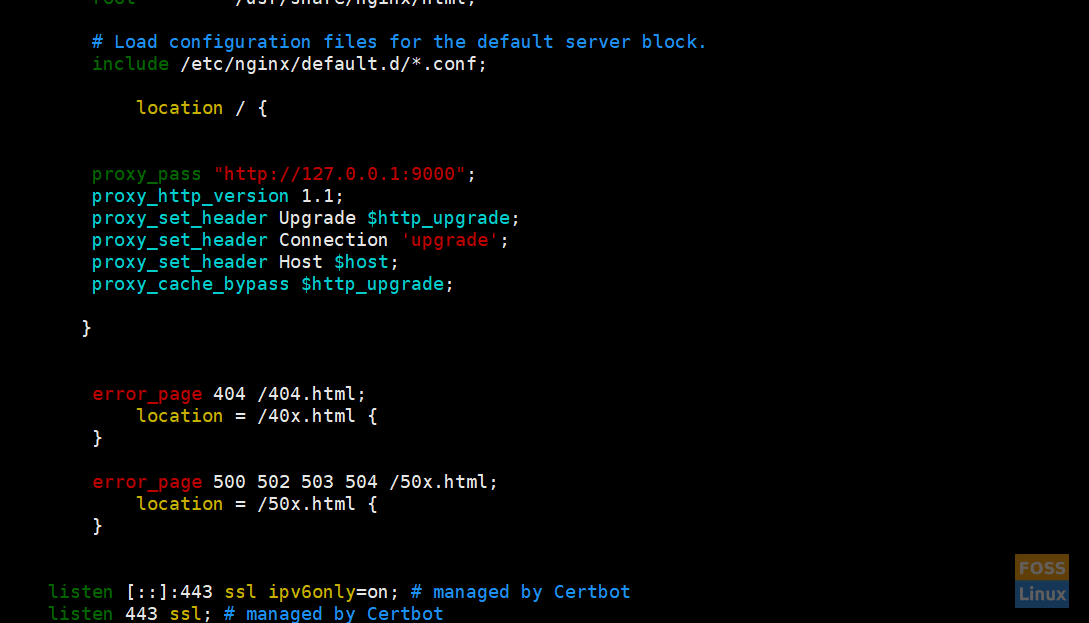
Nginx Configurations
Check nginx syntax:
nginx -t
Restart nginx:
systemctl restart nginx
11. DNS
Then go to your DNS manager and add A record for your sonar server.
A Domain Name Server IP
12. Modify Firewall Rules
If you have the firewall enabled, run the following command to open https traffic.
firewall-cmd --zone=public --permanent --add-service=https
firewall-cmd --reload

Firewall Rule HTTPS
if you need to open sonar for specific IP, run the below command:
firewall-cmd --permanent --zone=public --add-rich-rule='
rule family="ipv4"
source address="122.43.8.188/32"
port protocol="tcp" port="443" accept'
firewall-cmd --reload
13. Browse Sonarqube
Go to your browser and type your domain name.
eg:- https://sonar.fosslinux.com/
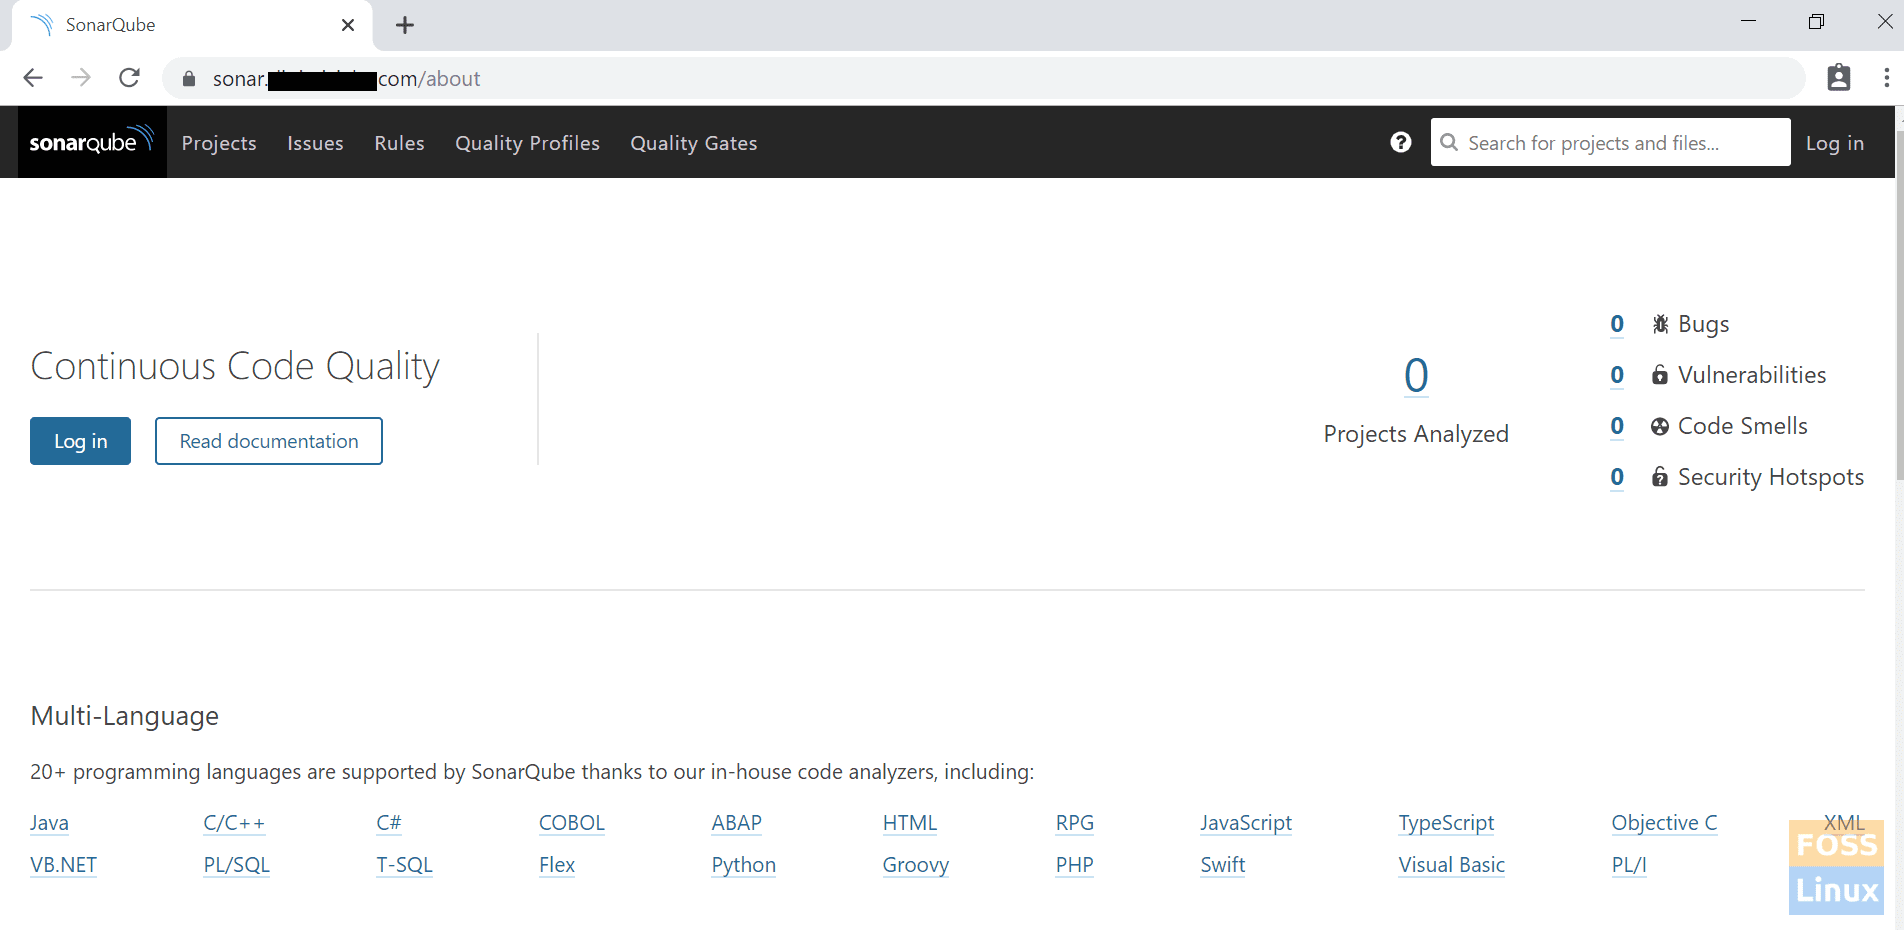
Browse Sonarqube
Then click “login.”
14. Login page
The default username and password is “admin”.
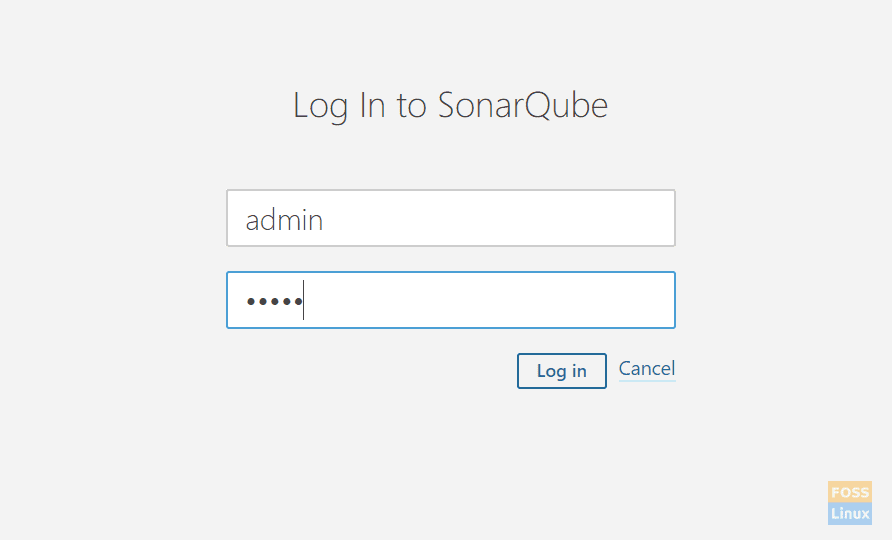
Login
Dashboard
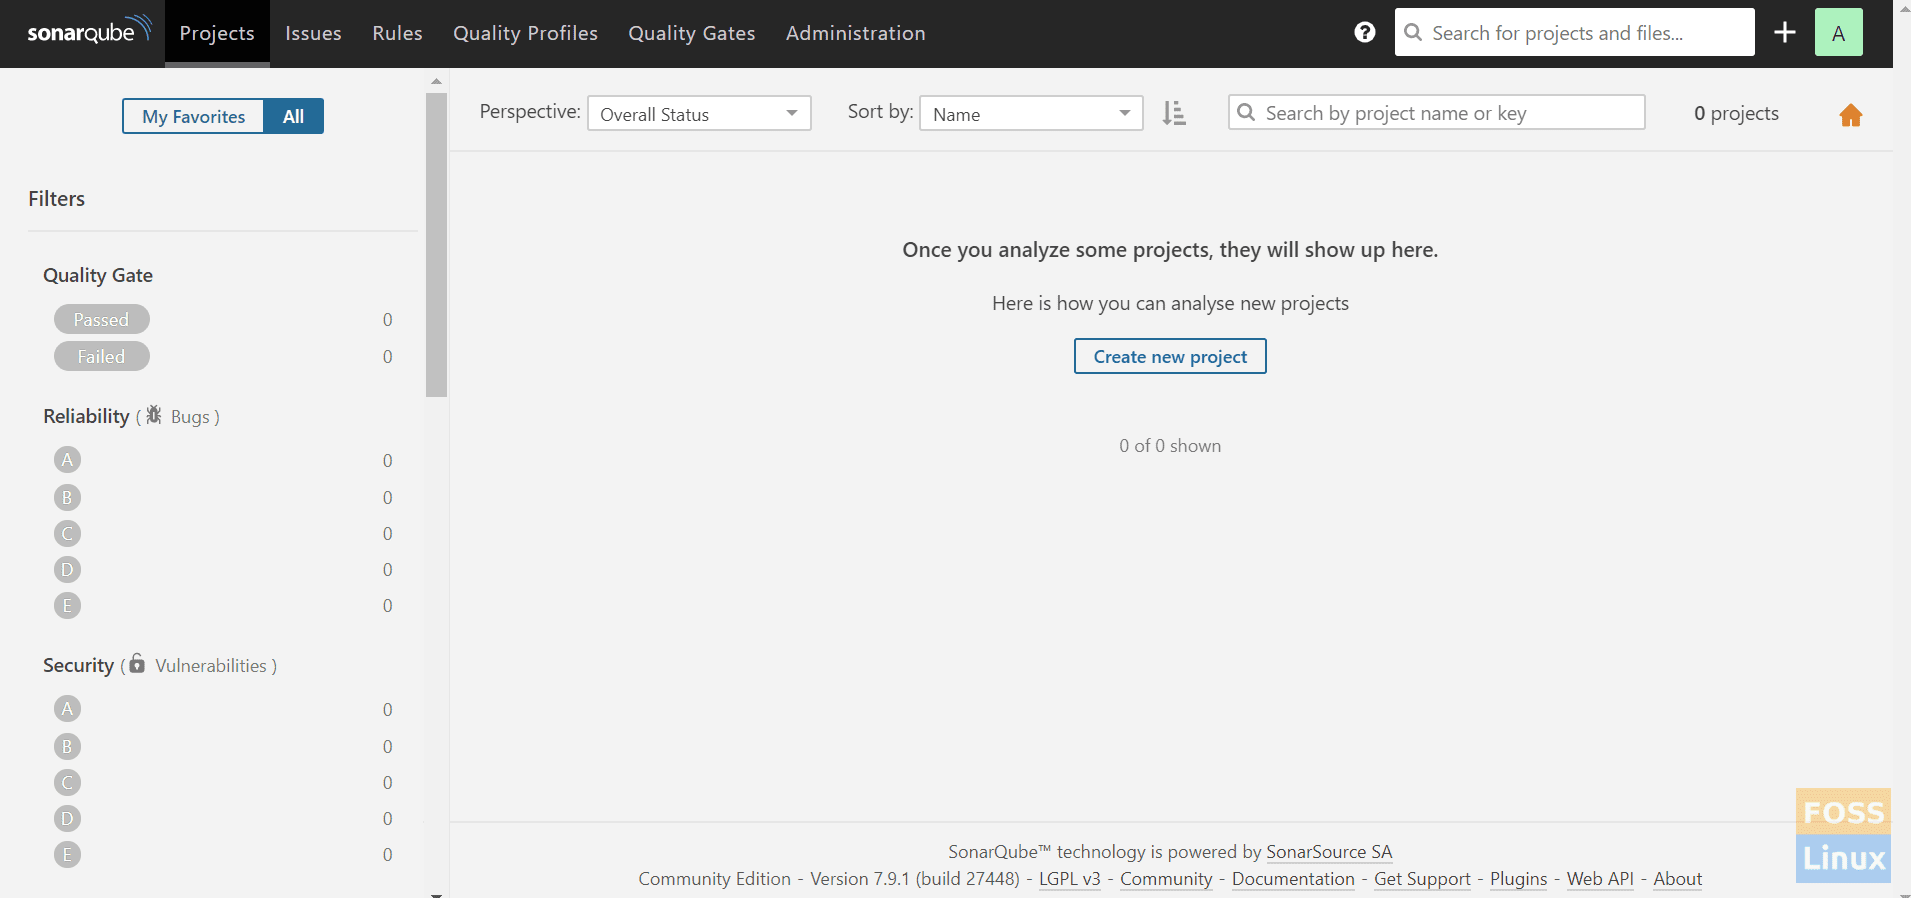
DashBoard
Now we configured SonarQube successfully. In our upcoming articles, we will see how to integrate SonarQube with Jenkins.
8 comments
excellent guide . Thank you
You saved my life.
Thank you very much for your step-by-step installation guide.
Not even in Sonarqube’s own documentation is so clear and well explained what needs to be done.
This was the third installation attempt following the documentation in the previous two.
With your help everything worked at first.
Sorry but I do not speak English and less write it, but for years that is not a problem thanks to technology.
A cordial greeting.
Is it mandatory to set up nginx. i installed sonarqube and service is running but when i opened in browser site cant be reached issue.
Hi Raj.
No. You need to check “sonar.properties” file. find “sonar.web.host” and it change to 0.0.0.0.
Check “sonar.web.port” also.
Then restart the application.
check logs files too.
Then check sonar port is up and running using this command “netstat -tunlp | grep portno ”
Check your firewall and open sonar port
What an elaborate effort I have never seen before.
May I setup MySQL instead of Postgre10? is Sonar supported this database?
May I ignored the haproxy & https? Did certs provided by certbot is working in Production environment? ?
Database installation is mandatory for sonarqube installation, also I’m getting the error while running the pipeline script after configuring sonarqube and sonar-scanner both with jenkins.
Can you please help me in this context.
I’m getting the below mentioned error while executing the pipeline script:
INFO: Scanner configuration file: /opt/sonar-scanner/conf/sonar-scanner.properties
INFO: Project root configuration file: NONE
INFO: Analyzing on SonarQube server 8.3.1
INFO: Default locale: “en_US”, source code encoding: “UTF-8”
INFO: Load global settings
INFO: Load global settings (done) | time=190ms
INFO: Server id: BF41A1F2-AXJt7ej9CzJgY9yzONqe
INFO: User cache: /var/lib/jenkins/.sonar/cache
INFO: Load/download plugins
INFO: Load plugins index
INFO: Load plugins index (done) | time=86ms
$ docker rm -f 6154c768cb5afcf61de6060d852982e211aa0322bd85b1675ad57c7fa600d82f
INFO: Load/download plugins (done) | time=397ms
[Pipeline] // withDockerContainer
[Pipeline] }
[Pipeline] // stage
[Pipeline] }
INFO: Process project properties
INFO: ————————————————————————
INFO: EXECUTION FAILURE
INFO: ————————————————————————
INFO: Total time: 6.724s
INFO: Final Memory: 7M/52M
INFO: ————————————————————————
ERROR: Error during SonarScanner execution
ERROR: You must define the following mandatory properties for ‘Unknown’: sonar.projectKey
ERROR:
ERROR: Re-run SonarScanner using the -X switch to enable full debug logging.
[Pipeline] }
WARN: Unable to locate ‘report-task.txt’ in the workspace. Did the SonarScanner succeeded?
[Pipeline] // withSonarQubeEnv
[Pipeline] }
[Pipeline] // script
[Pipeline] }
[Pipeline] // stage
[Pipeline] }
Failed in branch Running Sonarqube
Awsome , Perfect guide. Thank you