
Fedora is an open-source project and an upstream source of the commercial Red Hat Enterprise Linux distribution. Since Fedora 30, the Fedora project releases five different editions, spins, and platforms for hardware, containers, server, IoT, and cloud.
Fedora Workstation is an easy-to-use operating system for desktop and laptop users with tools essential for developers. Fedora Server is a powerful operating system with the latest data center technologies.
- Fedora CoreOS is a minimal operating system for managing containers.
- Fedora Silverblue provides support for container-based workflows.
- Fedora IoT is designed to suit IoT ecosystems.
In this tutorial, we shall highlight simple steps to install the Fedora 34 server with screenshots to guide you along the way.
The current version, Fedora 34, was released on 27th April 2021 with some key improvements and new features.
What’s new in Fedora 34 server?
- Linux Kernel 5.11
- Btrfs as default file system
- Smaller installer footprint
- Easy administration with Cockpit’s modern and powerful interface
- Introduction of additional modularity
- Server roles
- FreeIPA 4.9 security information manager plus so much more
Installing Fedora 34 Server
Installation prerequisites
- Fedora 34 Server ISO image
- At least 20GB of free space on your hard disk.
- Bootable media, i.e., USB flash drive or CD/DVD
- Stable internet connection
1. Download Fedora 34 Server ISO
Visit the official Fedora home page and Download Fedora 34 server 64-bit image.
Alternatively, you can download the image as a torrent file. Visit torrent.fedoraproject.org and download a torrent file for the Fedora-Server-dvd-x86_64-34-1.2.iso server edition. Open the torrent file with your preferred torrent software application like transmission and download the files. Torrent downloads are fast and can be resumed in case of internet interruption.
2. Validate Checksum of Fedora 34 Iso file
This step is to check if your Fedora server download is a legitimate image or not.
Import GPG keys for Fedora using the following terminal command:
$ curl https://getfedora.org/static/fedora.gpg | gpg –import
To verify the checksum file, change into the Fedora download directory where the iso and checksum files are located and run the following command:
$ cd ~/Downloads/Fedora-Server-dvd-x86_64-34
$ gpg --verify-files *-CHECKSUM
Next, validate the downloaded checksum with the sha256sum command:
$ sha256sum -c *-CHECKSUM
Installation steps of Fedora 34 server
The first step is to create a bootable media USB flash drive or CD/DVD using the dd command, Unetbootin, or Rufus tool.
3. Create bootable media with the dd command
To create a bootable media, plug in a USB flash drive and change into a root user with the su – command.
Ensure your drive has a single partition with a vfat file system with the following command:
# blkid partition #specify partition name i.e /dev/sdc1
Sample output:
LABEL="LIVE" UUID="6756-29D3" TYPE="vfat"
If the ‘TYPE’ is anything other than ‘vfat,’ clear the first block of the USB drive with the following command:
# dd if=/dev/zero of=partition bs=1M count=100
# dd if=/dev/zero of=/dev/sdc1 bs=1M count=100
Transfer the server boot ISO image with the dd command:
# dd if=path/image.iso of=device
Where path/image.iso is the boot ISO image file and device is the USB drive device name.
# dd if=~/Downloads/Fedora-Server-dvd-x86_64-34-1.2.iso of=/dev/sdc
Before you get started, you can test the Fedora 34 installation media for any errors or install it straight away. It’s good practice to test your media before installation, but this tutorial will go straight into the installation.
4. Boot into the Fedora boot menu
To begin the installation, boot into the Fedora boot menu, select a preferred installation language, then go to the next screen, which contains the installation summary. Here, you will configure various system settings under three categories, localization, software, and system.
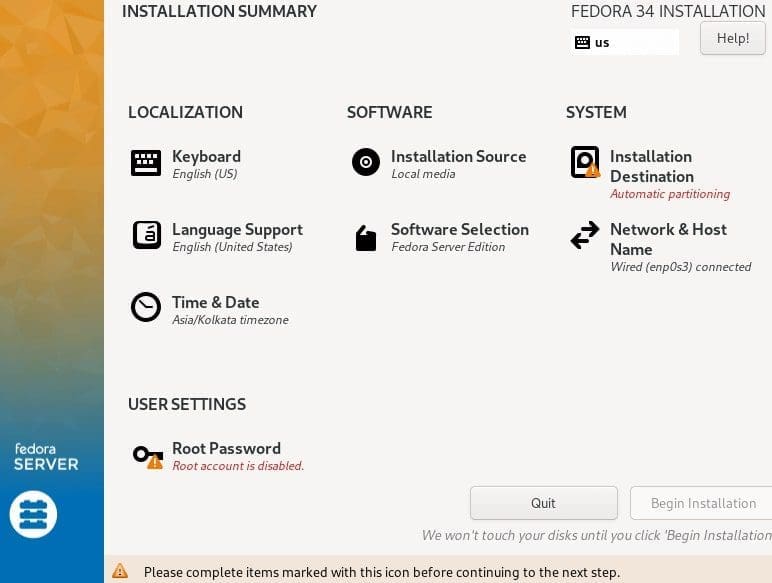
Fedora 34 server installation summary
You can add a keyboard layout, set language support, set system time & date, change installation source, change network adapter & hostname, and specify your installation destination.
5. Configure keyboard layout
Use the + sign to add a keyboard layout, click Add then Done to move back to the Installation Summary interface.
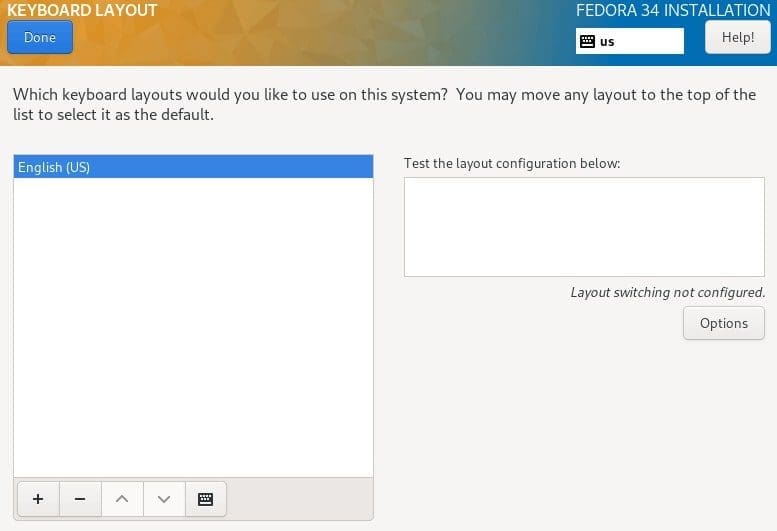
Add Fedora keyboard layout.
6. Configure language support
Fedora has support for many languages. To set your language, search for the language, then click Add to install. Click Done to save settings and exit the language support prompt.
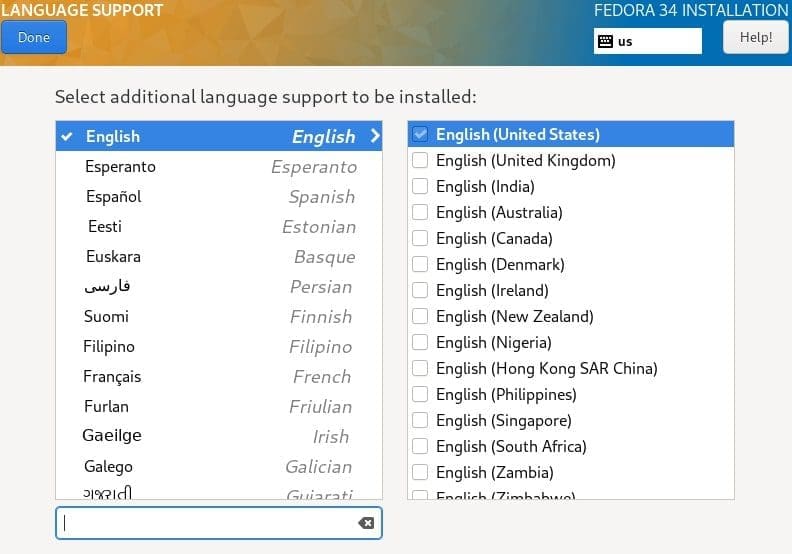
Set Fedora language support
7. Configure system time and date
The next step is to set the default timezone, time, and date. You can also switch on network time to automatically set the system time when connected to the internet. Complete your setting and click Done to move to the next step.
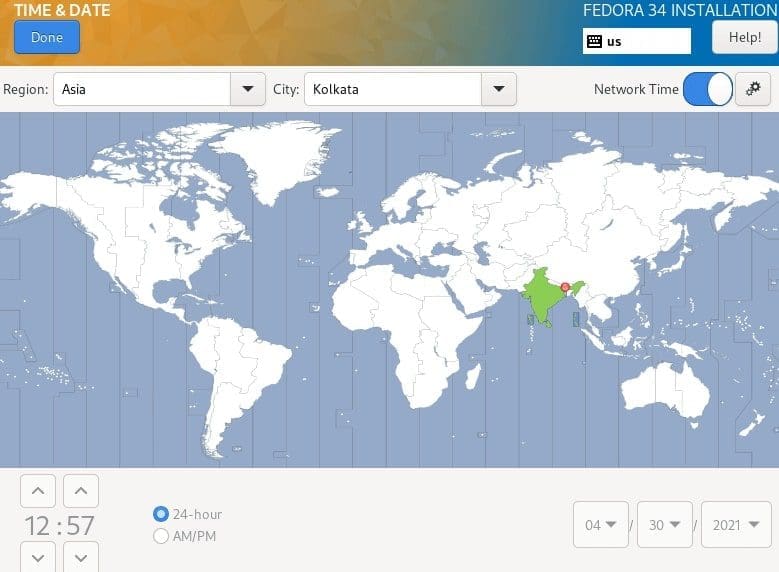
Set default timezone date & time
8. Configure installation disk
There are two ways to configure your system partitions and filesystem. You can choose automatic settings or perform a manual setup. For manual configuration, click the disk image and select ‘Custom,’ then click done.
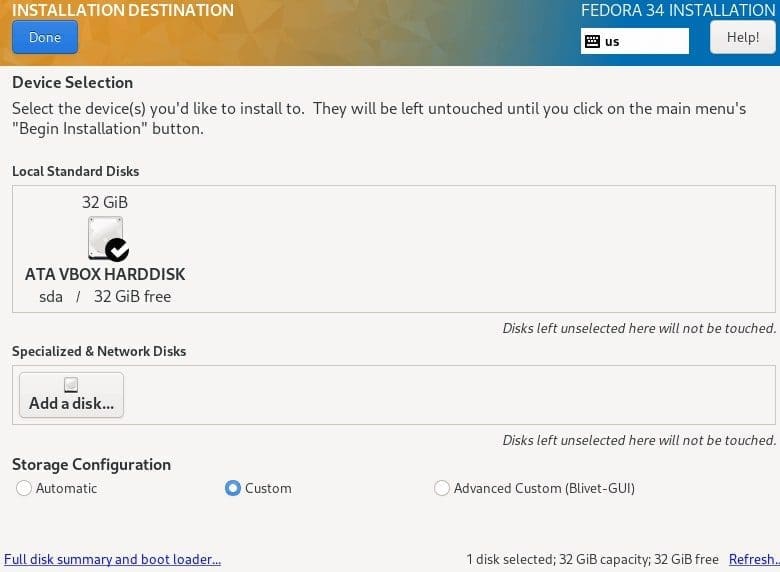
Select an Installation destination disk
In the ‘Manual partitioning’ screen, select ‘Standard Partition’ from the drop-down menu to create mounting points for various partitions for your system.
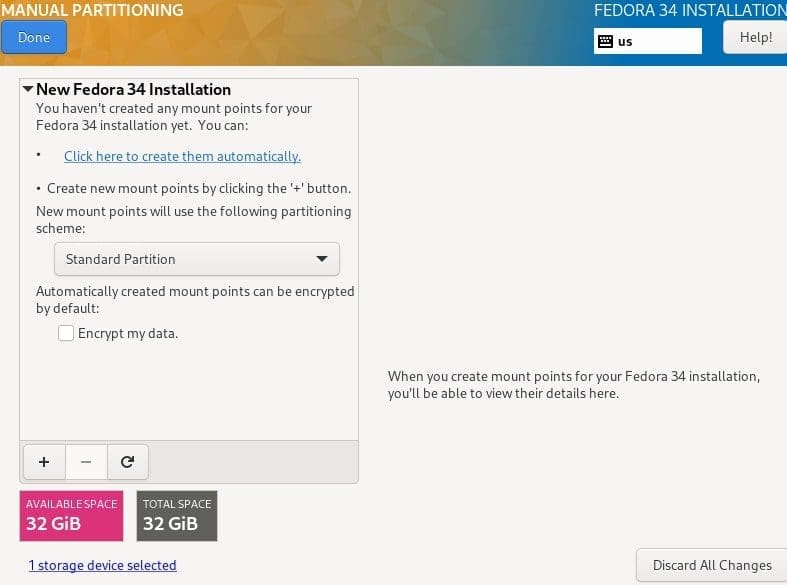
Fedora Manual partitioning
Use the ‘+’ button to add a new partition.
Root partition
First, create the root (/) partition and specify your desired capacity depending on the size of your system disk.

Create Fedora root partition
Then set the filesystem type (i.e., ext4) for the root file system created in the previous step. Note, Btrfs is the default filesystem for Fedora releases.
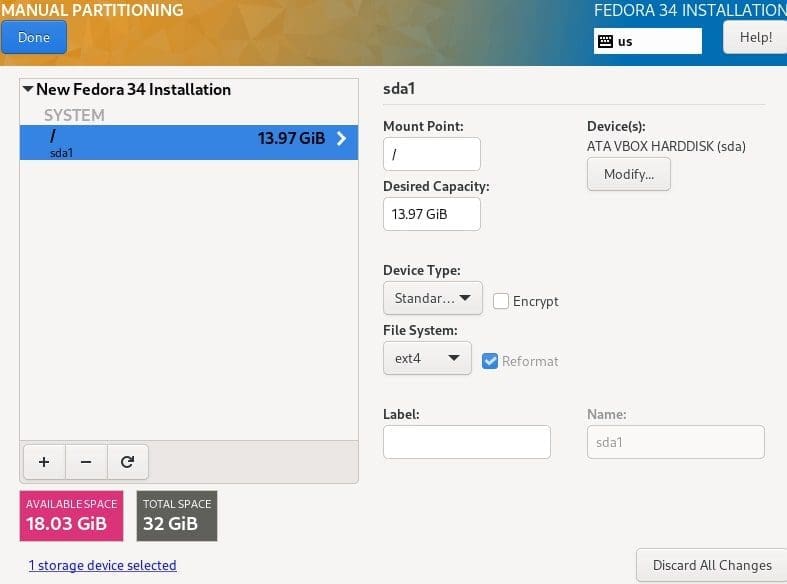
Set Fedora root filesystem
Home partition
Next, create a home partition and configure the mount point. The home partition will store the system user’s files and home directories. Click ‘Add mount point’ to complete settings and proceed to the next step.

Create Fedora home partition
You also have to set the filesystem type for the home partition. I have used ext4.
Swap partition
Next, create a swap partition and specify the desired capacity. A swap partition will allocate space to temporarily store extra data that is not actively being worked upon by the system if RAM is used up. Click ‘Add mount point’ to complete the step.
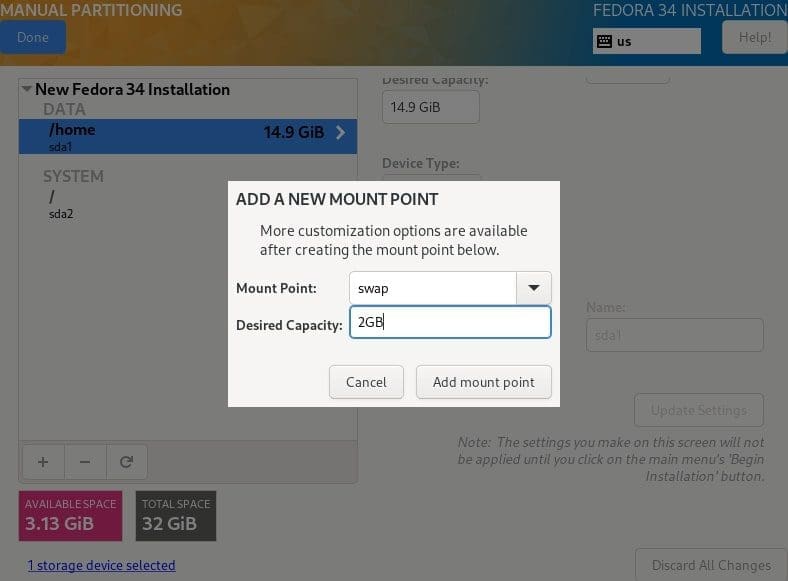
Create Fedora swap partition
When you are done configuring the necessary mount points, click the Done at the top left corner, which will take you to the next screen, where you are required to accept the settings to make changes to the disk. Click ‘Accept changes’ to continue.
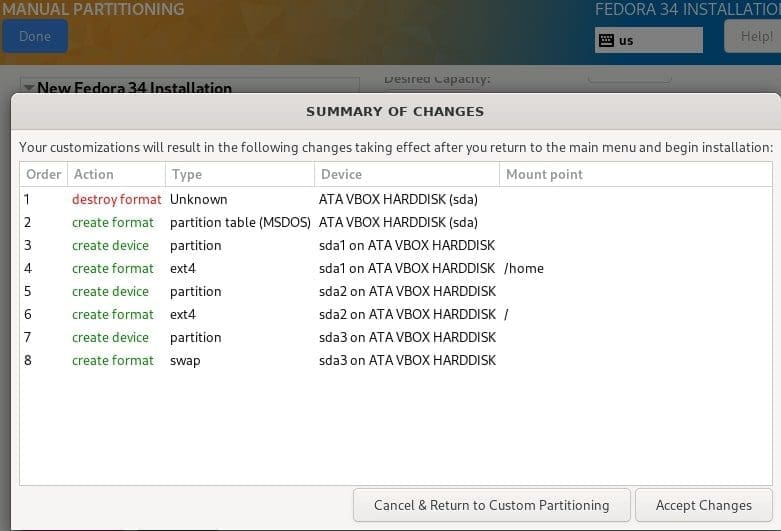
Accept Installation disk changes.
9. Configure network and hostname
Once you accept the changes, move back to the configuration screen and click on ‘Network and hostname’ to set your Linux system hostname. To configure network settings, click on ‘Configure,’ which takes you to the ‘Network & hostname’ screen. Here, you can configure network settings such as default gateway, server IP address, DNS servers, and so on.
For our Fedora server, select the manual configuration from the drop-down menu and navigate the settings tabs to set network features and properties per your server environment requirements.
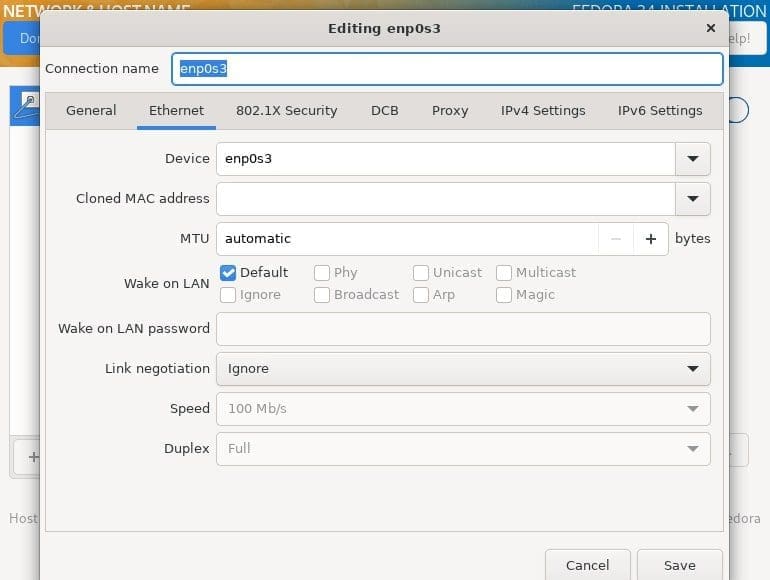
Configure Fedora network hostname
Click on save then Done to complete your network configurations and move back to the ‘Installation Summary’ screen.
10. Create root password
Before you begin installing system files, you need to set up a root user password and create an additional non-root system user account. Click on ‘Root password,’ choose a strong password, then click Done to move to the next step.
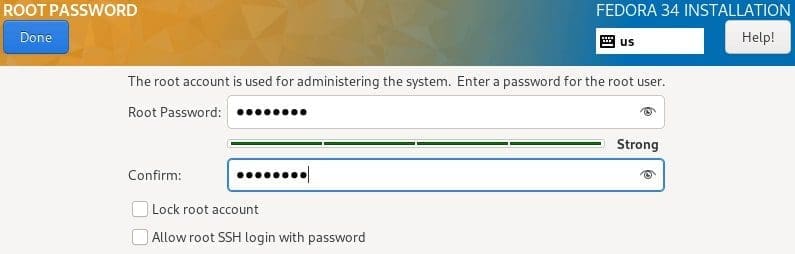
Set root user password
11. Create an additional user account
To create a user account, click on ‘User creation’ and update the necessary information. Set a strong password for the user and click Done to complete the settings. Optionally, you can also give administrator privileges to the user.
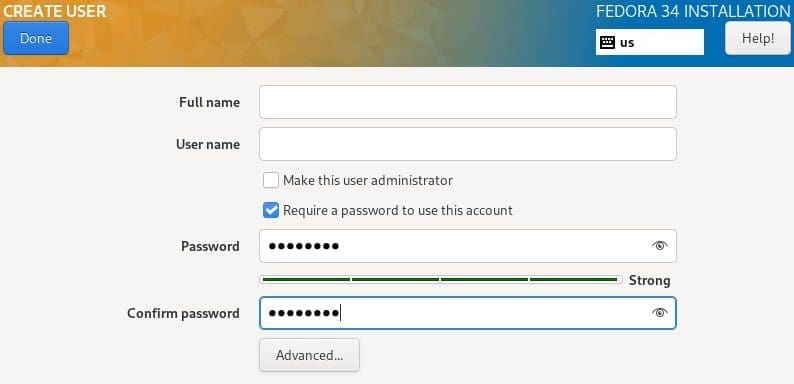
Create Fedora non-root user account
12. Begin installation of system files
Before installing system files, double-check on your configurations, and only then click on ‘Begin Installation’ from the ‘Installation Screen.’
At this point, it is safe to sit back and relax, stretch, or grab a coffee as you wait for the installation to finish. When the installation is complete, click on ‘Reboot’ in the bottom right corner to reboot your system.
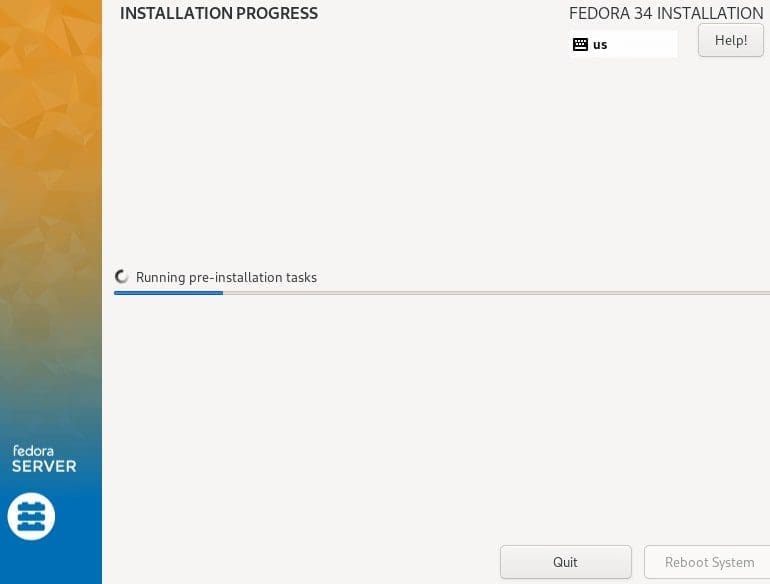
Fedora Installation progress
Next, remove the installation media and initiate the first boot into your Fedora 34 server.
13. First-time login
Log in to your system through the terminal interface as root and run the Fedora 34 server on your machine. By default, the server will boot into a terminal interface, but you can enable the GNOME/MATE GUI desktop with the following command:
# systemctl set-default graphical.target
# systemctl enable graphical.target
# reboot
Congratulations on your Fedora server setup!
What next?
I believe the steps above are simple enough to follow, even for first-time Linux users. You can also follow the same installation steps if you want to install the Fedora 34 Workstation.
At first log in, I always recommend users to update their system and configure some default settings. If you are stuck or need some guidance, check our guide on things to do after installing Fedora for some ideas.