
Automation is the key to success in the ever-evolving landscape of software development, continuous integration, and continuous delivery (CI/CD). Jenkins, a powerful and open-source automation server, has become an indispensable arsenal for developers and DevOps engineers. Suppose you’re looking to streamline your software development workflow. In that case, this comprehensive guide on installing and using Jenkins on Linux is your ticket to achieving greater efficiency and consistency in your projects.
What is Jenkins?
Jenkins is a potent open-source automation server that aids the automation of repetitive tasks in the software development process. Developed initially as the Hudson project, Jenkins has come a long way, offering a robust platform for building, deploying, and automating tasks. Its extensive plugin ecosystem and support for various programming/scripting languages make it a popular choice for organizations striving to enhance their CI/CD pipelines.
Why use Jenkins?
Before we dive into the nitty-gritty details of installing and using Jenkins, let’s explore why you should consider using it in the first place.
- Automation: Jenkins enables you to automate various tasks, from code builds and testing to deployment and monitoring. This automation reduces manual intervention, minimizing the risk of human error and ensuring consistency across your development process.
- Extensibility: Jenkins boasts an extensive library of plugins, allowing you to integrate it with various tools and services in your development pipeline. This extensibility ensures that Jenkins can adapt to your specific needs and workflow.
- CI/CD (continuous integration and continuous delivery): In the programming world, Jenkins is the backbone of CI/CD pipelines, helping teams build, test, and deploy code continuously. This approach accelerates development cycles, increases collaboration, and ensures that software is always production-ready.
- Community support: Being open source, Jenkins has an active and vibrant community of contributors and users. This means you can tap into a wealth of resources, knowledge, and support when working with Jenkins.
- Cost-effective: Jenkins is free to use, making it a viable solution for institutions, organizations, and businesses of all sizes. It allows you to reap the benefits of automation without incurring hefty licensing costs.
Now that we are conversant with the advantages of using Jenkins, let’s embark on our journey to install and use it on a Linux system.
Installing Jenkins on Linux
Prerequisites
Before installing Jenkins on your Linux system, ensure that you have the following prerequisites in place:
- A Linux-based operating system (e.g., Ubuntu, CentOS, Debian)
- Java Development Kit (JDK) installed (Jenkins requires Java 8 or later)
- Administrative privileges on your Linux machine
Step 1: Update system packages
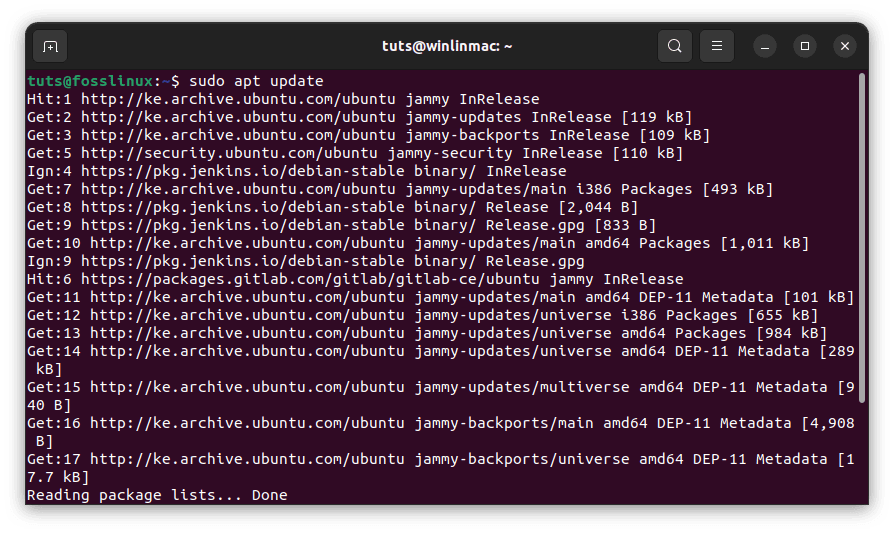
The first step in installing Jenkins on your Linux system is to ensure that your package list is up-to-date. This is crucial because it ensures you have recent information about available packages and their dependencies. An updated package list ensures a smooth installation process and minimizes the risk of encountering compatibility issues.
To update your system’s package list, open your terminal and run the following command:
sudo apt update

Update system resources
Remember that package management commands may vary if you use a Linux distribution other than Ubuntu. For example, on CentOS, you can use yum instead of apt:
sudo yum update
This command contacts the package repositories configured on your system and fetches information about available updates. It’s a good practice to run this command regularly to keep your system software current and secure.
Step 2: Install Java
Jenkins is built to run on Java, so the next essential step is installing a compatible Java Development Kit (JDK) if it’s not already on your system. Jenkins requires at least Java 8 or later to function correctly.
For Ubuntu users, you can install OpenJDK 11, which is a popular choice, with the following command:
sudo apt install openjdk-11-jdk
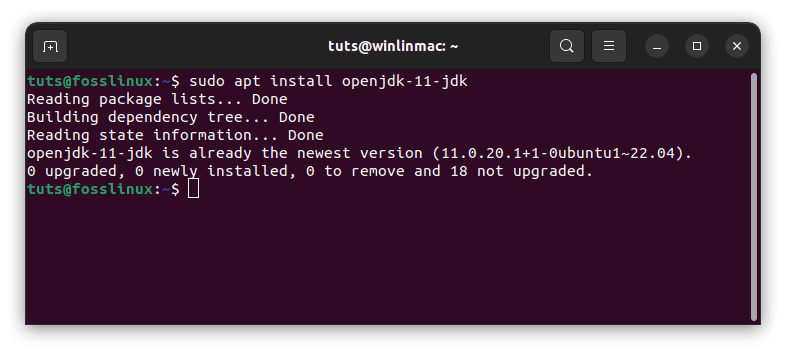
Install Java
This command downloads and installs the OpenJDK 11 package, which includes the Java Runtime Environment (JRE) and the Java Development Kit (JDK).
To verify the installation and confirm that Java is now available on your system, run the following command:
java -version
Running this command should display output indicating the installed JDK version, such as:
openjdk version "11.0.12" 2023-09-15

OpenJDK Runtime Environment (build 11.0.12+7-Ubuntu-0ubuntu1.21.04)

OpenJDK 64-Bit Server VM (build 11.0.12+7-Ubuntu-0ubuntu1.21.04, mixed mode, sharing)
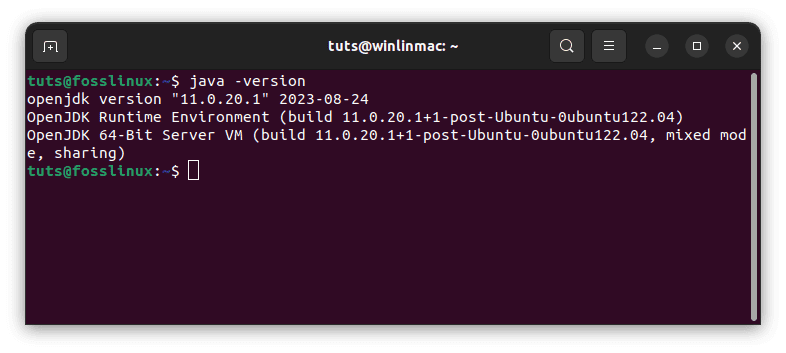
Confirm installed java version
This output confirms that Java has been successfully installed on your system and is ready for Jenkins to use.
Step 3: Add Jenkins repository
Jenkins provides official repositories tailored for various Linux distributions to ensure users can easily access the latest stable version. To take advantage of this and ensure you get the most up-to-date version, follow these steps to add the Jenkins repository to your system.
Add the Jenkins repository key
First, add the Jenkins repository key to your system. This key is used to ascertain the authenticity of the Jenkins repository:
wget -q -O - https://pkg.jenkins.io/debian/jenkins.io.key | sudo apt-key add -
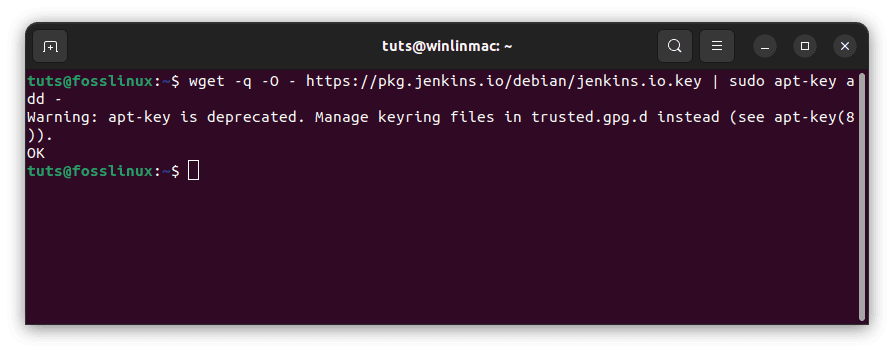
Add jenkins repo
This command retrieves the repository key from the Jenkins website using wget and adds it to your system’s list of trusted keys.
Add the Jenkins repository to the sources list
Next, add the Jenkins repository to your system’s sources list. This is where your package manager looks for available packages:
curl -fsSL https://pkg.jenkins.io/debian-stable/jenkins.io-2023.key | sudo tee \
  /usr/share/keyrings/jenkins-keyring.asc > /dev/null

echo deb [signed-by=/usr/share/keyrings/jenkins-keyring.asc] \
  https://pkg.jenkins.io/debian-stable binary/ | sudo tee \
  /etc/apt/sources.list.d/jenkins.list > /dev/null
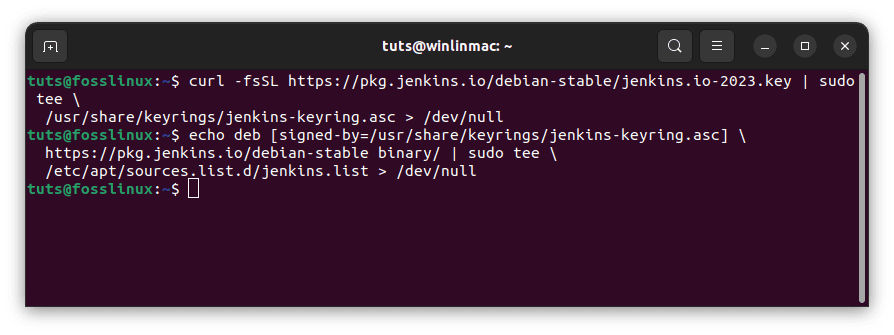
Add Jenkins repo and key
Here, you are creating a new file in the /etc/apt/sources.list.d/ directory called jenkins.list and specifying the Jenkins repository URL.
With the Jenkins repository key and URL added to your system, you are now ready to proceed to the next step.
Step 4: Install Jenkins
Now that you have added the Jenkins repository to your system, it’s time to update your package list again to include the newly added Jenkins packages. Run the following command to update your package list:
sudo apt update
Run the update command
Once the package list is updated, you can proceed to install Jenkins by running the following command:
sudo apt install jenkins
This command installs the Jenkins package along with its dependencies. You’ll be prompted to confirm the installation by typing “Y” and pressing Enter.
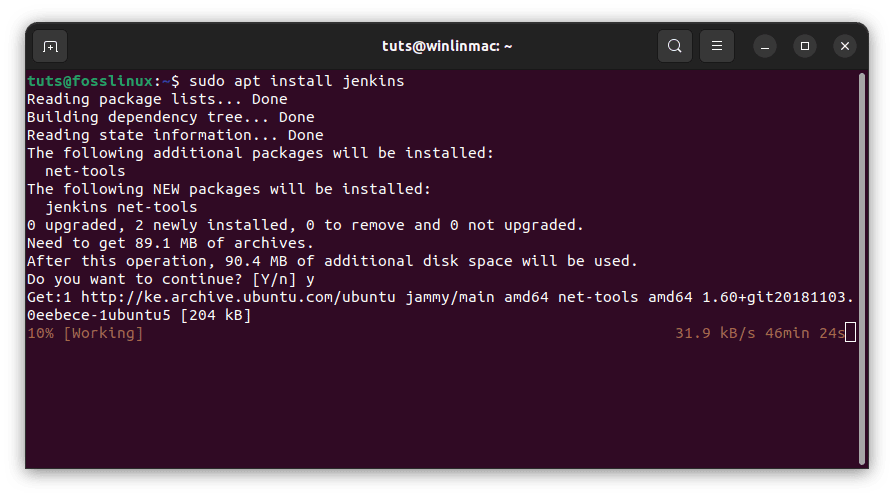
Install Jenkins
Step 5: Start Jenkins and enable autostart
With Jenkins successfully installed, you can now start the Jenkins service and ensure it automatically starts whenever your system boots up.
Fire up the Jenkins service using the following command:
sudo systemctl start jenkins
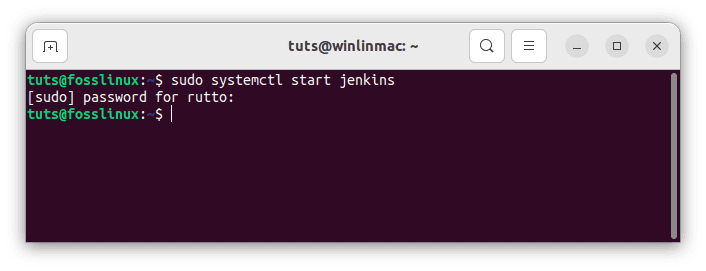
Start Jenkins
This command initiates the Jenkins service and makes it active for the current session.
To enable Jenkins to start automatically when your system boots, run the following command:
sudo systemctl enable jenkins
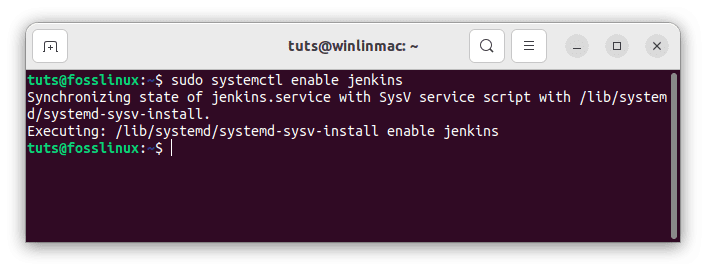
Enable Jenkins
Enabling the Jenkins service ensures that it will automatically start every time your system restarts, ensuring uninterrupted operation.
Step 6: Configure firewall
If you have a firewall enabled on your Linux system, it’s important to allow incoming traffic on the default Jenkins port, which is 8080. Opening this port ensures that external devices and other systems can communicate with your Jenkins server.
For instance, if you are using the Uncomplicated Firewall (UFW) utility, you can use the following commands to allow traffic on port 8080:
sudo ufw allow 8080

sudo ufw reload

Configure firewall
The first command allows incoming traffic on port 8080, while the second command reloads the firewall rules to apply the changes.
By configuring your firewall to permit traffic on port 8080, you ensure that users can access the Jenkins web interface and interact with Jenkins from remote machines.
Step 7: Access Jenkins web interface
At this point, Jenkins is up and running on your Linux system. To access the Jenkins web interface, open your web browser and go to the following URL:
http://your_server_ip_or_domain:8080
Replace your_server_ip_or_domain with the real IP address or domain name of your server.
http://192.168.100.6:8080
When you access this URL, you should see the Jenkins setup wizard, which will guide you through the initial configuration steps.
Access jenkins via the web
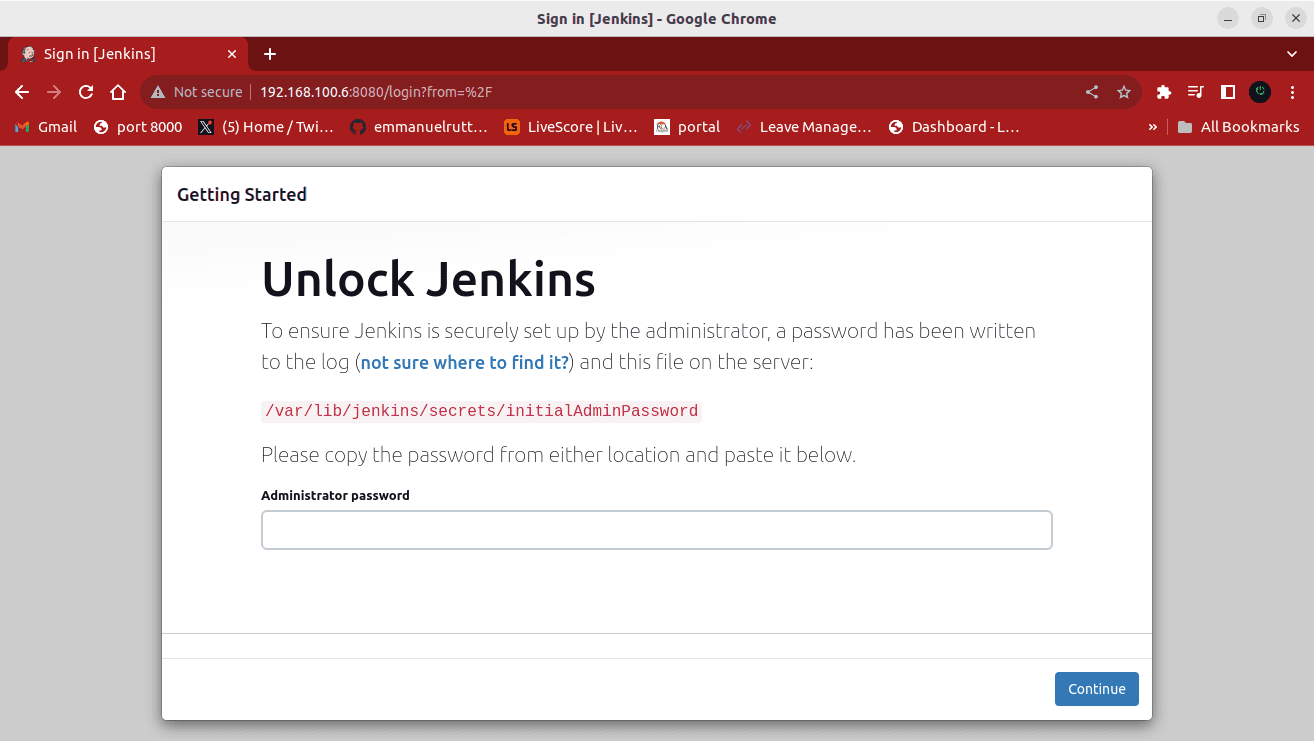
Step 8: Unlock Jenkins
During the initial setup of Jenkins, the server generates an unlock key that is required to access and configure Jenkins. This unlock key is a security measure to ensure that authorized personnel can only set up and modify Jenkins.
To retrieve the unlock key, you can use the following command in your terminal:
sudo cat /var/lib/jenkins/secrets/initialAdminPassword
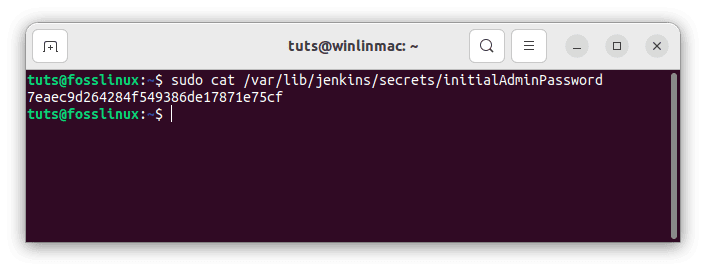
Unlock jenkins
This command reads the contents of the initialAdminPassword file, which contains the unlock key.
Copy the unlock key from the terminal output, then paste it into the setup wizard in your web browser to unlock Jenkins. This step ensures that you have administrative access to your Jenkins instance.
Login to jenkins
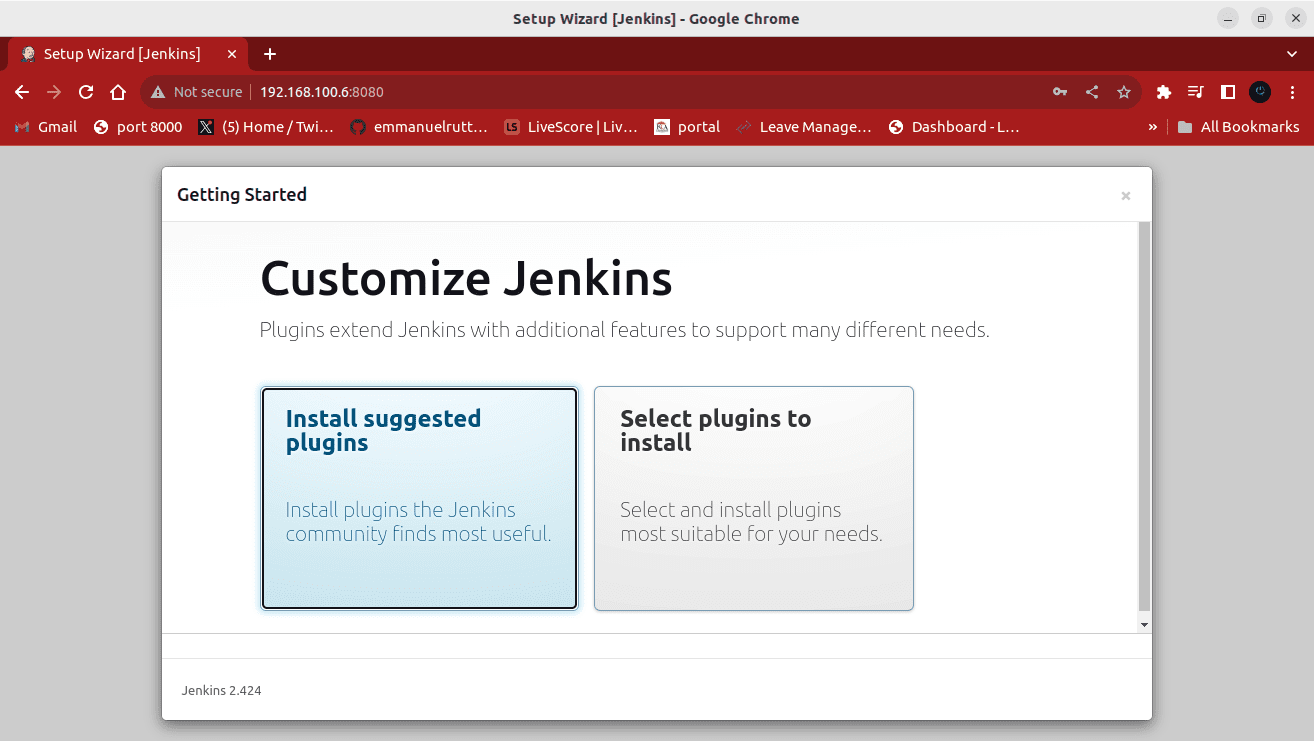
Step 9: Customize Jenkins installation
Once you have unlocked Jenkins, you will be guided through the setup wizard to customize your Jenkins installation according to your specific requirements.
During this step, you can:
- Choose to install recommended plugins that are commonly used in Jenkins setups.
- Select specific plugins based on your needs.
- Create an admin user account with a username and password. This admin account will have full control over Jenkins.
- Set up the Jenkins URL, which is the web address users will use to access Jenkins. By default, it is set to the server’s IP address or domain and port 8080.

Customize jenkins
The customization step allows you to tailor Jenkins to your development workflow and preferences. You can install additional plugins and make further configuration changes as your needs evolve.
Step 10: Start using Jenkins
With Jenkins successfully installed and configured, you can start automating your software development pipeline. To start, explore the Jenkins dashboard by navigating to the “New Item” page.
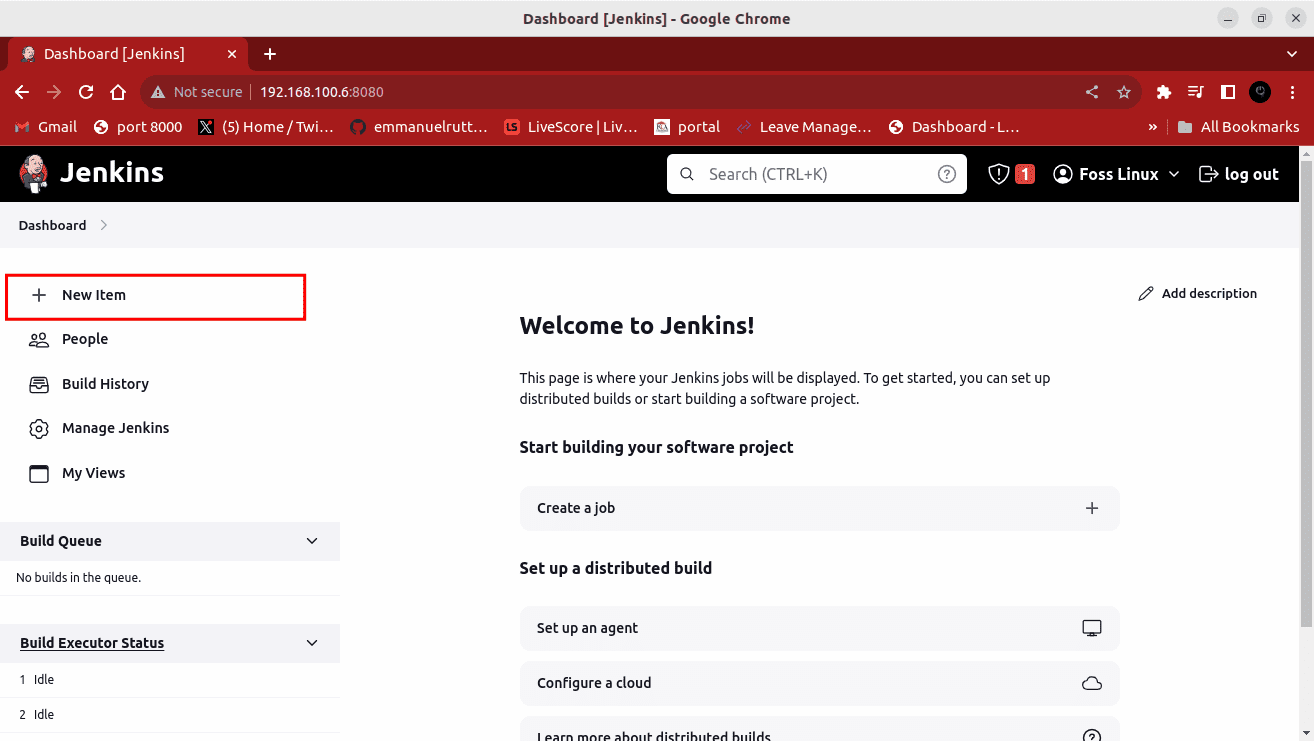
Click new item
Here, you can create your first Jenkins job, defining the tasks and automation steps that fit your project’s requirements.
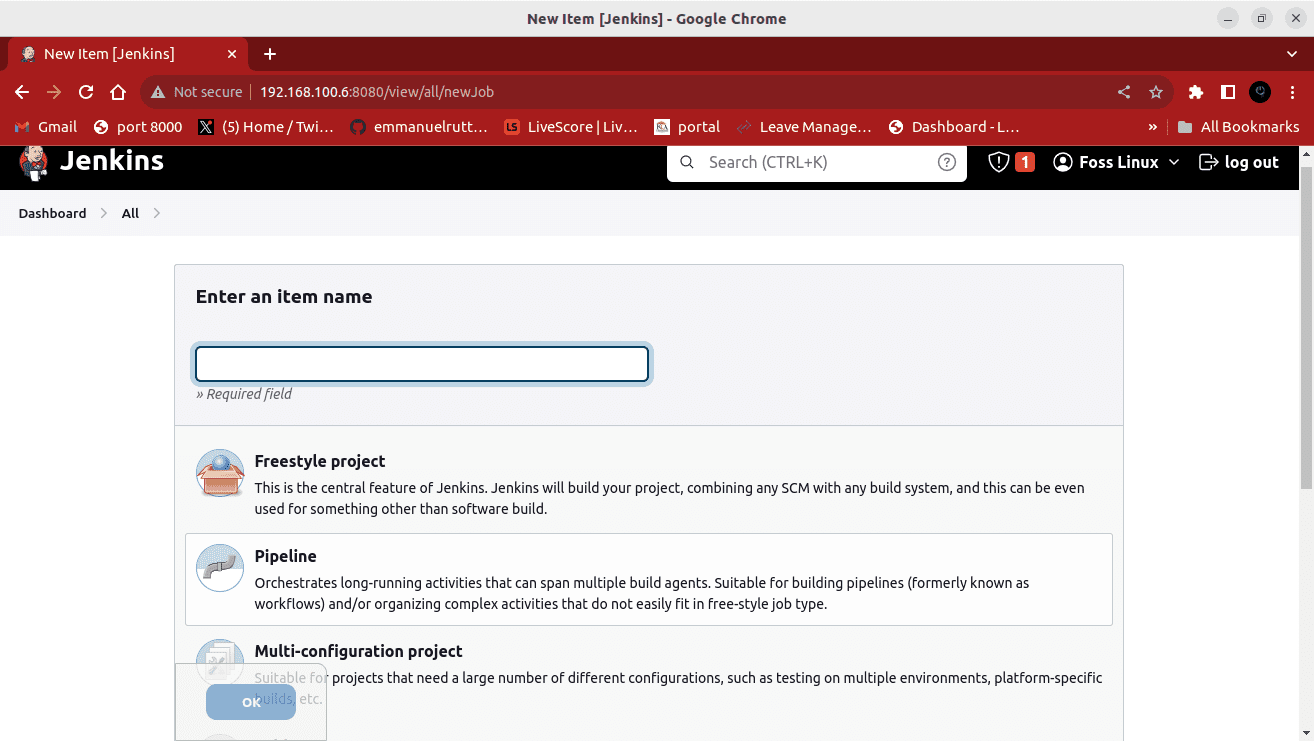
Create new item
The Jenkins dashboard serves as your central hub for managing and monitoring Jenkins jobs, configuring build pipelines, and keeping track of your projects’ progress. Experiment with Jenkins’s features, explore its extensive plugin ecosystem and begin your journey toward more efficient and automated software development.
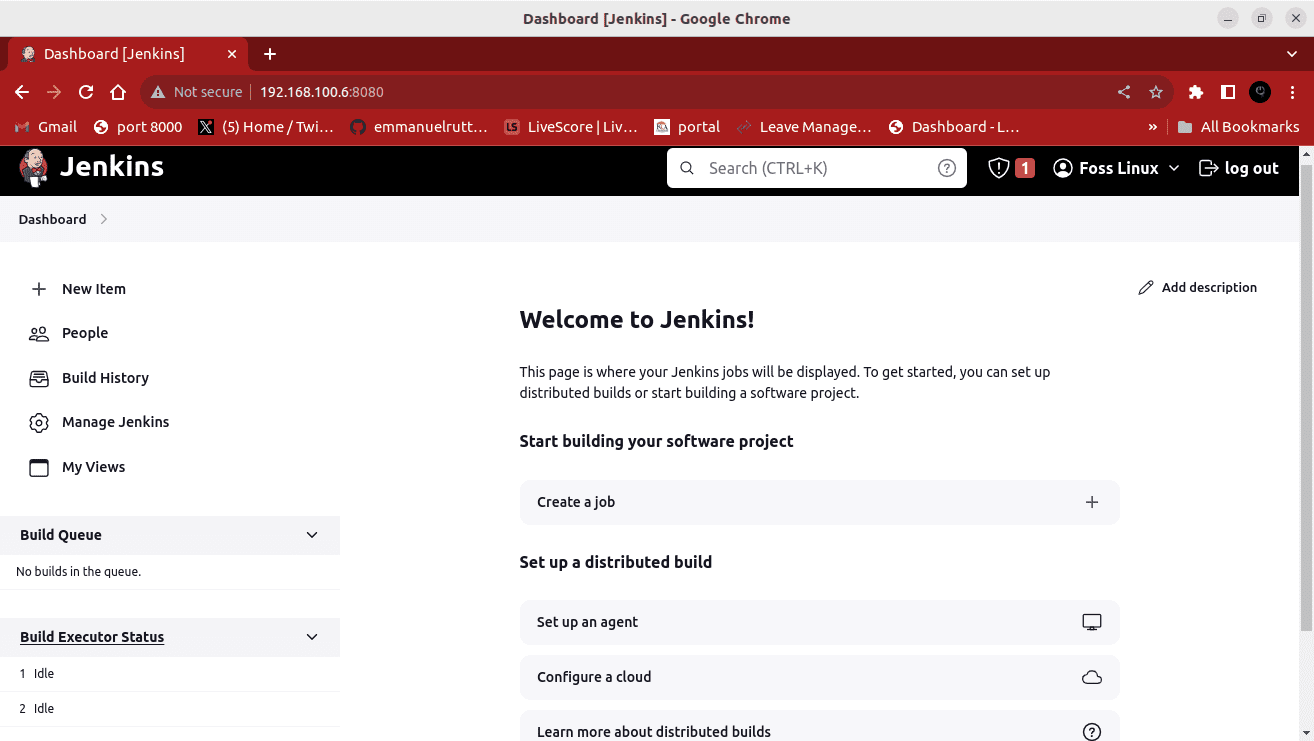
Jenkins dashboard
In the next sections of this guide, we will delve deeper into using Jenkins for continuous integration and explore some essential Jenkins plugins that can enhance your Jenkins experience. Stay tuned to unlock and experience the full potential of Jenkins in your development workflow.
Using Jenkins for continuous integration
Now that you have Jenkins up and running, it’s time to harness its power for continuous integration (CI). We will walk through the process of creating a Jenkins job that automates the build of a sample Java application sourced from a Git repository. This hands-on guide will enable you to grasp the practical aspects of using Jenkins in your development workflow.
Step 1: Create a new Jenkins job
- Log in to the Jenkins web interface: Open your web browser and navigate to the Jenkins web interface by entering the URL http://your_server_ip_or_domain:8080, replacing your_server_ip_or_domain with your server’s IP address or domain name. Log in using the root credentials you set up during the initial configuration.
- Create a new Jenkins job: In the left sidebar of the Jenkins dashboard, locate and click “New Item.” This action initiates the process of creating a new Jenkins job.
Click new item
- Name your job: In the “Enter an item name” field, provide a meaningful name for your Jenkins job. For example, you can name it “SampleJavaApp.”
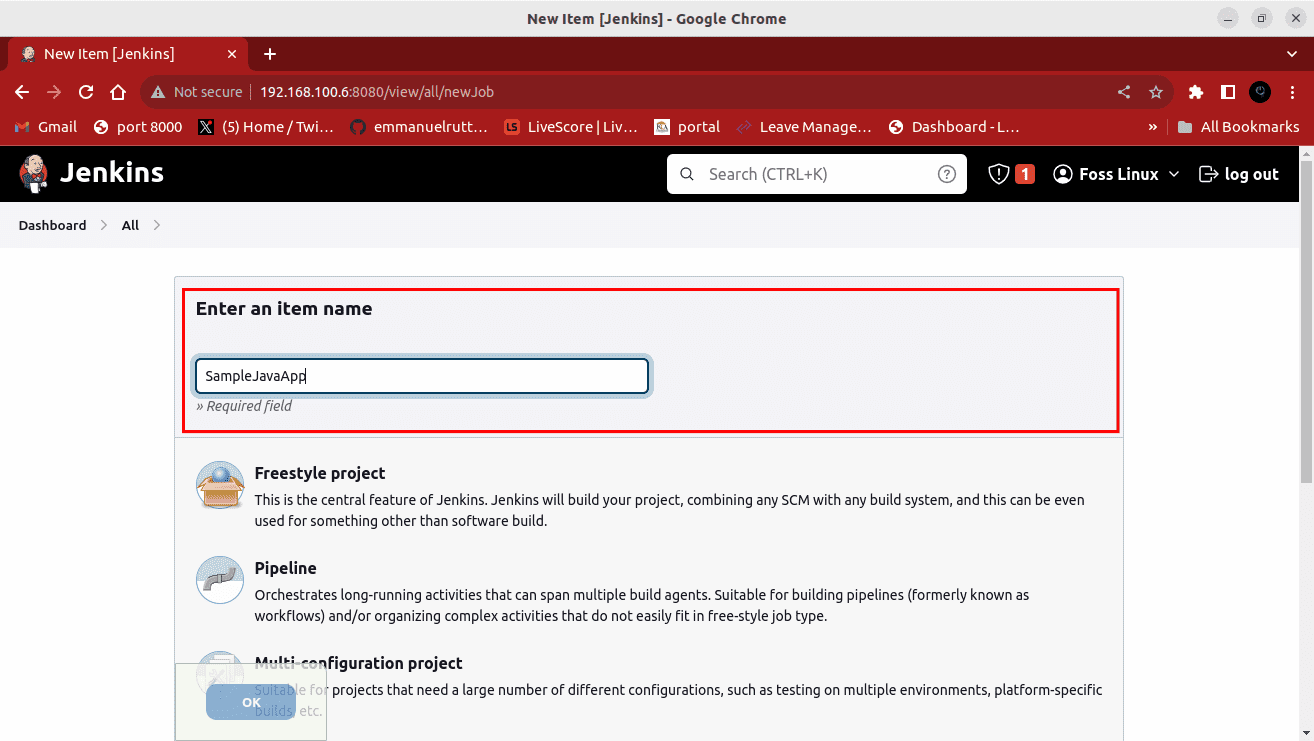
SampleJavaApp
- Select job type: Choose “Freestyle project” as the job type by clicking on it, then click “OK.” This selection sets up a basic Jenkins job that we will configure in the subsequent steps.
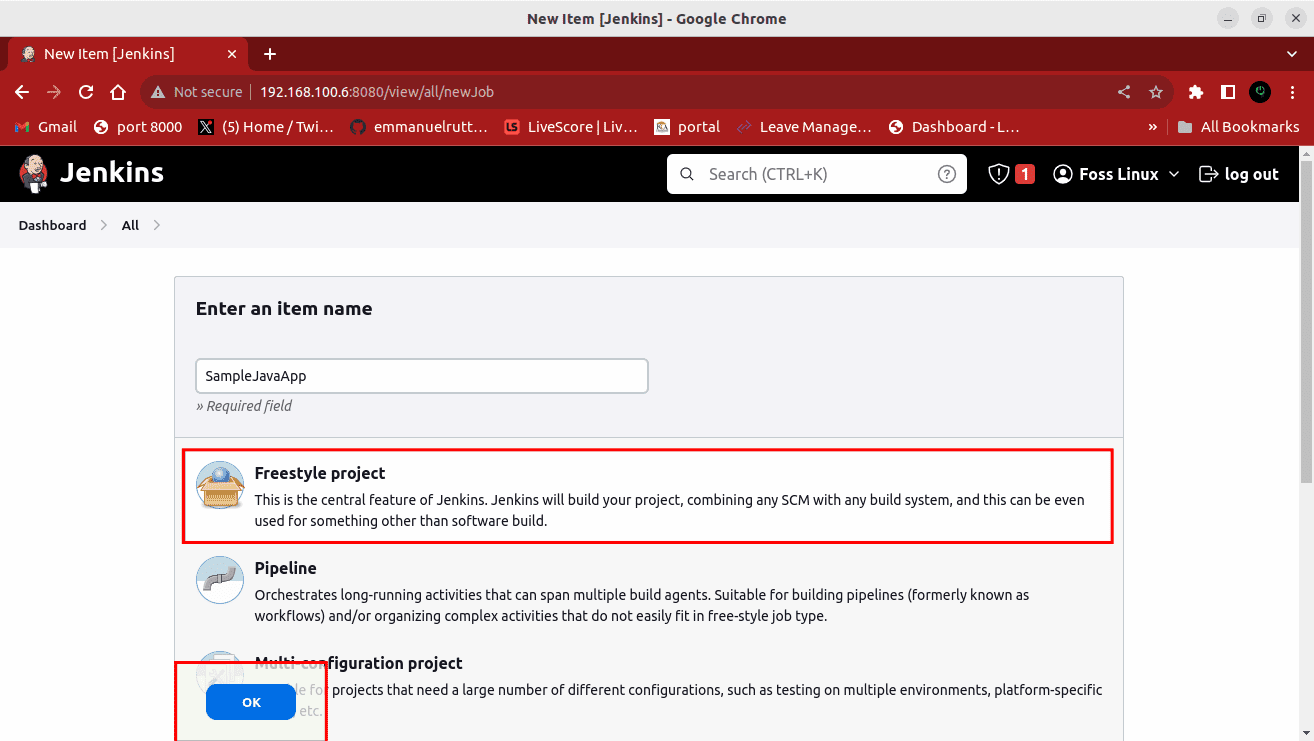
Choose freestyle project
Step 2: Configure source code management
Under the “Source Code Management” section of your newly created Jenkins job configuration, you will specify how Jenkins should access and manage your source code.
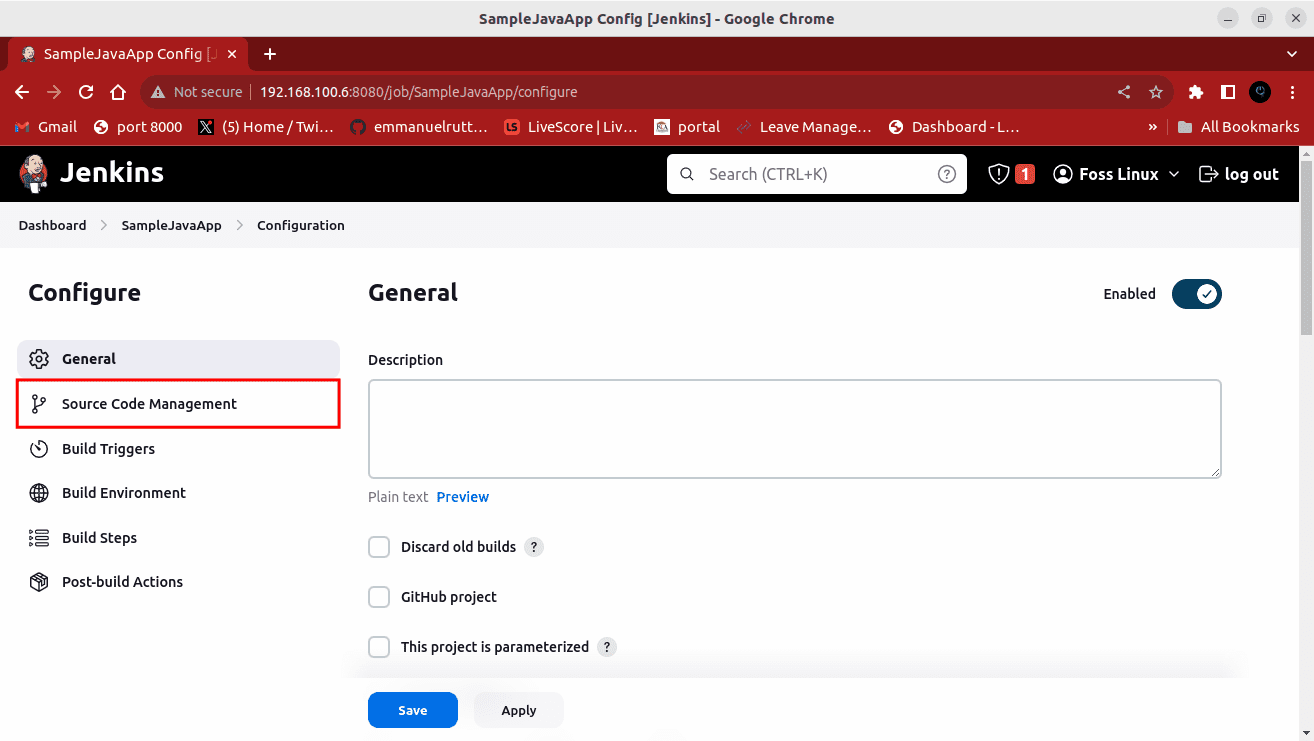
Source code management
- Choose version control system: Select your preferred version control system from the available options. For this example, we’ll use Git, a popular developer choice.
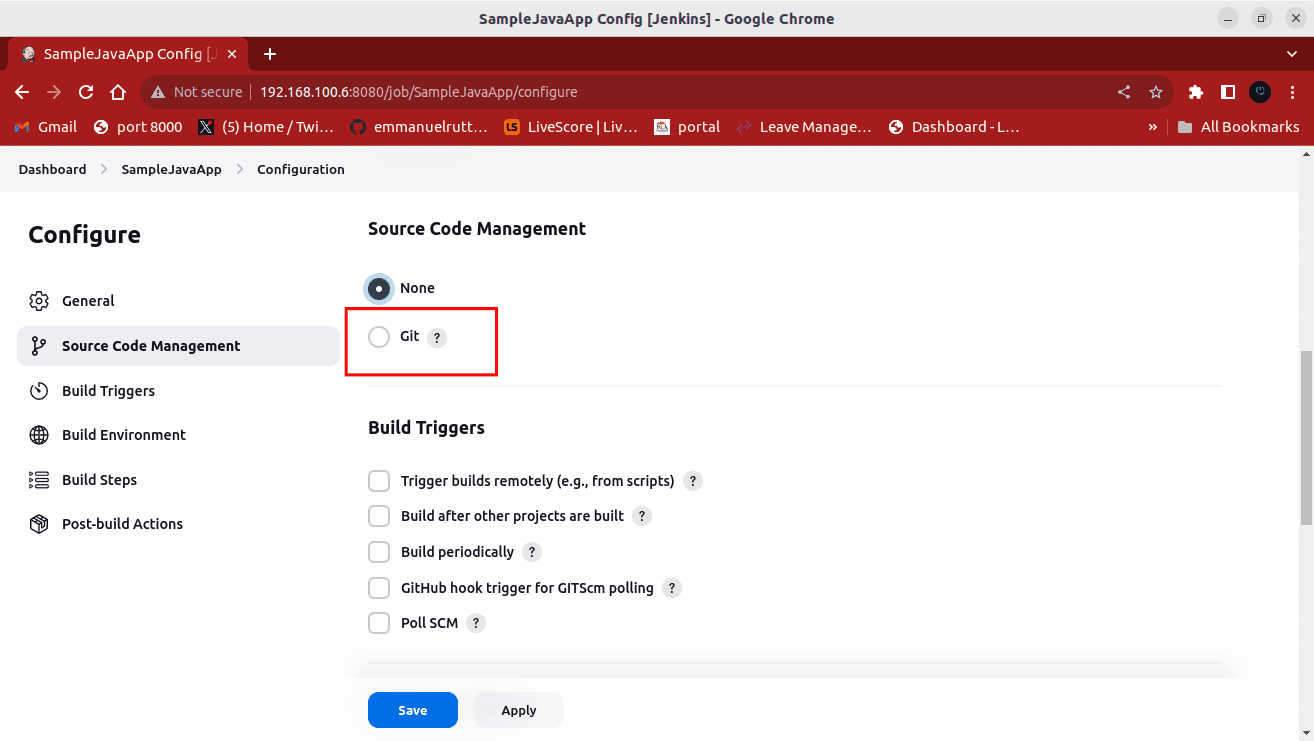
Choose Git
- Enter repository url: In the designated field, enter the URL of your Git repository where your Java application source code is hosted. Ensure that Jenkins can access this repository.
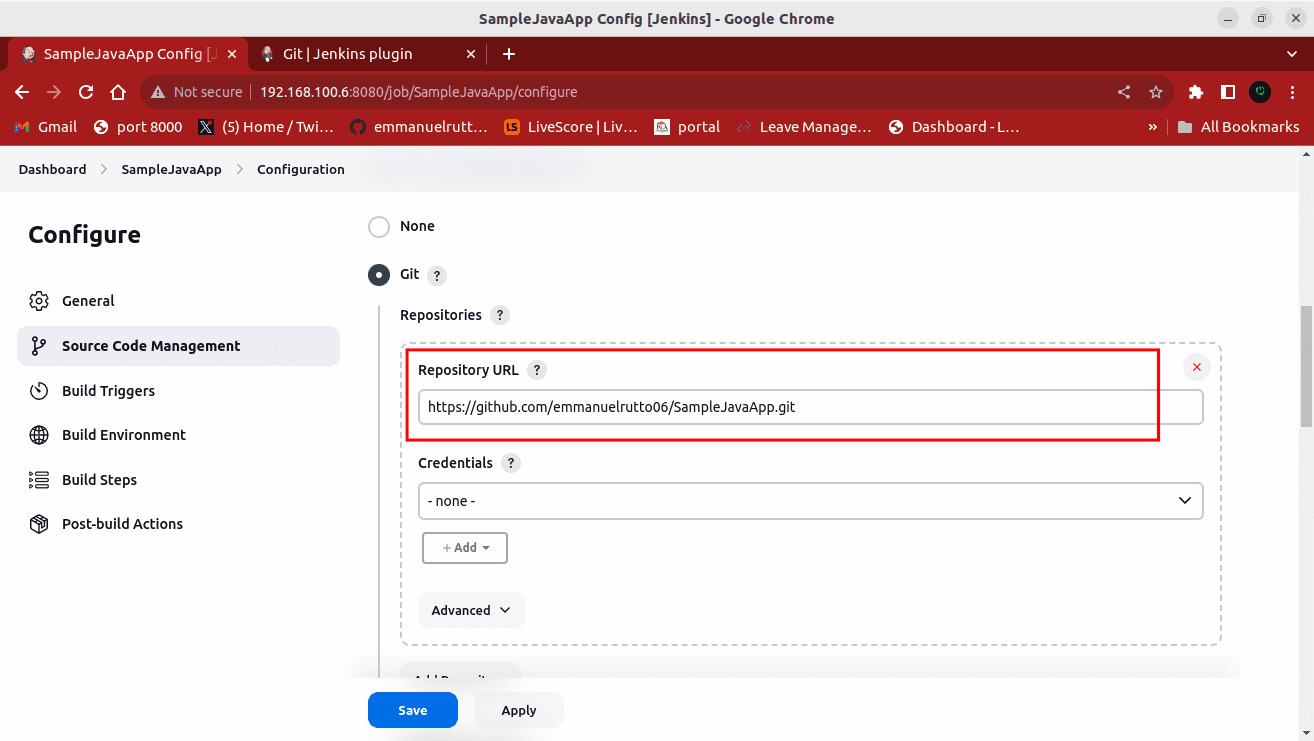
Add repository url
- Specify branch (optional): If you wish to build a specific repository branch, you can specify it in this section. For instance, you might want to build the “main” or “master” branch.
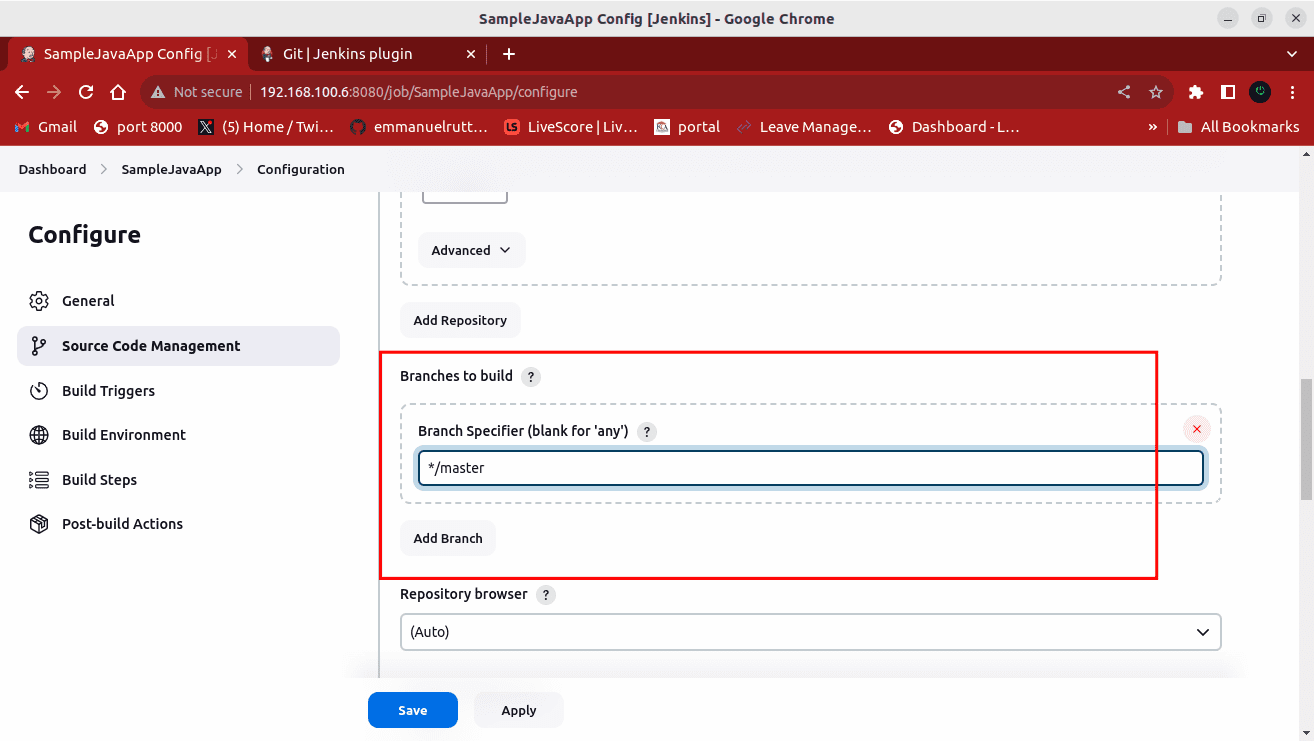
Specify branch
Step 3: Configure build triggers
The “Build Triggers” section determines when Jenkins should initiate a build job. It’s crucial to set up automatic triggers for continuous integration whenever changes are pushed to your Git repository.
- Enable automatic build trigger: Check the “Build when a change is pushed to GitHub” option (or its equivalent for your version control system). This option ensures that Jenkins automatically initiates a build whenever new code changes are pushed to your repository.
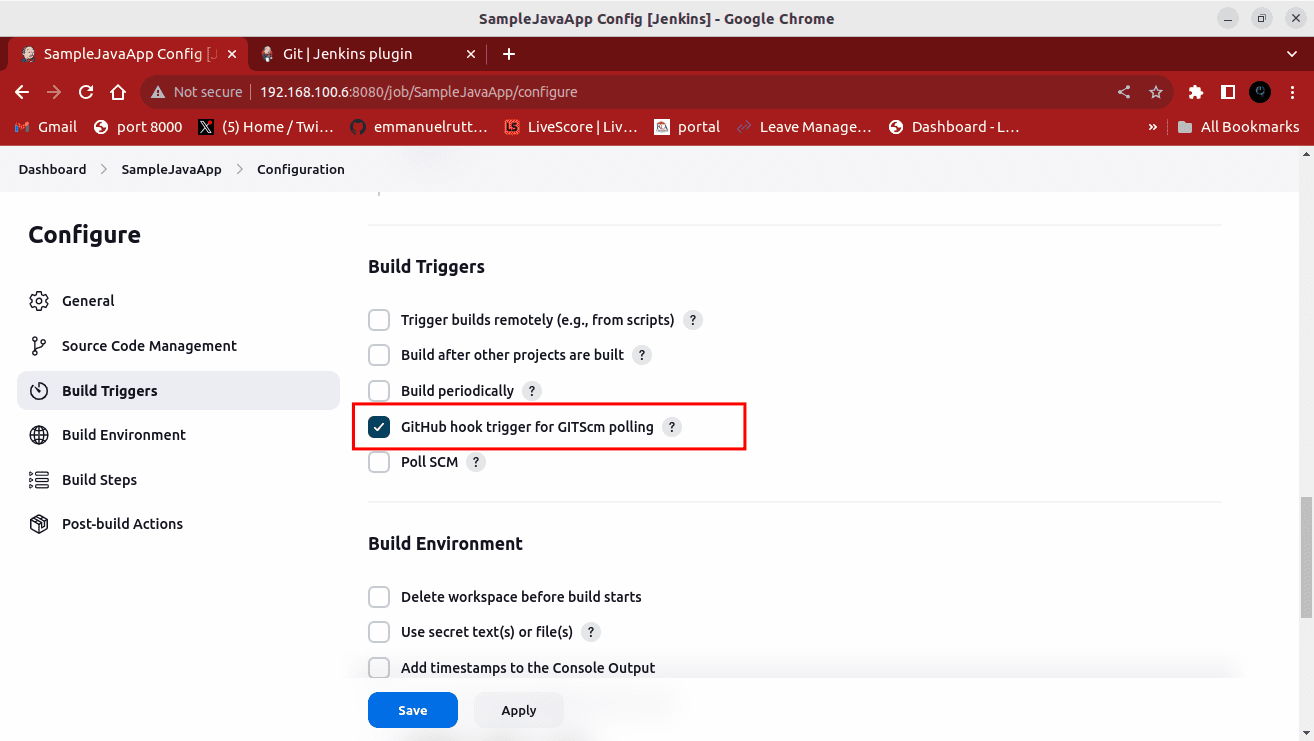
Build triggers automatically
Step 4: Configure build steps
The “Build Steps” section defines the steps and commands that Jenkins should execute to build your Java application.
- Add build step: Click “Add build step” to open a menu of available build step options. We’ll choose “Execute shell” in this example since we are working with a Linux-based system. If you’re using a different operating system, select the appropriate build step option, such as “Execute Windows batch command” for Windows.
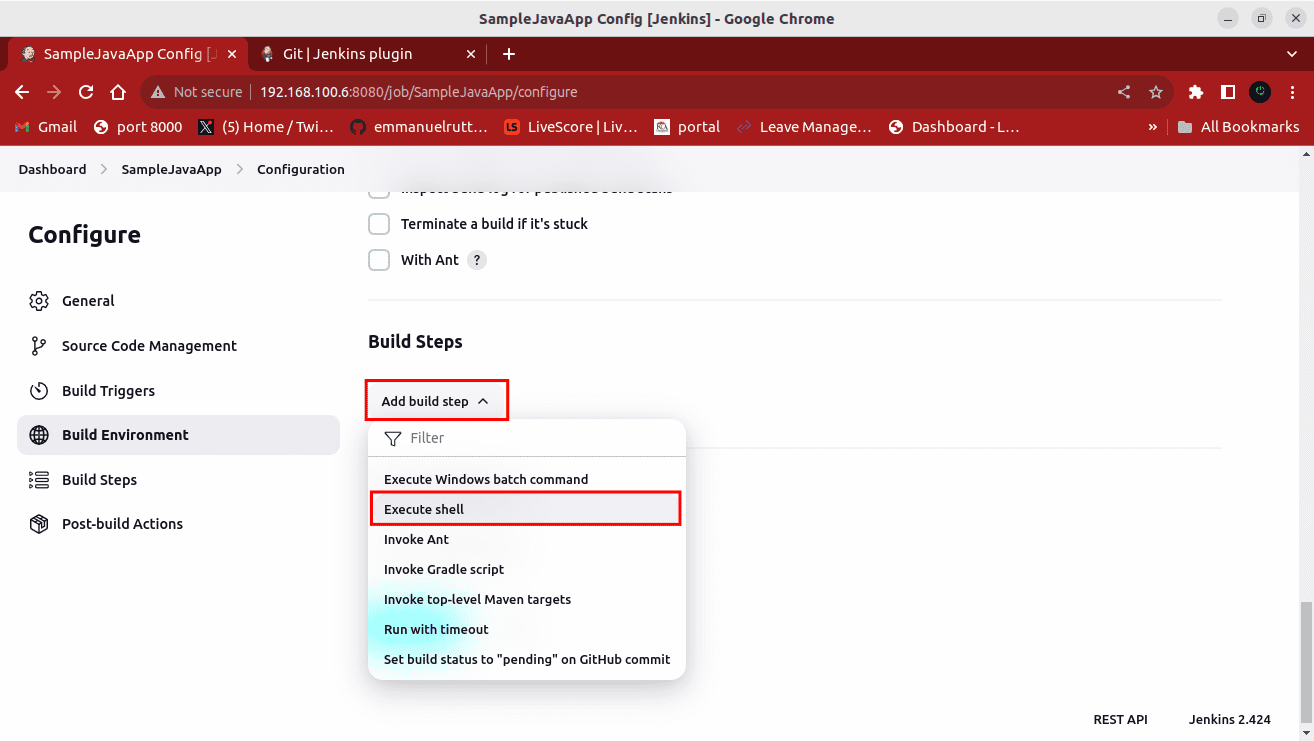
Add build setup then execute shell
- Enter build commands: In the command box that appears, you can now enter the build commands specific to your Java application. Jenkins will execute these commands during the build process. For instance, suppose you have a simple Java application named HelloWorld.java that you want to compile. In that case, your build commands might look like this:
#!/bin/bash

javac HelloWorld.java
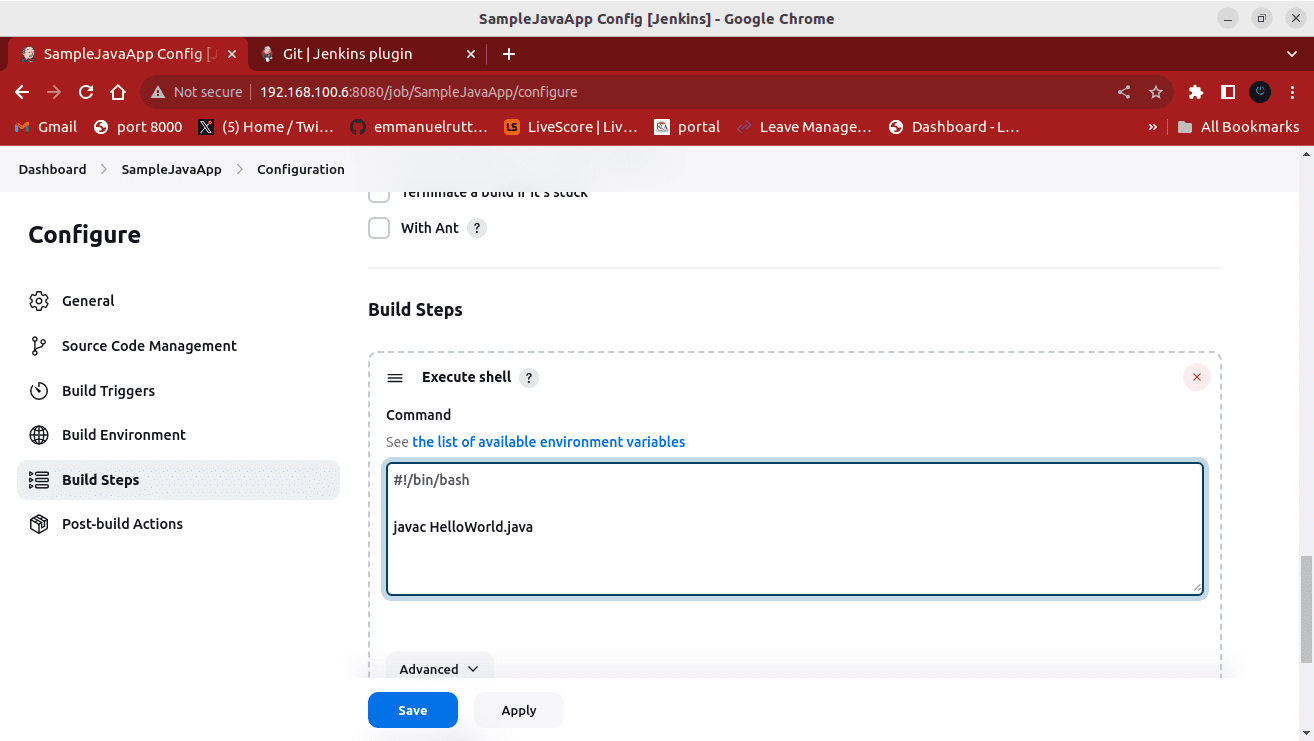
Add commands
Enclosed in a Bash script, these commands compile the HelloWorld.java source file.
Step 5: Save and build
After configuring your Jenkins job with the necessary details, it’s crucial to save your job configuration settings.
- Save configuration: Scroll down to the bottom of the job configuration page and click the “Save” button. This action stores your job’s settings and prepares it for execution.
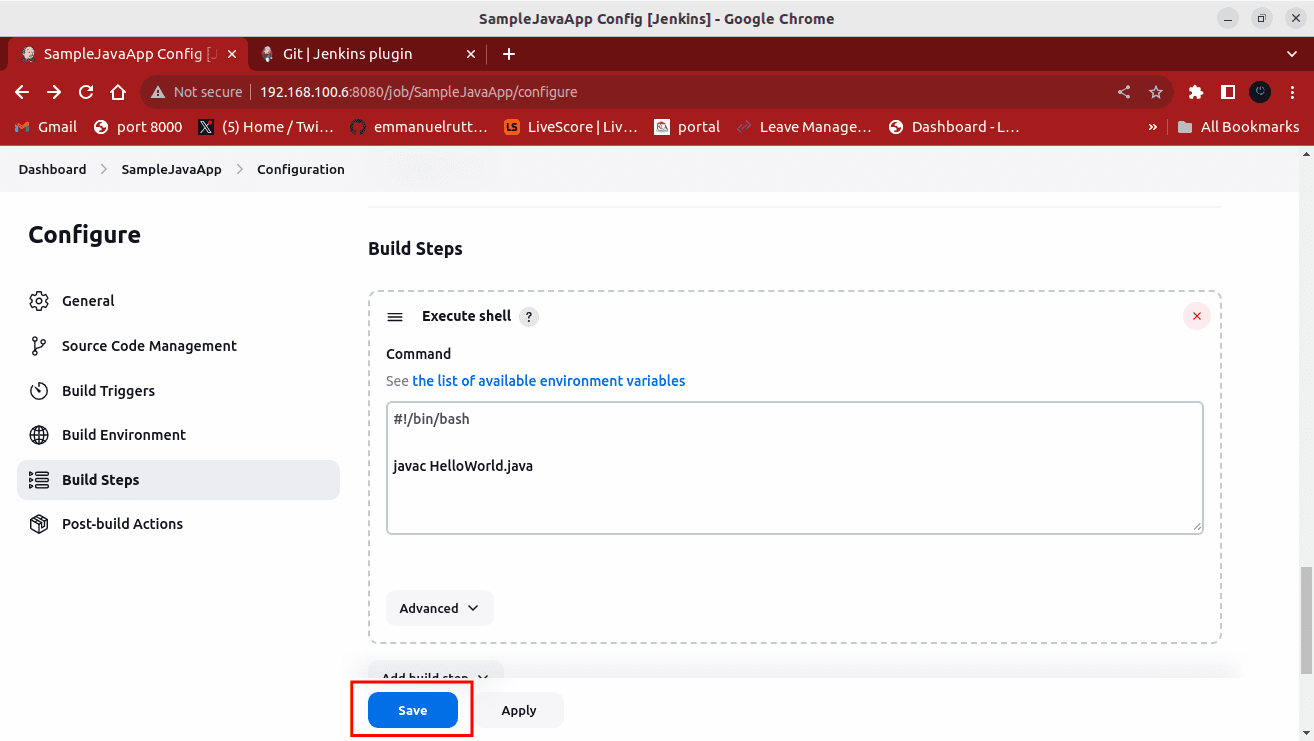
Click save
- Manually trigger a build: To initiate your first build manually, go to the homepage of your Jenkins job and click “Build Now.”
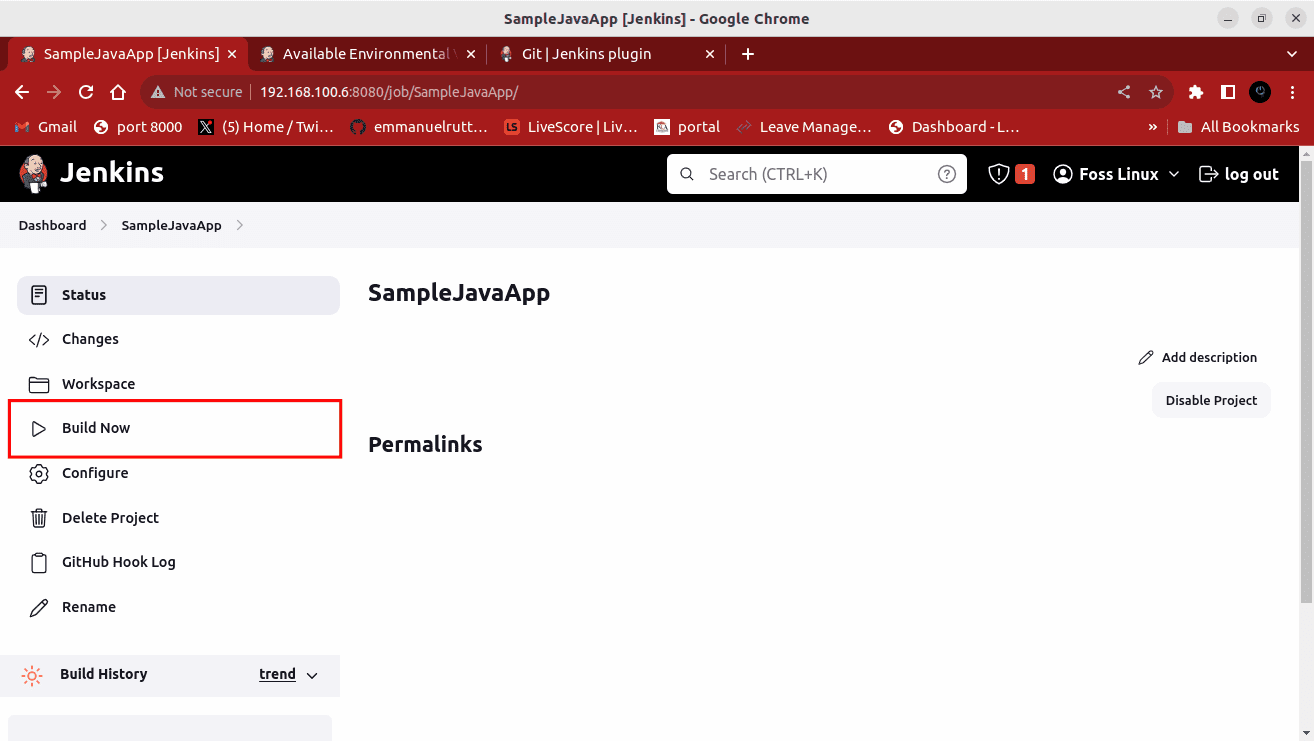
Click Build Now
This action instructs Jenkins to execute the defined build steps. You can monitor the progress and view build logs and reports in real time.
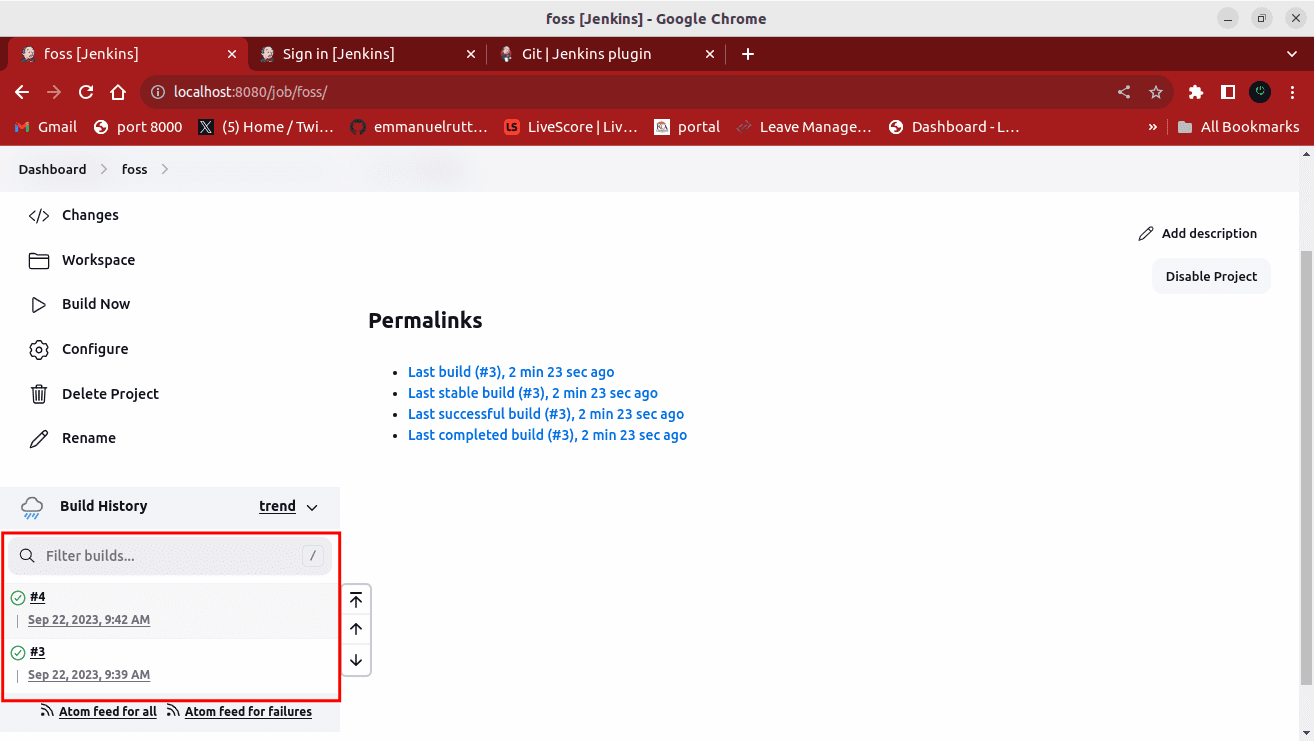
Track build progress
Step 6: Monitor build status
Jenkins provides a user-friendly interface for monitoring the status of your builds.
- View build status: On the homepage of your Jenkins job, you will find information about the most recent build, including its status (success or failure) and the timestamp of the last build.
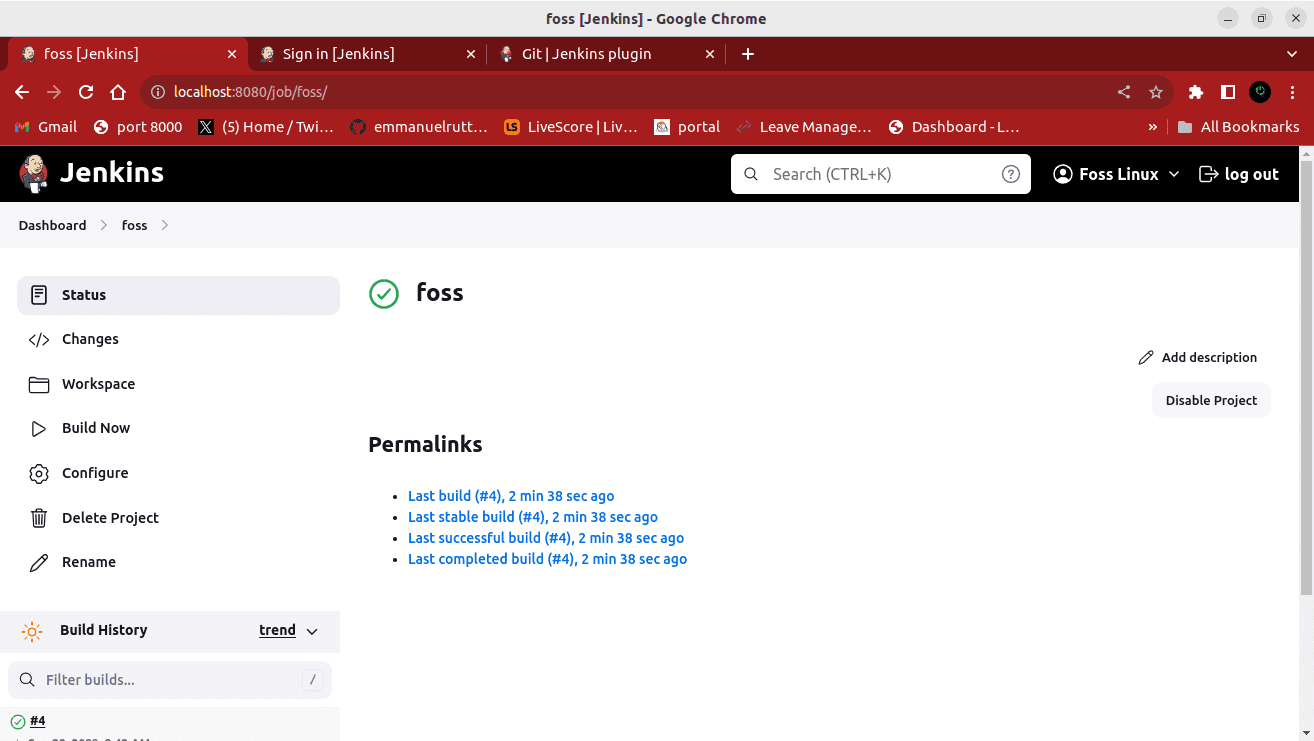
View build status
- Detailed build logs: Click on the build number or build status to access detailed build logs and reports. These logs provide invaluable information for debugging and identifying any issues arising during the build process.
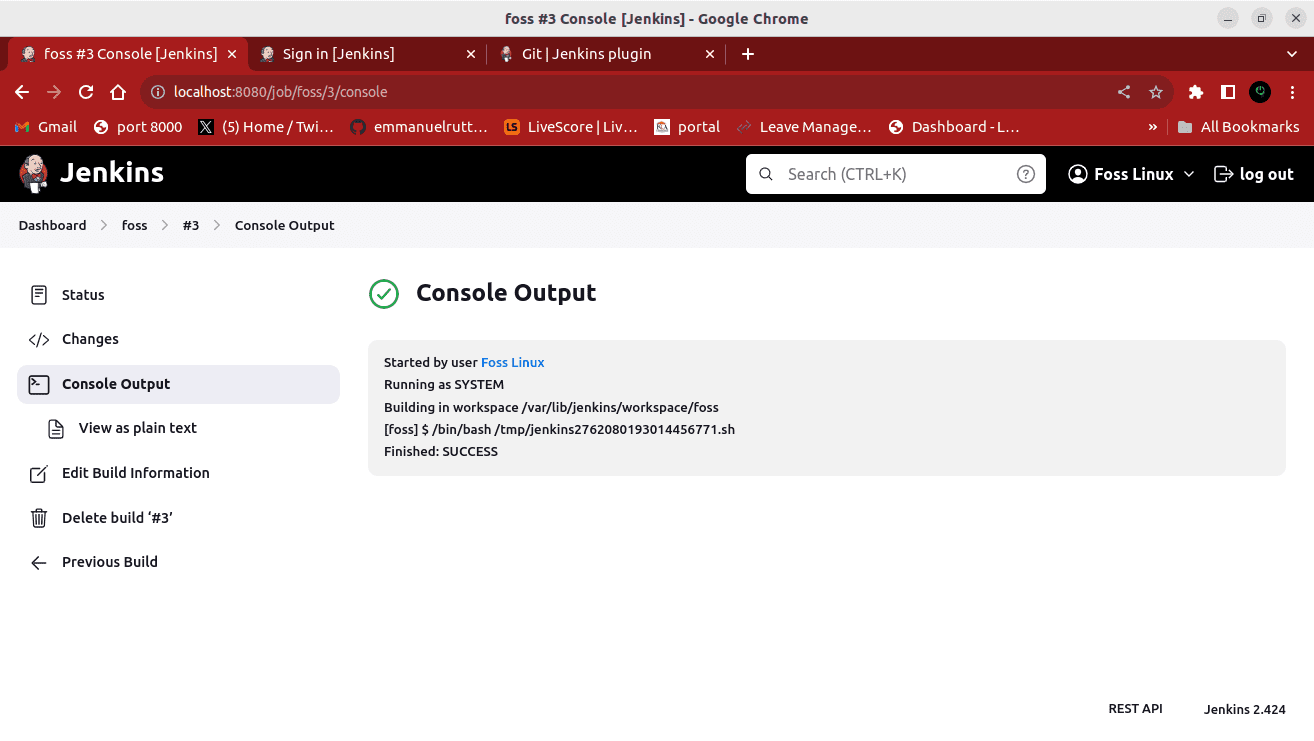
Detailed build logs
Following these steps, you’ve successfully set up a Jenkins job for continuous integration. Jenkins will automatically trigger builds whenever new code changes are pushed to your Git repository, helping you ensure that your Java application remains consistently built and tested. You can expand on this foundation to create more complex build and deployment pipelines tailored to your project’s needs.
In the subsequent Jenkins sections, we will dive deeper into Jenkins plugins and explore some essential ones that can further enhance your Jenkins experience, enabling you to automate more aspects of your software development pipeline.Top of Form
Jenkins plugins for enhanced functionality
Jenkins’ extensibility is one of its defining features. You can enhance its functionality by installing plugins that cater to your specific needs. Here are a few essential plugins that you might find useful:
1. GitHub plugin
If you’re using GitHub for version control, the GitHub plugin allows you to seamlessly integrate Jenkins with your GitHub repositories. It enables the automatic triggering of Jenkins builds on code commits and pull requests.
2. Docker plugin
The Docker plugin simplifies the integration of Docker containers with Jenkins. You can build, push, and run Docker containers as part of your Jenkins pipeline, enabling you to containerize your applications effortlessly.
3. Pipeline plugin
The Pipeline plugin, also known as Jenkins Pipeline DSL, allows you to define your CI/CD pipeline as code. It offers advanced scripting capabilities for defining and managing complex Jenkins workflows.
4. SonarQube scanner plugin
The SonarQube Scanner plugin integrates Jenkins with SonarQube, a popular code analysis platform, for code quality and static code analysis. It provides detailed metrics and reports to help you improve code quality.
5. Slack notification plugin
Keep your team informed about Jenkins builds and deployments using the Slack Notification plugin. It sends notifications to your Slack channels for real-time collaboration and awareness.
To install these plugins, follow these steps:
- Log in to the jenkins web interface.
- Click on “Manage Jenkins” in the left sidebar.

Manage Jenkins
- Select “Manage Plugins.”
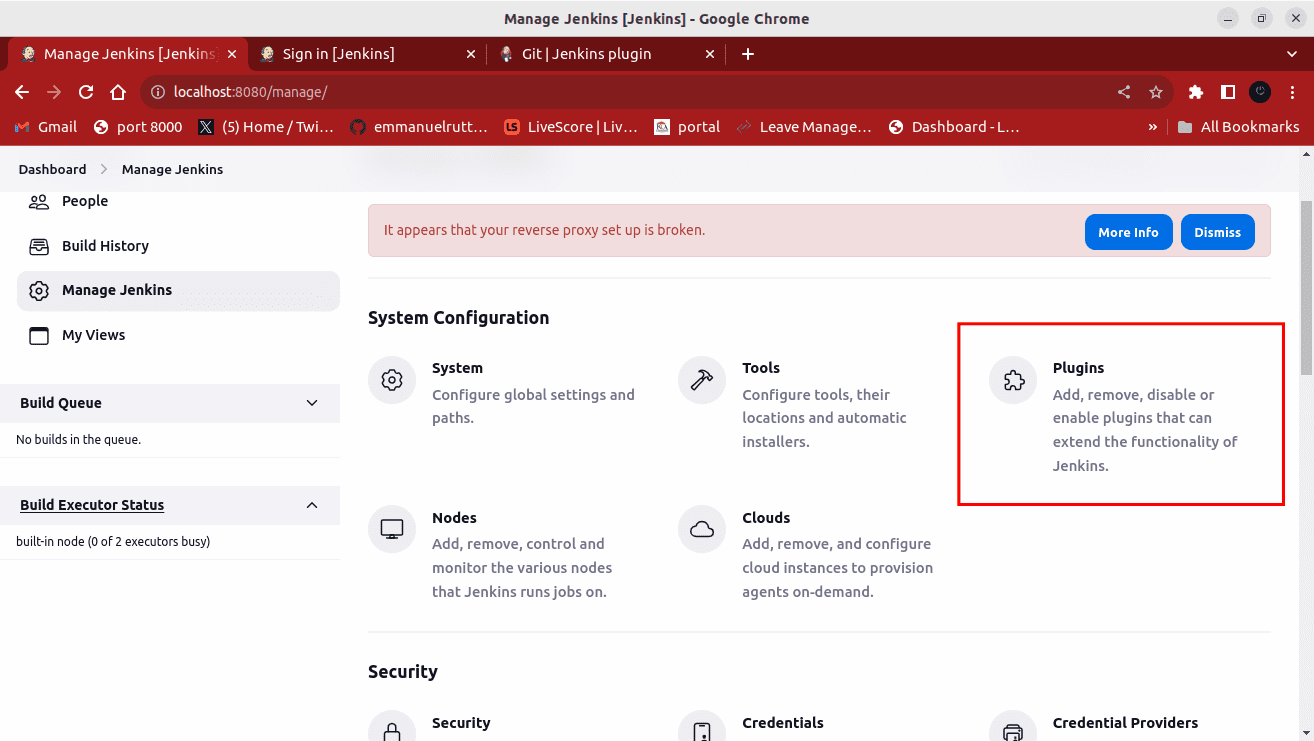
Click Plugins
- In the “Available” tab, search for the desired plugin.
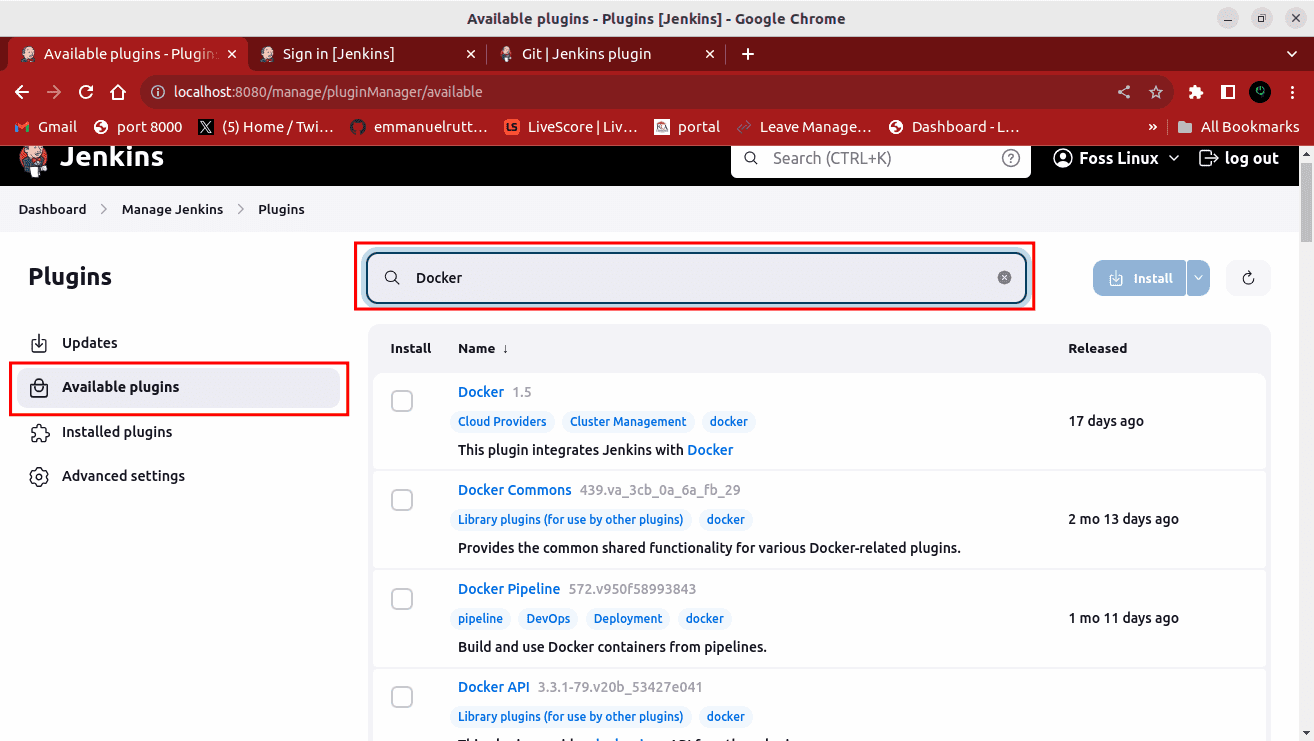
Under Available plugins choose your desired plugin
- Check the box next to the plugin’s name.
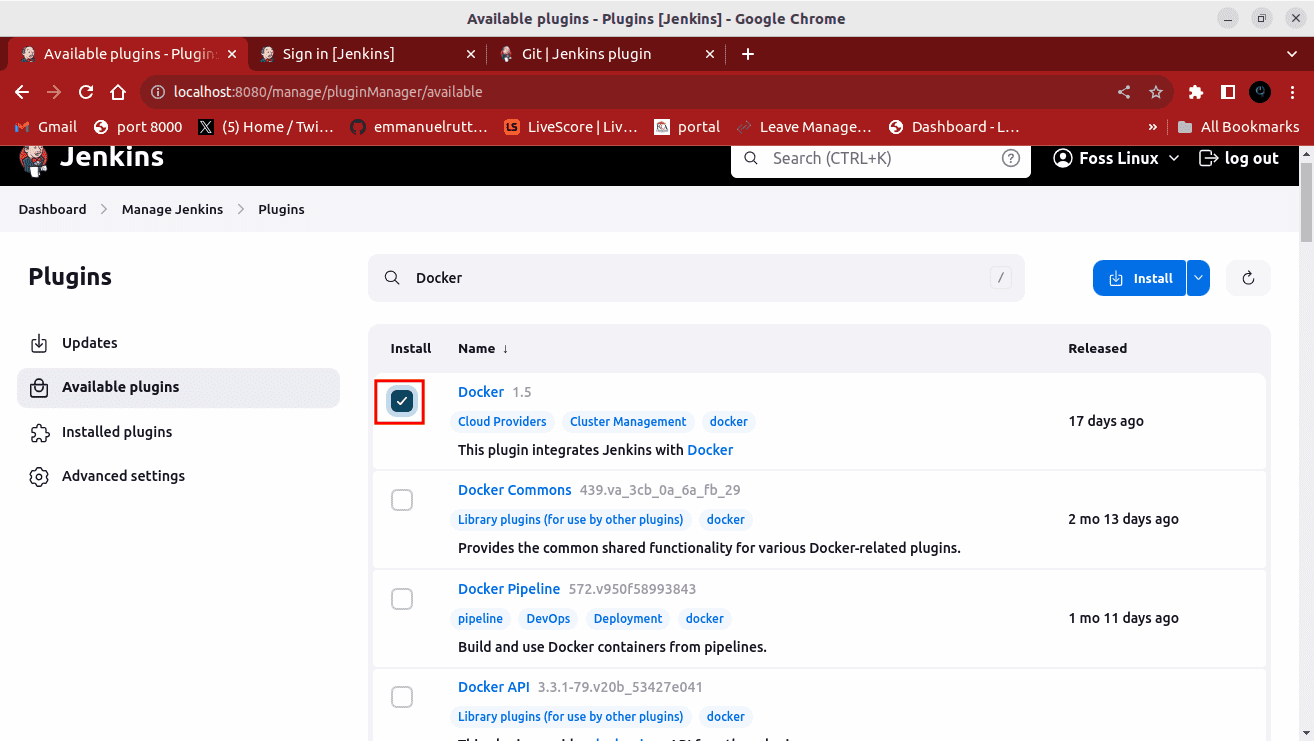
Check box next to plugin name
- Click “Install.”
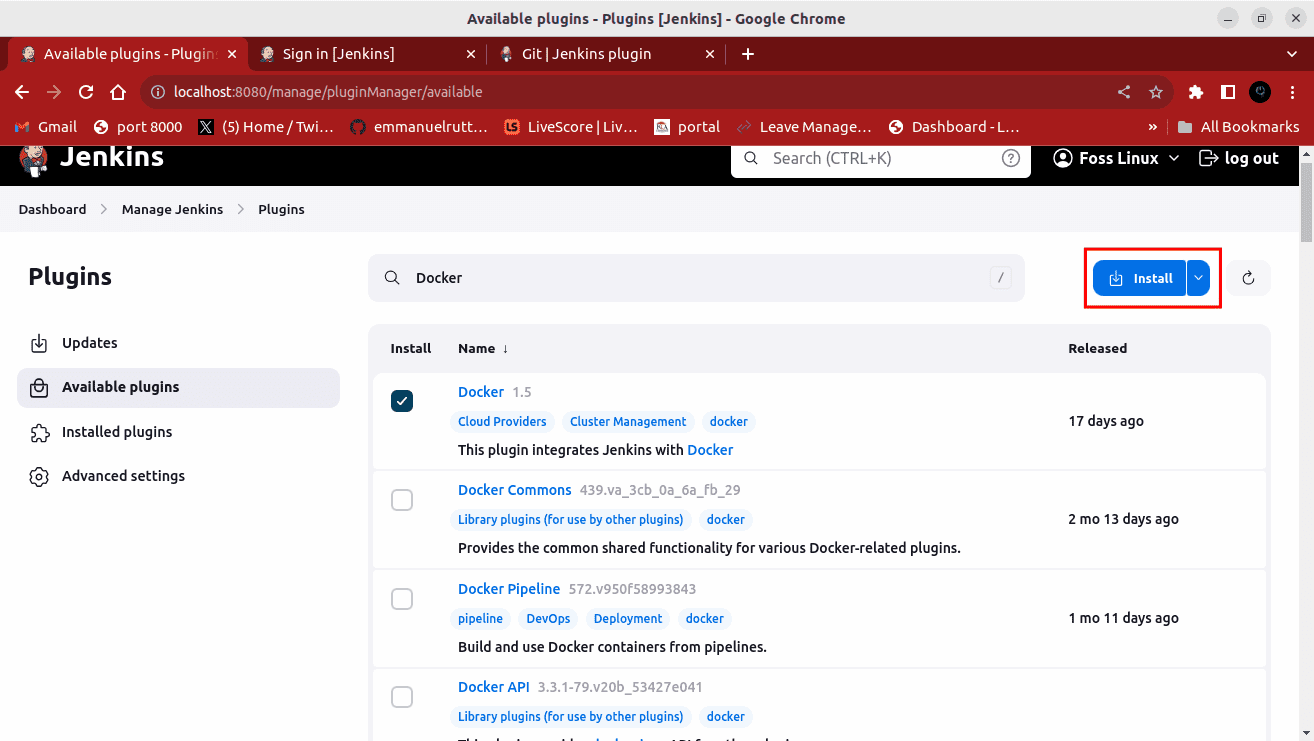
Click Install
Jenkins best practices
As you explore Jenkins further, here are some best practices to keep in mind:
1. Keep your Jenkins server secure
- Regularly update Jenkins and its plugins to patch security vulnerabilities.
- Restrict access to the Jenkins web interface using authentication and authorization.
- Monitor logs for suspicious activity and set up alerts for security breaches.
2. Backup Jenkins configuration
- Implement regular backups of your Jenkins configuration to prevent data loss.
- Store backups in a secure space, separate from the Jenkins server.
3. Use Jenkinsfile for pipeline as code
- Define your CI/CD pipelines using Jenkinsfile, which allows you to version control your pipeline configurations alongside your code.
- Store Jenkins files in your version control system for traceability and collaboration.
4. Leverage agent nodes
- Use agent nodes to distribute builds and jobs across multiple machines to parallelize tasks and optimize resource usage.
5. Monitor Jenkins performance
- Monitor your Jenkins server’s resource utilization and performance to prevent bottlenecks.
- Consider scaling Jenkins horizontally by adding additional build agents if needed.
Conclusion
Congratulations! You’ve successfully installed Jenkins on your Linux machine and learned how to create a basic Jenkins job for continuous integration. By leveraging Jenkins and its extensive plugin ecosystem, you can automate and streamline your software development workflow, ultimately leading to faster development cycles and higher-quality software.
Remember, Jenkins is a versatile tool with countless possibilities. Explore its features, experiment with different plugins, and tailor it to your needs. Whether you’re a developer looking to automate code builds or a DevOps engineer orchestrating complex deployment pipelines, Jenkins has you covered.
Thank you for joining us on this journey to explore Jenkins on Linux. As you continue to harness the power of automation with Jenkins, you’ll discover how it can transform your development process and make your software projects more efficient and reliable. Happy automating!