
Sonatype Nexus is a popular repository manager used worldwide for most of the components, binaries, and build artifacts. It comes with support for the Java Virtual Machine (JVM) ecosystem, including Gradle, Ant, Maven, and Ivy.
Compatible with standard tools including Eclipse, IntelliJ, Hudson, Jenkins, Puppet, Chef, Docker, etc., Sonatype Nexus repo can manage dev components through delivery for the binaries containers, assemblies, and finished goods.
In this tutorial, we will provide you a comprehensive guide on setting up Sonatype Nexus Repository OSS version on CentOS 7.
Installing Sonatype Nexus Repository OSS on CentOS 7
Before starting the tutorial, let’s look at the minimum system requirements for running the Sonatype Nexus Repo.
System requirements
- Minimum CPUs: 4, Recommended CPUs: 8+
- Minimum physical/RAM on the host 8GB
1. Pre-installation
Begin with setting the Hostname.
hostnamectl set-hostname nexus
Update your CentOS system.
yum update -y
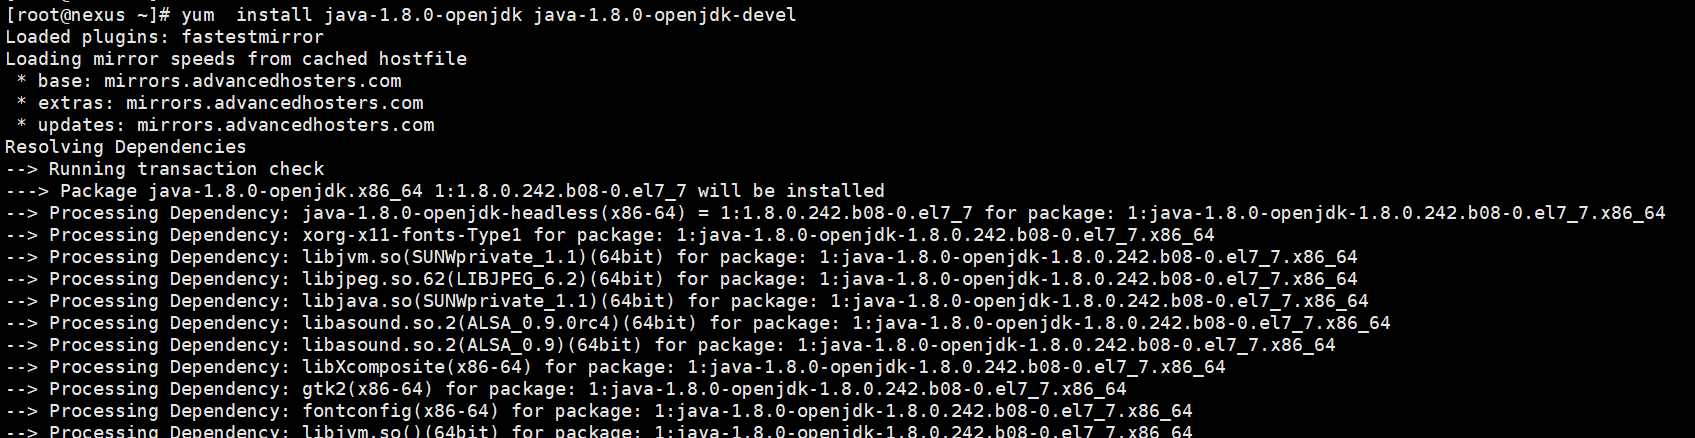
Install Java using the following command:
yum -y install java-1.8.0-openjdk java-1.8.0-openjdk-devel
Install JAVA
After installation is complete, check the java version to make sure you are all set to go to the next step of downloading the Repo.
java -version

JAVA Version
2. Download Nexus Repository Manager 3
Navigate to the opt directory:
cd /opt
Copy the latest URL of the Repo from the official website and then download it using wget.
wget https://download.sonatype.com/nexus/3/latest-unix.tar.gz
Extract the tar file.
tar -xvzf latest-unix.tar.gz
You should see two directories, including nexus files and nexus data directory.
ls -lh

Extracted Folders
Rename the folders.
mv nexus-3.20.1-01 nexus
mv sonatype-work nexusdata

Rename Directories
3. Set User/Permissions and Configurations
I. Add a user for a nexus service.
useradd --system --no-create-home nexus
II. Set the ownership for nexus files and nexus data.
chown -R nexus:nexus /opt/nexus
chown -R nexus:nexus /opt/nexusdata
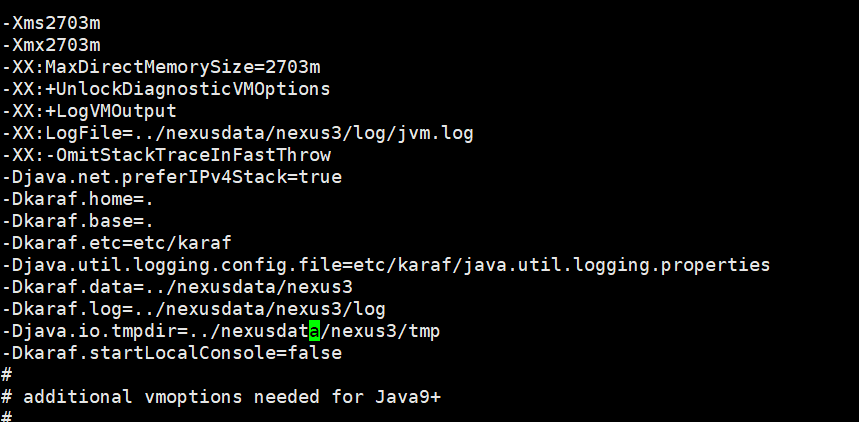
III. Change Nexus configuration and set the custom data directory
Edit “nexus.vmoptions”.
vim /opt/nexus/bin/nexus.vmoptions
Change the data directory.
-Xms2703m
-Xmx2703m
-XX:MaxDirectMemorySize=2703m
-XX:+UnlockDiagnosticVMOptions
-XX:+LogVMOutput
-XX:LogFile=../nexusdata/nexus3/log/jvm.log
-XX:-OmitStackTraceInFastThrow
-Djava.net.preferIPv4Stack=true
-Dkaraf.home=.
-Dkaraf.base=.
-Dkaraf.etc=etc/karaf
-Djava.util.logging.config.file=etc/karaf/java.util.logging.properties
-Dkaraf.data=../nexusdata/nexus3
-Dkaraf.log=../nexusdata/nexus3/log
-Djava.io.tmpdir=../nexusdata/nexus3/tmp
-Dkaraf.startLocalConsole=false
Save and exit the file.
Change Nexus Data Directory
IV. Change the user for the nexus service account.
Edit “nexus.rc” file.
vim /opt/nexus/bin/nexus.rc
Uncomment “run_as_user” parameter and add new value.
run_as_user="nexus"
V. Stop listening for remote connections.
We need to modify the “nexus-default.properties” file.
vim /opt/nexus/etc/nexus-default.properties
Change application-host=0.0.0.0 to application-host=127.0.0.1.

Change Application Host
VI. Configure the open file limit of the nexus user.
vim /etc/security/limits.conf
Add the below values to the file.
nexus - nofile 65536
Save and the exit file.
4. Set Nexus as a System Service
Create the Systemd service file in “/etc/systemd/system/”.
vim /etc/systemd/system/nexus.service
Add the following to the file.
[Unit]
Description=Nexus Service
After=syslog.target network.target

[Service]
Type=forking
LimitNOFILE=65536
ExecStart=/opt/nexus/bin/nexus start
ExecStop=/opt/nexus/bin/nexus stop
User=nexus
Group=nexus
Restart=on-failure

[Install]
WantedBy=multi-user.target
Reload systemctl.
systemctl daemon-reload
Enable service on system boot.
systemctl enable nexus.service
Start service.
systemctl start nexus.service
Monitor the log file.
tail -f /opt/nexusdata/nexus3/log/nexus.log
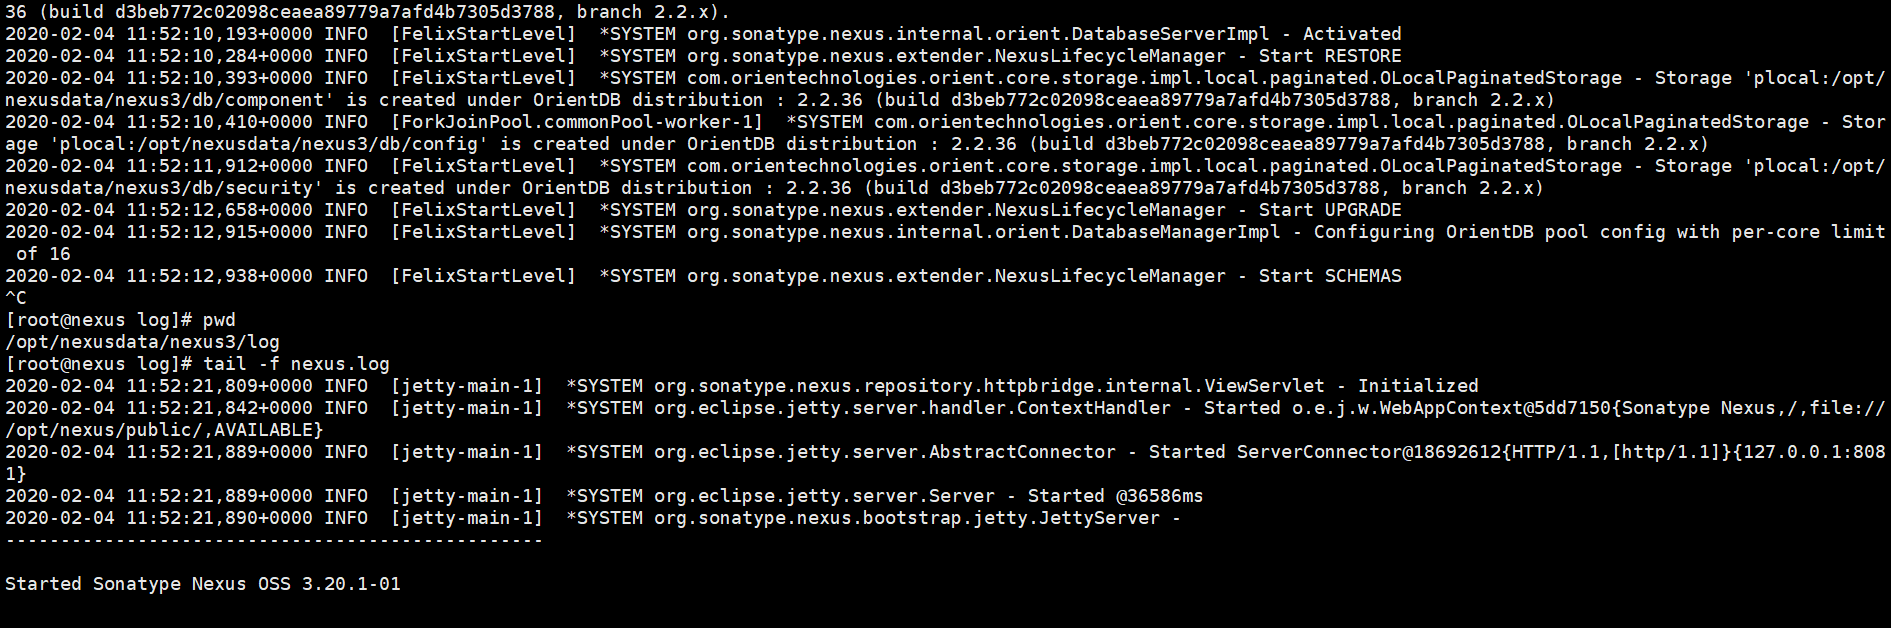
Logfile
Check the service port.
netstat -tunlp | grep 8081

Check Port
5. Setup up Nginx
Setup epel Repositories.
yum install -y epel-release
List the repositories.
yum repolist
Install Nginx.
yum install nginx
set nginx on system boot
systemctl enable nginx
check the status of Nginx and start service if the service is not running.
systemctl status nginx
systemctl start nginx
6. Set DNS records for the servers.
Then go to your DNS manager and add A record for your server.
A Domain Name Server IP
Here we have used AWS route 53 to setup our DNS.
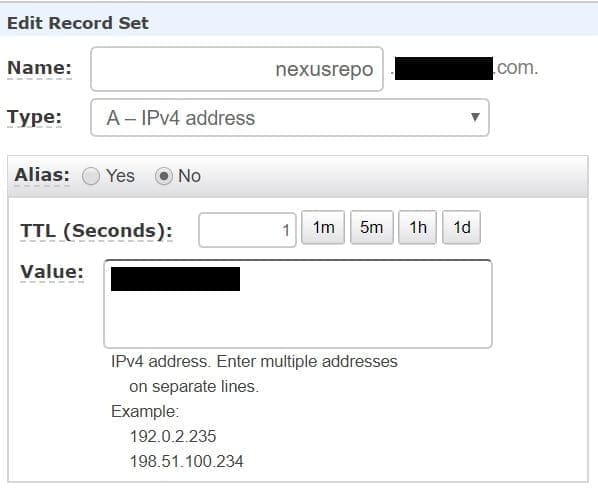
DNS Record
7. Configure SSL using certbot
I. Install certbot packages first.
yum install certbot python2-certbot-nginx
II. Install certificates.
certbot --nginx
It will ask a few questions and enter email, domain name, and needed inputs as follows.
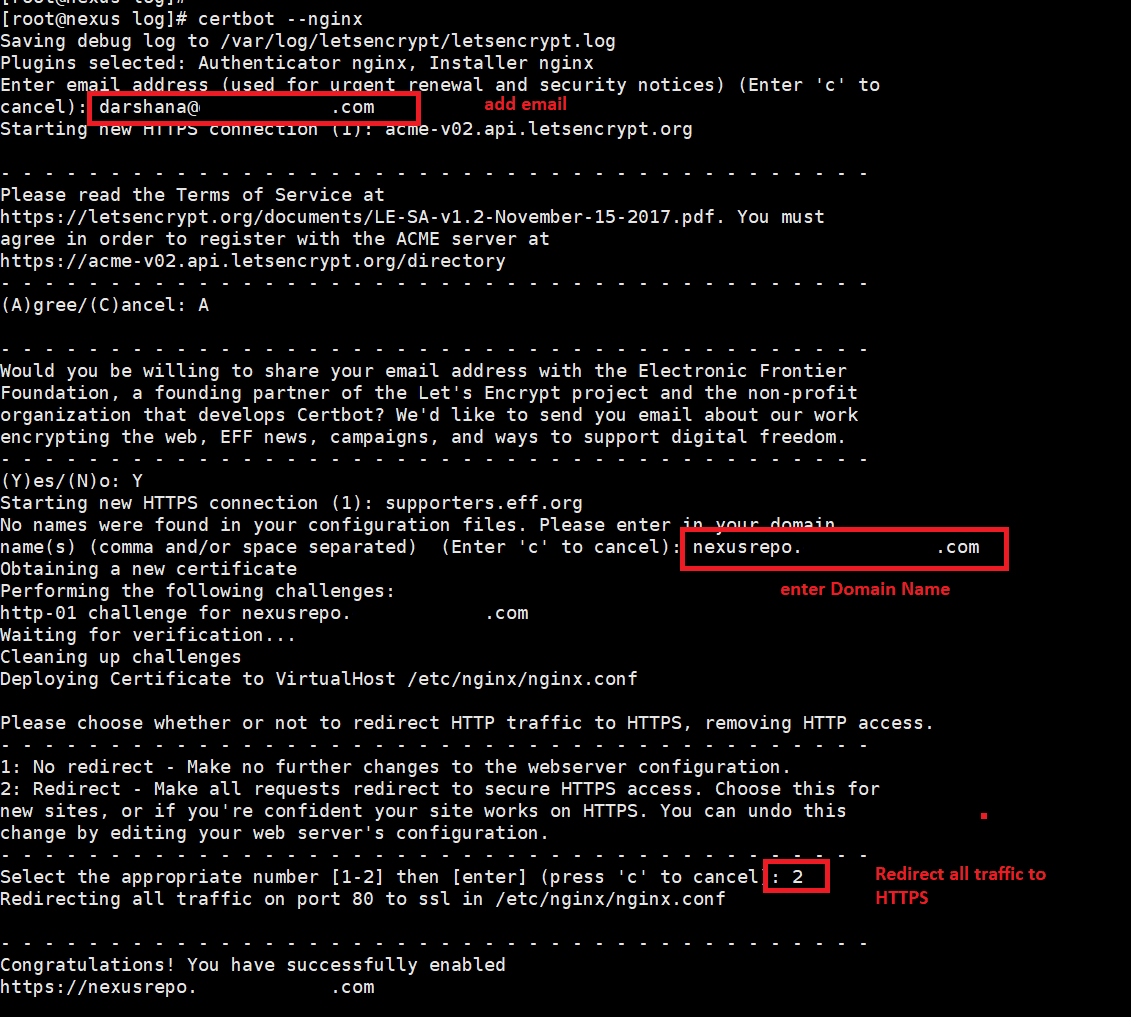
Generate SSL
After installation is done, open nginx.conf.
vim /etc/nginx/nginx.conf
You can see certbot SSL configuration.
III. Add Proxy pass
Add the following contents to a Location Blocks.
location / {

      proxy_pass "http://127.0.0.1:8081";
      proxy_set_header        Host $host;
      proxy_set_header        X-Real-IP $remote_addr;
      proxy_set_header        X-Forwarded-For $proxy_add_x_forwarded_for;
      proxy_set_header        X-Forwarded-Proto $scheme;
      proxy_set_header        X-Forwarded-Ssl on;
      proxy_read_timeout      300;
      proxy_connect_timeout   300;

 }

Proxy Pass
Save and exit the file.
Check nginx syntax:
nginx -t
Restart Nginx:
systemctl restart nginx
8. Set firewall rules
Now enable https access to a specific public IP. Run the below command.
firewall-cmd --permanent --zone=public --add-rich-rule='
rule family="ipv4"
source address="123.44.8.180/32"
port protocol="tcp" port="443" accept'
If you need to open https to public run below command:
firewall-cmd --zone=public --permanent --add-service=https
Reload the firewall.
firewall-cmd --reload
9. Setup SELinux policy for Nginx
setsebool -P httpd_can_network_connect 1
10. Browse web site using your domain name
eg: https://nexusrepo.fosslinux.com/
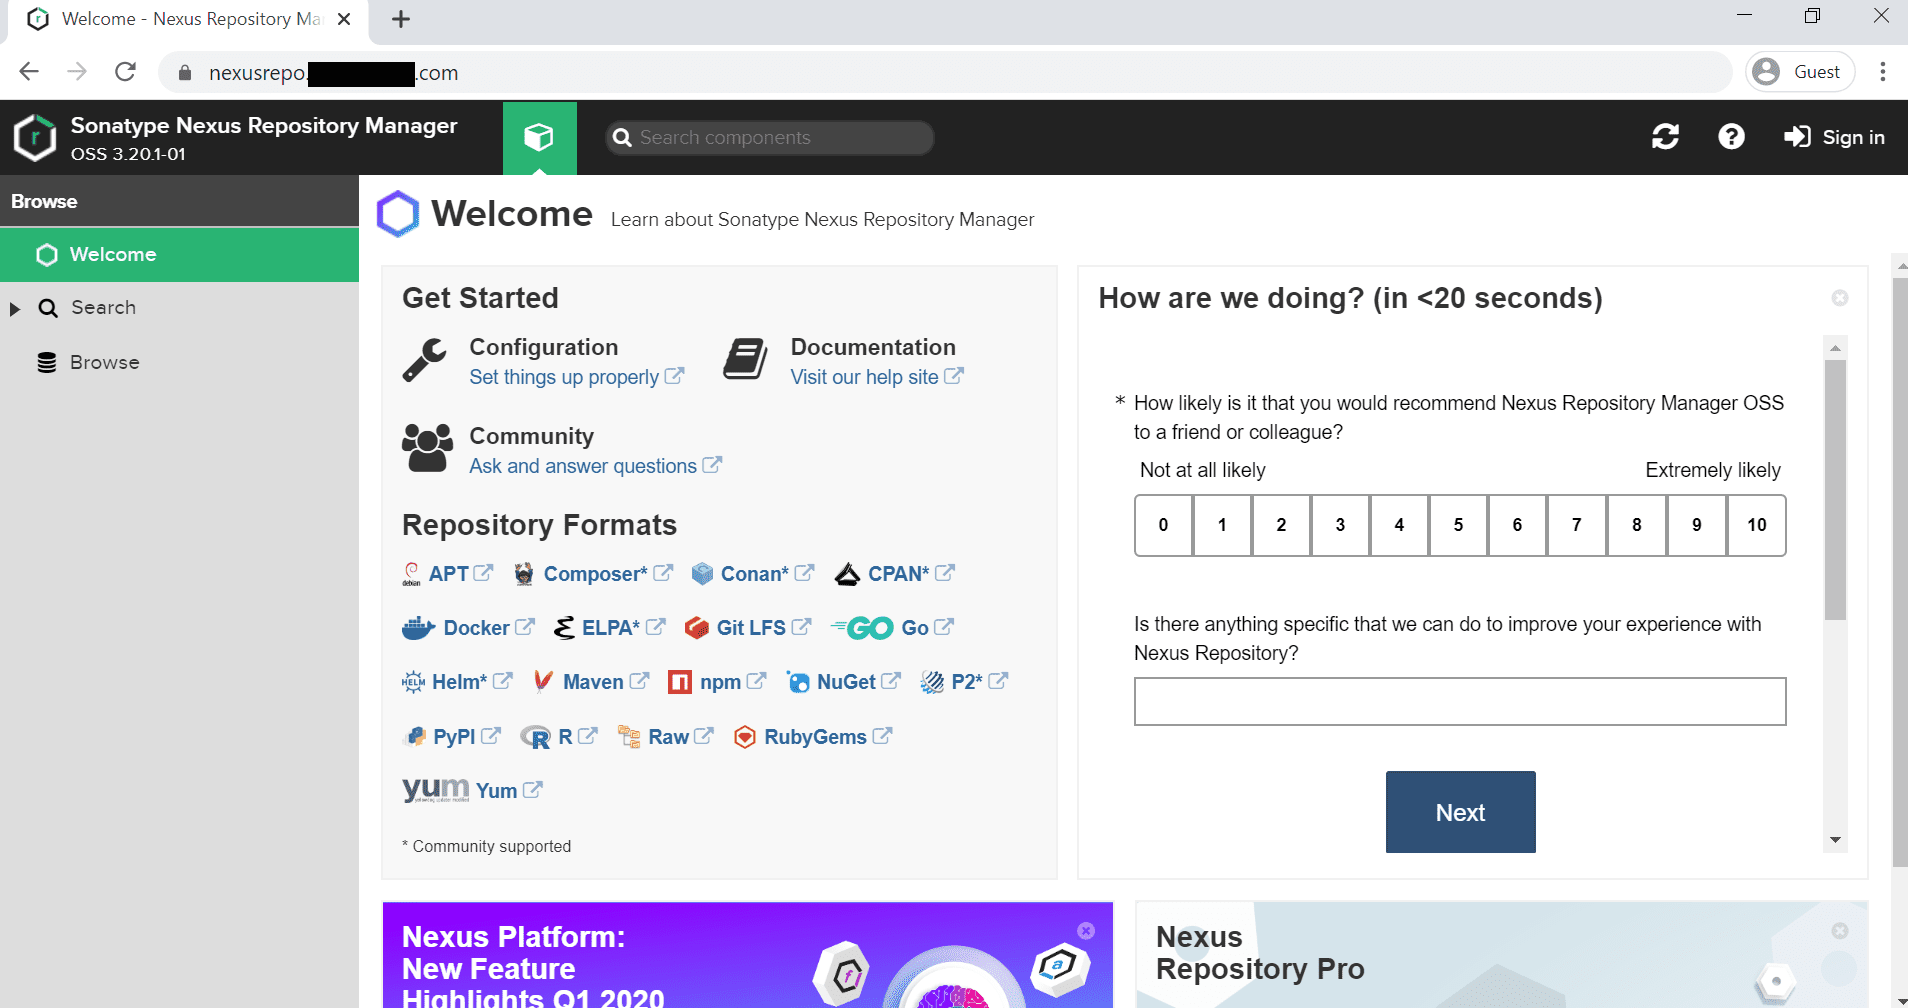
Browse URL
11. Sign in to the server
Sign in with the default user name as “admin.” Run below command in the server and get the password.
cat /opt/nexusdata/nexus3/admin.password
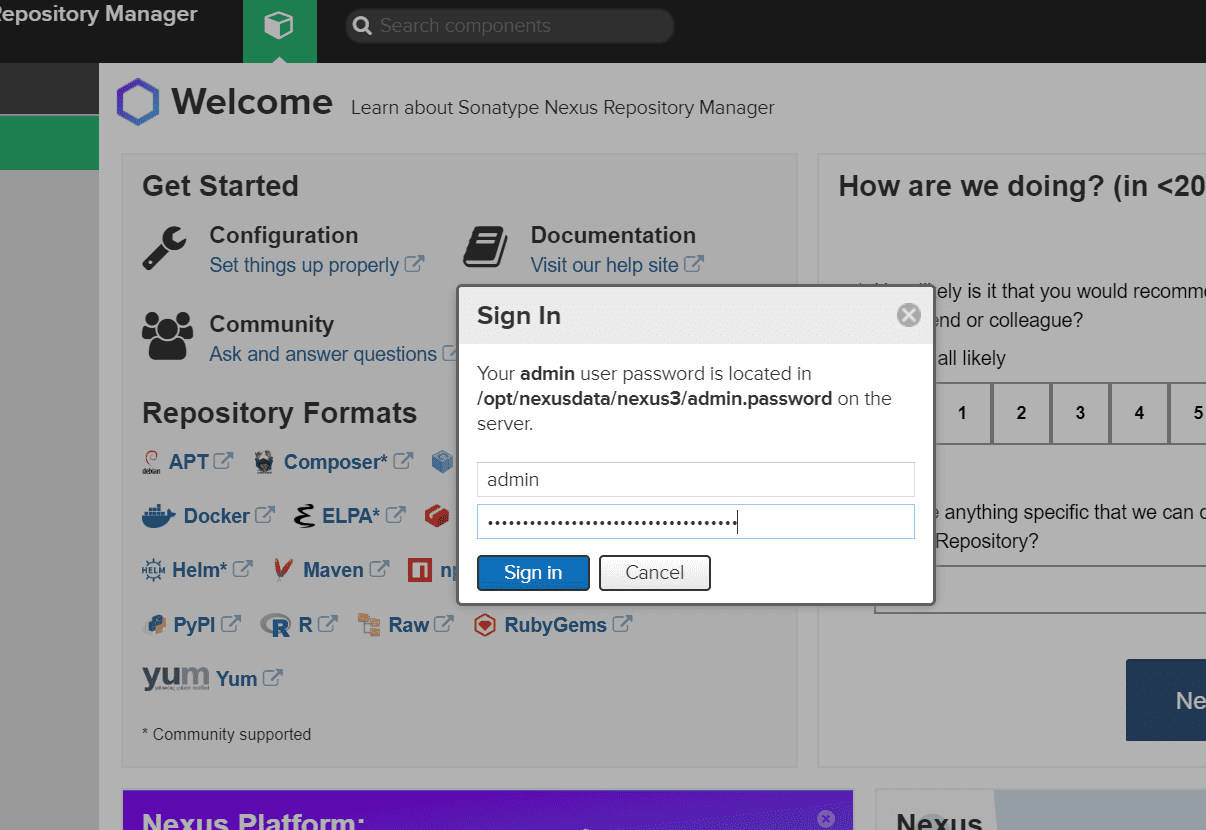
Sign In
After the first login, you should see a similar window, as shown below.

Click on next and set up a new password for the admin user.
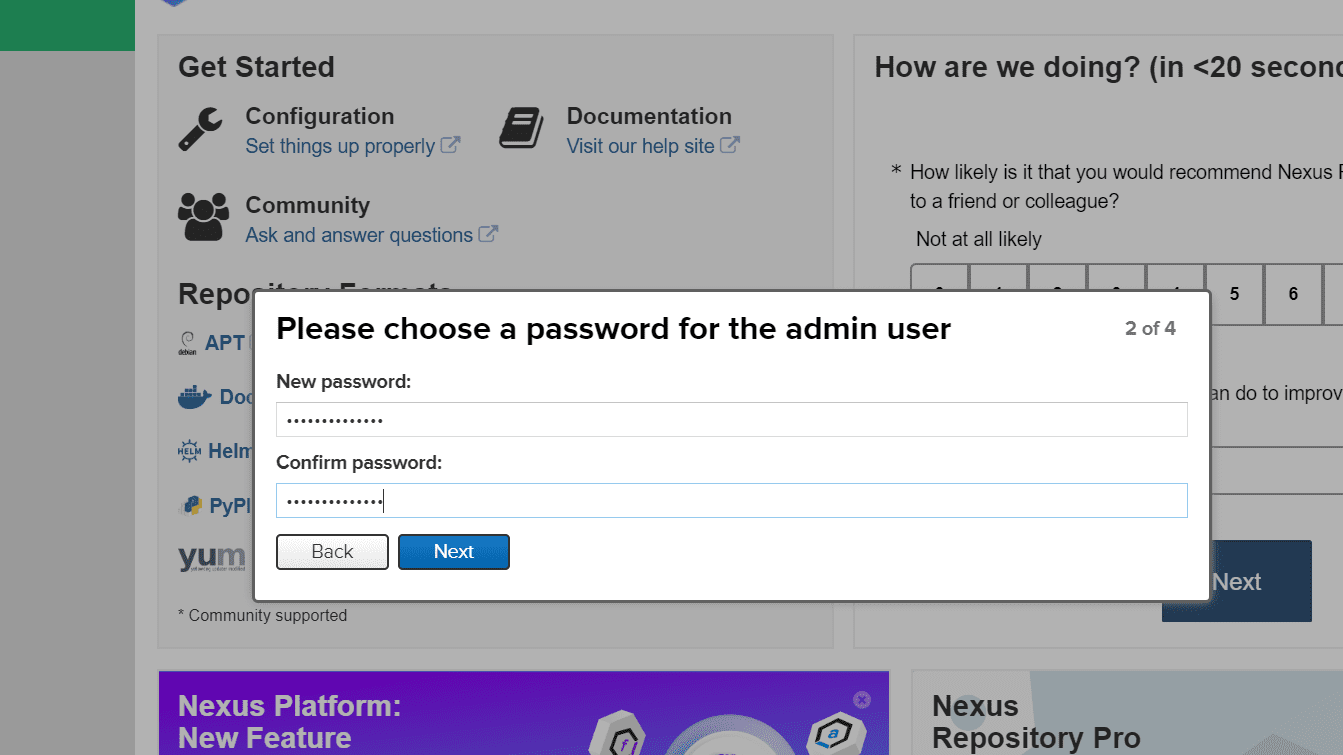
New Admin Password
Again, click on next, and you should see the “Configure Anonymous Access” window. Do not enable Anonymous Access.
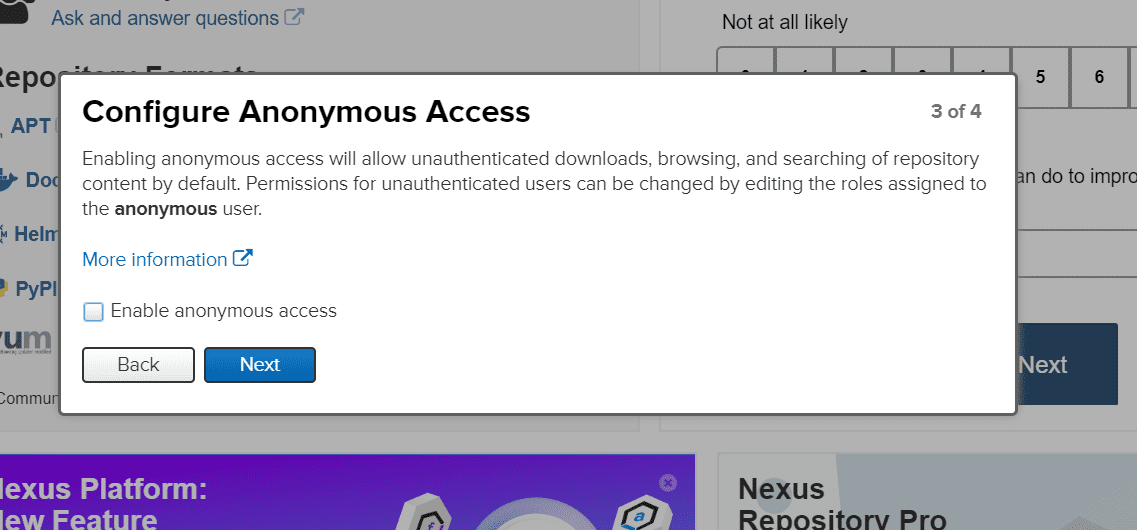
Anonymous Access
Click on the Next button, and you can see the complete setup.
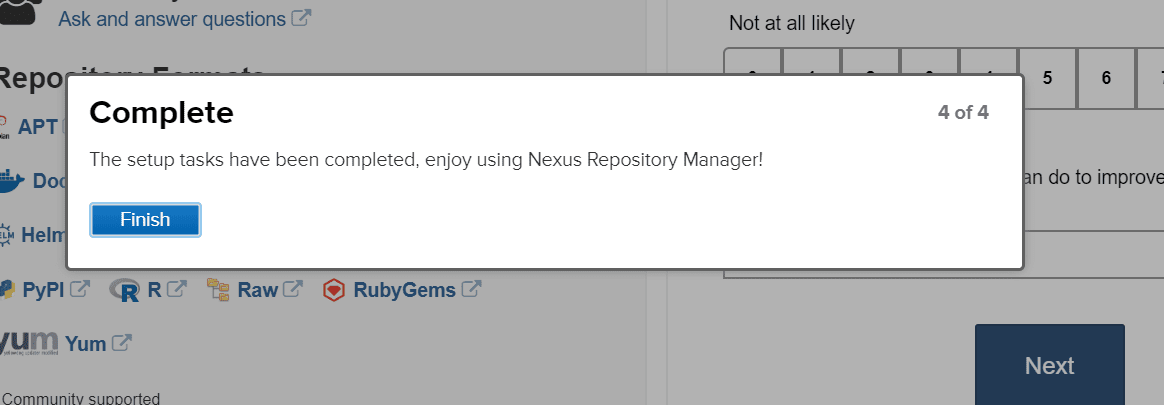
Complete Setup
Click on the finish.
That’s all about installing the Sonatype Nexus Repository OSS on your CentOS 7.
4 comments
The way you created the nexus account, without a home directory, creates a crash. The fix is to create a new directory (as user nexus):
mkdir /opt/nexus/.java
and then to add a line at /opt/nexus/bin/nexus.vmoptions
-Djava.util.prefs.userRoot=/opt/nexus/.java
and to
Hi!,
this problem ?
WARN [Timer-0] *SYSTEM java.util.prefs – Couldn’t flush user prefs: java.util.prefs.BackingStoreException: Couldn’t get file lock.
not working
nginx issue for http connector port 5000
add below in location :
location / {
if ($http_user_agent ~ docker ) {
proxy_pass “http://127.0.0.1:5000”;
}
proxy_pass “http://127.0.0.1:8081”;
proxy_set_header Host $host;
proxy_set_header X-Real-IP $remote_addr;
proxy_set_header X-Forwarded-For $proxy_add_x_forwarded_for;
proxy_set_header X-Forwarded-Proto $scheme;
proxy_set_header X-Forwarded-Ssl on;
proxy_read_timeout 300;
proxy_connect_timeout 300;
}