
Generally, when you want to copy files and directories from one server/localhost machine to another, you need to use file-sharing services like Samba(SMB) or NFS. Even though they are reliable, it is a tedious process to use when copying one time files.
That is because you need to set up and configure a Samba or NFS server. That brings forth the need to understand and use the SCP Linux command.
SCP (Secure Copy) command is a Linux utility used to copy files/directories between hosts securely. It uses SSH (Secure Shell) to transfer and authenticate users. Therefore just like when using SSH, you are required to know the credentials of your remote hosts.
If you are well-versed with the Linux CP command used to copy files and directories, then SCP is not much different. The only added and useful parameter is the remote destination host-name. Take a look at the syntax below.
scp file_name_to_copy username@destination_host:destination_directory_path
In the destination_host parameter, you need to enter the IP address of your remote host. If you don’t know how to find it, run the ipconfig command on the terminal.
Best ways to use the SCP command in Linux
In this article, we are going to look at 15 useful SCP commands you can use in your day to day interaction with the Linux systems. We shall use Ubuntu 18.04 LTS Server virtual machine as our remote host.
1. Copy a single file from the local computer to a remote host
It is one of the most straightforward commands. I have a file called Hello.scp on our local computer, that we are going to copy to our remote host. See the command below.
scp Hello.scp tuts@192.168.83.132:/home/tuts/FOSSLINUX

Copy a single file from the local host to a remote host
On the right side, we have our localhost, and on the left is our Ubuntu Server. If you are doing this for the first time, you should see a warning asking you whether you want to continue connecting, type ‘yes.’ You should see a prompt to enter your remote host password. By executing an ls command on the remote host, we see we have copied our file successfully.
2. Copy multiple files
In the previous command, we have seen how we can copy a single file. To copy multiple files, use the syntax in the command below. We are going to copy three files, Hello1, Hello2, and Hello3.
scp Hello1 Hello2 Hello3 tuts@192.168.83.132:/home/tuts/FOSSLINUX

Copy multiple files
By running ls command on the remote host, we see we have successfully copied the files.
3. Copy a directory recursively
Other than files, we can use SCP to copy a directory from the local computer to a remote destination. Use the syntax in the command below. We are going to copy the folder, FOSSTUTS.
scp -r FOSSTUTS tuts@192.168.83.132:/home/tuts/FOSSLINUX

Copy a directory using SCP command
Note, when performing any action on an entire directory, we will need to include the -r parameter, which stands for recursive.
4. Copying files with the verbose output
Including a verbose parameter in our SCP syntax prints all the process SCP is doing in the background. Let’s copy multiple files to our remote host using the -v (verbose) parameter.
scp Hello1 Hello2 Hello3 tuts@192.168.83.132:/home/tuts/FOSSLINUX
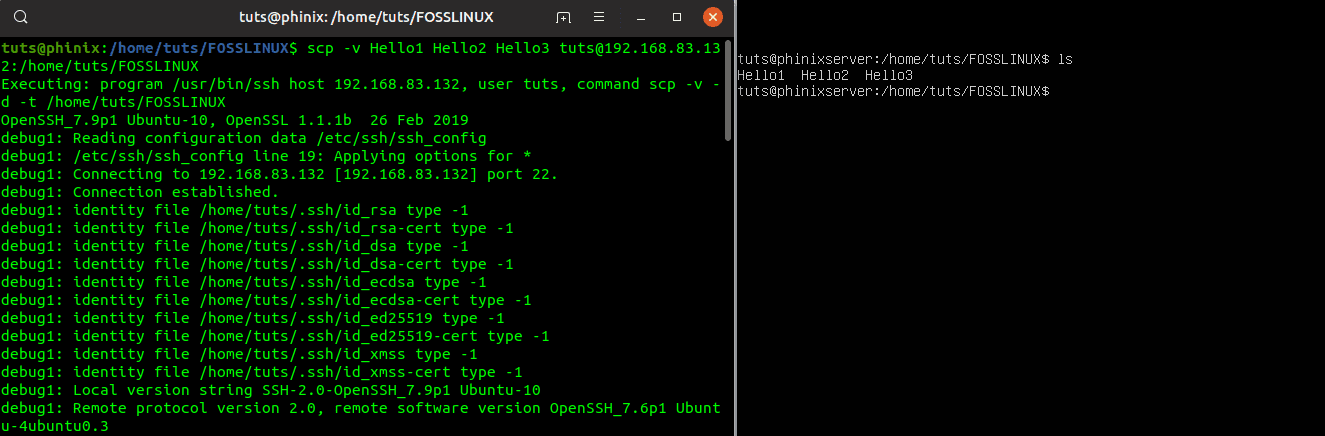
Copying files with the verbose output
From the above image, you can see we have much output from the command we ran on our local computer. It gives you all the details concerning the operation carried out currently.
5. Copy files across two remote hosts
Assuming you are managing multiple remote servers and you want to copy a file from one server to another. Look at the syntax in the command below.
scp tuts@192.168.43.96:/home/tuts/FOSSLINUX/Hello1 tuts@192.168.83.132:/home/tuts/FOSSLINUX

Copy files across two remote hosts
We are copying the file Hello1 from the host 192.168.43.96 to the host 192.168.83.132.
6. Compressing and copying files
To speed up the copying process and save on bandwidth, you can compress your files with the -C parameter. The data is compressed on your local computer on the fly and decompressed on the remote host. See the syntax below.
scp -vC Hello1 tuts@192.168.83.132:/home/tuts/FOSSLINUX
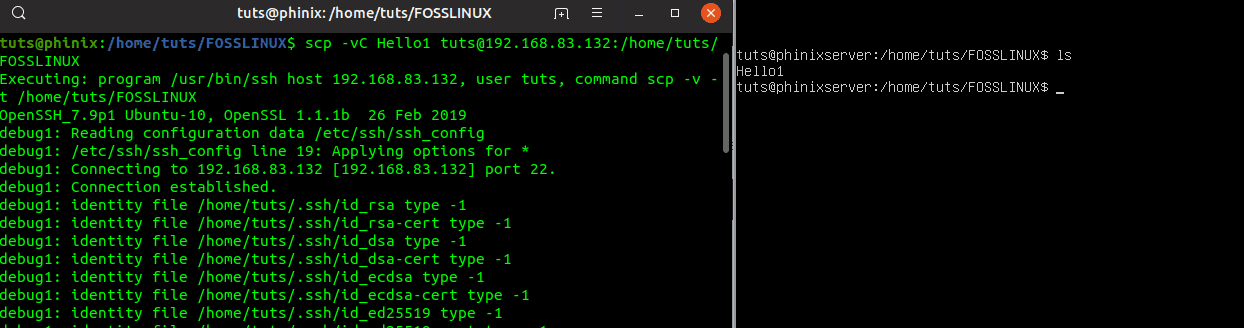
Compress and copy files
We have included the -v (verbose) parameter so that you can see what is taking place.
7. Managing the bandwidth
Copying a file to a remote host can be explained as an upload. If the upload bandwidth is high, it might affect other processes running in the background. You can limit the bandwidth to use in the copying process using the -l parameter. See the command below.
scp -l 100 Hello1 tuts@192.168.83.132:/home/tuts/FOSSLINUX

Manage bandwidth
The bandwidth you assign is in kilobytes. Therefore, in the above command, we are using a maximum of 100Kb/s to carry our copy process.
8. Use a custom port numbering
Like explained above, SCP uses SSH to carry out the process of copying files. By default, SSH runs on port 22; however, if you configured an SSH server on the remote server to run on a different port, you can specify this in your SCP command. See the command below.
scp -P 22 Hello1 tuts@192.168.83.132:/home/tuts/FOSSLINUX

Use a custom port number with SCP
Since I have not configured any SSH server, we leave the port number to 22 for this post.
9. Copying and preserving file attributes
In case you want to copy a file and preserve attributes like permissions, modification times, access times, etc., use the -p parameter with the SCP command. See the command below.
scp -P 22 Hello1 tuts@192.168.83.132:/home/tuts/FOSSLINUX

Copy and preserve file attributes
Note, in this example, the ‘p’ is a lower case, unlike when using a custom port number.
10. Suppress SCP output with the -q parameter
Suppose you don’t want to print the SCP output, error notifications, warning, or even the progress meter. You can achieve it using the -q parameter, which suppresses all SCP output.
scp -q Hello1 tuts@192.168.83.132:/home/tuts/FOSSLINUX

Suppress SCP output with the -q parameter.
From the image above, the only SCP output is the password prompt. The -q parameter suppresses all other outputs.
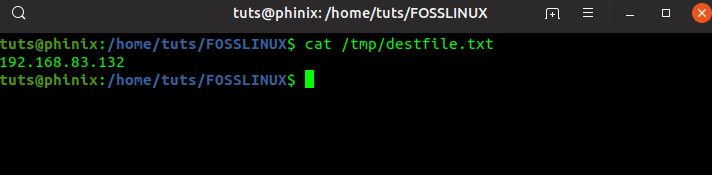
11. Use SCP to copy a file from a remote host to your local computer.
For most of the examples above, we are copying files from our local machine to a remote server. Now, suppose you want to copy a file from the remote server to your local computer. You should use the SCP command with a little tweak in the usual syntax. Look at the command below.
scp tuts@192.168.83.132:/home/tuts/FOSSLINUX/serverFile.txt /home/tuts/FOSSLINUX

Use SCP to copy a file from a remote host to your local computer.
By running an ls command on our local computer, we see that the ‘serverFile.txt’ copied successfully.
12. Copy files and directories without using passwords
From the examples above, we see that whenever we need to copy a file, we get a prompt to enter a password. We can skip this step by generating SSH keys to use during the authentication process.
To generate an SSH key, use the command below.
ssh-keygen -t rsa
The system should generate an SSH key. You can see the process taking place from the output in the terminal. Now, we need to copy the key to our remote host to use for authentication. Use the command below.
ssh-copy-id root@192.168.4.200
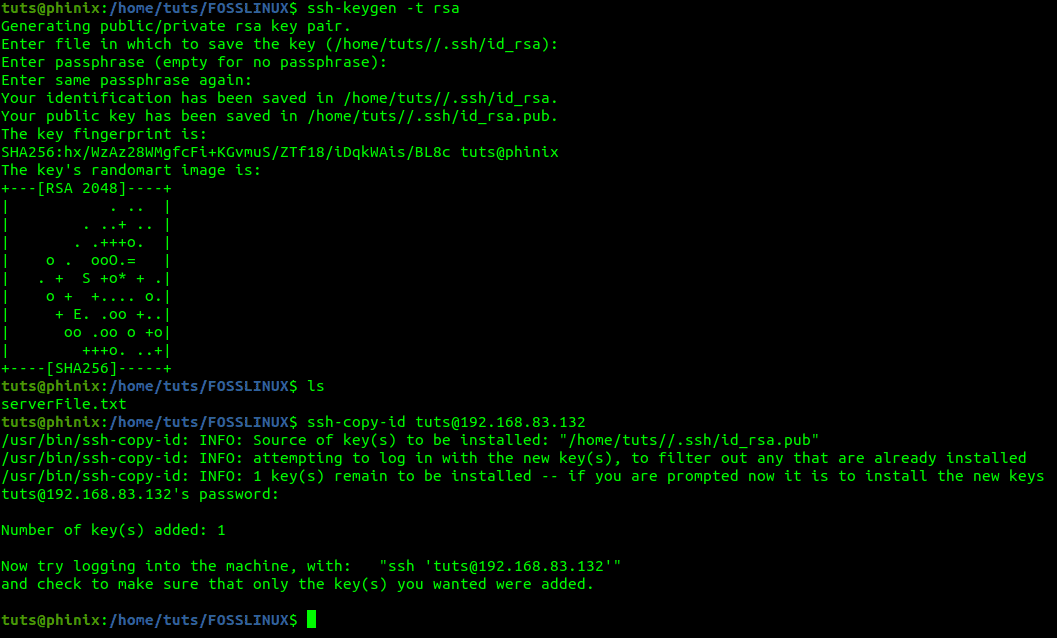
Generate SSH keys
Now let’s try copying a file from our local computer to our remote host.
scp Hello1 tuts@192.168.83.132:/home/tuts/FOSSLINUX

Copy a file without a password
From the image above, we see there was no prompt to enter a password.
13. Use a different cipher
SCP uses the AES cipher/encryption to copy files securely. However, you can specify a different cipher scheme using the -c parameter. Note, the c is a lower case unlike in compression where the C is in upper case. See the command below.
scp -c aes128-gcm@openssh.com TESTFILE tuts@192.168.83.132:/home/tuts/FOSSLINUX

Use a different cipher
We have specified the encryption scheme we want to use as AES. You can also use others like blowfish and many more.
scp -c blowfish TESTFILE tuts@192.168.83.132:/home/tuts/FOSSLINUX
14. Use the SSH key file instead of a password
SCP allows you to use a key file instead of a password to complete the authentication process using the -i parameter followed by the key file. See the command below.
scp -c privateKey.pem TESTFILE tuts@192.168.83.132:/home/tuts/FOSSLINUX

Use a key file instead of a password
15. Use an SCP shell script to copy files
Assuming you have to use the SCP command regularly, you can write a shell script to simplify the whole process. In this article, we shall write a script that reads the destination host from the destfile.txt.
The destfile.txt file
Below is our SCP script
echo "STARTING SCP SCRIPT"
echo
echo -e "Enter the path to the file you wish to copy:\c"
read file

for dest in `cat /tmp/destfile.txt`; do
scp -rC $file ${dest}:/tmp/

done
Save the file with a ‘.sh.’ extension since it’s a bash script. Make the script executable using the chmod command, as shown in the image below, before executing it.

Use an SCP Shell script
Conclusion
Those are 15 SCP practical examples that you can apply to make your life easy working with Linux systems. Do you have an SCP command you want to share with our readers? Leave a comment below. If you find this article resourceful, please share the link with a friend.
1 comment
Nice intro to scp. I was intrigued by “15 ways”…
Found a couple glitches:
Typo in #9
scp -P 22 Hello1
should be
scp -p Hello1
Typo in description of #14
using the -i parameter
should be
using the -c parameter