
Antivirus Live CD or USB drives come in handy when your computer is infected with a virus and other malware. The majority of viruses work only in Windows OS. This malware can’t damage a Linux system because it can’t be executed in the Linux environment.
Using Linux OS, you are already reducing the virus risk to the minimum, but things become complicated to control in a dual boot PC with Windows in it. You don’t want your machine to be a medium for transferring the malware to your friends’ PC.
Here is how you can quickly create an Antivirus Live CD/USB drive that uses the popular ClamAV scanner engine. ClamAV is an open-source (GPL) anti-virus engine used widely for situations, including email scanning, web scanning, and endpoint security. It provides several utilities, including a flexible and scalable multi-threaded daemon, a command-line scanner, and an advanced tool for automatic database updates.
Creating ClamAV Antivirus Live USB drive
Step 1) Download the latest ISO image from the below link:
Download Antivirus Live CD ISO
Step 2) For burning the ISO image to a USB flash drive, I suggest using UNetbootin. It is a free application and works on Linux, Windows, and macOS.
Step 3) Insert a blank USB flash drive into the USB port of your PC. I suggest using a minimum of 512MB capacity. The USB drive will be completely formatted in the process.
Step 4) Launch UNetbootin.
Step 5) Select the “Diskimage” radio button and “ISO” from the drop-down list. Then browse and select the Antivirus ISO image. You should browse through / > Home > username > Downloads.
Select “Type” as “USB Drive.” You should automatically see the flash drive mounted. If not mounted, you may have plugged in the USB drive after launching the app. Relaunch the app, and you should be fine. Click OK when you are done.
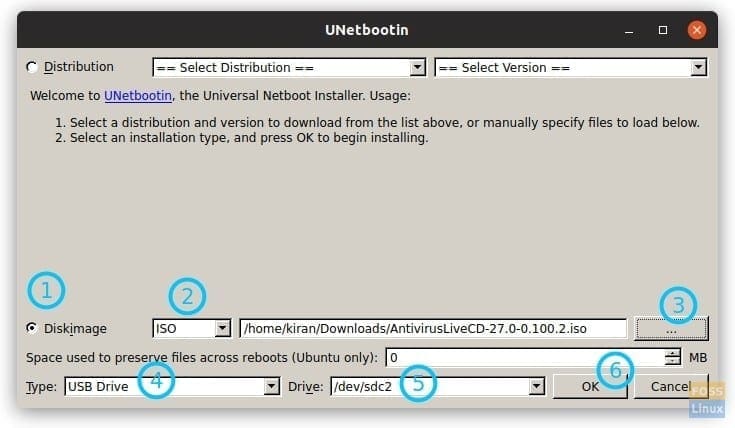
UNetbootin settings for making Antivirus USB drive
Wait for the process to finish. Congrats! Your Antivirus Live USB drive should be ready for use.
Using the Antivirus Live USB Drive to scan and remove malware
1) Plugin the USB drive to the USB port and then boot into it.
2) For the majority of users, the default video driver should work.
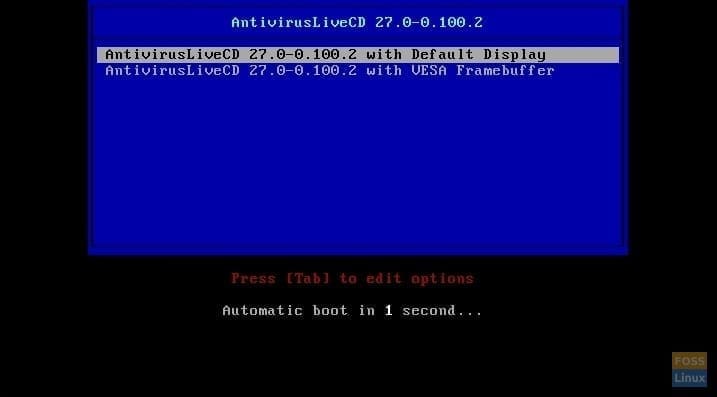
Booting into an Antivirus USB drive
3) Select your preferred language and proceed.
4) You will see a prompt that there is no root password and asks you if you want to set one. Enter ‘y’ and type in a root password.
5) You should go through setting a time zone.
6) Type “antivir” and press enter.
7) You should see three choices: (1) Scan your computer against virus (2) Update Virus signature databases (3) Update your ClamAV software.
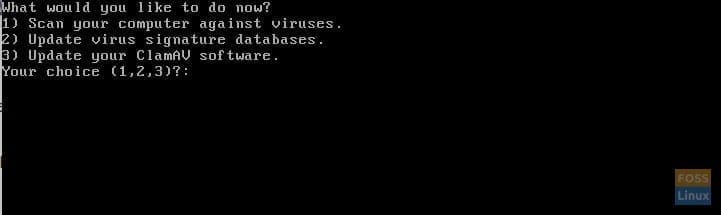
Options
I recommend first enter (3) and (2) to make sure the ClamAV engine and virus signatures are updated. It is crucial for security as new virus updates are added daily.
8) Finally, enter (1) to scan your computer for malware. You will be presented with three more options on what to be done just in case malware is found. I recommend (3), which is moving the infected file to quarantine. That way, you will know which files are infected.

Scan Options
The process of scanning is slow and could take several hours for a larger size hard disk.
12 comments
When I start it up it asks for a login. I type antivir and then my password and it keeps coming back to the same questions. I then try to type my password for the login and then it asks for the password. I type the password and It again comes back to the same questions. Help
It says Login incorrect
what is the password? asks me login I write antivir and the password chosen but tells me that it is not good.
Thank you
type root no pwd that’s all
It doesn’t boot. It says it’s not bootable.
First: English is not my native language,. so forgive me for possible mistakes! 🙂
I think ClamAV it’s a decent AV. I would rather have the same choice available on the installed version, such as custom scan, but it’s a good tool anyway. In the last scan of the same folder, ClamTK (installed version but same AV engine) detected 26 suspicious items, while KRD (Kaspersky Rescue disk) detected none and Eset rescue CD only 8. I couldn’t make a comparison with Bitdefender Rescue CD because the last version is not bootable anymore from USB stick (I unsuccessfully tried to create USB with several tools) and the Bitdefender team says it’s no more supported, so I fear we won’t get further editions.
I guess the last editions of ClamAV improved their detecting capability a lot, if we compare it with older editions. Talking about the installed edition, nowadays it’s the only real solution for Linux users who want an AV (especially on servers dealing with data flows from everywhere). For Windows perhaps not the best (no real time detection is a severe flaw) but a good one if you need to scan devices.
The downsides of the live edition are:
1) No custom scan
2) you have to use unetbootin from Windows to create a bootable USB, while Linux unetbootin edition doesn’t work. I suggest to improve this side and make it bootable from Linux at least using dd or Etcher.
My overall rating is good, because it’s very light and essential and finds what it has to find. Perhaps not for newbies because it lacks a GUI but… not so difficult! (to be honest, I love this old school text-based user interfaces!).
I used quarantine, where do they store the quarantine files (windows 10)
Did the author validate the steps? I would say No. This article is inaccurate.
Does not work with the VMware vmxnet3 network card. Needed to add an E1000 for it to work.
Steps are inaccurate. Need more information for this to work.
Is there a way to have this scan a thumb drive inserted in another USB port instead of the system hard drive?
The article leaves out that you have to switch your BIOS to allow legacy boot for this OS image to attempt to boot. Even with that, I have yet to find a laptop less than 6 years old that can fully get through the boot far enough to get to the video driver screen.