
Kali is a security distro of Linux derived from Debian. The main objective of Kali is to carry out computer forensics and innovative penetration testing. The OS was developed due to backtrack rewriting by the two developers (Mati Aharoni for backtrack and Devon Kearns of offensive security).
Security administrators mainly use it to identify security breaches. Kali has several pre-configured tools that enhance its security protection in the operating system. Subsequently, Network Administrators can use the OS to maintain an efficient and secure web framework. This is because the OS supports network auditing.
Network architects also use Kali to design network environments since the OS assures proper configuration, making their work easier. Other people who can also use this system include chief information security officers, forensic engineers, computer enthusiasts, and hackers.
Different ways to install Kali Linux
Kali has multiple installation methods. Fortunately, you can install it as your primary Operating System. The first method is using a Kali ISO image downloaded from their official website. After downloading the correct image, you can create a bootable USB or DVD and install it on your computer.
Alternatively, you can virtualize the OS by using either VMware, Hyper-V, Oracle Virtual Box, or Citrix. Virtualization is an adorable method that allows you to have more than one functional operating system in a single computer.
Cloud (Amazon AWS, Microsoft Azure) is another excellent installation method of Kali Linux worth trying. The final installation method is dual booting your computer with two operating systems. This means kali can work perfectly in such an environment.
Before we dive into “how to use Kali Linux,” let us quickly take you through the installation process. This article will cover Kali installation through the Vmware workstation.
Recommended Read: How to install Kali Linux on your PC
Step 1): The first step is downloading the image that we will import to our VMware.
Step 2): After downloading the Iso, we will start the installation process. Select the Graphical install in the first welcome screen as it appears below.
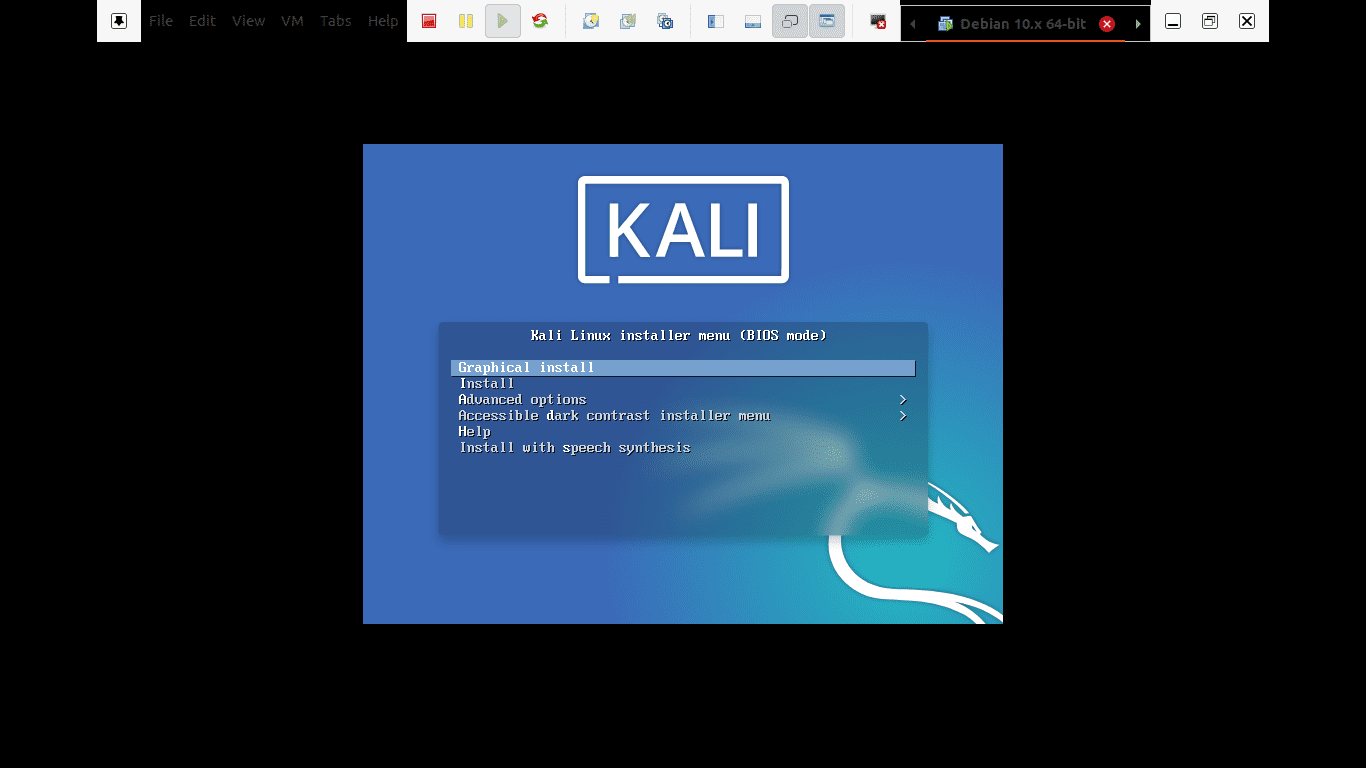
Graphical install
Step 3): In step 3, you will choose the preferred language to use while setting up the Operating system and be used after the installation. In our case, we will use the default “English.”

choose the preferred language
Step 4): Here, the setup will review your network interface, search for a DHCP service, and then prompt you to enter a hostname.
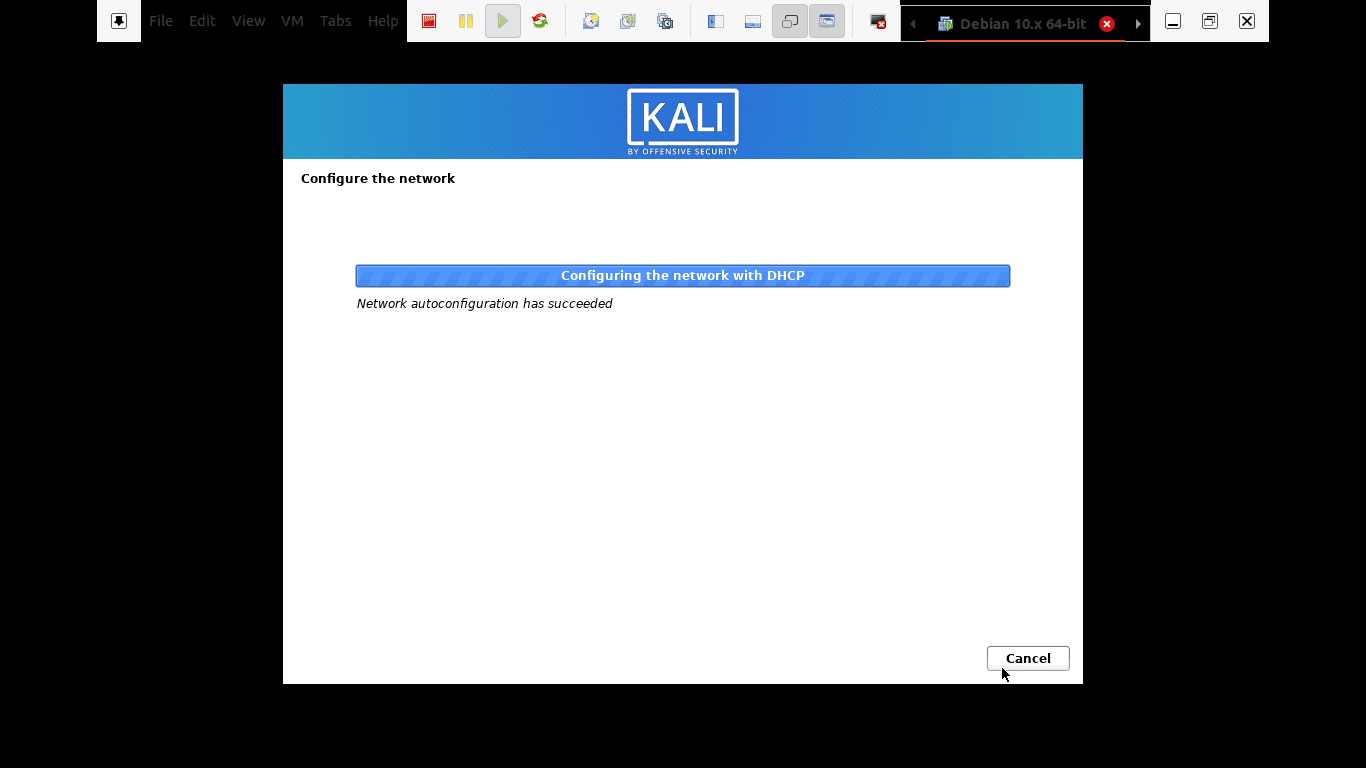
the setup will review your network interface
If the setup installer looks up and doesn’t find a DHCP service on the network, you will be asked to enter manually.
Step 5): In this step, you can provide a default domain name for the system. After inputting the domain name, advance to the next step by pressing continue. However, we advise that you leave this part blank.
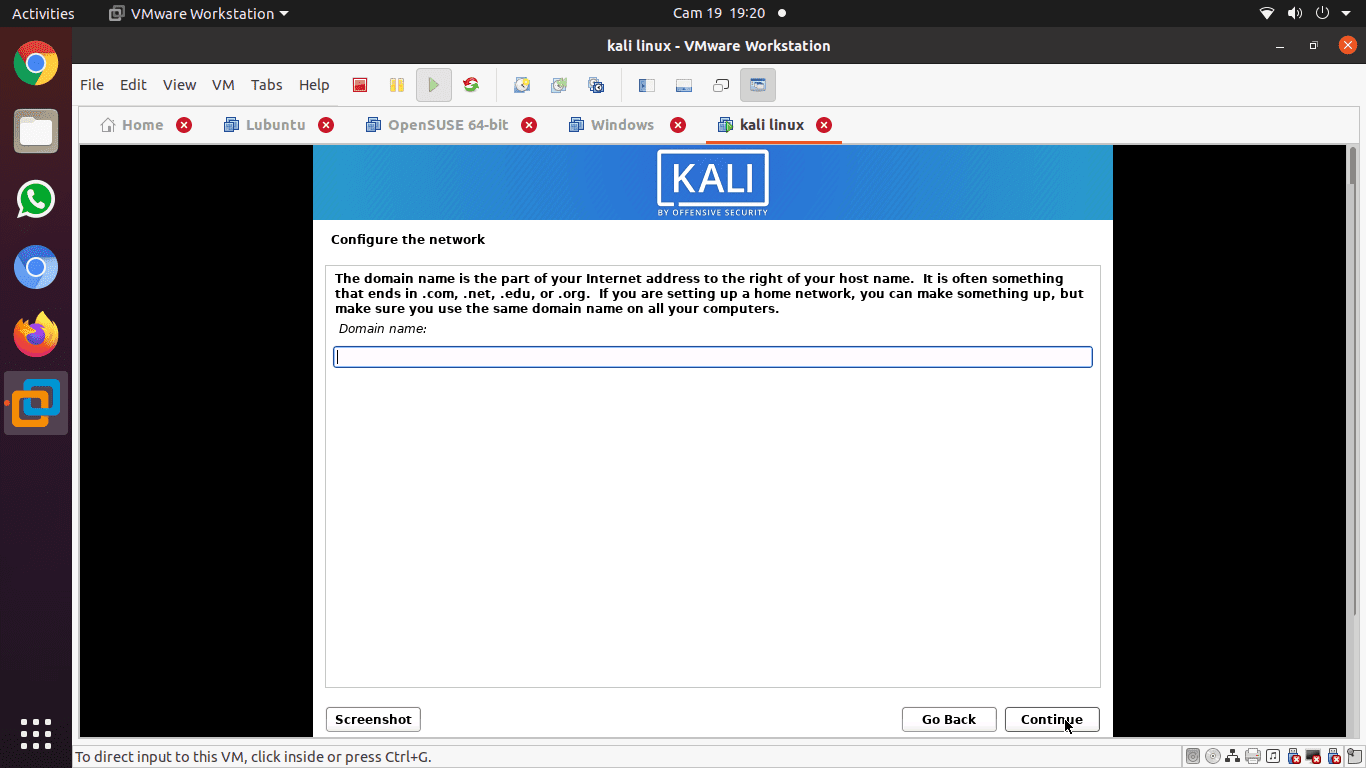
provide a default domain name for the system
Step 6): The next step is the user accounts for the system. You are required to enter your full names in this step and press continue to proceed with the installation.
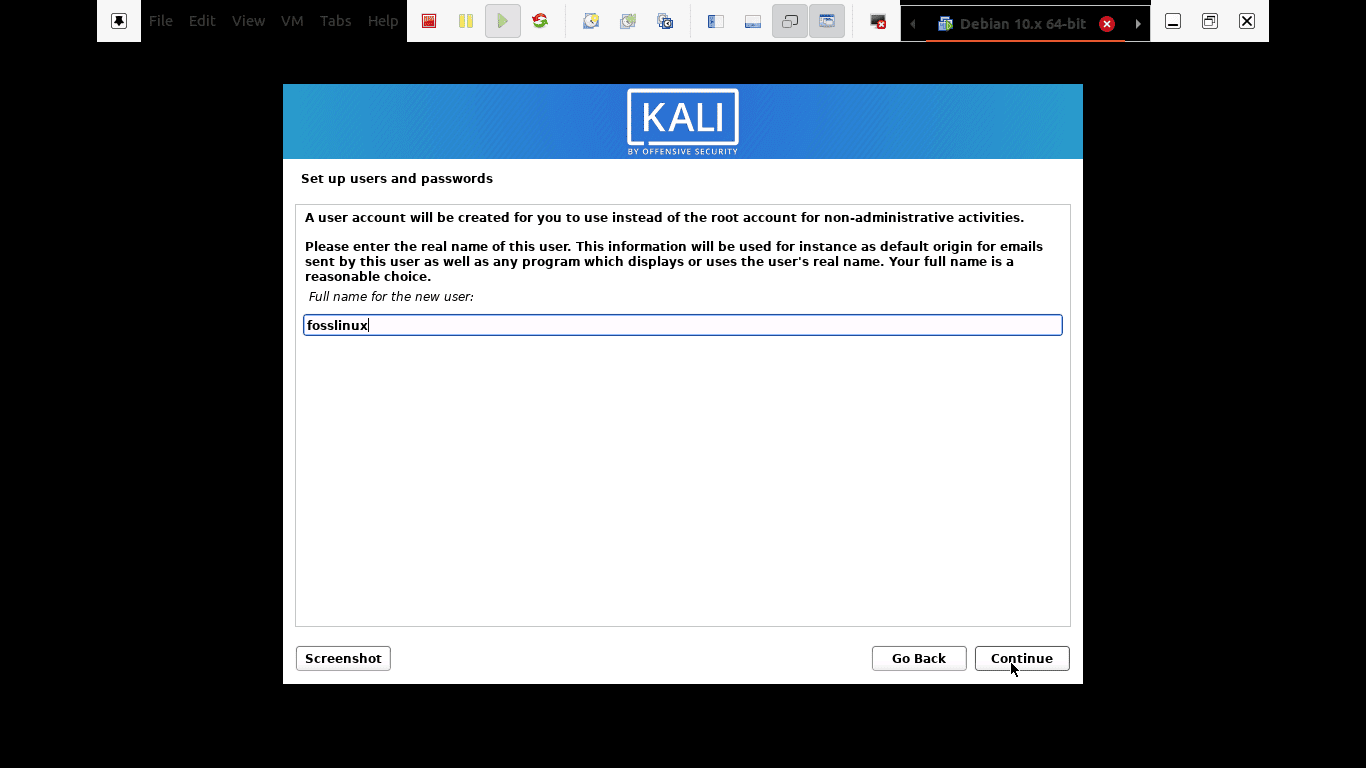
user accounts for the system
Step 7): After that, you will be required to enter the username and password in the next step. The password, in this case, needs to be written twice for security purposes. Thereafter, click the continue button to advance to the next step.
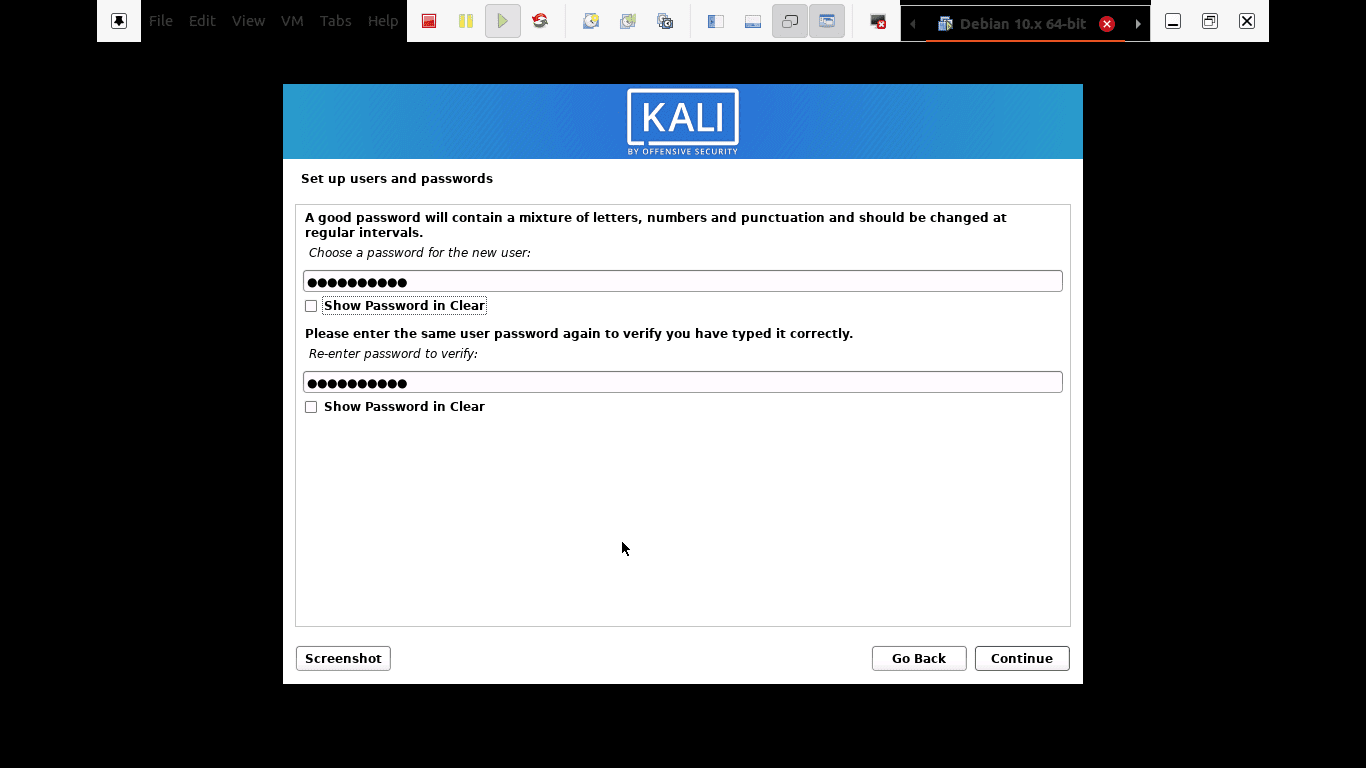
enter the username and password in the next step
Step 8): Step seven will allow you to set your time zone. This is important because your computer will be allocated the timezone of the region you selected.
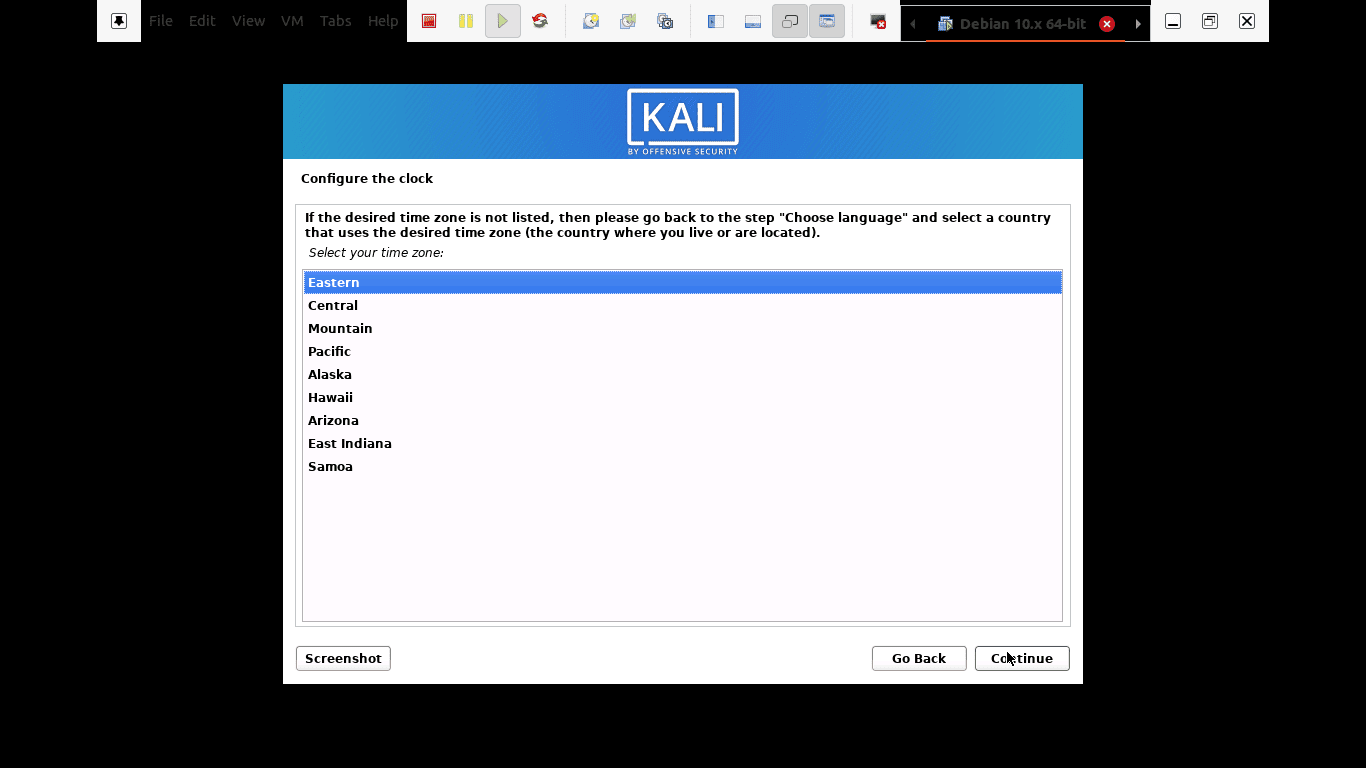
set your time zone
Step 9): The installer will review your disk and offer various choices depending on the setup. In our case, we will use the “use entire” disk option. However, there are numerous options for you to select from.
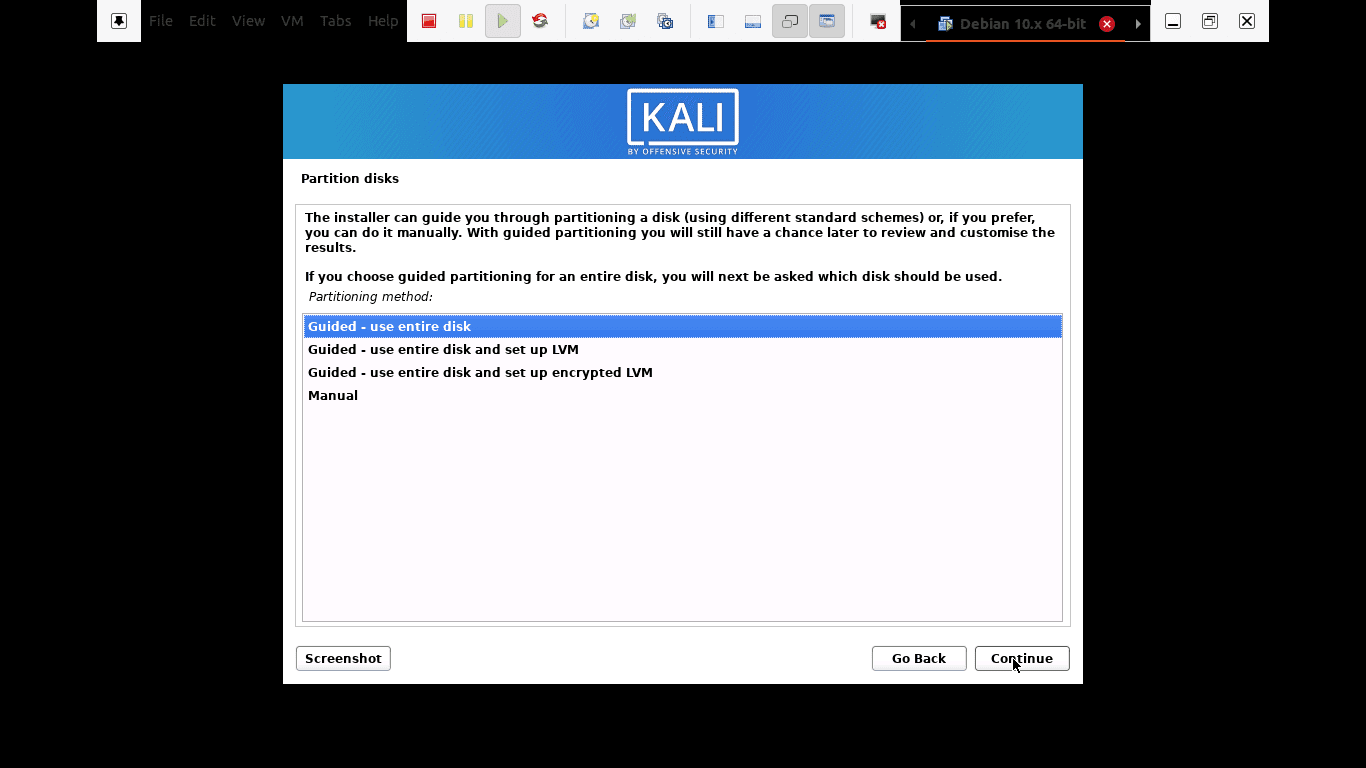
The installer will now review your disk and offer various choices depending on the setup
Step 10): Depending on user needs, you can choose to keep all your files in a single partition that comes as default. On the other hand, you can also have separated partitions to store your files.
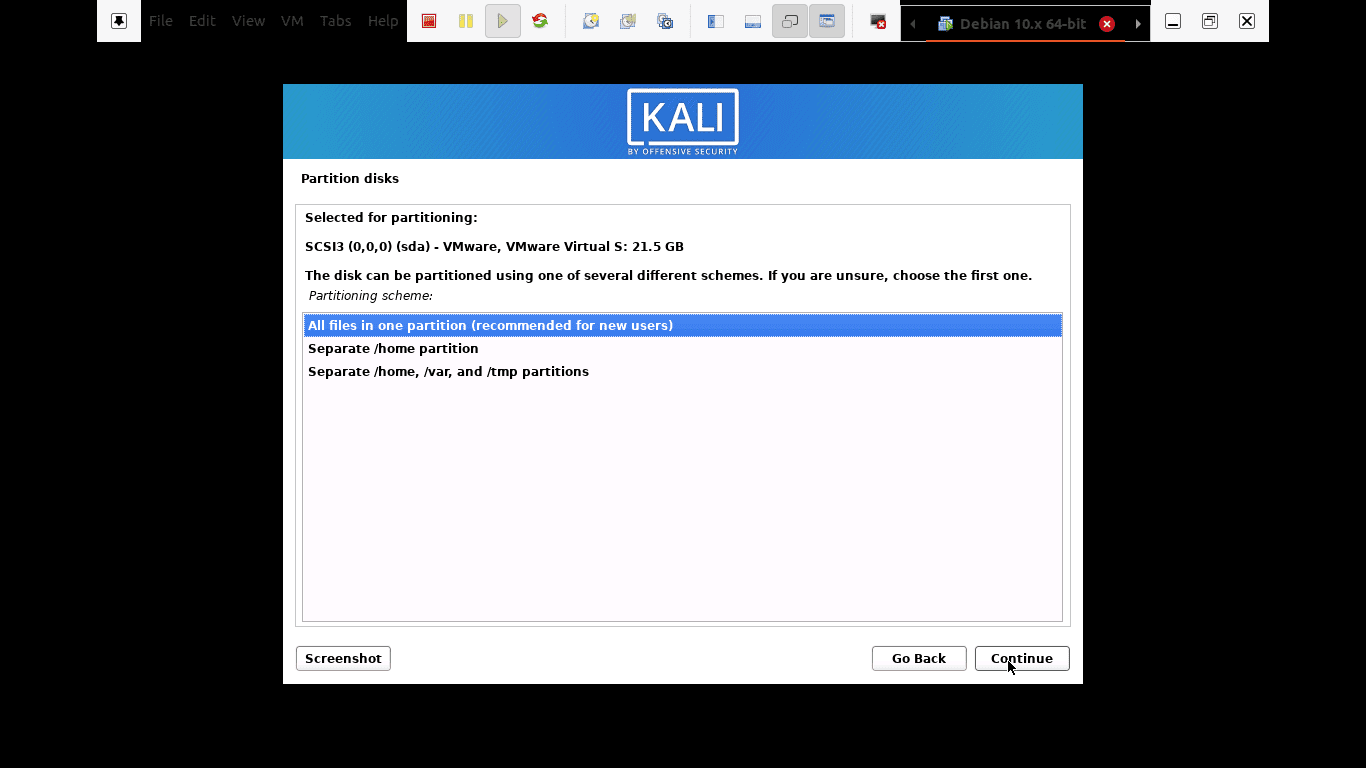
you can choose to keep all your files in a single partition that comes as default
Step 11): Before making irreversible changes, the installer will give you the last chance to review your disk configuration. You will be in the final stages after clicking the “continue” button.
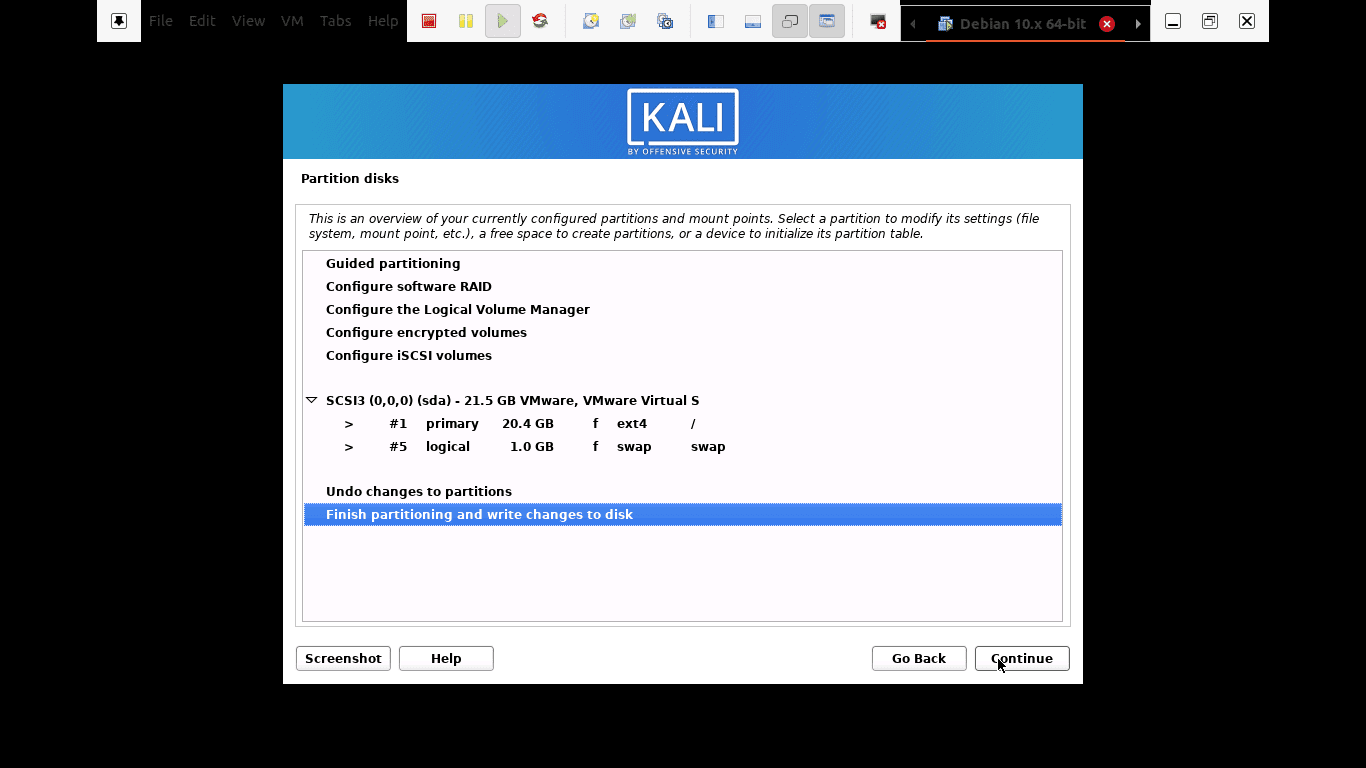
The installer will give you the last chance to review your disk configuration.
Step 12): In this step, you will be allowed to select which meta-packages to install. The default selections will establish a standard Linux system for you. So, you really don’t need to change anything.
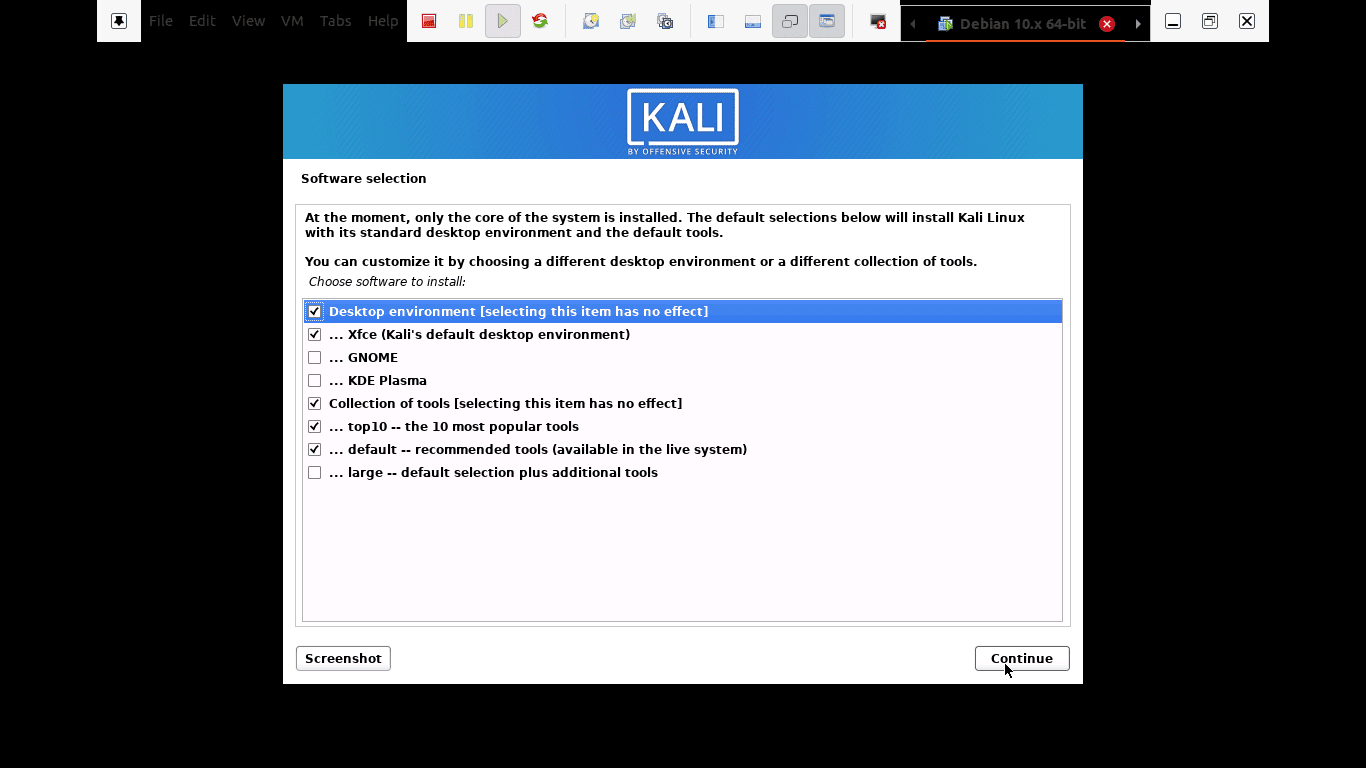
select which meta-packages to install
Step 13): Here, you will select “yes” to confirm the installation of the GRUB boot loader. After that, press the “continue” button to proceed with the process.
Step 14): You will choose the hard drive to install the grub bootloader in this step. Note: it is not selected by default. This means you have to select the drive.
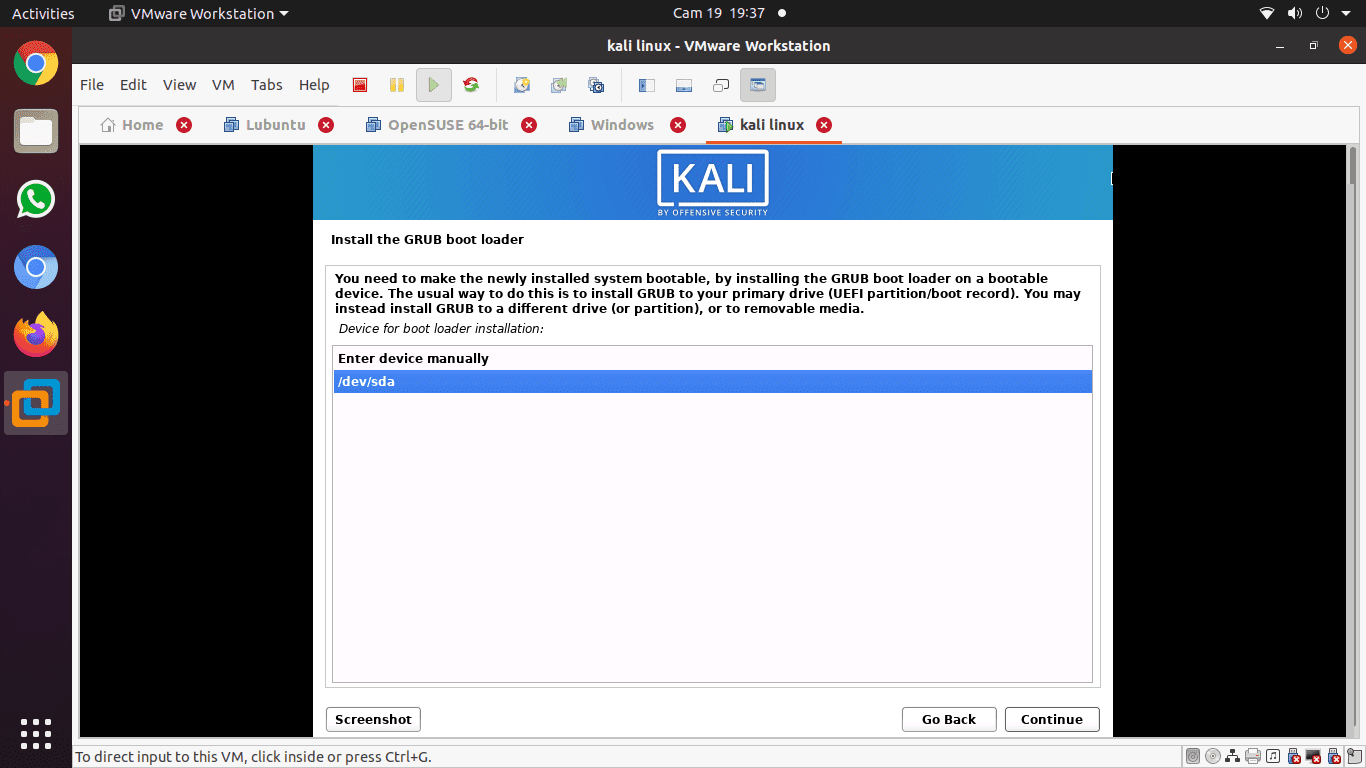
choose the hard drive to install the grub bootloader
Step 15): Installation is ongoing. Please wait until it is over.
Step 16): Finally, click the “Continue” button to reboot into your new copy of Kali Linux.
After rebooting, the system, the GUI interface that will open up will prompt you to enter your username and password, and then it opens up to such a window where you can navigate through.

After rebooting, the system, the GUI interface that will open up will prompt you to enter your username and password
Updating Kali Linux
In every machine, it is vital to keep your Operating system’s tools up to date for the proper running of the system. Here, we will break down the steps you need to update your kali system to the latest version.
Step 1): First, go to the applications bar and look up the terminal. Open it by clicking on the application, and then type in the following command “sudo apt update,” and the update process will be initiated.
sudo apt update
Step 2): After updating the system, you can now upgrade the tools by typing “sudo apt upgrade,” and the new packages will be downloaded.
sudo apt upgrade
Step 3): While upgrading, the system will ask if you want to continue. In this part, you will type “Y” and click enter.
Step 4): There is also an alternative to upgrading your entire OS to a newer one. To achieve this, type “sudo apt dist-upgrade”.
sudo apt dist-upgrade
Test performances with Kali Tools
This section will cover machine testing with the aid of Kali Linux tools. These are tools used for hacking and penetration testing. Here we have compiled the best kali Linux tools that allow you to assess web-server’s security and help in hacking and pen-testing.
Kali Linux comes with many tools that aid you to test, hack and do any other digital-related forensics. A point to note: Most of the tools we will talk about in this article are open-source, meaning their initial source codes can be altered or modified by anyone.
Nmap
The abbreviation Nmap stands for Network Mapper. It is one of the commons kali tools for information gathering. This means that Nmap can get insights about the host, address, and detect the type of OS and network security details, such as the number of open ports and what they are.
Additionally, it offers features for firewall avoidance and spoofing. To run a basic Nmap scan in Kali, follow the guides below, and you will be done.
Nmap can also scan a single IP, a DNS name, a range of IP addresses, subnets, and text files. In this instance, we will display how Nmap scans the localhost IP addresses.
• First, click on the terminal, which is on the dock menu.
• The second step is to enter the “ifconfig” that will return your Kali system’s local IP address.
• Please note the local IP address it will display and enter nmap 10.0.2.15 in the same terminal window. What this will do is scan the first 1000 ports on the localhost.

Nmap
Lynis
This is a powerful kali tool primarily used for security auditing, system hardening, and compliance testing. Nonetheless, you can also use it in penetration and vulnerability testing. The app scans the entire system according to the components it detects.
To get this on our system, we will install it via a package manager for Debian. Use the command below to get Lynis on your Kali system.
apt-get install lynis
After the installation process is over, the next step is running it. However, you have to note that you could run it from any directory if Lynis were installed via a package or Homebrew. If you used other methods, ensure that you are in the right directory and add ‘. /’ in the terminal before typing the “lynis” command. After that, we will run a basic scan by typing the following command in the terminal.
lynis audit system
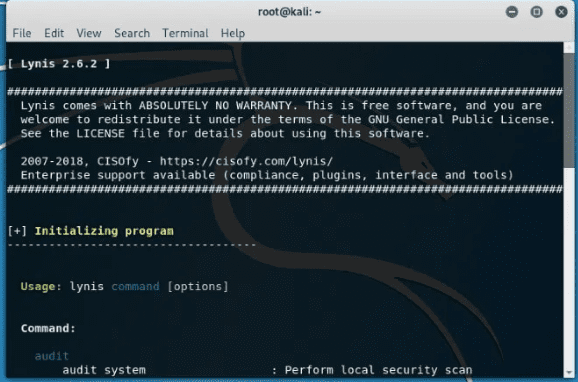
Lynis
Metasploit Framework
This is the most frequently used penetration testing framework. The framework offers two editions which include an open-source and its pro version. With this outstanding tool, you can test known exploits, verify vulnerabilities, and perform a complete security assessment.
We advise you to use the pro version when you are into serious stuff since the free version lacks some features.
Use the command below to run the primary interface of the Metasploit Framework.
msfconsole –h
Metasploit has several commands that you can run on your computer. You can use the “msfd –h” command to give an instance of msfconsole that remote clients can connect to. “msfdb” command is also used to manage the Metasploit Framework database.
To connect to an RPC instance of Metasploit, use the following command “msfrpc –h.” Finally, you can use the Metasploit standalone payload generator by typing in the “msfvenom –h” command.

Metasploit Framework
Nessus
Nessus helps the user find vulnerabilities that a potential attacker may take advantage of when connected to a network. This is highly recommended to administrators of multiple network-connected computers to help secure all those computers.
Unfortunately, Nessus is not a free tool anymore. You can only try it for 7 days, and the trial version stops working. Before installing Nessus, ensure that your OS is up to date by the following command “apt update && apt upgrade.” After that, you can purchase Nessus to obtain an activation code from the Tenable portal.
You can then go to the Nessus download page and choose a compatible version (32-bit or 64-bit) to install. Alternatively, you can use the command line to install the Nessus package. To do this, type in the following command in the terminal to install and start up the service “/etc/init.d/nessusd start”. Finally, let us configure and Use Nessus.
To carry out configurations, follow the installation wizard. First, create an administrator user account. After that, activate it using your activation code you got from the Tenable support portal. Thereafter, let Nessus fetch and process the plugins. Let us now go and see how to use Nessus in a penetration test.
- Hunting for web shells: You may find a server already comprised without the admin even knowing. In such a situation, use Nessus to help in detecting compromised hosts.
- Identifying a weakness severity: Nessus in such a critical situation helps identify the low-severity weaknesses and allows the admin-user to recast them.
- Detecting default authorizations: to carry this out, you will use credentials from other testing sources to perform credentialed patch audits, vulnerability scanning, and discovery of interesting configurations.

Nessus
Maltego
This is an adorable data mining tool used for online information analysis. It helps connect the dots where necessary. The software creates a nice graph that aids in analyzing the link between those pieces of data.
A point to note: Maltego is not an open-source tool. This means that you cannot modify or alter its source code to match your preferences.
The software comes pre-installed in your OS. Nonetheless, you will have to sign up to select the edition of your choice.
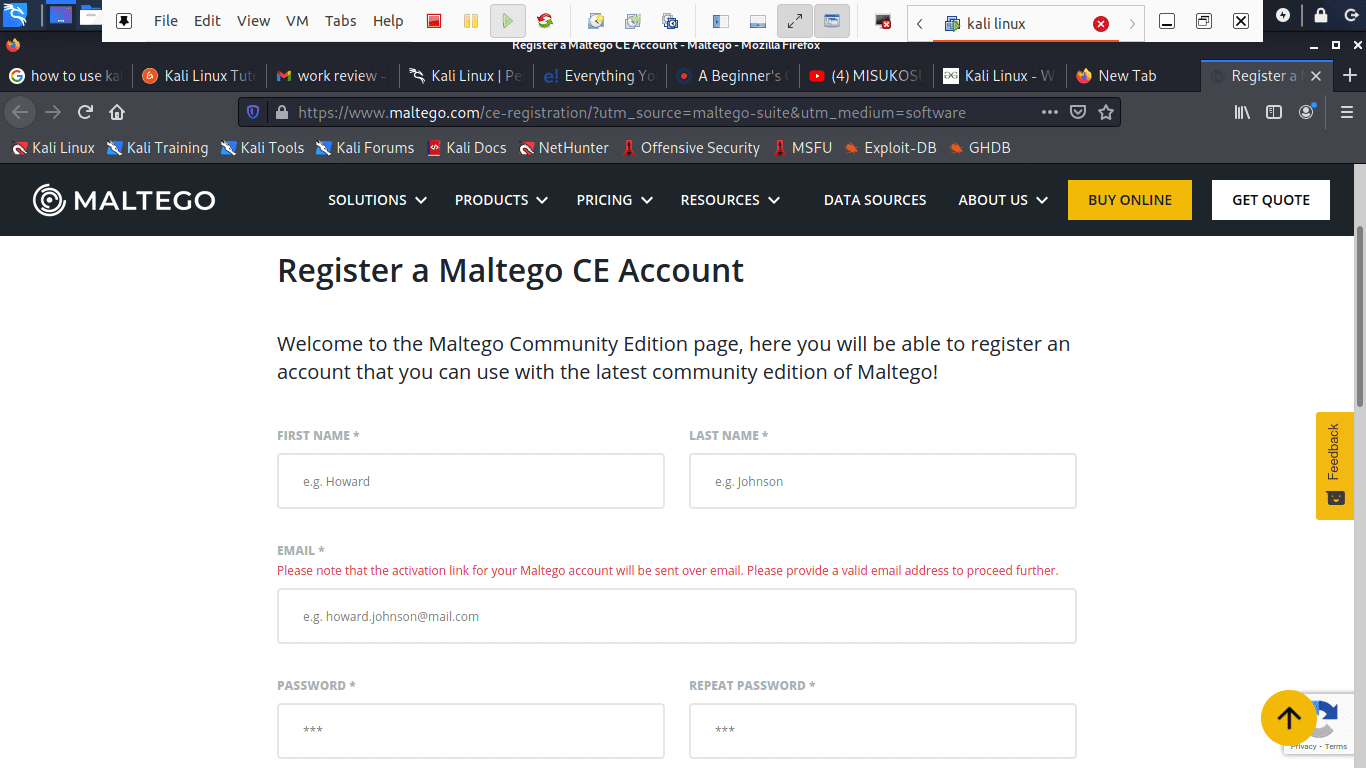
Register a Maltego CE account
You can resort to the community edition if you want to use it for personal use, but if you’re going to use it for commercial purposes, then you will have to subscribe to the classic or use the XL version.
To do data mining, let us start by firing up Maltego. To open up the application, go to applications, Kali Linux, and open-top 10 security Tools. Among the listed security tools listed, you will see Maltego.
Click on the app and wait for it to start up. It will then open with a greeting screen after loading, asking you to register. Here, go ahead, register, and save your password to prevent login in every time you open up the app.
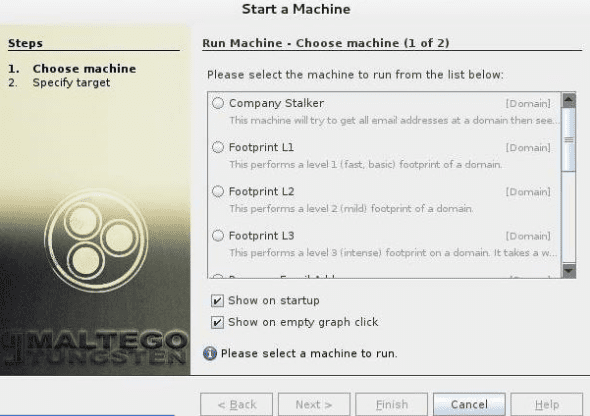
The next step is choosing a machine and parameters. After successful registration, we have to select the machine to run against our target. A machine in Maltego generally means what type of footprinting we want to do against our target. In our case, we are focusing on network footprinting, and our choices are:
- Company stalker: this gathers information about the email
- Footprint L1: collects essential information
- Footprint L2: gathers a moderate amount of information.
- Footprint L3: gathering intense and complete information.
Here, on the machine section, we will select the L3 footprint. This is because we will be able to gather as much information as we can. Unfortunately, it is the most time-consuming option, so you better be aware of that.
after selecting the machine type, choose the target and click Finish
Choosing a target: after selecting the machine type, choose the target and click Finish. Thereafter, leave the rest for Maltego to complete.
Maltego will begin gathering as much information as it can from the domain you gave. Thereafter, it will be displayed. The software also collects the nameservers and mail servers. Finally, click on “Bubble View,” which is the second button after the main view. This section will let you view the relationship between your target and its subdomains plus the linked sites. This, therefore, proves how Maltego is an exciting tool to do networking on a potential target.
Final Results from maltego
Aircrack-ng
Aircrack-ng is a collection of tools used to assess WIFI network security. It has enhanced tools that monitor, get insights and also have the ability to comprise a network (WEP, WPA1, and WPA 2).
Another great advantage of this software is that you could regain its access through this software if you forgot your WI-FI’s password. To your advantage, it also includes a variety of wireless attacks with which you can monitor a Wi-Fi network to enhance its security.

Aircrack-ng
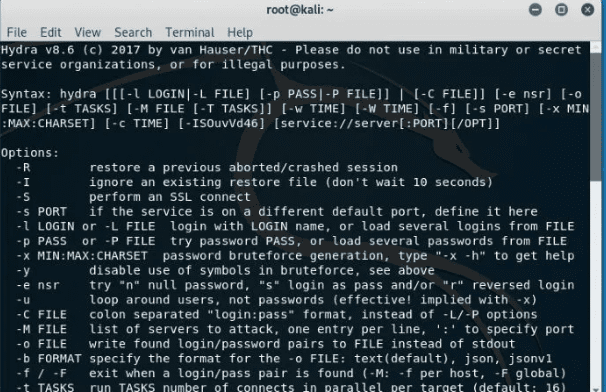
Hydra
Suppose you have been looking for an exciting tool to crack passwords, then hydra is here for you. This is one of the best pre-installed Kali Linux tools to carry out such a task. Additionally, the software is open-source, meaning you can modify its initial source code.
Hydra
Burp Suite Scanner
This is an adorable web security analysis tool. Burp provides a Graphical User Interface (GUI) and other advanced tools, unlike other web application security scanners. Unfortunately, the community edition restricts the features to only some essential manual tools.
The software is also not open-source, which means you cannot modify its initial source code. To try this, you can test using the free version, but those who want detailed information about versions and upgrading should consider visiting their official website.
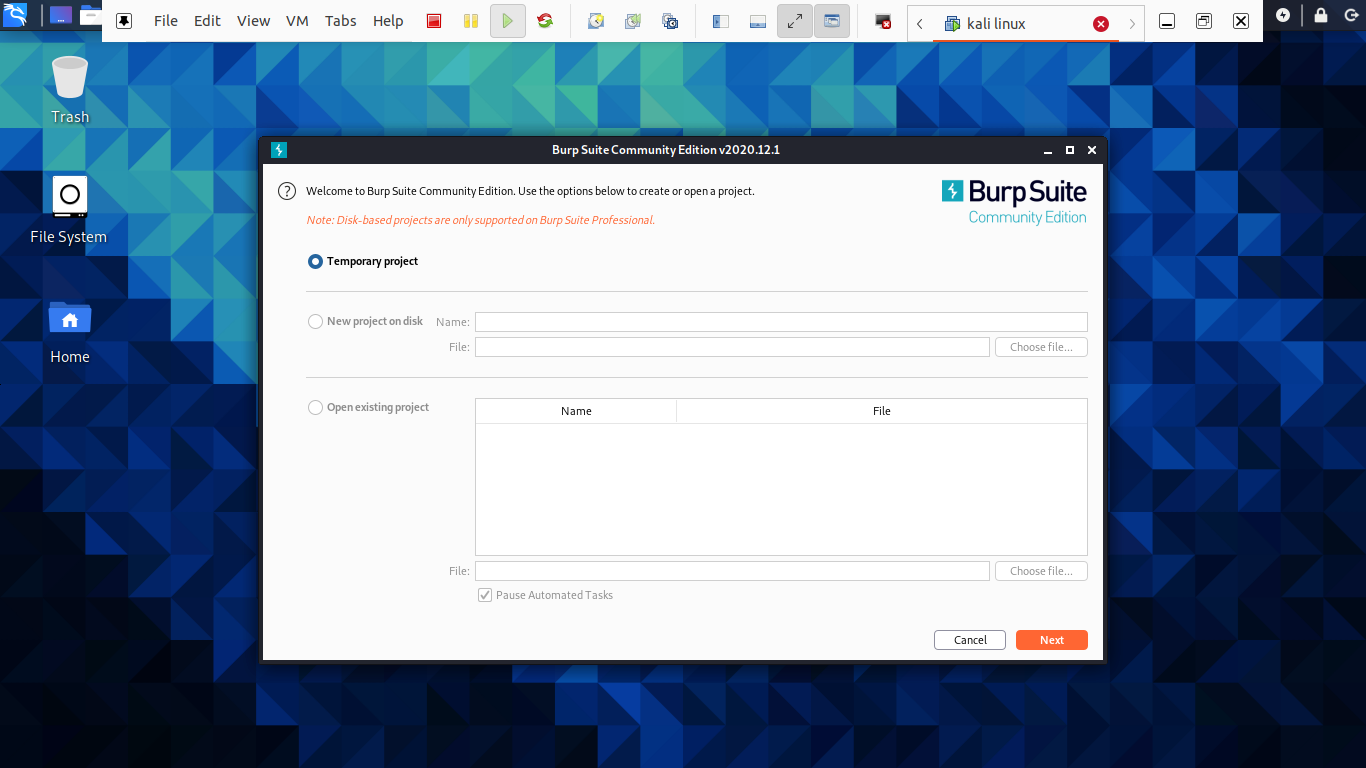
Burp Suite Scanner
SQL Map
Have you have been looking for an open-source penetrating testing tool? Then sqlmap is one of the best. It automates the process of exploiting SQL injection weakness and aids you in taking over database servers.

SQL Map
Wireshark
This is the most popular network analyzer that is pre-installed in Kali Linux. It is categorized as one of the best kali tools used in network sniffing. The software is actively maintained, which makes it worth trying.
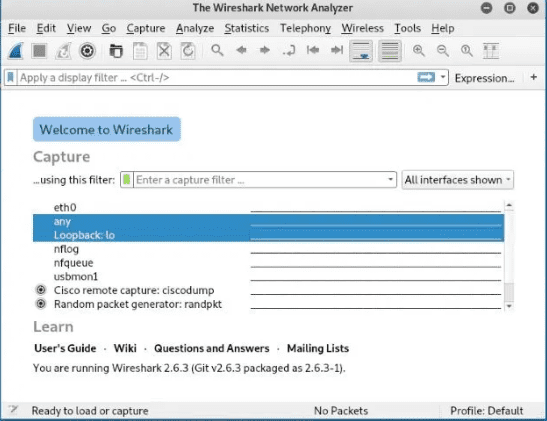
Wireshark
Using Kali Linux Graphical User Interface
Here we are profoundly going to reveal how you can navigate through this comprehensive operating system. First, this OS has three tabs that you should be aware of. Applications tab places tab, and finally the kali Dock.
Let us break down for you the meaning and functions of this tab:
Application tab- application tab provides the user with a graphical Drop-down List of all the applications. The tab also displays pre-installed tools on the system. In this tutorial, we will discuss several kali tools and how they are used.
How to access the Applications tab
Step 1): First, click on the application tab.
Step 2): The next step is to browse to the category you want to explore.
Step 3): After that, click on the application you want to start.
Places Tab – equivalent to other graphical operating systems, Kali also gives simplified access to your pictures, My Documents, and other essential components. The places tab on Kali Linux provides the user with crucial access that is vital to the OS. Music, Downloads, computers, Browse Network, Home, Desktop, and Documents are the default options that the places tab contains.
Below are the steps to access Places
Step 1): First, click on the places tab.
Step 2): After that, select the location you would like to access, and you are done.
Kali Linux Dock – similar to the Windows taskbar, Kali Linux has a Dock that allows you to access any app. Additionally, it also keeps the memory and offers easy access to frequently used applications. Sometimes referred to favorite applications. The Dock also allows the addition and removal of applications easily.
How to add an item to Dock
Step 1): At the start of the Dock, click the show applications button.
Step 2): Choose the application you want to add to the Dock
Step 3): After that, right-click on the application
Step 4): Finally, a menu with options will be displayed, here you will select the “Add to favorites options,” which will automatically allocate your app to the Dock.
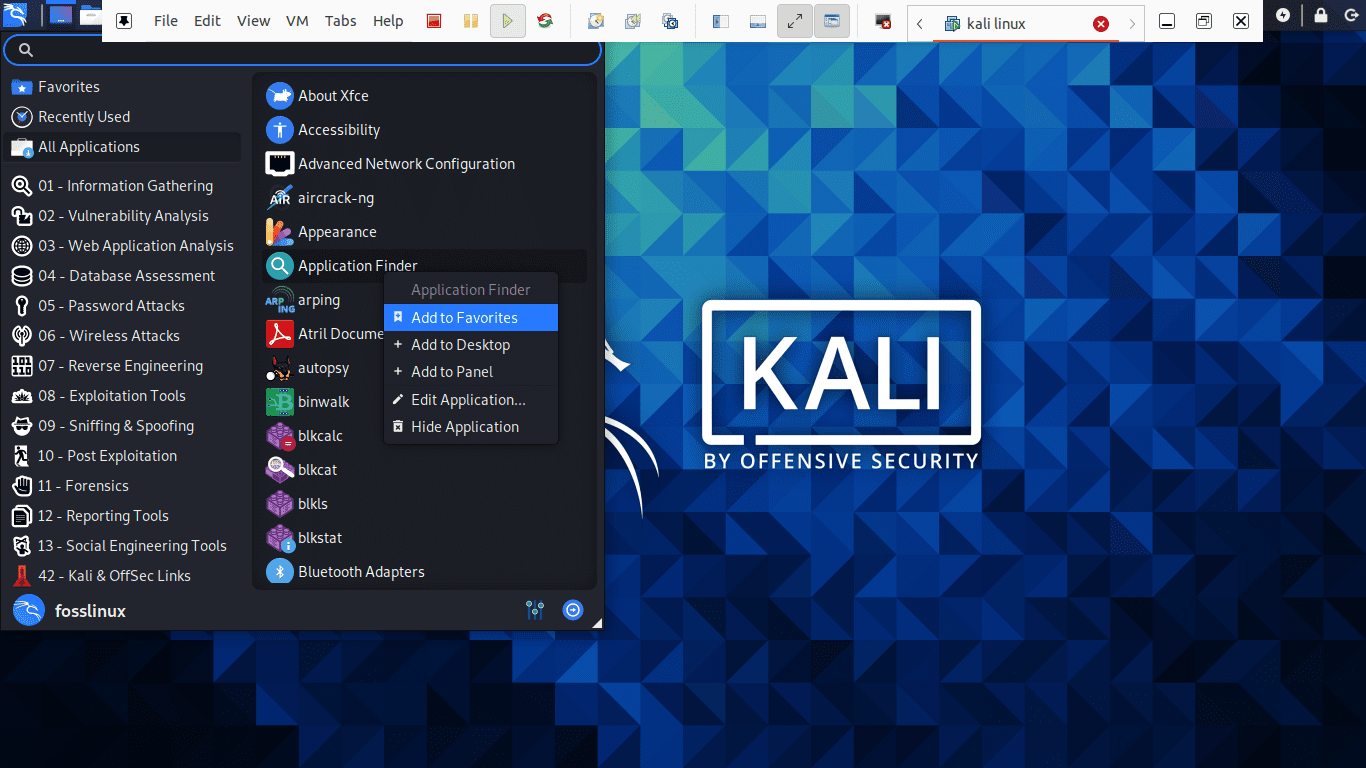
Let us show you how to add an item to Dock
How to remove an item from Dock
Removing an app from Dock is similar to adding an item to the Dock. To accomplish this, follow the few steps below:
Step 1): At the start of the Dock, click on the show applications button.
Step 2): Thereafter, select the app you want to remove from the Dock
Step 3): Proceed by right-clicking on the Item
Step 4): Here, a drop-down menu with options will appear, select the “Remove from Favorites” option, and you are through with the process.
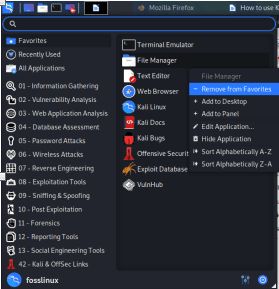
How to remove an item from Dock
How to connect to the internet
To connect to the internet in Kali Linux, press the network icon on the top panel. Here, a list of wireless networks will be displayed. Select your network. After that, provide the network’s security key, and you will be connected in a short while. Then again, you can use the Ethernet cable that automatically connects you to the internet. Kali Linux comes with Firefox as the default browser.
However, there are several browsers that kali Linux supports, for instance, google chrome and chromium.
How to create Documents, presentations, and Spreadsheets?
To use LibreOffice in Kali, you must first install it since it does not come as a pre-installed application. To achieve this, make sure that your repos are up to date by typing “sudo apt update.” After that, use the command below to download the LibreOffice via the terminal “sudo apt install libreoffice.”
sudo apt update
sudo apt install libreoffice
The abbreviation LibreOffice stands for Linux-based Office Software. After installing, its icons for Libre writer, spreadsheet, and presentation packages reside on the Dock. You only have to click on the applications tab and navigate either to the libre writer, spreadsheet, or the presentation package. Click it and wait as it launches up for use. The app also launches with tips that guide how to navigate through the office processor.
A terminal is also an essential tool in this OS. If you want to install an application, you can only copy and paste the install command, and your app will be installed. It is also used to update and upgrade your system to the newer released version. Without updating and upgrading your system, then your OS could crash at any time. This could be a waste to you and all your stuff on the computer.
Kali also has a “recent tab” that holds the memory of the freshly done things, for instance, apps opened a moment ago or, instead, recently accessed documents. This eases one’s work of trying to access them.
Conclusion
Up to this end, we are pretty sure that you can now install and use kali Linux with ease. We have generally gone through the basics that you need to get started with this OS. However, we can’t brag that we have covered all that is required in this Operating system.
Have you tried this adorable Operating system? Why? And what was your experience while using and navigating through the apps? Please share with us in the comment section how you are getting along with this Kali Linux OS.
We hope that you had fun while studying this Operating system. Thank you all for reading this article.