
Kali Linux, previously known as BackTrack Linux, is a Debian-based open-source Linux distribution designed for advanced penetration testing and security auditing. This operating system has many tools for diverse information security undertakings, including penetration testing, reverse engineering, security research, and computer forensics.
Kali Linux is a multi-platform elucidation that information security pros and hobbyists can use for free. It is designed to satisfy the needs of penetration testing and security auditing professionals. To do this, Kali Linux has undergone the following significant changes to match these requirements:
- Network services are deactivated by default in Kali Linux due to system hooks that disable network services. These hooks allow users to install various services on Kali Linux while assuring that their distribution is secure by default, regardless of which packages are installed. Additional services, such as Bluetooth, are automatically blocked.
- Kali Linux uses an upstream kernel that has been patched for wireless injection.
- A basic and trusted collection of repositories. Given Kali Linux’s purposes and ambitions, protecting the system’s integrity as a whole is critical. With that in mind, Kali’s number of upstream software sources is kept to a bare minimum. Unfortunately, many new Kali users are tempted to expand their sources by adding more repositories.
Downloading Kali Linux ISO image
The Kali website is the only recommendable source where one can download the Kali Linux ISO images. Many websites offer Kali images due to their popularity, but they should not be trusted because some may contain viruses that could cause serious harm to your system. In addition, the Kali Linux website is protected by HTTPS, making impersonation more difficult.
An attacker would additionally need an approval credential by a Transport Layer Security (TLS) certificate authority that is reliable to the target’s browser to carry out a man-in-the-middle attack. Since certificate authorities are put in place to avoid problems like this, they only give authorization to users whose identities have been approved and who have provided tangible shreds of evidence that they own the website in question.
Which ISO image to download?
A list of ISO images to be downloaded may be found on the official download website, such as:
- Bare Metal
- Virtual Machines
- ARM
- Mobile
- Cloud
- Containers
- Live Boot
- WSL
Fresh Kali Linux images are generated on these websites every few months. Therefore, click this link to get the Kali Linux Live Boot ISO image that we shall later write into our USB thumb drive.
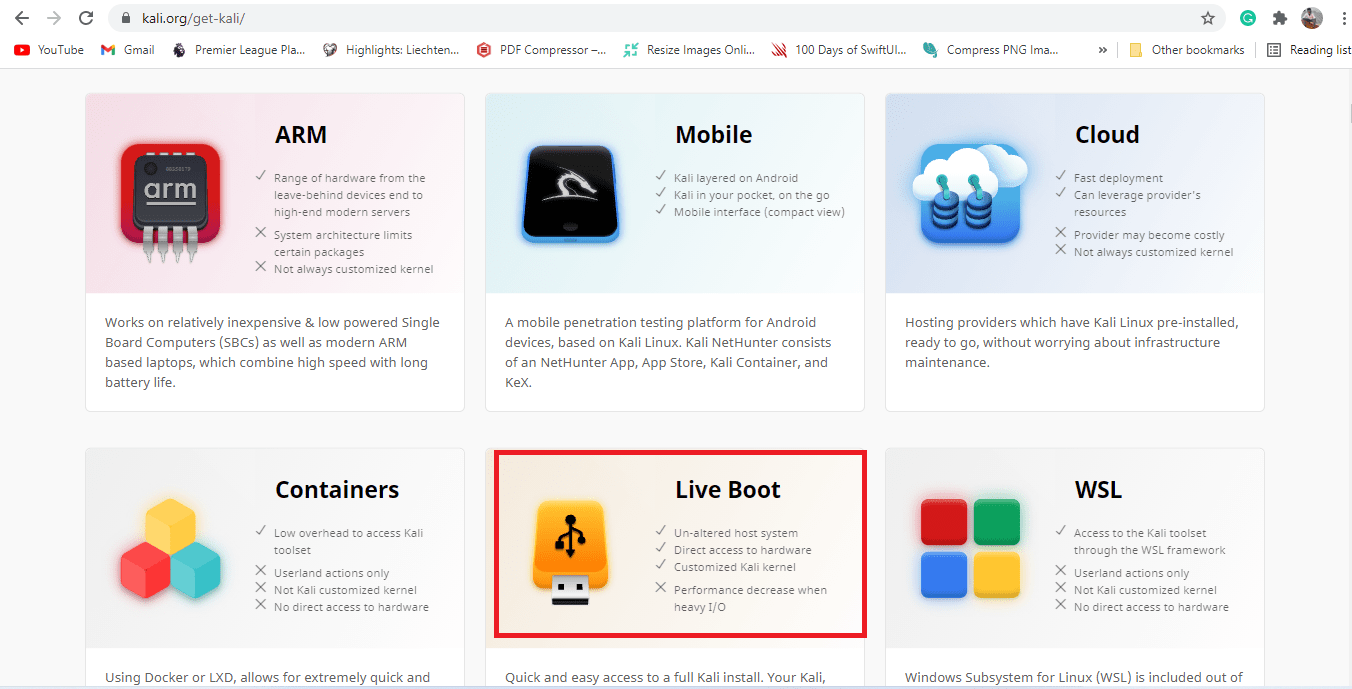
Select Live boot ISO
Verifying authenticity and integrity
To protect their data and networks and their clients, security experts must check the integrity of their tools. While the Kali websites and URLs are TLS-protected, Kali distributes the image over a network of external mirrors means one should not trust everything they download. It is possible that the mirror someone recommends was hacked or was the target of an assault.
The Kali plan mainly contains checksums with the images it releases to avoid this. However, for such verification to be adequate, one must ensure that the checksum they retrieved is the same as the one provided by the Kali Linux designers. There are two methods to determine this as follows;
- Using a website that is TLS-protected
The provenance of the checksum is indirectly ensured by the X.509 credential safety model when one obtains it from the TLS-protected download webpage: the material that is seen comes from a site that is successfully under the control of the one who requested the TLS certificate.
- Using the Web of Trust feature of PGP
PGP/GPG is a one-of-a-kind security model. Any user can produce any key with any individuality, but he would only trust it if signed by a key trusted. When they sign a key, the user certifies that he has met the key’s holder and is aware of the related identity. The user also defines his first list of trusted keys, which includes the personal key.
Writing the Kali Linux ISO image on a USB Flash Drive
To install Kali Linux onto the USB drive, the user must burn the ISO onto a USB thumb drive. The ISO image we downloaded in the previous step will be used to write our USB flash drive. Most people chose the Kali live image because they want to boot from a USB drive and use a live environment or install Kali Linux’s default settings. In this tutorial, we shall be illustrating how to install Kali Linux on a flash drive. Stick to the tutorial to learn more.
Creating a complete Kali Linux USB bootable drive
In this article, we shall use the Balena Etcher application. The instructions for obtaining BalenaEtcher are straightforward and do not require any technical knowledge. The following are the steps to be taken:
- First, visit Etcher’s official webpage.
- Download the Etcher application that suits your operating system
- Install Etcher by following the installation instructions.
Etcher has evolved from its original function of writing ISOs to burn images to portable media. When compared to other options, Etcher outperforms the competition by being extremely dependable and straightforward to use. Rufus, Easy2Boot, and dd are some of the choices. All of these programs, however, are no match for Etcher.
Writing the complete Kali Linux ISO onto a USB drive
1. The user must first pick the “Flash from file” to select the Live Kali Linux ISO after opening the writing software(Balena Etcher).
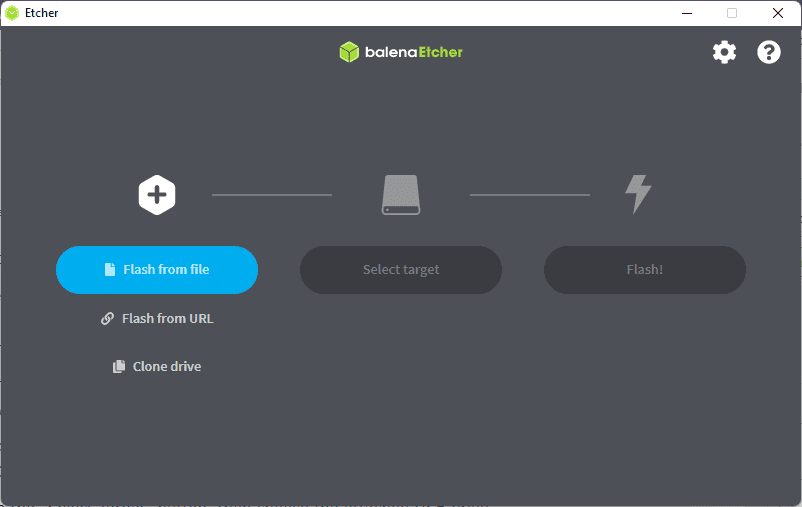
Click Flash from the file
2. Click “Select target” to select the USB drive that we shall use to write the Live Kali Linux ISO we selected in the previous step.
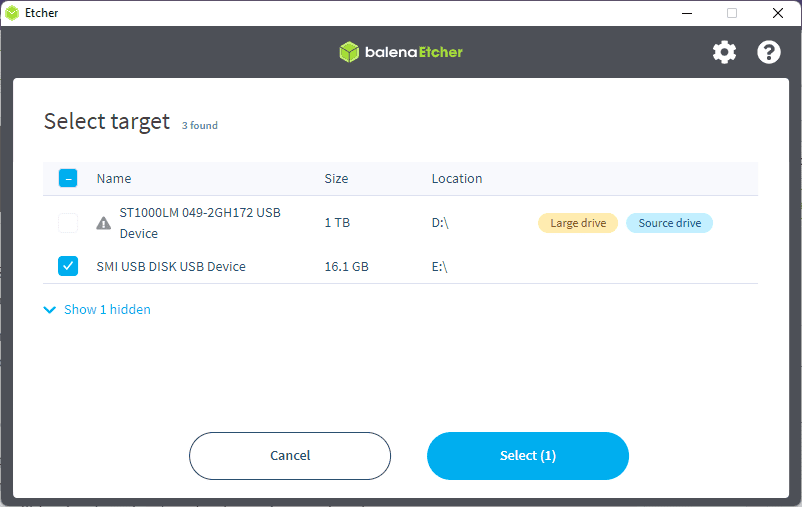
Etcher Select target
3. Next, to write the Kali Linux ISO to a USB drive, click the blue “Flash” icon shown below:
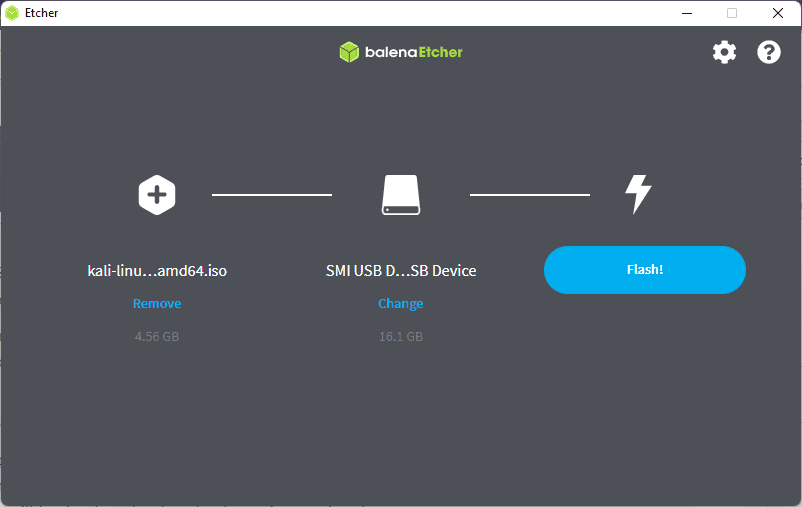
Etcher click flash
A new popup notification will appear, asking the user if they are okay wiping off all of the data on the USB drive. To ensure the next step, the user should click ‘Okay.’ The writing process will begin.
Note: This process will take quite a while, depending on the processing capabilities of your machine and the ISO size to be written on the flash drive. It is recommended to use USB 3.0 if you intend on getting faster speeds.
Be patient as the software formats, and write the new Kali Linux ISO software onto your USB drive. The entire process is approximated to be around 15-20 minutes. Once the writing process is complete, the Etcher application will verify the written software before summing up the process. After a successful verification, click ‘close’ and then ‘reboot’ the computer.
Booting to your PC
To go to the boot menu, the user turns on their computer while pressing the F12 key. This may vary depending on the computer model. As a result, anytime in question, the user is to consult an authorized PC supplier.
Once you get to the boot menu, change the boot order to USB being the first choice. Next, save and exit changes by pressing the F10 key on your keyboard.
Note: In the BIOS, disable the ‘secure boot option,’ then save and quit the settings.
To live-boot from the bootable flash drive, select the “Live System” option to proceed. Your PC will directly boot into the Kali Linux desktop. Now you can freely use the Kali Linux software on your USB without installing it on your hard drive.
We are not yet done since our subject matter is to install the complete Kali Linux on a USB drive, but we are only booting from the USB drive. So, continue reading the article to learn how to install the complete Kali Linux on a USB drive.
Once in the live boot environment, you should have an additional USB drive to install Kali Linux.
Note: It is important to have a flash drive with a minimum of 16GB to proceed with the installation. Also, ensure all your important stuff in the flash drive is backed up to avoid losing data. Once you have all those requirements in place, now it is time to start the installation process.
Installing complete Kali Linux on a USB thumb drive
Ensure to try and use USB 3.0 ports and drives to boost speeds. However, the process might be prolonged depending on your computer specs. Besides, it would help if you considered that your speeds would be slower than internal drives, and at some point, it might lag and slow down.
Now that you have that in mind, clean your USB thumb drive to install the Kali Linux operating system. Before the installation process, completely erase all the data from the flash drive to avoid falling into errors. Also, it is advisable to remove GPT if it exists.
Remember, we had already booted to our live environment using the bootable flash drive we created using the etcher application. Since we are in a live environment, we shall not see any disks. Now plug in the USB thumb drive you want to install Kali Linux. When you check disks, you will see the flash drive we inserted. Please make sure you note down the name as it will be helpful to remove the GPT.
List the disks present by running this command:
sudo fdisk -l
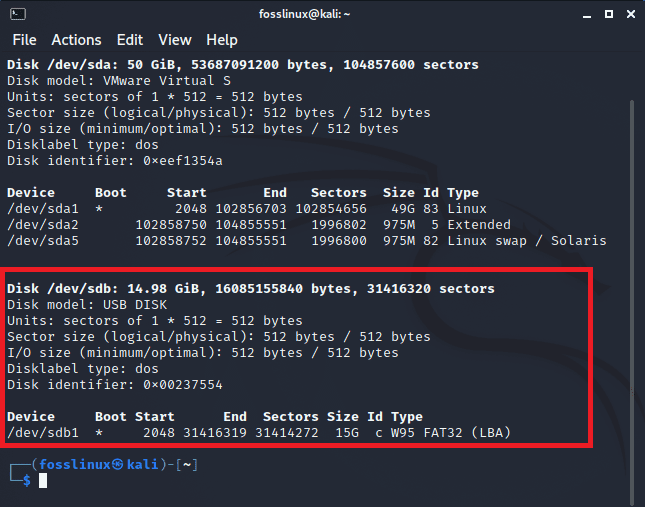
List all available disks
The disk highlighted above is my flash drive /dev/sdb, while the other one /dev/sda is my internal drive
To remove GPT, if it exists, run the command below:
sudo gdisk /dev/sdb

Remove GPT if it exists
/dev/sdb is the name of my flash drive, and it might not be the same as yours.
Note: Since GPT is not present in my flash drive, then I will skip to the installation part, but if you see GPT present in the highlighted sector above, then proceed to the next steps of removing the GPT partition
Once you run the command above, the system will detect the partition tables available in that flash drive and ask which one you choose. Then, select any of the provided tables to proceed.
Now switch to expert mode by running the command below:
x
Proceed and remove GPT by running this command:
z
If prompted, agree to wipe out the flash drive completely.
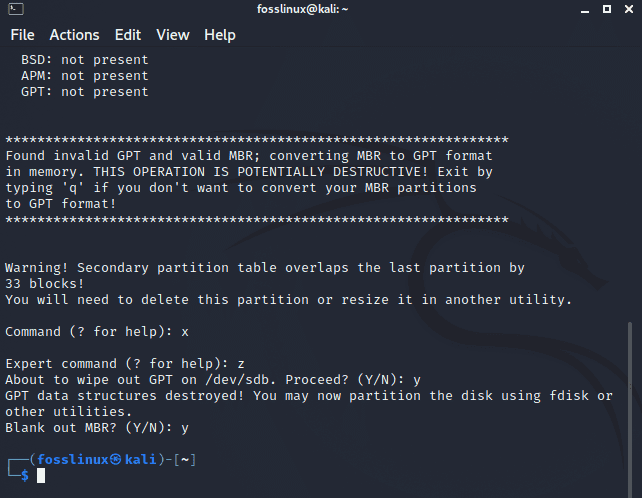
Switch to expert mode and wipe out GPT on your flash drive
Our flash drive is now cleaned. We can proceed to install Kali Linux on our cleaned flash drive.
To install the Kali Linux ISO onto our USB drive, we shall use the graphical and reboot method illustrated in this article. Follow all steps to be successful with the process.
We shall not reboot our PC since the installer is readily available for use in the live environment.
Step 1: Create Partitions on the cleaned USB
We have to create two partitions on our cleaned or rather main USB that we shall use to install Kali Linux. We shall use either Gparted or the Gnome Disk Utility for this exercise, easily found in the live environment.
The two partitions are:
- ext4 – the root partition for formatting Kali Linux
- FAT – this partition will contain the remaining unallocated space that remained after creating the first partition, and it will be used as a regular USB drive
I have a 16GB USB thumb drive where the root partition will be 8GB, and the remaining 8GB will be formatted as FAT for normal USB drive use. This, therefore, implies that I have an 8GB drive that can be used on any PC to transfer and store data. Sounds great, right!!!
Remember, it is not necessary to do the partitioning process before the installation process since it can be done while installing Kali Linux. However, we recommend that you complete this process before installing since it might be very complex during the installation process, and you might end up messing with everything.
After successfully creating the partitions on the main USB thumb drive, we are a step closer. Now take a deep breath as we roll on to the significant part of this article, the installation part.
Step 2: Installing Kali Linux on the Main USB thumb drive
- The first step is to boot our Kali Linux from the bootable USB drive we created earlier in this article. However, since we are already in the live environment, we shall skip this step and move to the next.
- From the live session, launch the installation application. The Live session of Kali Linux will be similar to the installed Kali Linux desktop environment.
Note: Only the older versions of Kali Linux support this method. Hence to be on the same page, you will download the Bare Metal Kali Linux ISO image and create a bootable flash drive as we did for the Kali Linux Live ISO in the previous step. After that is complete, follow all the other steps as they are from step 3 (the next step) - The welcome screen of the installer will appear. Now select the language and click the “Continue” button.

Kali Linux Setup Language
- Now specify your geographic location

Kali Linux Setup Geographic Location
- Proceed and setup your Keyboard layout
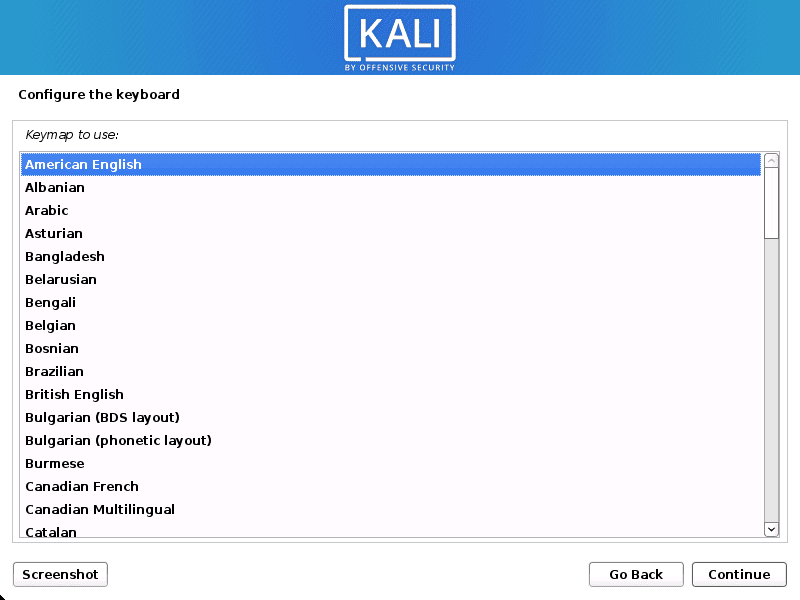
Kali Linux setup keyboard
- This process is not as direct as the previous ones, and you must understand the concepts highlighted below:
While setting up the network, the system probes the network interfaces to look for a DHCP service, then prompts the user to enter the hostname for the system, as shown in the example below where we entered kali as our hostname.
Note: If no DHCP service is running on your network, you will be asked to provide the network information after probing the network interfaces manually. However, you don’t need to worry much since you are provided with the luxury of skipping this step.
Now that you have a glimpse of what is required, after entering the Hostname “kali,” click continue to proceed to the next step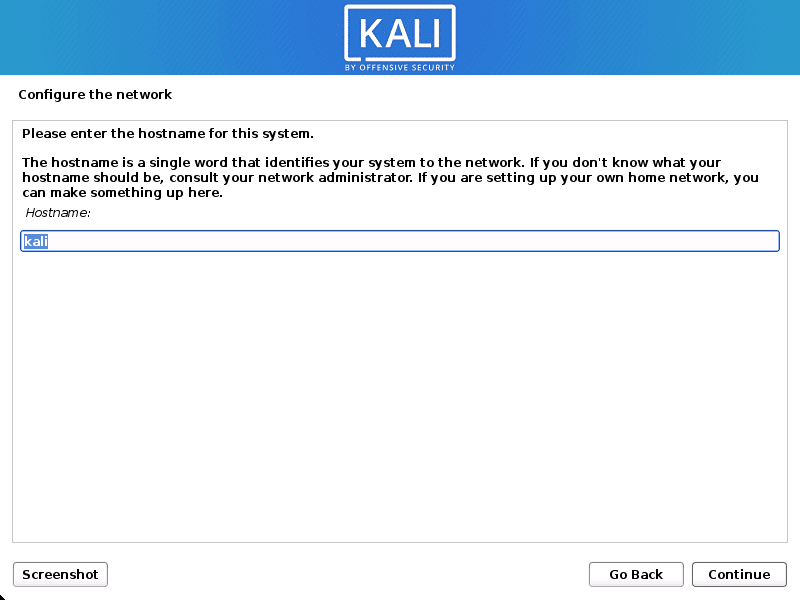
Kali Linux setup hostname
- The next step is also optional, and you might opt to leave the domain name black just like we did for this tutorial.
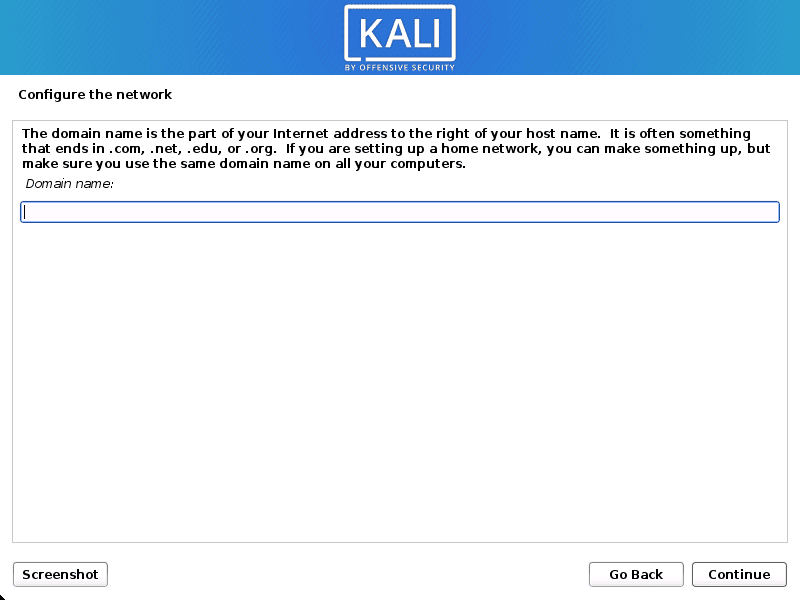
Kali Linux setup domain name
- This step involves providing full names for the user and setting up passwords. It is referred to as the “User Accounts” step. Ensure you create strong user accounts to avoid being a victim of attacks due to easy-to-guess passwords. Now enter the full name of the new user. In our case, we shall still use kali. Click continue to proceed.
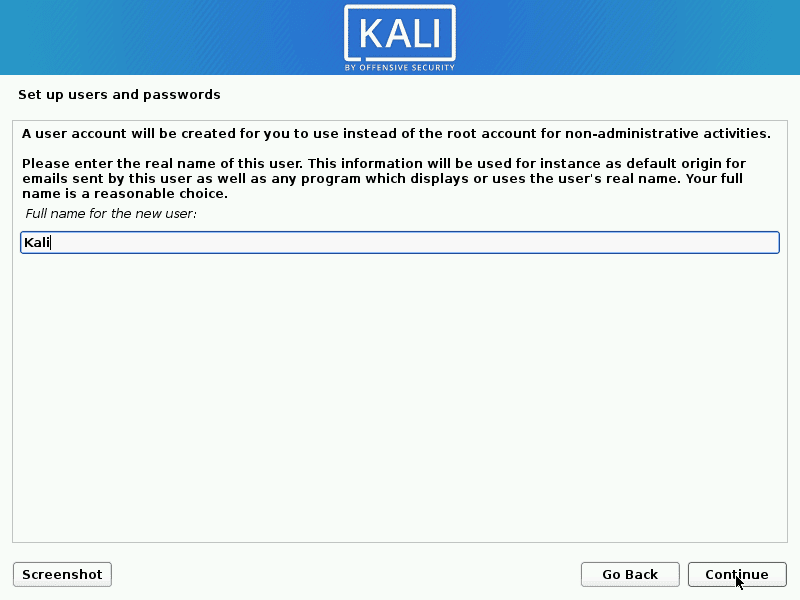
Kali Linux setup full name for a new user
- Enter your username. For the sake of this tutorial, we shall stick with kali and click continue.
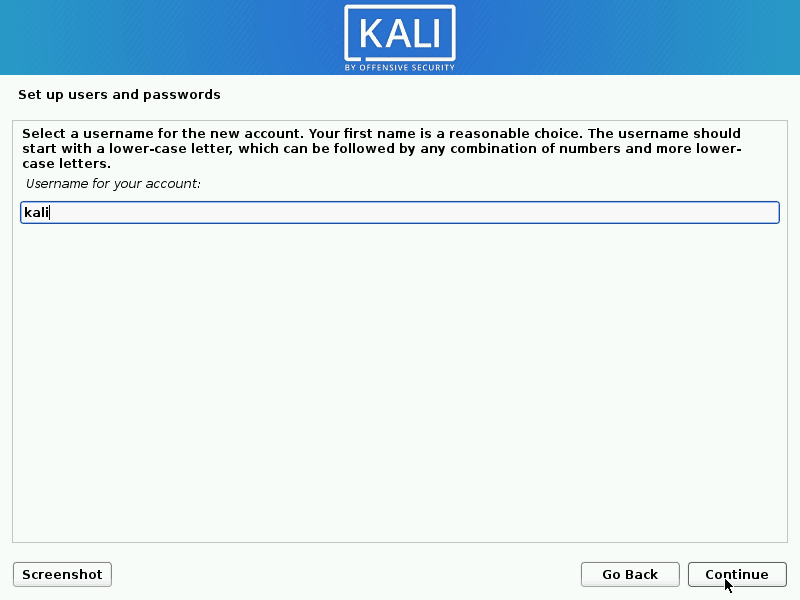
Kali Linux, enter your username for the account.
- Now it is time to set up a strong password. Choose a strong password combination, confirm it and click continue to go to the next stage.
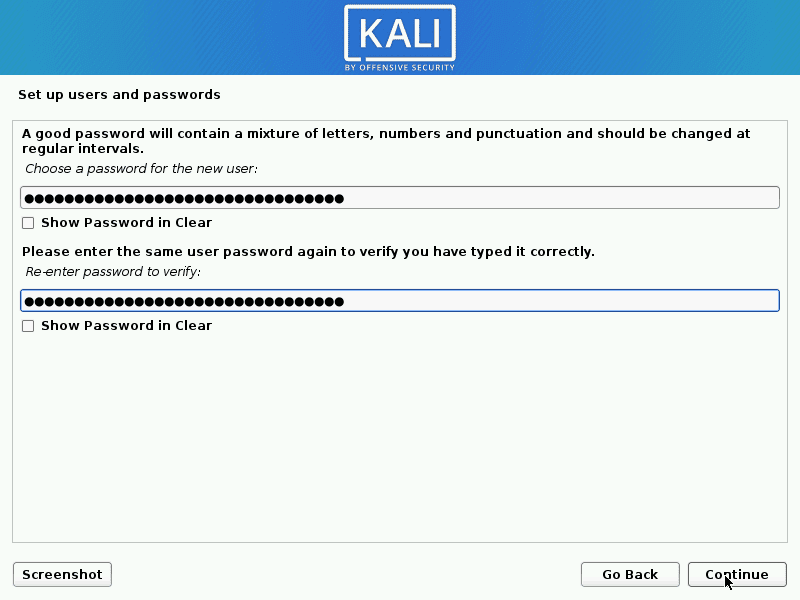
Kali Linux set up a strong password.
- Configure the clock and time zone. Select your time zone and proceed by clicking the “Continue” button
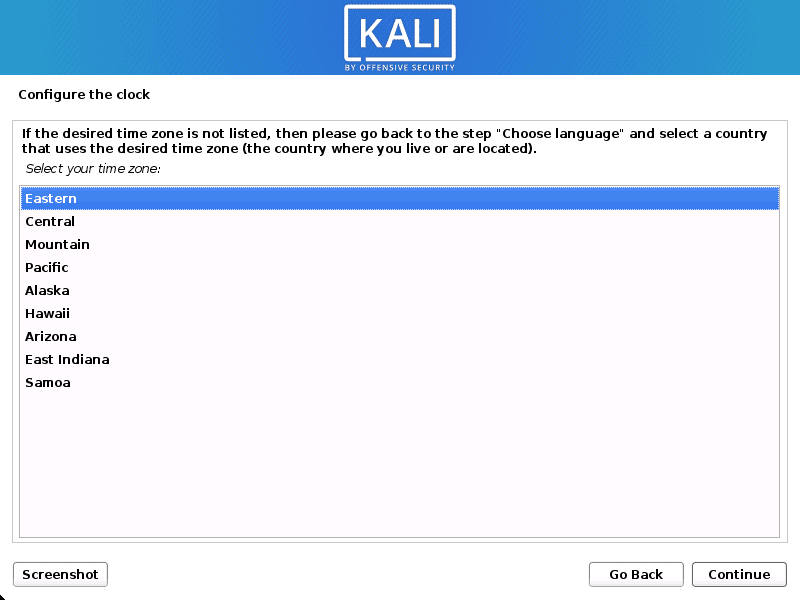
Kali Linux setup timezone and clock
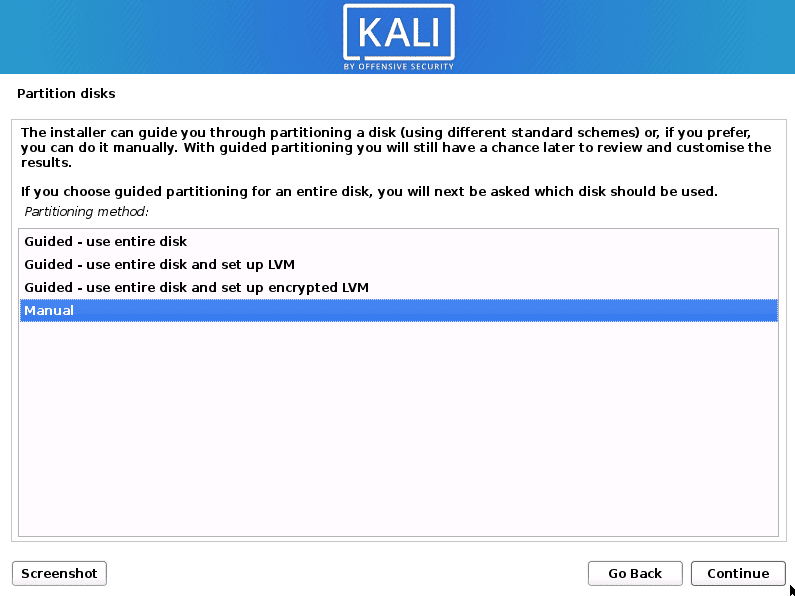
The installer will now probe you in this step to partition disks depending on your preference. Since we had already partitioned our USB Installer, we shall select the partitioning method from the four provided choices:
- Guided- use entire disk
- Guided – use entire disk and set up LVM
- Guided – use entire disk and set up encrypted LVM
- Manual
For the sake of this tutorial, we shall select the last option (Manual) to enable us to select the ext4 partition we created earlier in this tutorial. Once you are done, click continue to proceed.
Partition disks
- It is time to select the disk to be partitioned, which is the main USB drive we partitioned earlier in this article tutorial. Click continue to go to the next stage.
- This step solely depends on the users’ preferences. You can opt to keep all your files in a single partition, which we will do in this tutorial. Alternatively, if you have enough space on your USB thumb drive, you can have separate partitions. For the sake of this tutorial, select the first option, “All files in one partition (recommended for new users”), and click continue to proceed.
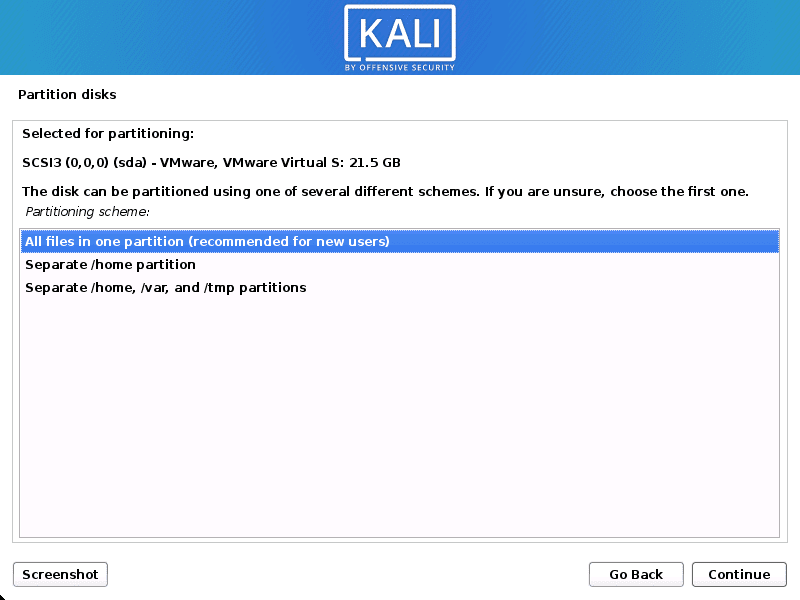
Kali Linux partitioning scheme
- We are almost done with disk partitioning. In this stage, select the last option, “Finish partitioning and write changes to disk,” now continue to the final disk partitioning stage.
- This is the last stage of disk partitioning. It is the step whereby the users have the final chance to review the disk configuration before proceeding since the process is irreversible. If you have finished checking the disk configuration, select “Yes” to write changes to disks. Once you click “Continue,” the installer will start installing Kali on your USB thumb drive.
- In the next step, you will need to enter the appropriate proxy info. (Kali Linux uses a central repo to distribute applications). If you have no idea what information to provide in this step, leave it black and click “Continue” to proceed.
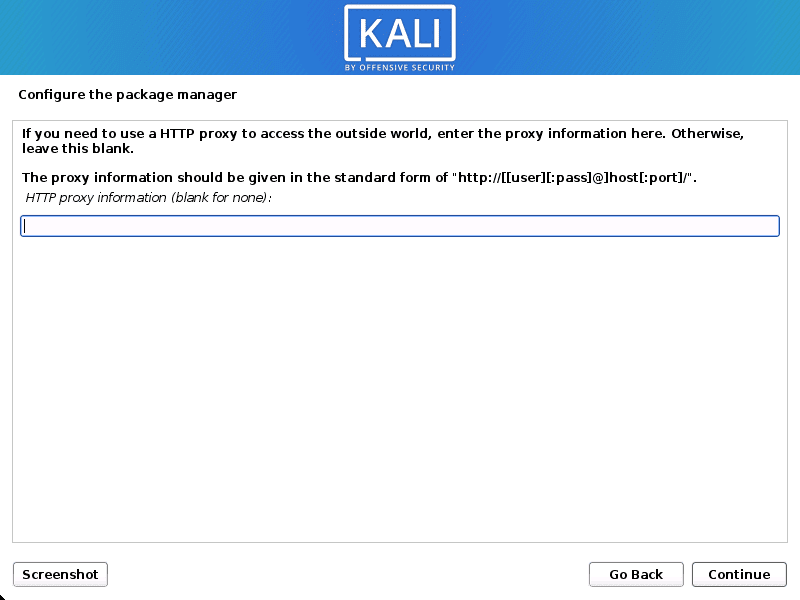
Kali Linux Setup Proxy information
- Metapackages. All the default sections to install Kali Linux with the standard desktop tools and environment are selected. Hence we recommend that you leave everything as it is and click “Continue” to proceed with the installation process.
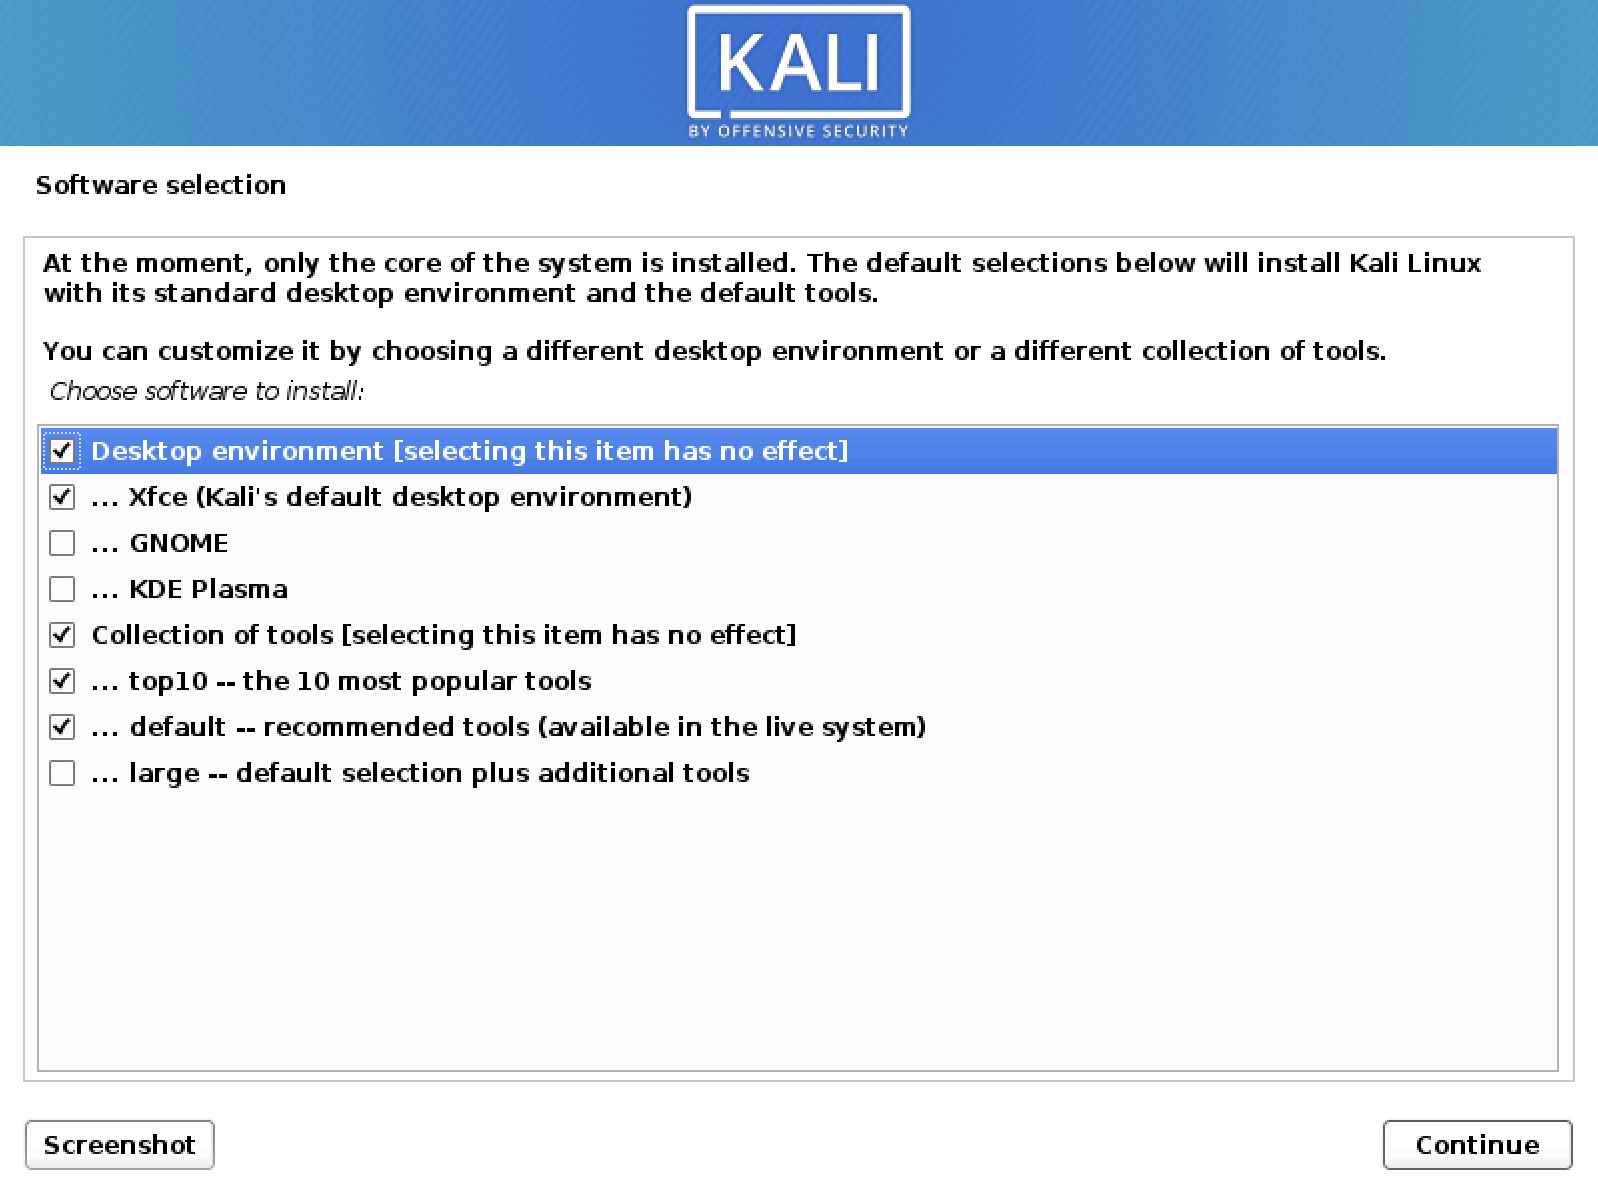
Kali Linux Metapackages
- Now it is time to install the GRUB boot loader to your drive to enable you to boot from your USB thumb drive. Select “Yes” and click “Continue” to proceed
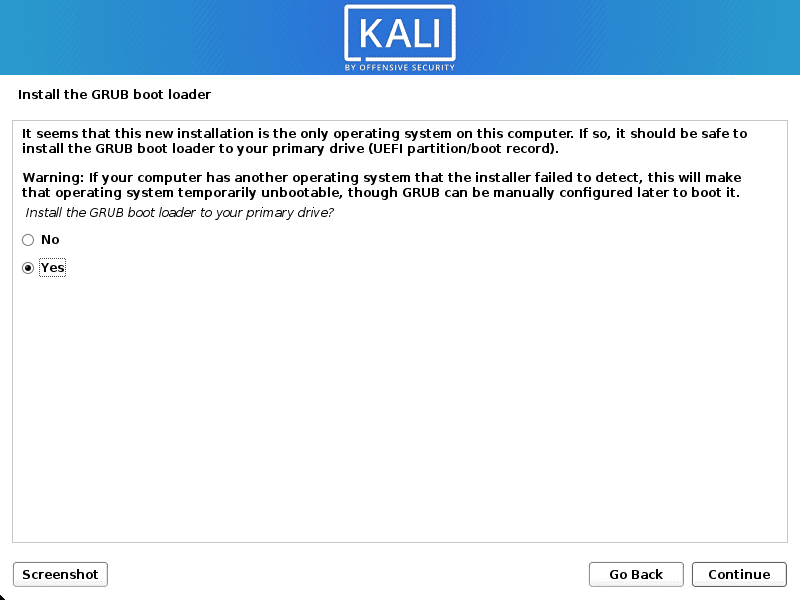
Kali Linux Install GRUB boot loader on the primary drive
- Now select the hard drive to install the GRUB boot loader. This section provides us with two options: Manually selecting the device and choosing an already provided device name. Select the provided name, which on most occasions, is the second option. For instance, ours is /dev/sda. Click “Continue”
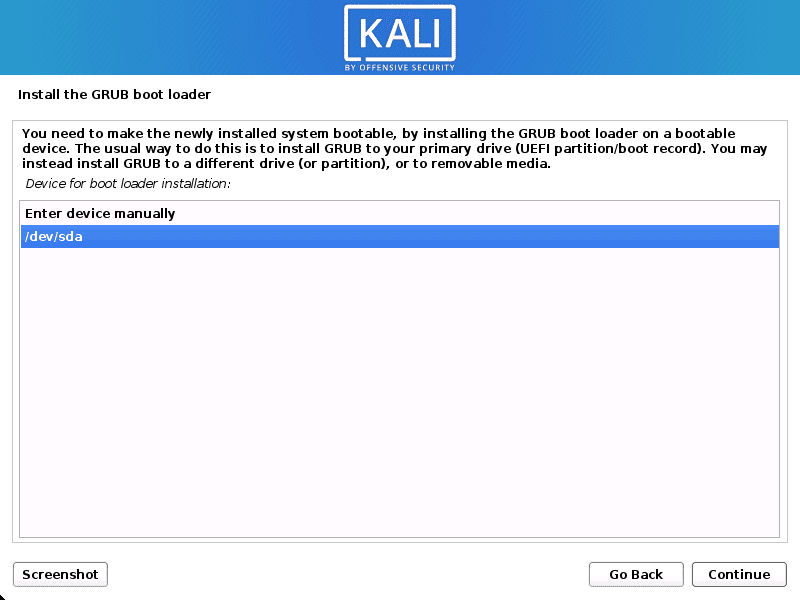
Kali Linux select the hard drive to install the GRUB boot loader
- Reboot your PC. This is the final step of completing your complete Kali Linux installation on a USB thumb drive. Click continue and remove all the USB thumb drives plugged into your PC to complete the installation process
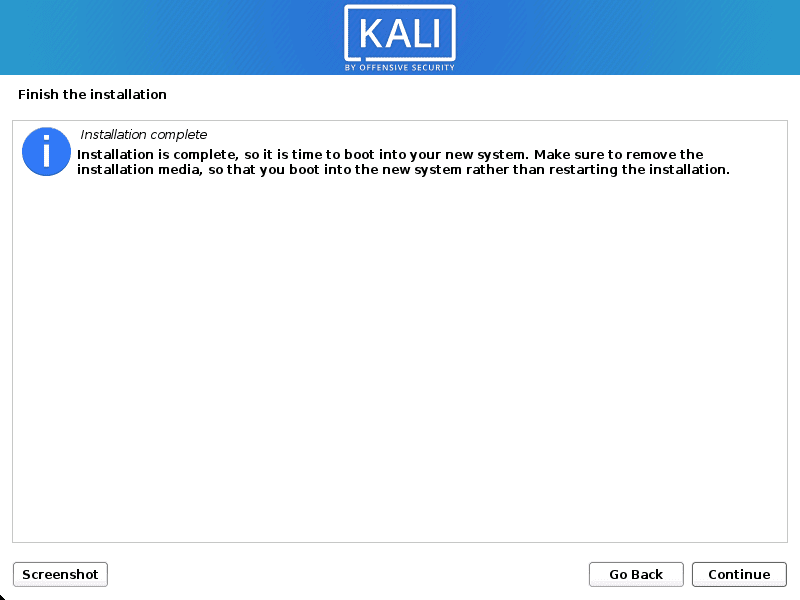
Kali Linux Complete installation
Booting to your newly created USB Kali Linux drive
Congratulations, you now own a Linux operating system on your thumb drive, and you can use it on any PC. First, plug the USB thumb drives into the computer and reboot it. Remember to change your BIOS boot mode to USB to enable booting from your USB thumb drive. Now power on your PC and enjoy using your Kali Linux operating system installed in your USB thumb drive.
That’s all. You have successfully installed Kali Linux on your USB thumb drive, and you can use it on any PC.