
Many users prefer using command line-based applications for their day-to-day work, even if there are graphical alternatives. Of course, for some use cases, it might not be a choice, like logging into a system through SSH, but in many cases, we cannot resist the speed and elegance that the command line offers.
Many command-line text editors are reasonably popular, like Vim, Emacs, or Nano. But we will take a look at a different editor today, which is called Micro. The specialty of this editor is that it is straightforward to use, with familiar keyboard shortcuts, while also containing several advanced features. As a result, it suits beginners and power users all the same. We will introduce and explore Micro in this article.
Interface
The interface is quite simple and minimal. However, there are some aspects of the interface which are helpful for programmers right off the bat. By default, the lines are numbered, syntax highlighting is enabled, and the cursor’s position is shown in the bar below.
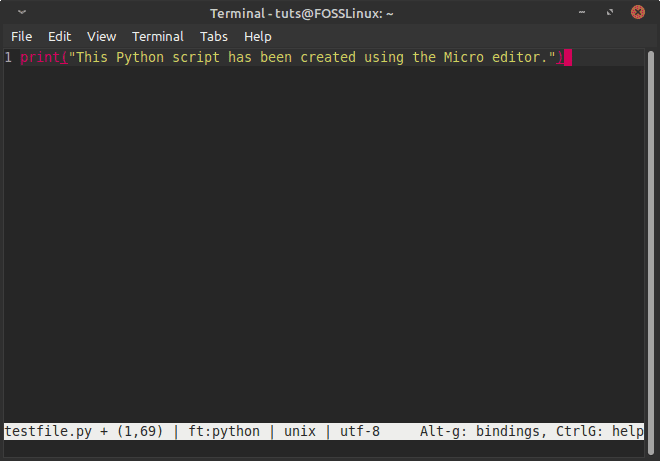
Micro interface
The status bar below also shows the file’s name, the file type (shortened to ft), the system type that Micro uses (in this case, Unix), the character set being used, and how to get help within the editor.
Micro command line text editor features
Keybindings
The keybindings can be checked by pressing the keyboard combination Alt-G, as shown in the status bar. Most of the command-line-based text editors have complicated and specific keybindings, which have a bit of a learning curve and provide you with high efficiency, but only when you have mastered those keybindings. Delightfully, Micro differs here and provides the most straightforward and most intuitive keybindings.

Micro default keybindings
As seen in the image, Ctrl-S for saving, Ctrl-F for finding, Ctrl-Q for exiting, etc., are the most apparent keybindings used mainly by editors with a graphical interface. Therefore, getting used to these keybindings will be extremely easy.
For those of you who might want different keybindings, don’t worry. Micro has got you covered. To edit or add keybindings, the bindings.json file has to be opened. Why don’t we do it with Micro itself:
micro ~/.config/micro/bindings.json
For example, I want to add a keybinding of Ctrl-Tab to go to the next tab. That can be done by adding the following to the file:
"Ctrl-Tab": "NextTab"
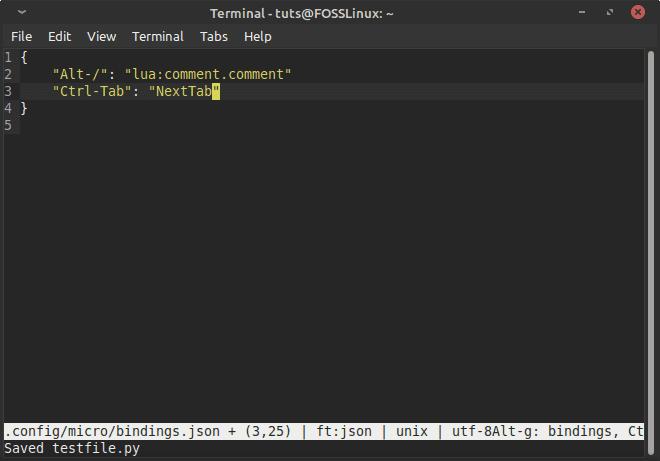
Adding a keybinding
See the image to get a view of where it needs to be added.
The obvious question here is how to know the command for which action and which keys can create the combinations. That is listed on their help page right here. Knowing the names of all the commands and the keys that can be used becomes simple. You can use keyboard keys and mouse actions to create shortcuts (also listed on the link).
The default keybindings, which are already quite ample and straightforward for a fast and efficient workflow, are listed here. In addition, some handy keyboard shortcuts are pre-configured, and we recommend checking them out to optimize your workflow further.
Commands
Micro provides a command bar to get some tasks done much faster. For example, as we mentioned before that the keybindings could be configured. Furthermore, it can directly be done using the command bar instead of accessing the bindings file. The command bar can be accessed using Ctrl-E, which brings up a line starting with “> ” below. It has some exciting features such as:
If you have opened Micro without a filename, just using the command:
micro
Or, if you want to save the file with a new filename, you can do so using the command bar. When you want to save the file, open the command bar with Ctrl-E and type in:
save [filename]
This works like a ‘Save As’ option, will save the content with the filename that you provide.
This was just an example of how useful it can be, but further, there are further useful commands such as:
Going To a Specific Line Number
goto [line number]
Takes you to a specific line number.
Replacing a Word
replace [search] [value] [flag]
Replaces the ‘search’ word with the ‘value’ word. The flag -a can be used to replace all occurrences at once.
Running Bash Commands
run '[Bash command]'
This is one of the more valuable features, in which you can run any command-line command right from inside the editor. Moreover, the output is given in a single line.

Running the ls Bash command
Access Help Menu
help [keyword]
You can get help with any of the features of Micro. This will be covered in more detail in a subsection later.
Setting Values to Provided Options
set [option] [value]
There are various configurable options within Micro. We will describe the process later on in the article.
Plugins
There are various options to manage plugins. This will also be discussed later.
As you can see, there are many useful commands that Micro provides for an easier workflow. Check them all out here.
Help Menu
Ctrl-G brings up the help section for the Micro editor. In a very abridged manner, it takes you through all the different features. But what is much more helpful is that it has a dedicated help section for other features. For example, Micro provides various options to choose a color scheme. If you want to know what you can do about it, enter in the command bar:
help colors
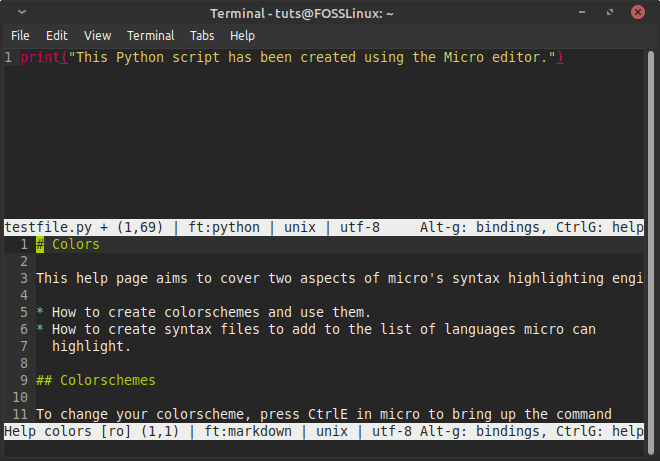
Micro help colors
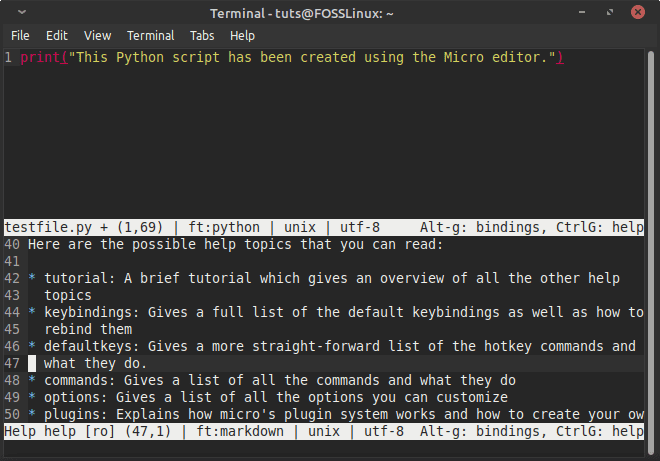
A whole menu will come up, detailing the configurations and options regarding the color schemes. Press Ctrl-G to get back to the editor. Say you want to check out what the default keybindings are:
help defaultkeys
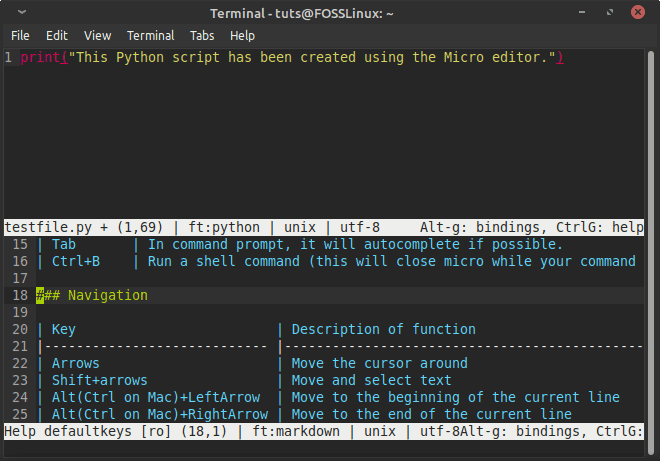
Micro help for default keys
Simply opening the help menu with Ctrl-G shows you the different things with a dedicated help section that you can go through for an in-depth look.
Micro help options
Options
As mentioned above, there are specific configurable options in Micro, and you can set the values for those as you see fit. For example, you want the feature of autosaving in your editor. Micro provides the option to do that, open the command bar with Ctrl-E and enter:
set autosave [n]
Where n is the number of seconds, you want Micro to autosave after. The default value is 0, which means there is no autosaving.
There are many such options given by Micro, such as toggling mouse support (more on that later), display of line numbers, scrollbar, highlighting when finding words, wrapping text, etc. Most of the options are given for the ease of the user, while some options are technically advanced, useful for power users and programmers. You can check them all out here.
Plugins
Micro provides plugins and a system to manage them right out of the editor. There are specific plugins preinstalled in the editor, such as the diff plugin, which shows you changes with the most recent commit on Git. Simpler ones are such as the autoclose plugin, which automatically closes brackets and quotations. More plugins can be installed on Micro, all of which are listed here.
For example, there is a filemanager plugin for Micro. Installing a plugin is as easy as running this command:
micro -plugin install [plugin name]
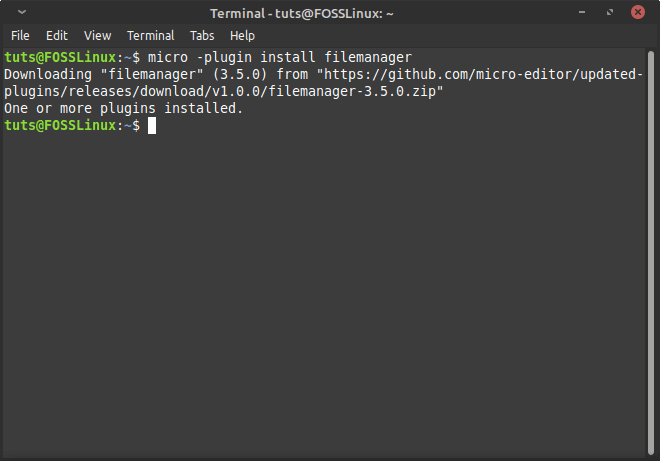
Installing plugins
This brings in new, helpful, and, more importantly, familiar commands to the editor, which can make things easier. For example, now you can run a tree command, which shows the content of your directory in a tree format.
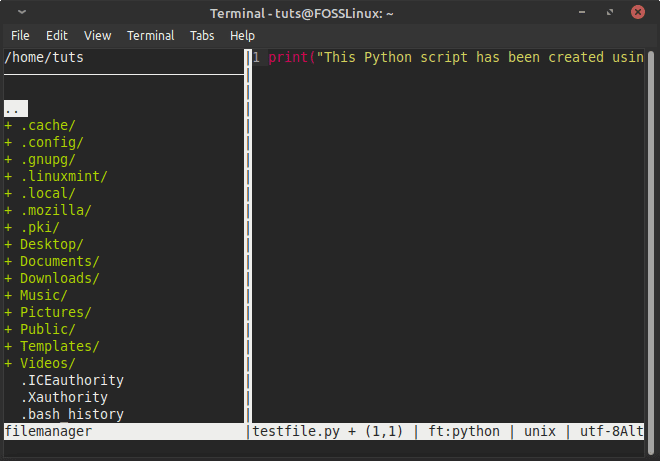
tree Command using filemanager plugin
This plugin also comes with the commands touch (a common Bash command to create new files), mkdir (a famous Bash command to create new directories), rm (Bash command to delete files), and more commands which can be explored here.
The plugins you want to install will have their dedicated pages, which can be found with a simple search. And if you want a feature that isn’t there, you can even create your plugin. They are written in Lua and can be made using the instructions they have provided on their website.
Mouse Support
The handy feature that sets Micro apart from the other command-line text editors is the seamless and fantastic mouse support. You can scroll, select the text, double click to choose a word, triple to select a line, and almost all the intuitive tasks. There is no right-click, of course, because the command line doesn’t allow it in the first place, but the rest of the features are all there.
Installation
Micro is available as a ready package on most of the distributions, which makes installation very easy.
Ubuntu and Derivatives
On Ubuntu and its derivatives, a simple command will do:
sudo apt install micro
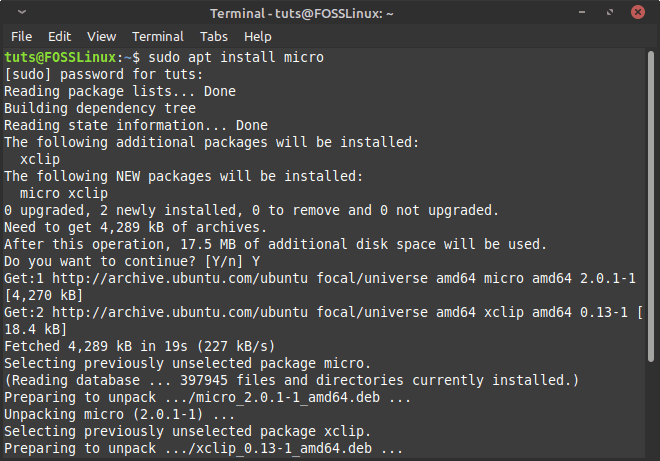
Micro installation
Fedora
For installing Micro on Fedora, enter:
sudo dnf install micro
Arch
On Arch Linux:
sudo pacman -S micro
Solus
The package is available on Solus as well:
sudo eopkg install micro
Conclusion
The Micro editor is very promising. It has advanced features, where almost everything can be configured to your liking, and it has straightforward roots which will put the users on any experience level at ease. It has many exciting features, handling requirements of common users as well as specific groups. Excellent usability and complete control make this editor true to the open-source philosophy.