
Are you looking to setup a secure and efficient SFTP server on your Ubuntu machine? Well, you’re in the right place. Having worked with several server setups over the years, I’ve found SFTP to be one of my go-to choices when it comes to transferring files securely. In this guide, I’ll walk you through setting up an SFTP server on Ubuntu, step-by-step, ensuring that by the end, you’ll have a fully functional SFTP server ready for action!
What is SFTP?
Before diving in, it’s essential to understand what SFTP is. SFTP stands for Secure File Transfer Protocol. Unlike FTP, which stands for File Transfer Protocol, SFTP encrypts the data being transferred, ensuring security and integrity. This means that your files remain confidential and are not tampered with during transfer. As someone who values security, I love this feature, and I believe it’s one of the primary reasons SFTP has gained popularity.
Getting Started – Setting up SFTP Server Ubuntu
1. Prerequisites
Before setting up the SFTP server, ensure that you have:
- A machine running Ubuntu (any recent version should work). I’m using Ubuntu 22.04 in this guide.
- Root or sudo access to the machine.
2. Install OpenSSH Server
Ubuntu typically comes with the SSH client pre-installed. However, for our purpose, we need the OpenSSH server. To install it:
sudo apt update
sudo apt install openssh-server
After the installation, you can check the status of the service:
sudo systemctl status ssh
You should see “active (running)” in the “Active” line.
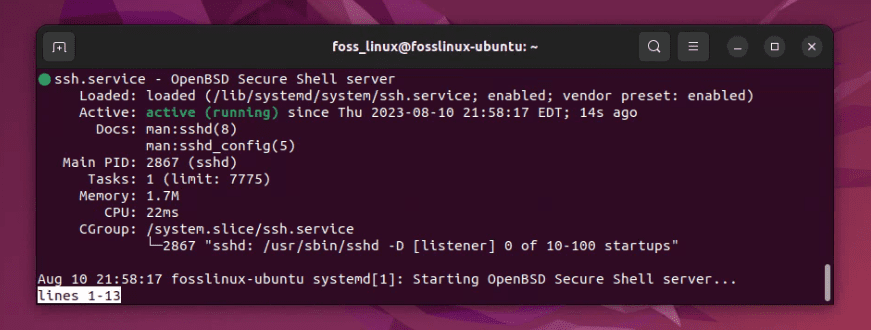
Checking systemctl service status
If the service is not running, you can start it with:
sudo systemctl start ssh
This was the easy part. I remember the sense of accomplishment I felt the first time I got this running. But hold on to your hats; the journey has just begun!
3. Configuring SFTP
Create a Dedicated SFTP Group and User
I always recommend (from personal experience) setting up a dedicated group and user for SFTP. This ensures isolation and better control over permissions.
Create a group:
sudo groupadd sftp_users
Now, let’s create a user. For this example, I’ll use sftpuser (you can choose a name you like):
sudo useradd -m sftpuser -g sftp_users
Set a password for this user:
sudo passwd sftpuser
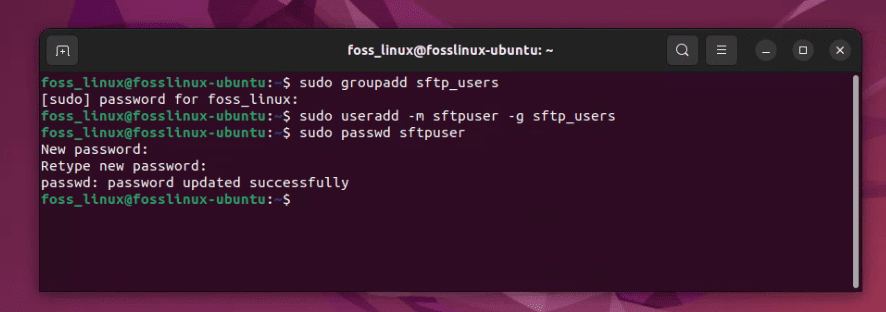
Creating a dedicated SFTP Group and User
Configure the SSHD Configuration File
Open the SSHD configuration file using your favorite editor. I’m a bit old school, so I usually go with nano, but feel free to use vim or any other:
sudo nano /etc/ssh/sshd_config
Scroll down and look for the line that says Subsystem sftp /usr/lib/openssh/sftp-server. Comment it out by adding a # at the start of the line. Just below it, add:
Subsystem sftp internal-sftp
Now, at the very bottom of the file, append the following lines:
Match Group sftp_users
ChrootDirectory /home/%u
X11Forwarding no
AllowTcpForwarding no
ForceCommand internal-sftp
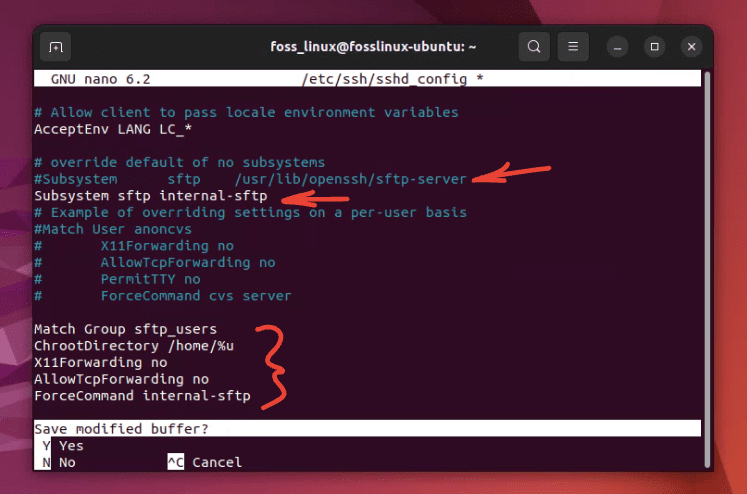
Configuring sftp service
So here is how the final edit should look like:
Save and exit the editor by pressing CTRL X, followed by “Y” to save the file.What we’ve done here is essentially telling our SSH server to restrict users of the sftp_users group to their home directories using the SFTP protocol.
Adjust Directory Permissions
For the chroot environment to work correctly, the user’s home directory needs to be owned by root:
sudo chown root:root /home/sftpuser
However, the user should be able to upload and download files, so create a directory for that:
sudo mkdir /home/sftpuser/files
sudo chown sftpuser:sftp_users /home/sftpuser/files
Restart SSH Service
Now, restart the SSH service to apply changes:
sudo systemctl restart ssh
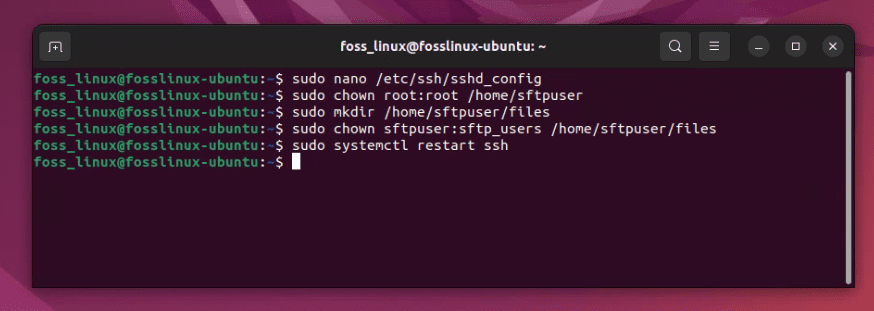
Adjusting Directory Permissions and Restarting SSH service
4. Testing Your SFTP Server
Now, let’s test our setup. On another machine or even the same machine, run:
sftp sftpuser@your_server_ip
Enter the password you set for sftpuser when prompted.
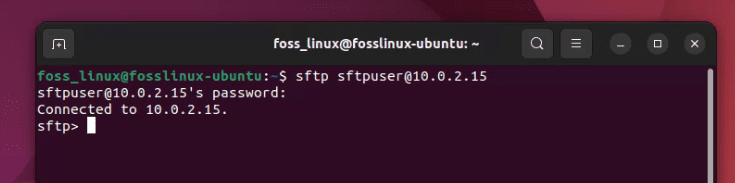
Successful sftp connection on Ubuntu
If everything was done correctly, you should be logged into the files directory of sftpuser. Go ahead and upload, download, or list files using the put, get, and ls commands, respectively.
Pro Tips
- Security First: Always keep your system and software updated. Regularly update the OpenSSH server to benefit from the latest security patches.
- Backup: Before making changes to any configuration file, it’s a good habit to make a backup. It’s saved me on more than one occasion!
- User Management: While we created just one user for demonstration, you can easily create more users and add them to the
sftp_usersgroup to provide them access.
Common Troubleshooting Tips
When setting up an SFTP server, especially with configurations like chroot environments, it’s not uncommon to encounter issues. However, armed with the right troubleshooting tips, you can effectively resolve most problems:
1. Check the SSHD Configuration:
The very first thing to do when encountering issues is to validate your sshd_config file:
sshd -t
This command will check for syntax errors. If there’s an issue with your configuration, this will typically point you directly to the problem.
2. Verbose Logging:
When encountering connectivity problems, verbose logging can be a lifesaver:
- On the client side: Use the
-vvvoption with thesftpcommand:sftp -vvv sftpuser@10.0.2.15 - On the server side: Check the logs. On Ubuntu, the SSH logs are usually stored in
/var/log/auth.log. Tail the log and then attempt to connect:tail -f /var/log/auth.log
3. Directory Permissions:
If you’re chrooting users, remember:
- The chroot directory (and all directories above it) must be owned by
rootand not be writable by any other user or group. - Inside the chroot directory, users should have a directory they own and can write to.
4. Ensure SSH Service is Running:
Sounds basic, but sometimes the service might not be running:
sudo systemctl status ssh
If it’s not running, start it with:
sudo systemctl start ssh
5. Firewall and Port Settings:
Ensure that the port SSH is listening on (usually 22) is allowed in your firewall settings:
sudo ufw status
If port 22 is not allowed, you can enable it using:
sudo ufw allow 22
6. Test Without Chroot:
Temporarily disable the chroot settings in sshd_config and try connecting. This can help you narrow down if the issue is with chroot or another part of your setup.
7. Check User’s Shell:
Ensure that the user has a valid shell. If the shell is set to /sbin/nologin or /bin/false, it’s okay for SFTP but ensure the user doesn’t need to log in via SSH.
8. Restart the Service After Changes:
Whenever you make changes to sshd_config, remember to restart the SSH service:
sudo systemctl restart ssh
9. Subsystem Configuration:
Ensure only one SFTP subsystem is defined in sshd_config. The preferred one for chroot setups is ForceCommand internal-sftp.
10. Disk Quotas and Space:
Sometimes, users can’t upload due to disk quotas or insufficient disk space. Check the available space with:
df -h
And if you’re using quotas, ensure they are set appropriately.
Final Thoughts
Setting up an SFTP server on Ubuntu isn’t overly complicated, but it does require careful attention to detail. Honestly, the first time I set one up, I struggled with permissions. However, once you get the hang of it, it becomes a routine task. It’s such a relief knowing that your data is being transferred securely, isn’t it?