
Canonical announced the launch of Ubuntu 22.04 LTS (Jammy Jellyfish) on April 21, 2022. It’s now available on desktop computers and Servers. This article will highlight the procedures needed to set up Ubuntu 22.04 Server Edition with LTS (Long Time Support) on your computer. Let’s look at the new features that have been included before we begin the Installation procedure.
Here are some of the latest enhancements to Ubuntu 22.04 LTS Server:
- Canonical will offer free updates and support for the next five years (until April 2027) as this is an LTS version, in addition to the ten years of security protection offered by the UA-I subscription.
- SSH with two-factor authentication.
- The 5.4 New Kernel
- Ubuntu Server Live Installer with Auto-Updates.
- The Jammy Jellyfish 22.04 server features a new accent color-customizer that allows users to customize the server quickly and effectively.
- The introduction of Gnome 42 is a major feature introduced in this server update. It ships in with new power options enabling users to select between power consumption and performance from the settings window.
- Bootloader Flexibility – Previously, the Ubuntu installer would only write the bootloader to a single drive. However, in Ubuntu 22.04, this is no longer the case.
- Introduces the WireGuard Virtual Private Network
Installing Ubuntu Server 22.04 LTS
Technical requirements
Ubuntu Server Edition provides a standardized, minimum foundation for many types of server software. This includes file and print sharing, website and email hosting, and more. This release is compatible with four different 64-bit processor families:
- (Intel/AMD 64-bit) amd64
- s390x (IBM Z and LinuxONE)
- arm64 (64-bit ARM)
- ppc64el (POWER8 and POWER9)
Ubuntu 22.04 LTS Server requires the following minimum hardware and software configurations to run:
- Memory Capacity of 4 Gigabytes (RAM)
- Consistent Online Connectivity
- Computer with a Dual-Core CPU
- Bootable USB Drive or DVD
- A Disk that can hold up to 25 GB of data
Once you have all the prerequisites, you can proceed to the installation phase.
Steps to install Ubuntu Server 22.04 LTS
Follow the steps highlighted below to install the Ubuntu Server 22.04 LTS
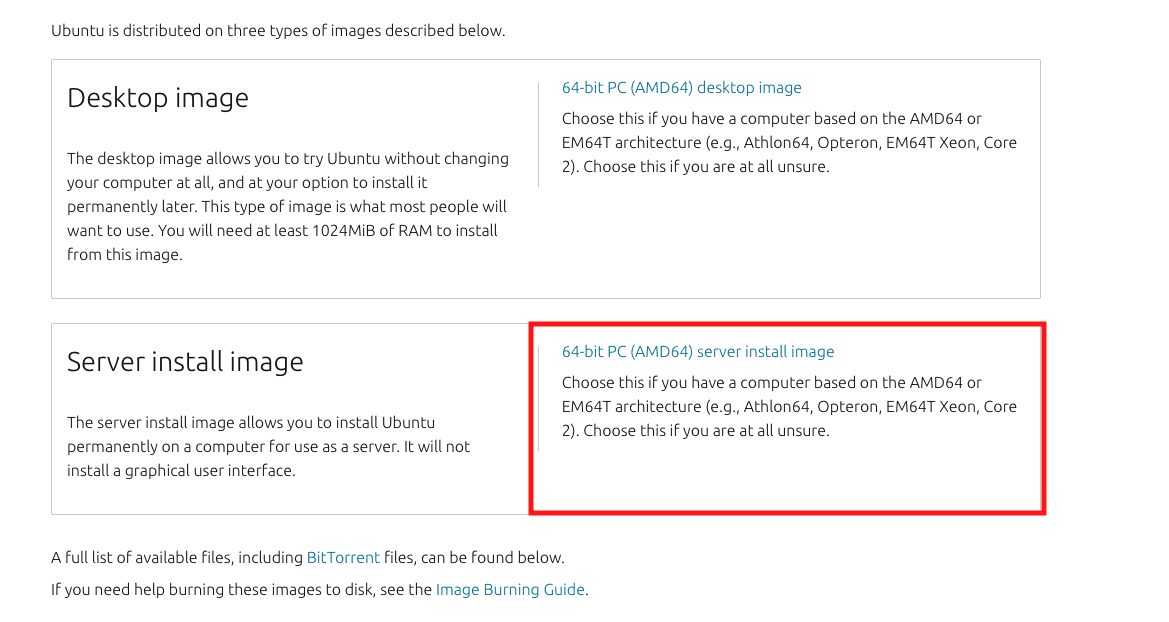
Step 1: Download the Ubuntu server ISO image file
Go to the Ubuntu 22.04 LTS release website and locate the server image link, as highlighted in the following screenshot:
Download Ubuntu Server
Once you have successfully downloaded the server ISO file, proceed to step 2
Note: Make sure you have a backup of your data before installing Ubuntu Server Edition. If Ubuntu is not the first OS to be installed on your machine, you will need to re-partition the drive. However, if you partition your drive and make a mistake or something goes wrong, you might lose everything on the disk. Even though installation software is generally safe to use (much of it has been around for years), it might be used destructively. Hence, you need to be keen and install software from the links we provided.
Step 2: Preparing the Install media
You may use various methods to create a bootable USB flash drive of Ubuntu Server 22.04 LTS. For example, you can use Image Burner, Rufus, Etcher, and many more. However, in this tutorial guide, I will be using Etcher.
Before initiating the media preparation process, you need to consider the following prerequisites:
You will require:
- A USB stick/flash disk with a capacity of 2GB or greater
- Laptop
- Ubuntu Server ISO image. Download links have been provided in this article guide.
- BalenaEtcher for creating a bootable media drive
BalenaEtcher can be downloaded from Etcher’s official website. Download a software compatible with your parent OS and Install it. For instance, I will download a macOS version since I will use my MacBook Pro to create a bootable installation media.
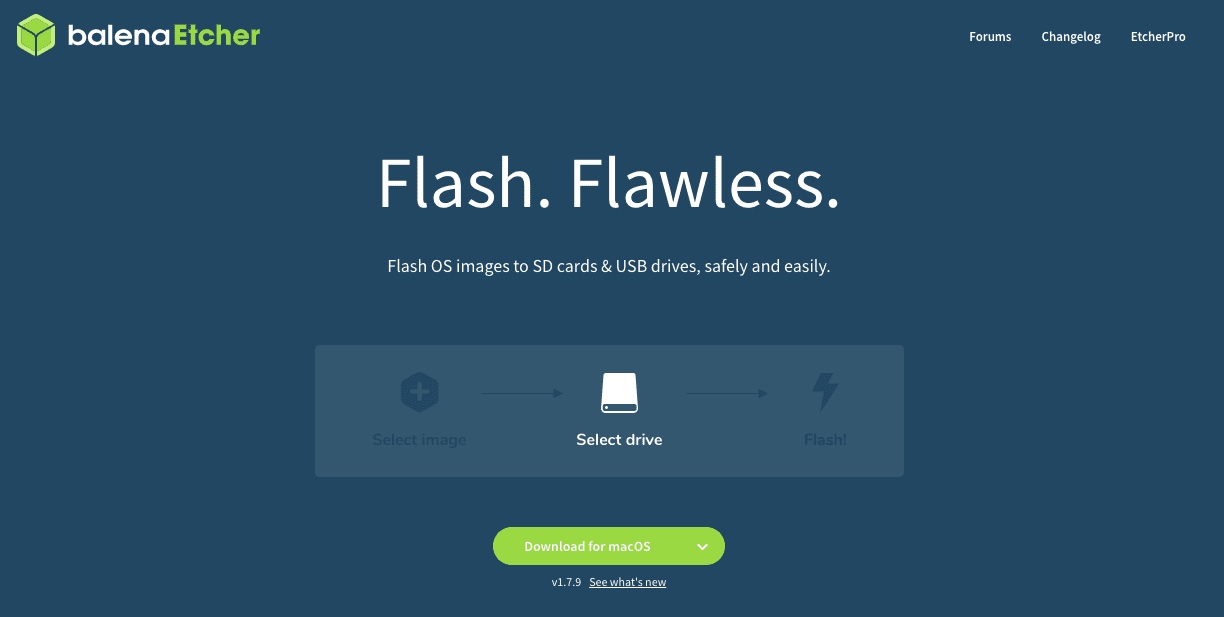
Balena Etcher download page
Be patient, as the downloading process will take quite a while, dependent on your internet speed. When using a MacBook to create an installation media, you must go the extra mile and prepare the USB drive before proceeding to the next step. Follow the steps below to prepare your USB stick:
- Fire up Disk Utility. It may be accessed via Applications>Utilities or by a Spotlight search.
- Insert your Flash drive and look for the new device in Disk Utility.
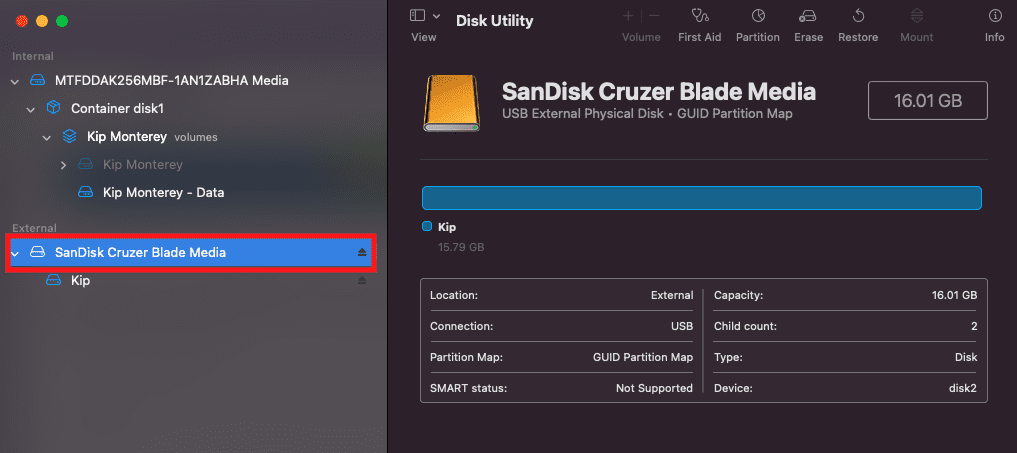
New drive
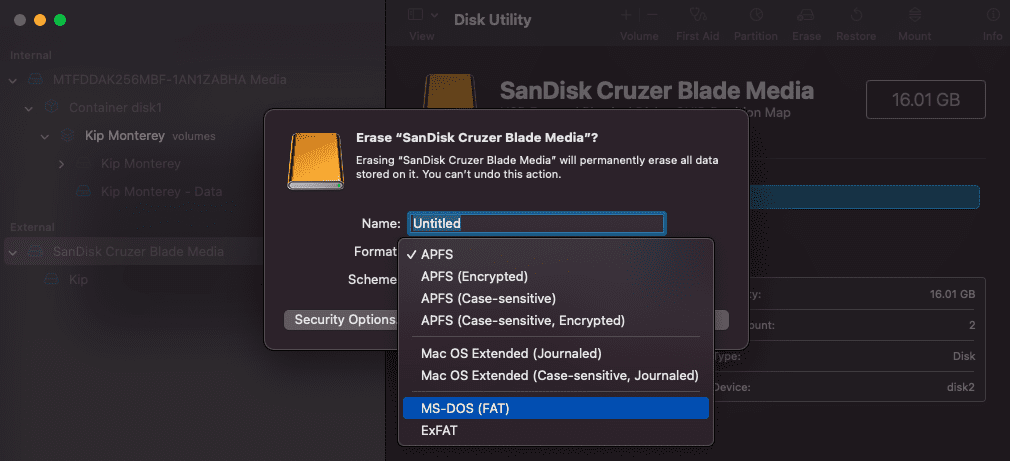
- Pick the USB stick device (you may need to activate the View>Show All Devices option) and then select Erase from the tool’s menu (or right-click menu)
- Select MS-DOS (FAT) as the format and GUID Partition Map as the scheme.
Erase USB drive
- Check that you’ve selected the proper device, and then click Erase.
Once you prepare the USB flash drive, you can drag the downloaded BalenaEtcher application into the Applications folder to install it.
Note: Recent versions of macOS, by default, prevent the execution of programs from unknown authors. To avoid this problem, allow the ‘App Store and identified developers in the System Preferences Security & Privacy pane. If you are still cautioned not to start the application, click the ‘Open Anyway’ button in the same box as illustrated in the snapshot below:
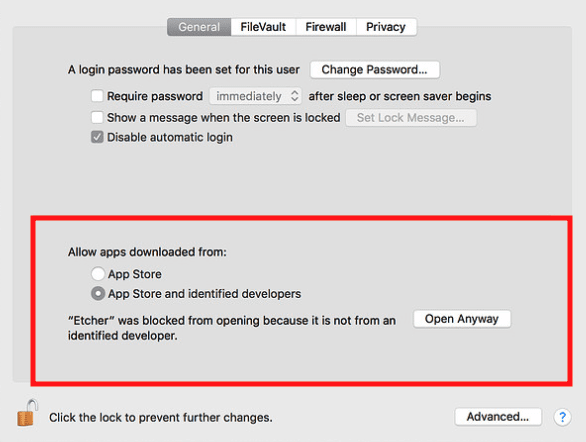
macOS security and privacy
Now launch it.
Etcher Configuration
Etcher will initialize and write to your USB device in three steps, each of which must be chosen individually:
- Flash from file: Selecting an image will launch a file requester, from which you should go and pick the previously downloaded ISO file. The ISO file will be placed in your Downloads folder by default.
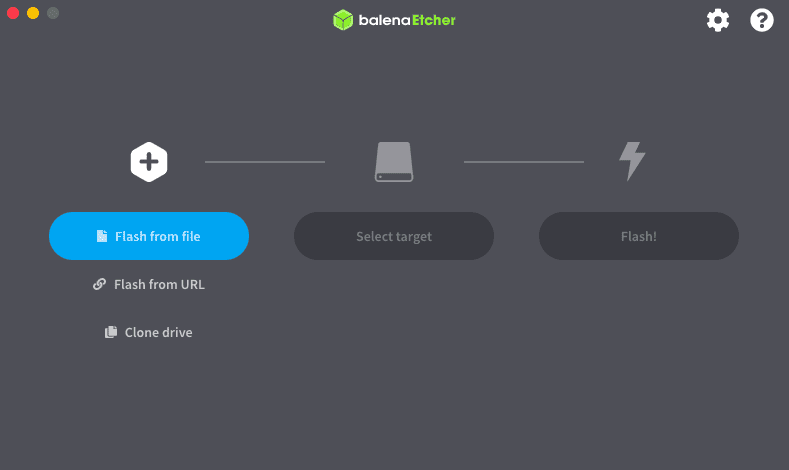
Flash from file
- Select target: The select drive option is substituted with the name of your USB device if one is already connected. It allows you to choose your target device. You will be notified if the storage space is insufficient for your chosen ISO.

select target
- Flash: The flash option will turn on when both the ISO file and the drive are selected.
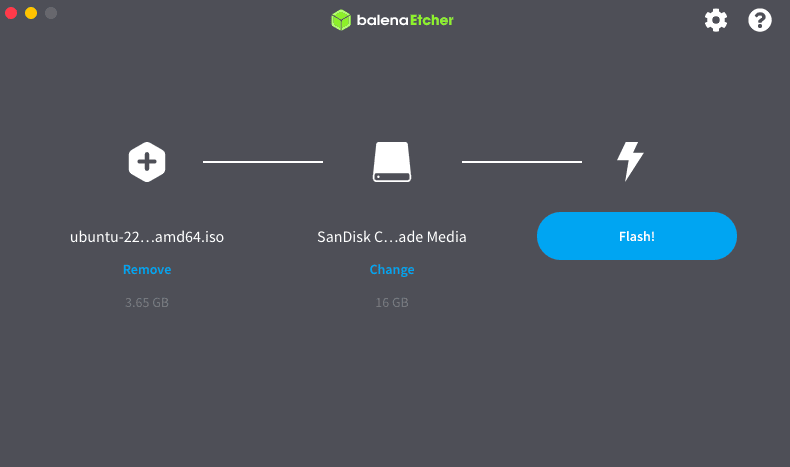
flash
Etcher, like Disk Utility, requires low-level access to your storage devices and will prompt you for your password when you pick it.
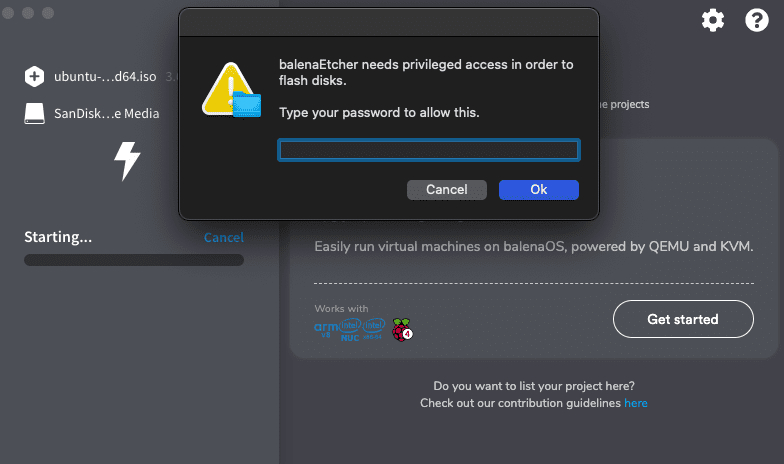
Input password
Now with the procedures provided above, configure Etcher to flash the Ubuntu 22.04 LTS server on our USB stick.
Note: This process will take some time. Once done, click the ‘Flash Complete’ option and eject your USB drive.
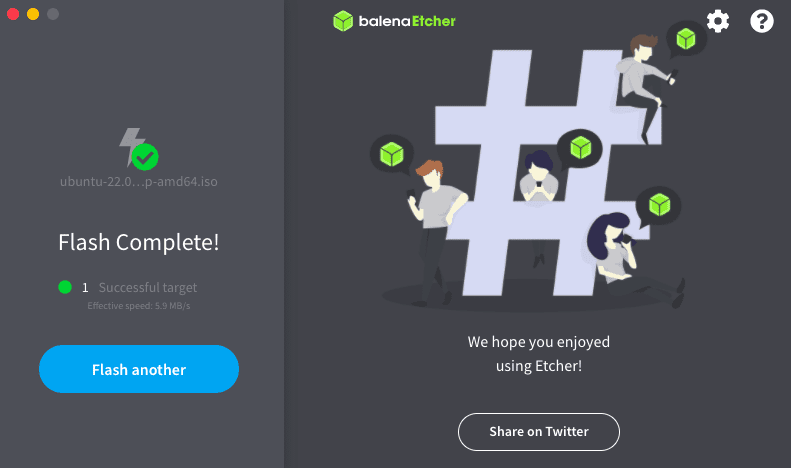
flash complete
Now that we have our USB ready with Ubuntu 22.04 LTS server, we can proceed to the installation process. However, before we kickstart the installation procedure, it is important to note that you can create your USB stick using any of your parent OS such as Windows or Linux. I created mine using my MacBook Pro since it is my parent OS, so don’t get confused thinking we are installing the server on a mac.
How to prepare installation media on Linux
For Linux users, we shall be using the terminal program to create a bootable USB thumb drive. We assume you already have the installer file downloaded on your Linux PC. Now navigate to the ‘Downloads’ directory using the following command
First, launch the terminal using the Ctrl + Alt + T command, then execute this line of code:
cd ~/Downloads/
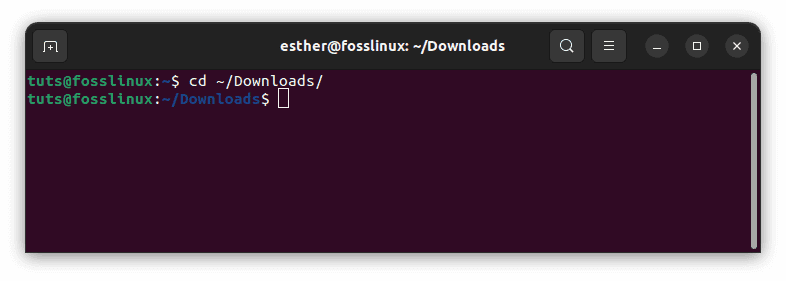
cd into Downloads
Use the ls line of code to list all files in the downloads folder. If your Ubuntu 22.04 LTS server is available, you will see something similar to the screenshot shown below:
ls
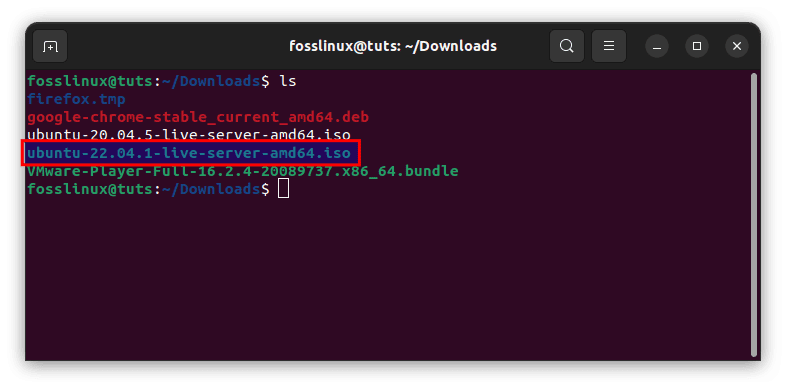
list all files in the download section
Now proceed and list the available disks on your Linux OS by executing this line of code:
sudo lsblk
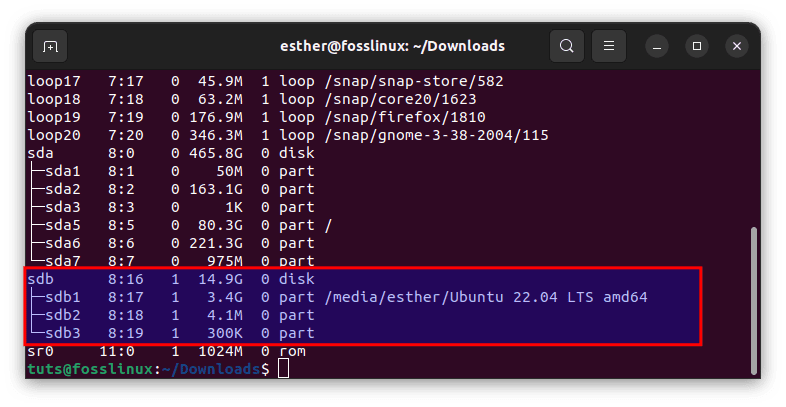
List available disks
Jot down the name of your USB thumb drive to avoid confusion in the next step.
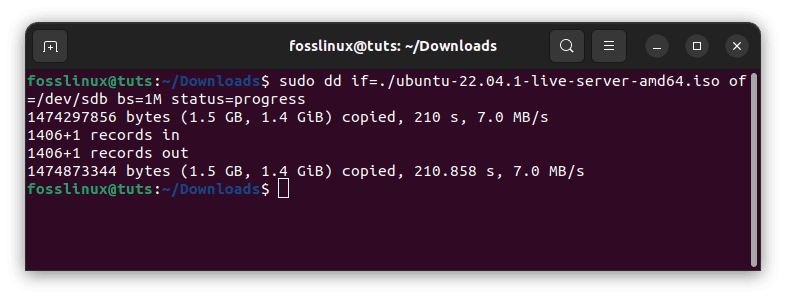
Now execute this line of code to flash or write the Ubuntu 22.04 LTS server ISO to our USB thumb drive:
sudo dd if=./ubuntu-22.04.1-live-server-amd64.iso of=/dev/sdb bs=1M status=progress
Flash all files to the USB
Note: Ensure you replace the name of the Ubuntu 22.04 LTS server ISO with the actual name of the file you downloaded on your PC. Besides, you need to replace /dev/sdb with the actual name disk name that you wrote down previously.
Once you click ‘Enter’ on your keyboard, the writing process will begin. Always ensure you have backed up files to avoid data loss during the writing process.
The entire writing process will take quite some time, depending on your laptop’s specs. Be patient as the process continues. Once it completes, your USB flash drive will be ready.
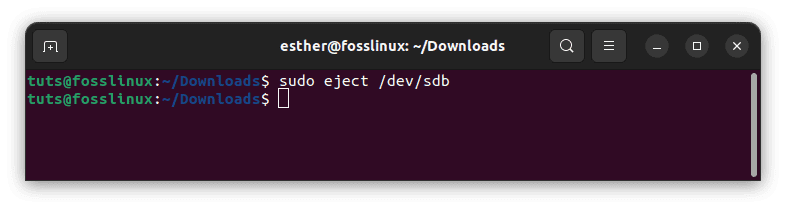
Now eject the drive using this command:
sudo eject /dev/sdb
Eject flash disk
That’s it. You have effectively created a bootable USB drive on your Linux PC.
How to prepare installation media on Windows
For Windows users, we shall be using the Rufus application. Rufus may be downloaded from the Rufus official website. Download the Rufus portable version.
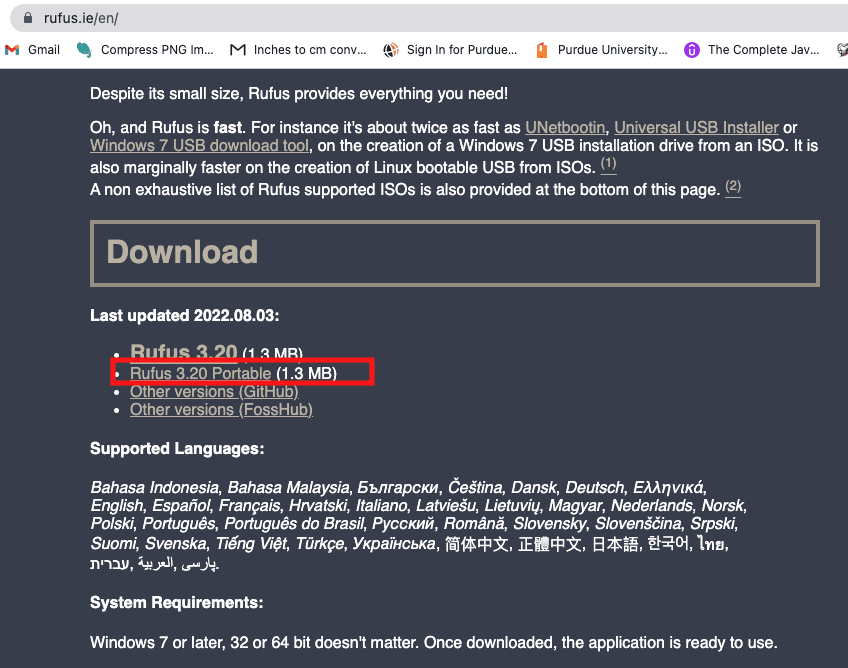
Download Rufus portable version
Insert a USB flash disk into your computer and start Rufus. Then, press the ‘SELECT’ button.
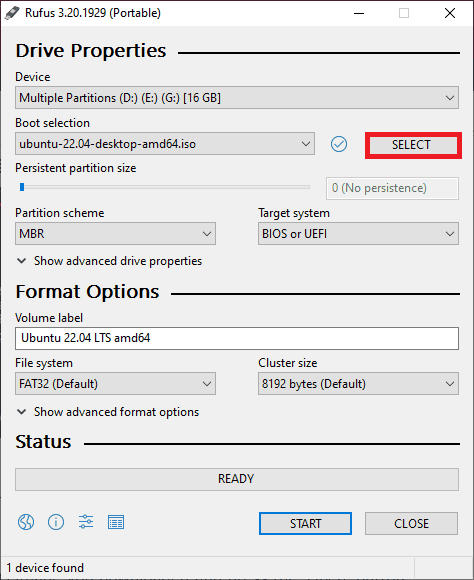
Click Select
Choose the Ubuntu Server 22.04 ISO image you downloaded and press the ‘Open’ button.
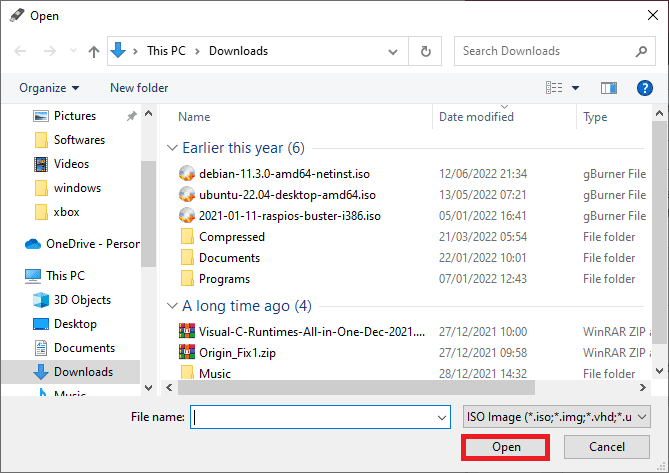
Click Open
Don’t change a thing. Select the ‘START’ button, as shown in the illustration below.
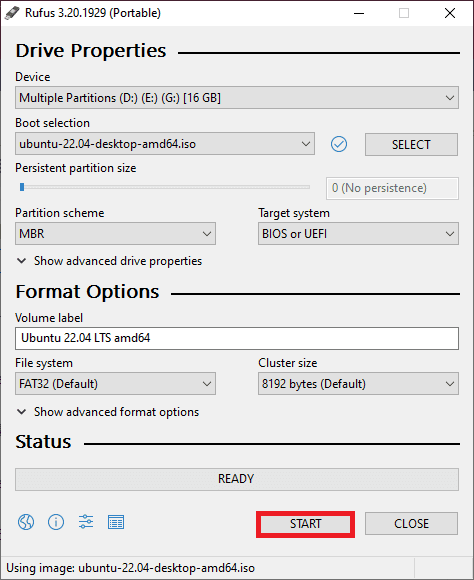
Click Start
A download prompt will appear. Click ‘Yes’ to proceed.
Now choose the ‘Write in ISO Image mode (Recommended) option and click ‘OK.’
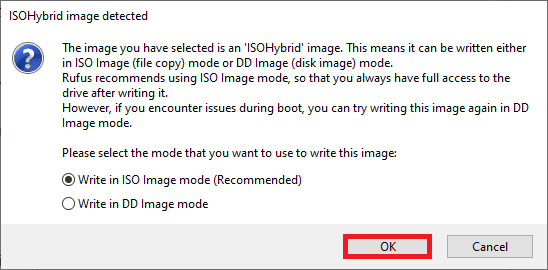
Click Ok
If you have critical data on your USB thumb drive, move it somewhere secure before clicking OK.
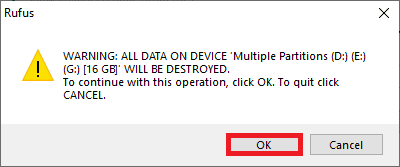
Rufus prompt
Rufus will flash the ISO image into your USB thumb drive. This process will take quite a while; therefore, be patient until it completes the writing process.
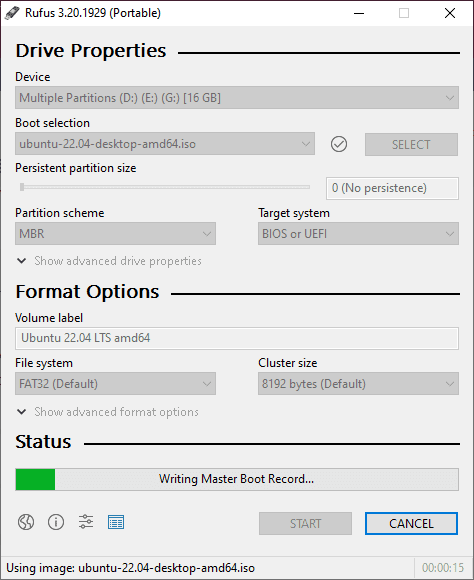
Rufus writing process
When the Flash drive is ready, click CLOSE and remove it from your computer.
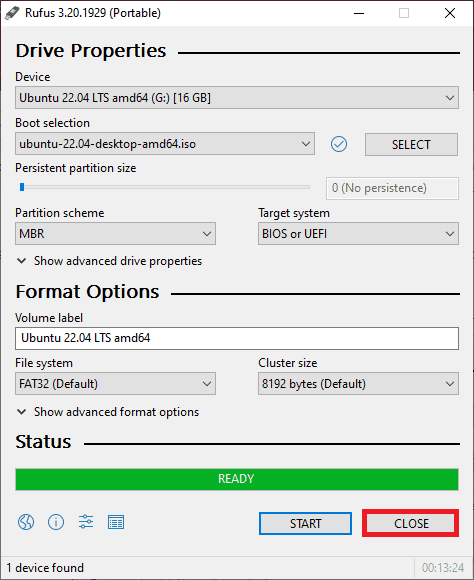
Click Close
That’s it. You have created a bootable USB drive on your Linux PC
With that said, let us now delve deep into the main subject matter.
Installing Ubuntu Server 22.04 LTS
Reboot the target machine where you wish to install Ubuntu 22.04 LTS server and navigate to its bios settings. Now change the boot medium from Internal hard disk to bootable media (USB or DVD). Once that is dusted, you will get a screen similar to the one displayed below:
Select ‘Install Ubuntu Server’ and press ‘Enter’ to proceed. Ubuntu will check your USB thumb drive for errors and challenges before firing up the Ubuntu Server installer.
The Ubuntu installation server will now begin.
Note: We shall use the ‘up,’ ‘down,’ ‘tab,’ and ‘Enter’ keys to navigate the installer.
Choose your language and press the ‘Enter’ key to proceed.
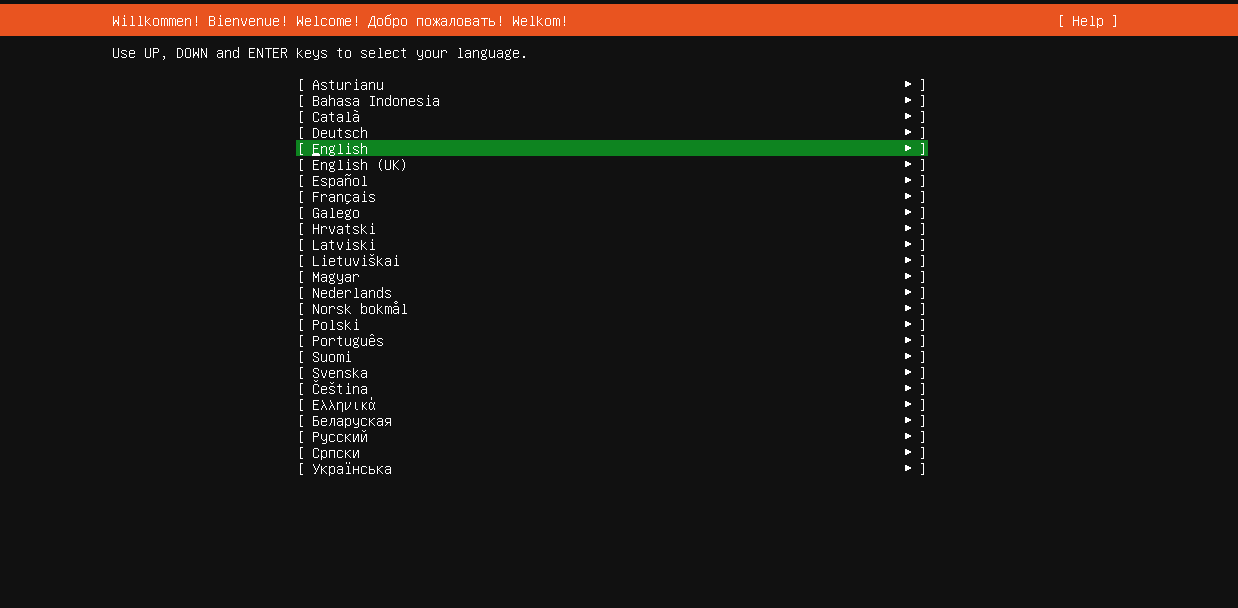
Choose language
Note: If you are connected to the internet, and a new version of the Ubuntu Server 22.04 LTS installer is available, you will see a prompt asking you to update. If you wish to proceed and update the installer, choose Update to the new installer. However, if you don’t intend to update your current installer, choose ‘continue without upgrading’ and press ‘Enter’ to update.
Choose your keyboard Layout and Variant now. Then, hit ‘Enter’ after you are done.
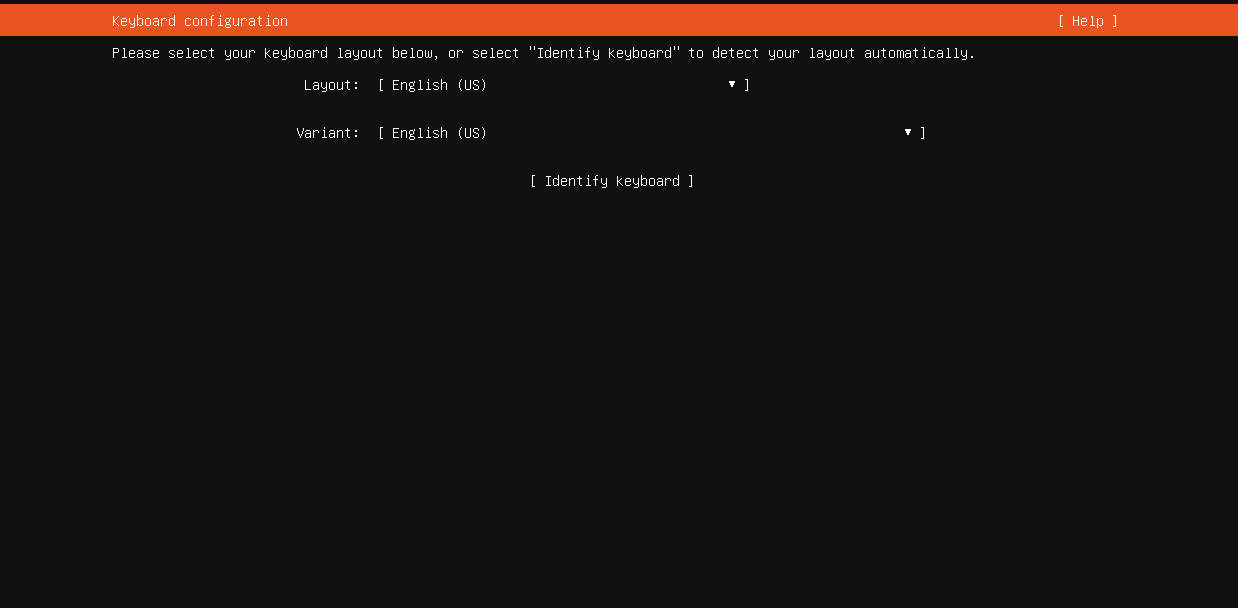
Choose keyboard variant
The following section is network interface configuration. Here we shall configure the network interfaces of our Ubuntu 22.04 LTS server. To perform the configuration, choose a network interface from the provided list and hit ‘Enter’ on your keyboard.
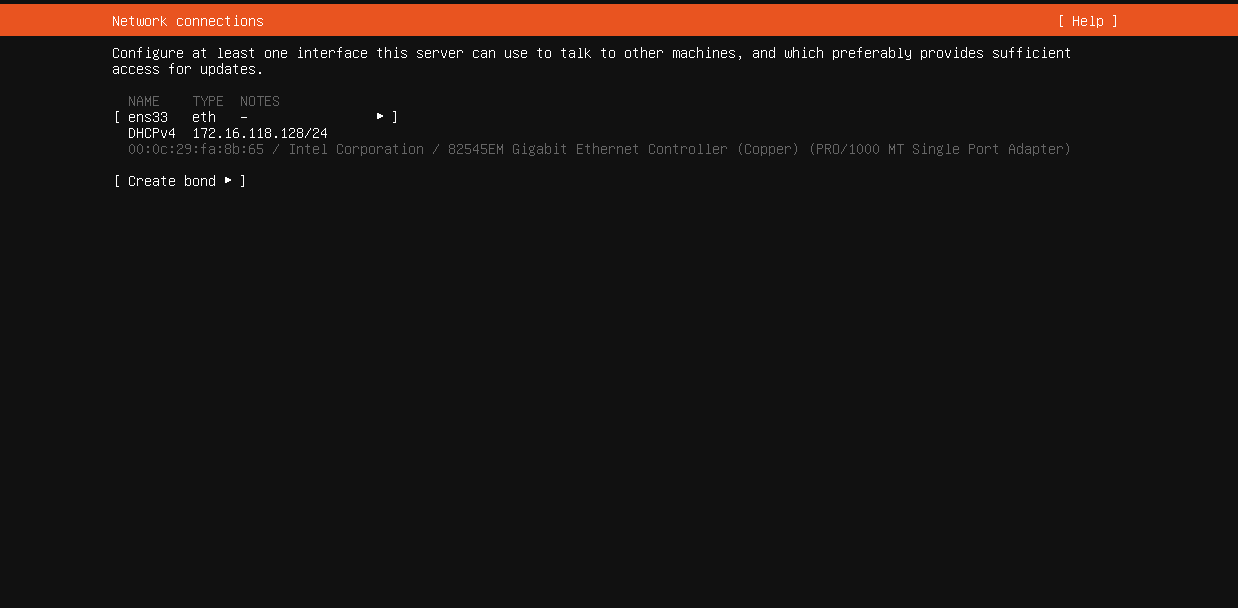
Configure internet
If you wish to configure HTTP network proxy settings for the installation, you may do so here. If you don’t know what to do, leave it as-is. After that, choose Complete and hit Enter.
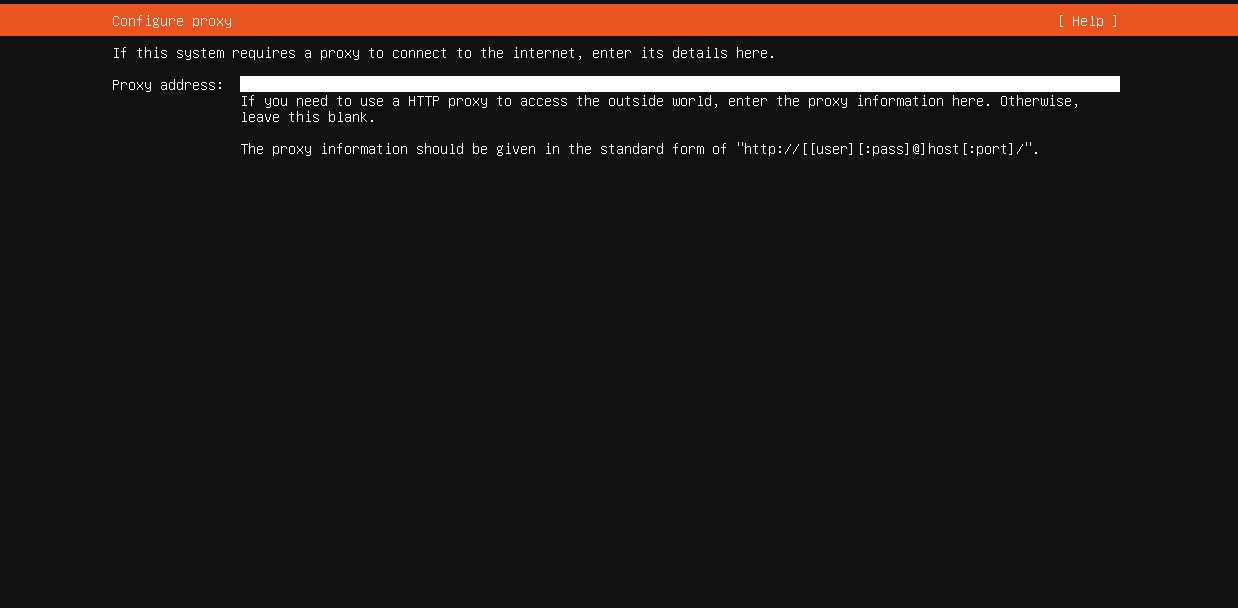
Configure proxy
Based on the country location, the following screen that appears will configure the Ubuntu archive mirror automatically. Once it completes, click ‘Enter’ to proceed to the next phase. If you don’t know which mirror to choose, leave everything as it is and click ‘Enter’ on your keyboard.
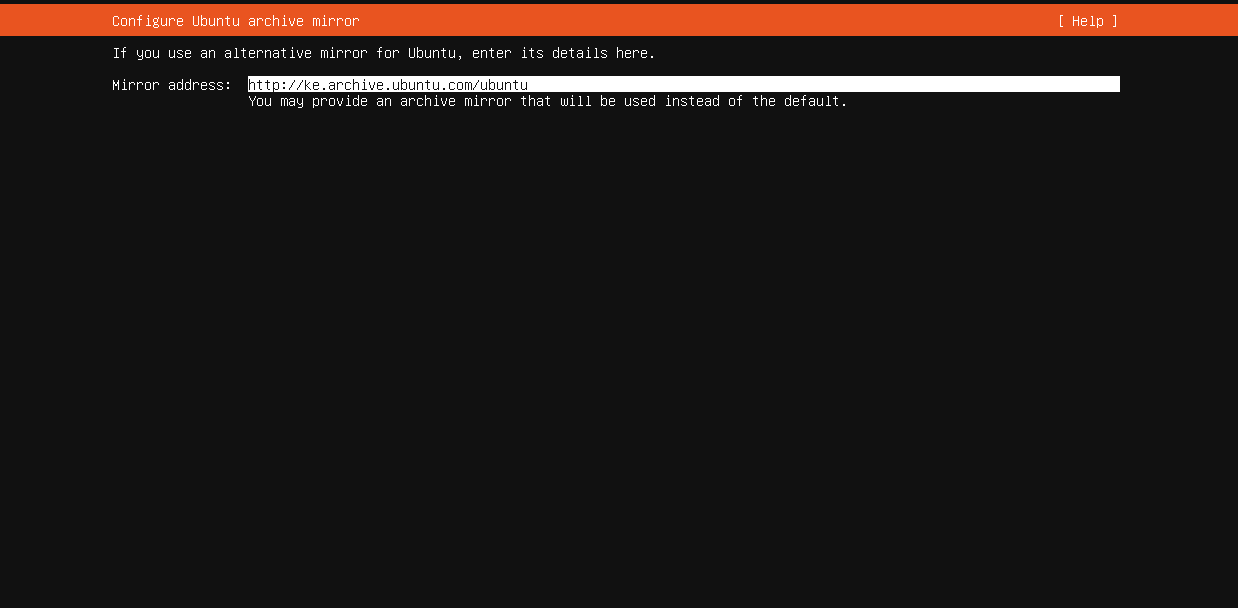
Configure Archive Mirror
In this phase, you will be given a screen where you will configure the storage layout for the Ubuntu 22.04 LTS server installation. You have two choices here.
- Use the entire disk – Select this option if you want the installer to create partitions for you.
- Custom Storage Layout – Select this option if you wish to design your unique partition scheme or table.
In this article guide, we shall select the second option, ‘Custom Storage Layout.’ This will allow us to construct our unique partition scheme.
Note: The space bar is used during the installation to select and deselect items or menus.
Select Custom Storage Layout and click the ‘space bar’ to select or mark it.
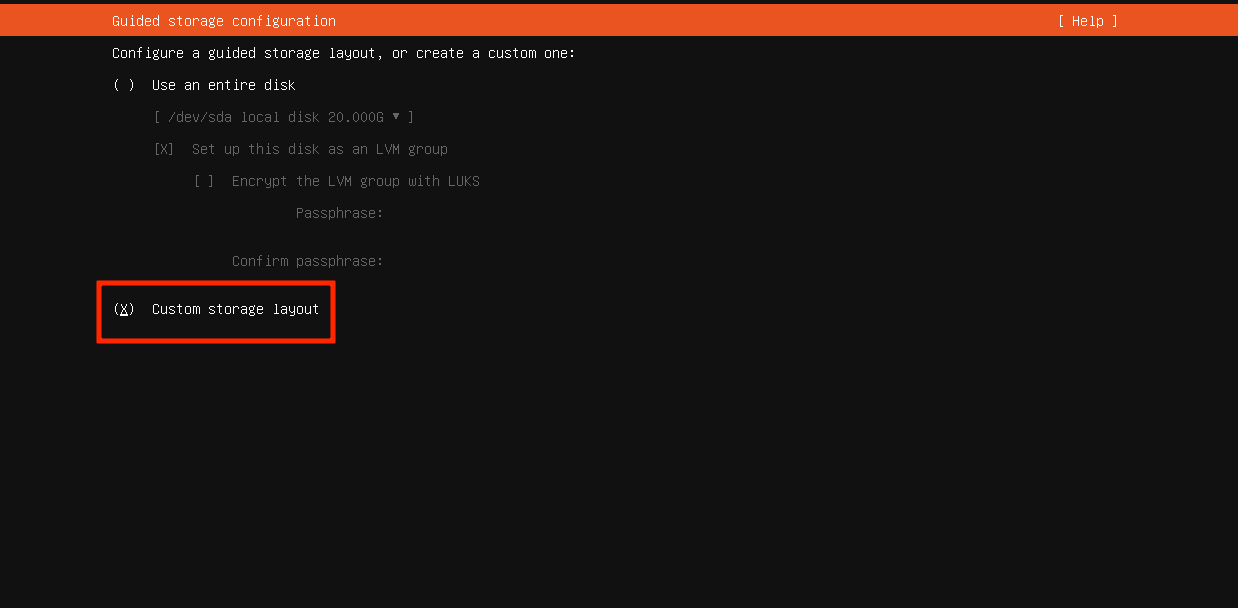
Choose a custom storage layout
Once you are done, choose ‘Done’ and press ‘Enter’ to proceed.
Click done
In the next phase, choose the hard disk you intend to partition and press ‘Enter.’
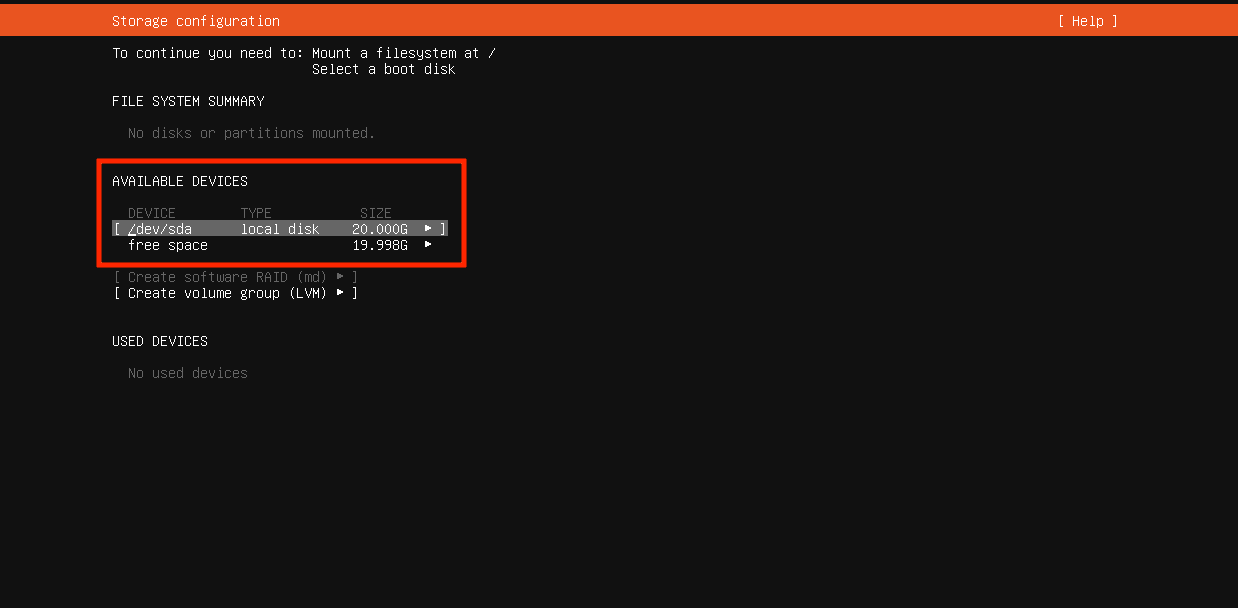
Choose hard disk
Now choose the ‘Use As Boot Device’ option and press ‘Enter’ on your keyboard.
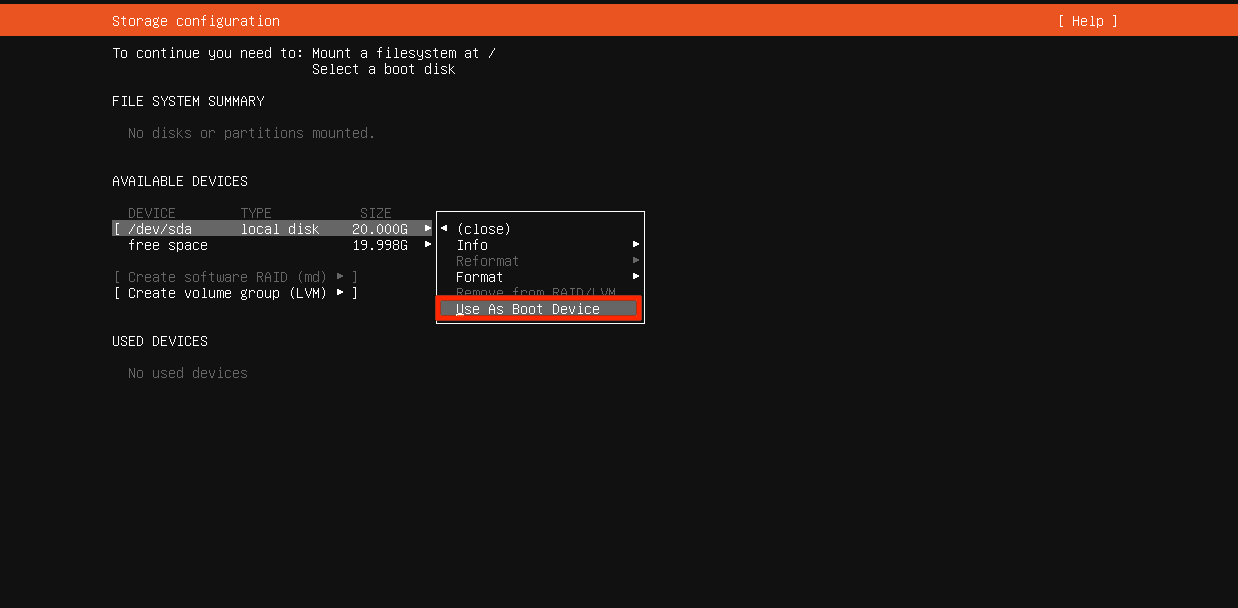
Choose Use As Boot Device
A boot partition will be created.
The next phase is to create a root (/) partition. To create it, select the hard disk drive, press enter as we did before, then select ‘Add GPT Partition’ and ‘Enter.’
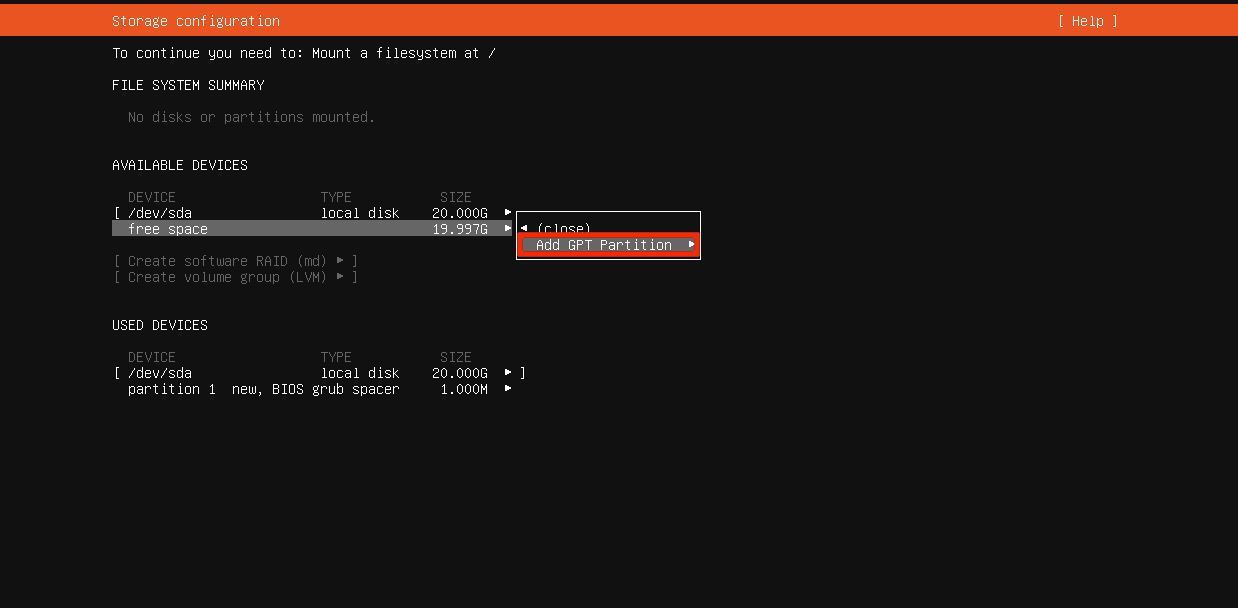
Add GPT Partition
Once that is done, set the partition size to your desired size and format it as ‘ext4’. Don’t forget to mount it to /. After mounting, click ‘Create’ and press ‘Enter’ on your keyboard.
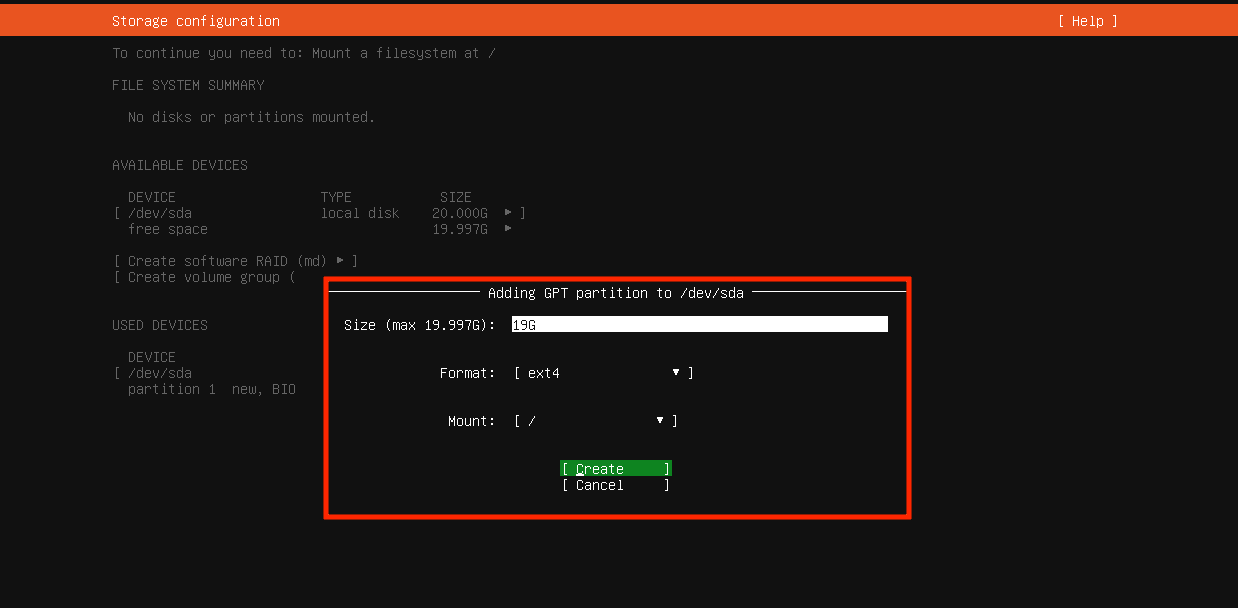
Create root Partition
Note: While partitioning, you can use M to refer to ‘Megabyte,’ G for ‘Gigabyte,’ and T for ‘Terabyte’
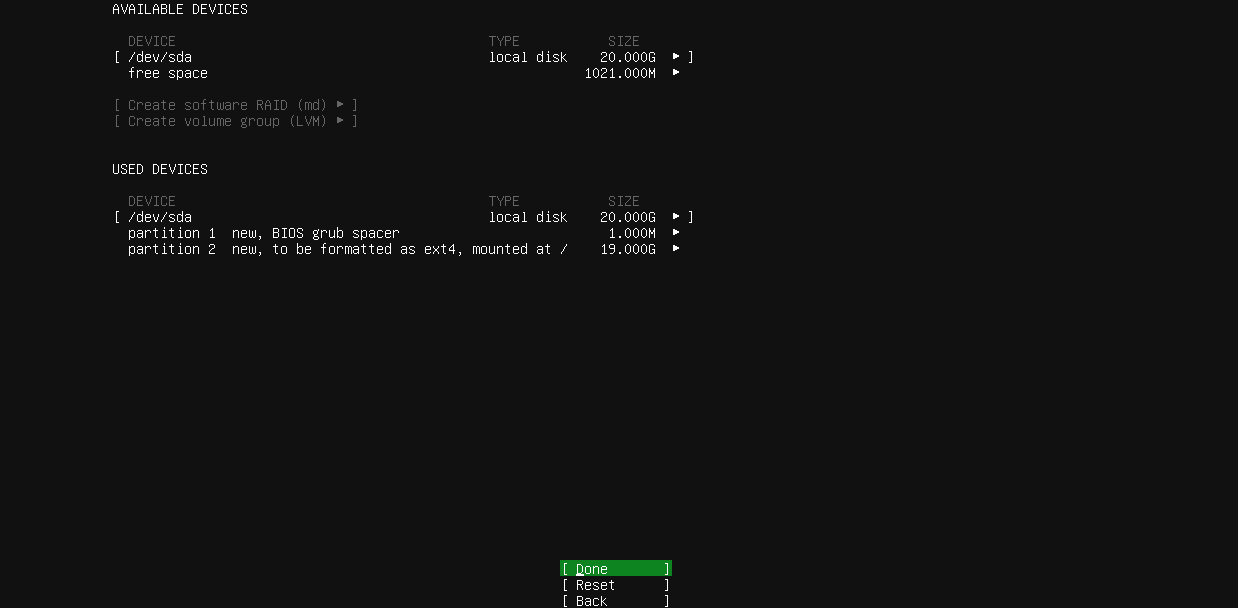
The root partition will now be created. If you are sure you don’t want to make another partition, choose ‘Done’ and click ‘Enter’ to proceed with the installation process.
A prompt will appear, probing you to confirm if you are willing to confirm the disk changes. If you are certain, choose ‘Continue’ and press ‘Enter’ on your keyboard.
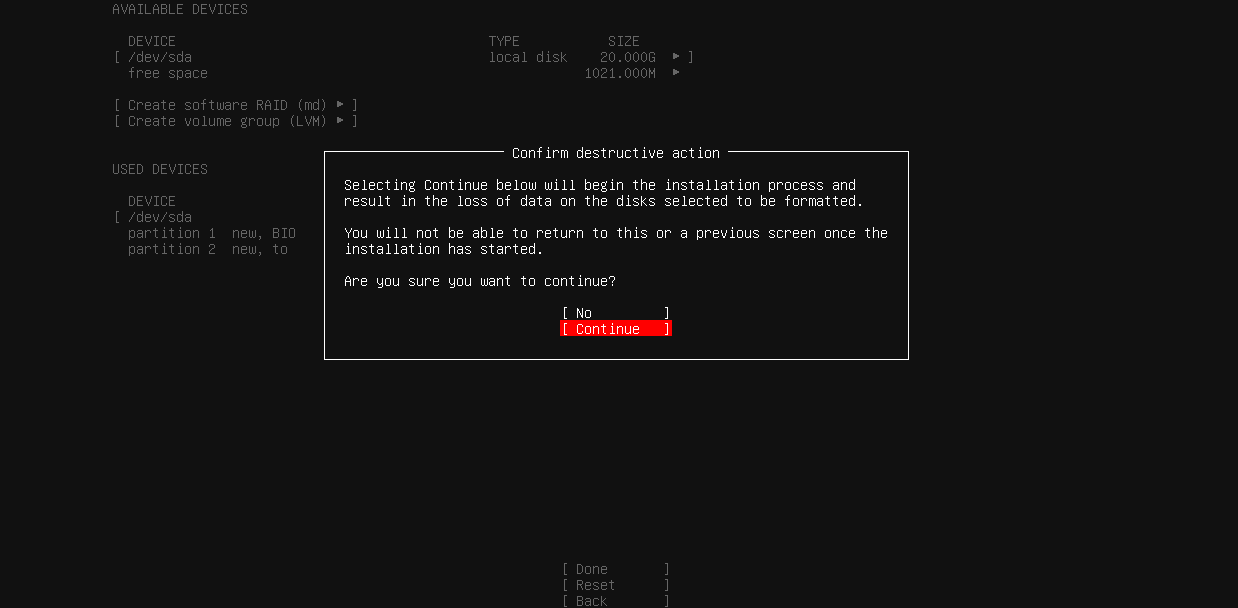
Confirm disk changes
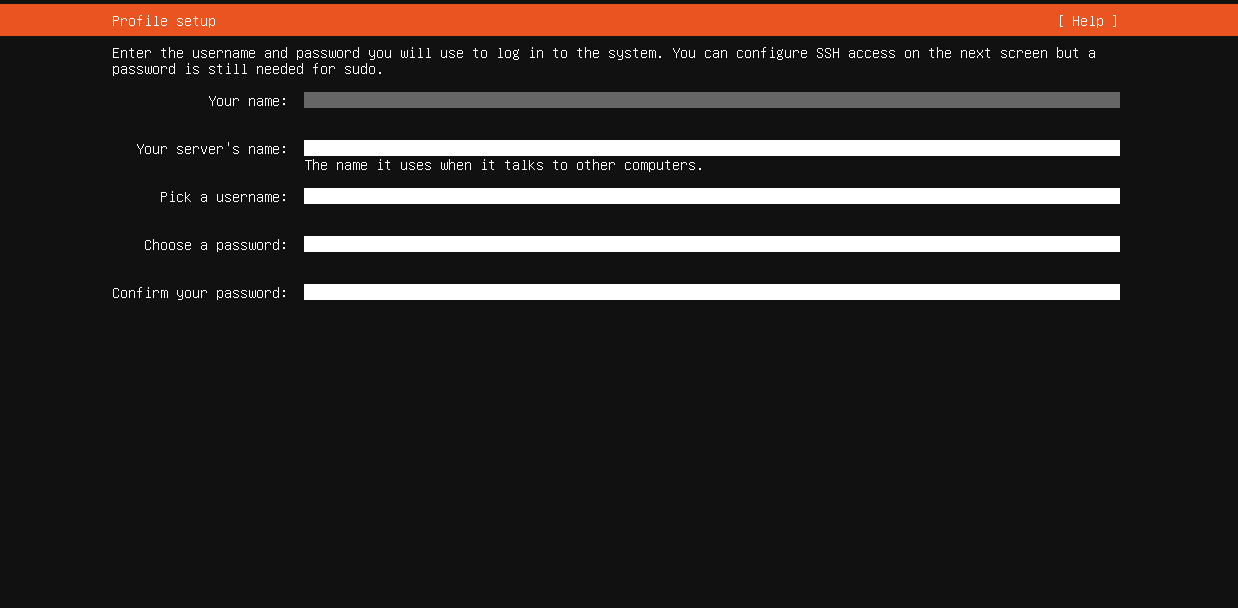
Input your login credentials and select ‘Done,’ then press ‘Enter’ to proceed.
Input credentials
Select Install OpenSSH server and click ‘Space Bar’ to allow SSH access to your Ubuntu Server 22.04 LTS.

Install Open SSH
Now select ‘Done’ preceded by ‘Enter’ on your keyboard.
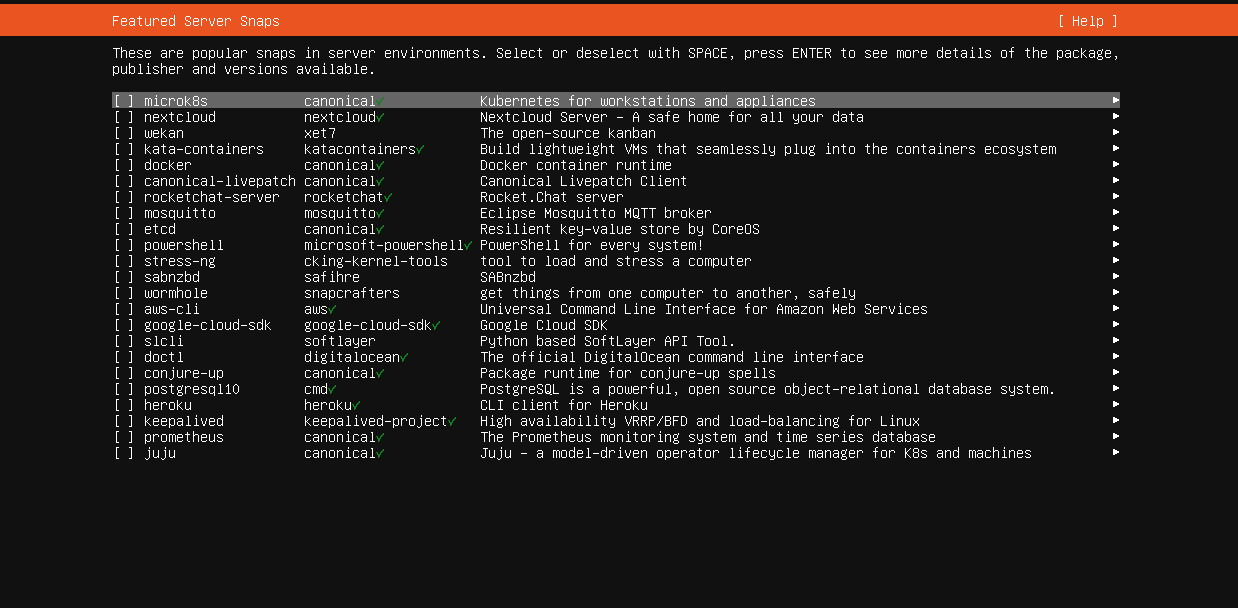
You may do so through this menu if you wish to install additional software and tools. When you’re finished, pick ‘Done’ and click ‘Enter.’
Install additional software
The installer will begin transferring all required files to your hard disk. It may take some time to complete.

Installing the Ubuntu Server system
Once it is dusted, the installation process will also begin. It will take a while to complete the entire process. Be patient, and still as the installer does its thing.

Install complete
Choose ‘Reboot’ and click ‘Enter’ once the installation completes. Unplug your server’s installation media (USB thumb drive) and press ‘Enter.’ Your server will boot up.
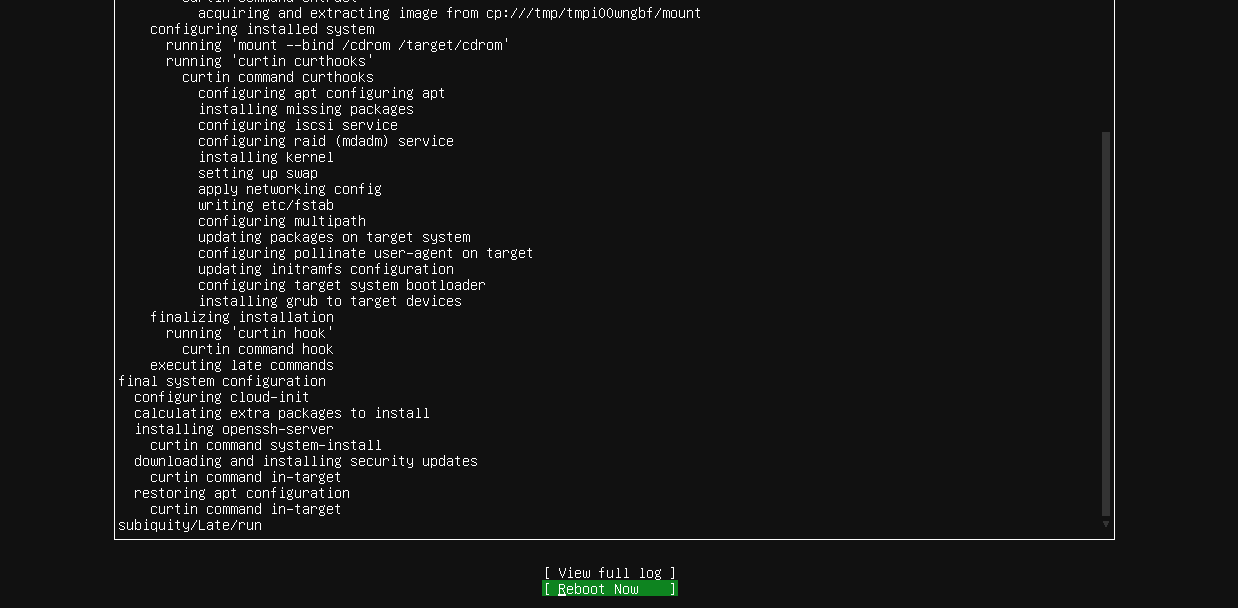
Reboot now
Note: Remember to change the boot medium from bootable media to internal hard disk so that the machine boots from the disk where we just installed Ubuntu 22.04 LTS Server.
Sign in using the credentials we created during installation to log in to your Ubuntu 22.04 LTS server.
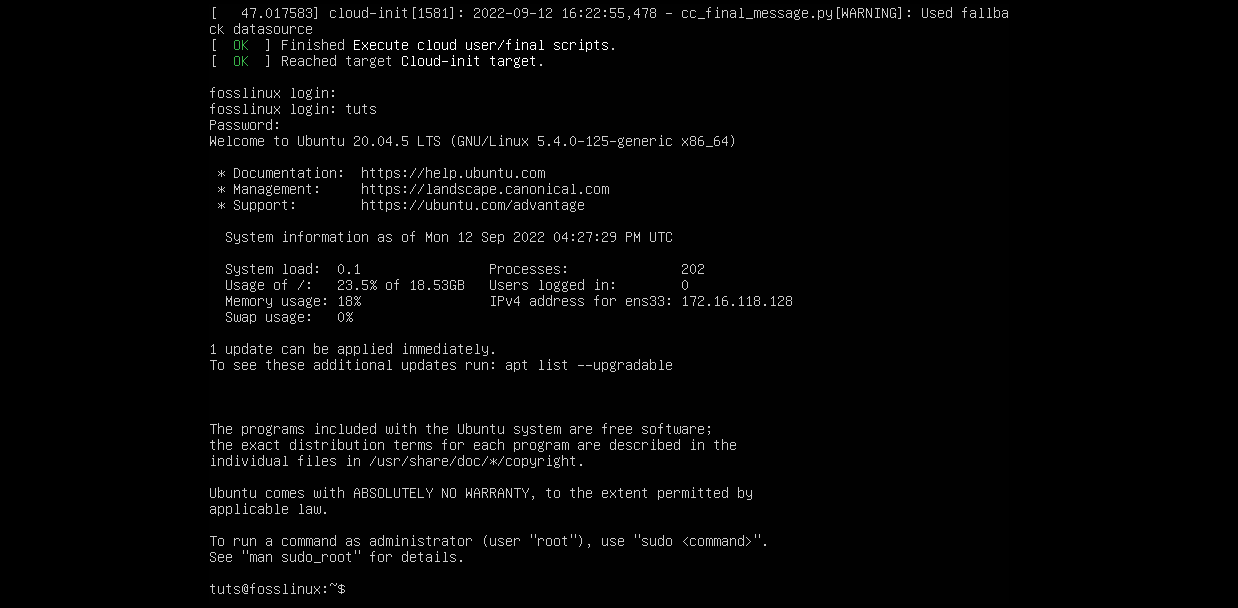
Successful login
After successfully logging in, run this command to ascertain that the Ubuntu 22.04 LTS server has been installed on your system.
cat /etc/lsb-release
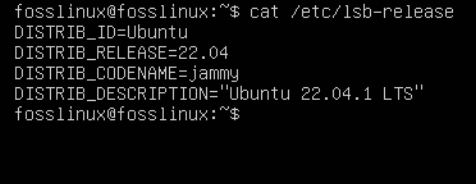
Run cat command
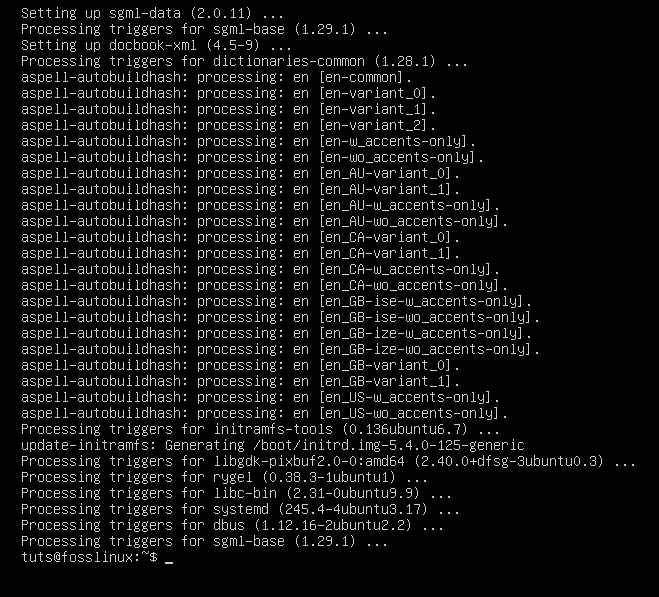
If you intend to install a GUI desktop environment on our Ubuntu 22.04 LTS server, we shall execute the following command:
sudo apt update

sudo apt install gnome-shell ubuntu-gnome-desktop -y
Install gnome desktop
This process will take quite a while to complete. Please be patient as the terminal does its thing. Once it completes and all Gnome desktop packages have been installed, reboot your server. Upon login, you will encounter a login screen similar to the one displayed below:

GUI desktop
That’s it. Ubuntu 22.04 LTS server has been successfully installed on our machine.
Conclusion
This article has covered an in-depth analysis of the installation process of the Ubuntu 22.04 LTS server. We went a mile further and covered how to create and prepare installation media from the three major platforms macOS, Linux, and Windows. I hope you enjoyed reading this tutorial guide. If yes, please leave a remark on the message board below. Also, remember to follow FOSSLinux for more detailed tutorial guides. Thanks for reading.