
Kernel-based Virtual Machine, known as KVM, is an open-source virtualization tech built into the Linux kernel. This virtualization module in the Linux kernel allows the kernel to work as a hypervisor. This software can run multiple Linux or Windows guest virtual machines. Each guest OS is isolated from the others and has its operating system and dedicated virtual hardware like network interfaces, CPUs, storage, and memory.
What does the KVM hypervisor do?
KVM hypervisor enables full virtualization capabilities. It gives each VM a standard service of the physical system, including the Virtual Basic Input Output System (Bios) and virtual hardware like network cards, processors, memory, and much more. As a result, every VM completely mimics a physical machine.
KVM is made available as a Linux kernel module that directly plugs into the kernel’s code and permits it to function as a hypervisor. As earlier said, each VM runs as a single Linux process under systems, with dedicated virtual hardware resources attached. KVM can only be utilized on a processor with hardware virtualization extensions like AMD-V or Intel-VT.
KVM hypervisor benefits
The primary benefit of the KVM hypervisor is its native availability on Linux. Because KVM is part and parcel of Linux, it installs natively, permitting a smooth integration and an easy user experience. The tool ships with more benefits compared to other virtualization techs. Some of these include:
- Cost efficiency – Cost is a driving factor for most organizations and users. Because KVM is open source and available as a Linux kernel module, it comes out of the box at zero cost. Businesses can optionally subscribe to multiple commercial programs, like the Ubuntu Advantage for Infrastructure, to receive enterprise support for their KVM-based virtualization or cloud infrastructure.
- Scalability – As a Linux kernel module, KVM spontaneously scales to respond to heavy loads once the number of VMs increases. The KVM hypervisor also allows clustering for thousands of nodes, laying the foundations for cloud infrastructure implementation.
- Performance – One of the key drawbacks of old virtualization tech is performance degradation compared to physical machines. Since KVM is the type-1 hypervisor, it outshines all type-2 hypervisors, ensuring near-metal performance. With the KVM hypervisor, virtual machines boot faster and achieve recommended performance results.
- Security – Because KVM is a member of the Linux kernel source code, it benefits from the world’s most extensive open-source community collaboration, rigorous development, testing, and continuous security patching.
Here are the prerequisites before we get started:
- A system running Ubuntu
- An Account with sudo privileges
- Access to the terminal
But before we start, it is recommended that we check virtualization support on our Ubuntu machine.
- Before installing KVM, check if your CPU supports hardware virtualization via the egrep command.
egrep -c '(vmx|svm)' /proc/cpuinfo
Check the number in the output:

egrep command
If the above command returns a value of 0 in your machine, your processor cannot run KVM. On the flip side, any other number means you can move to the next section, where we will cover the installation process.
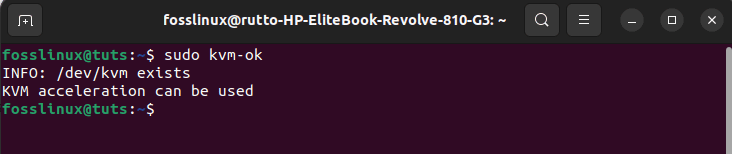
2. After the first check, go ahead and also confirm if your system can use KVM acceleration by issuing the following command:
sudo kvm-ok

First KVM error
If the kvm-ok command returns an error stating KVM acceleration cannot be used or any other error, try solving the problem by installing a cpu-checker.
To install a cpu-checker, run the following command on your terminal:
sudo apt install cpu-checker
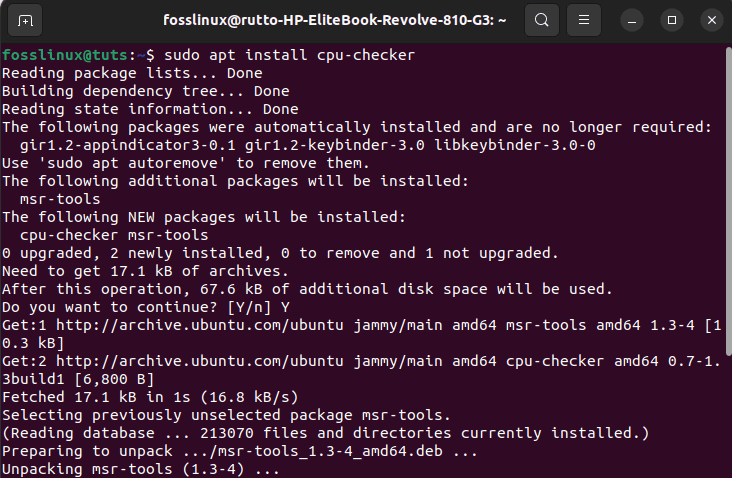
Install CPU checker
After installing the CPU checker, your output should resemble the following snapshot:
KVM can be used
Restart the terminal when the installation is complete.
At this point now, you should be ready to start installing KVM. Here is a step-by-step procedure for getting this done.
Step 1: How to install KVM on Ubuntu 22.04
First, run the following command to help install KVM and additional virtualization packages on your Ubuntu system:
sudo apt install -y qemu-kvm virt-manager libvirt-daemon-system virtinst libvirt-clients bridge-utils
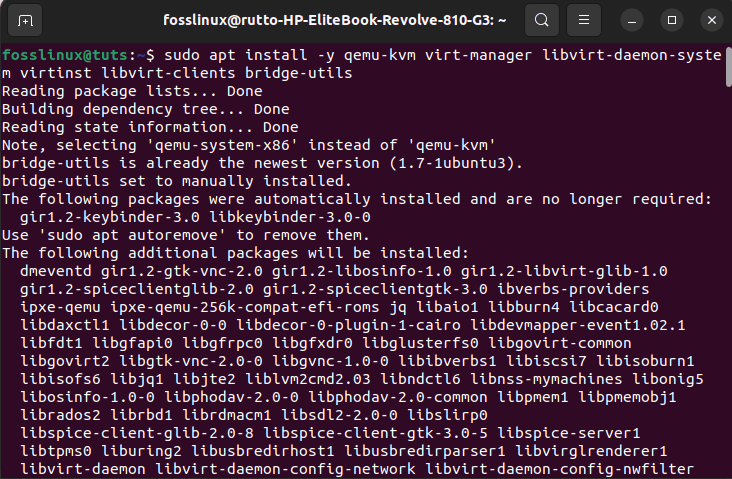
Install KVM and other packages
Let us breakdown for you the packages that the above command is setting up on your system:
- qemu-kvm – This open-source emulator and virtualization package gives hardware emulation.
- Virt-manager – A QT-based graphical interface for controlling virtual machines via the libvirt daemon.
- libvirt-daemon-system – This package provides configuration files needed to run the libvirt daemon.
- virtinst – This is a set of command-line utilities for provisioning and redesigning virtual machines.
- libvirt-clients – A group of client-side libraries and Application Programming Interfaces(APIs) for controlling and managing virtual machines and hypervisors from the terminal.
- bridge-utils – A set of tools for generating and managing bridge devices.
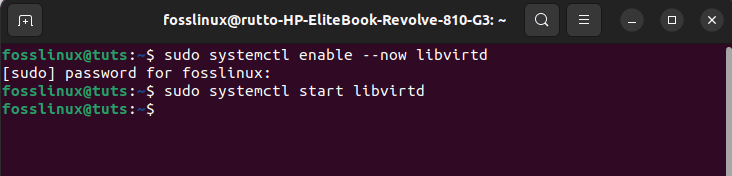
Step 2: Enable the virtualization daemon (libvirtd)
With all the packages set up, enable and start the Libvirtd daemon by issuing the following commands:
sudo systemctl enable --now libvirtd
sudo systemctl start libvirtd
Enable virtualization daemon
Then confirm that the virtualization daemon is running. This can be achieved by running this command:
sudo systemctl status libvirtd
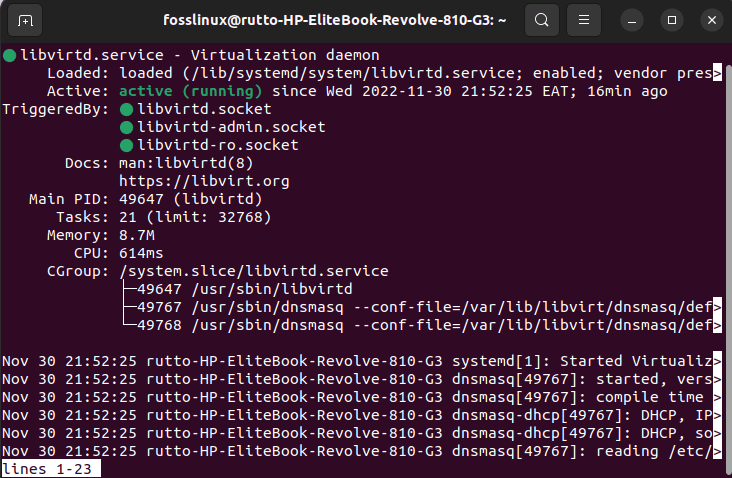
Check Status
The green active(running) display should confirm that the virtualization daemon is actively running.
Next, you need to append the currently logged-in user to the KVM and libvirt groups so that they can invent and manage virtual machines:
sudo usermod -aG kvm $USER
sudo usermod -aG libvirt $USER
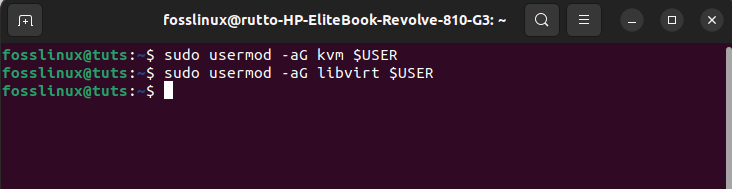
Add logged-in user currently
The $USER environment variable in the above commands points to the currently logged-in user’s name. To apply this change, you must log out and back in again.
Step 3: Create network bridge (br0)
You must map the VM’s interface to a network bridge to access KVM virtual machines outside your Ubuntu system. Though a virtual bridge named virbr0 is created spontaneously when KVM is installed, it is used for testing.
To generate a network bridge, create a file “01-netcfg.yaml” with the following data under the folder /etc/netplan. But first, create a netplan configuration file by running the following command:
sudo nano /etc/netplan/01-netcfg.yaml
network:
ethernets:
enp0s25:
dhcp4: false
dhcp6: false
# add configuration for bridge interface
bridges:
br0:
interfaces: [enp0s25]
dhcp4: false
addresses: [192.168.122.1/24]
macaddress: ec:8e:b5:2e:f3:b5
routes:
- to: default
via: 192.168.0.0
metric: 100
nameservers:
addresses: [4.2.2.2]
parameters:
stp: false
dhcp6: false
version: 2
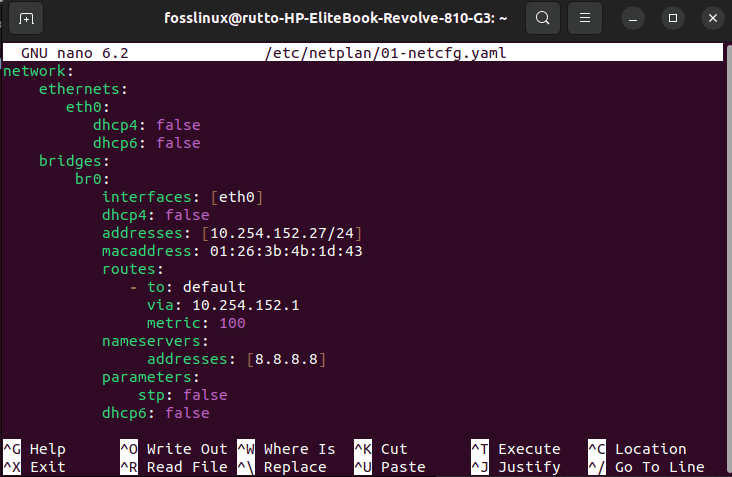
yaml file
Save the file using “Ctrl+x” and press “y” to exit.
Note: These details are per our setup, so ensure you replace the IP address entries, mac address, and interface name as per your setup.
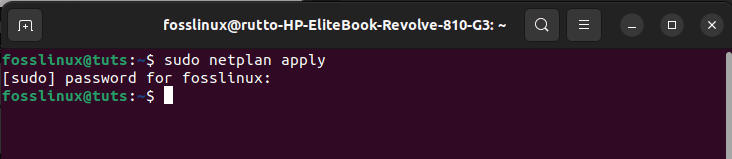
For the above changes to take effect, run “netplan apply.”
sudo netplan apply
Apply changes
Then verify the network bridge “br0” by running the IP command as shown here:
ip add show
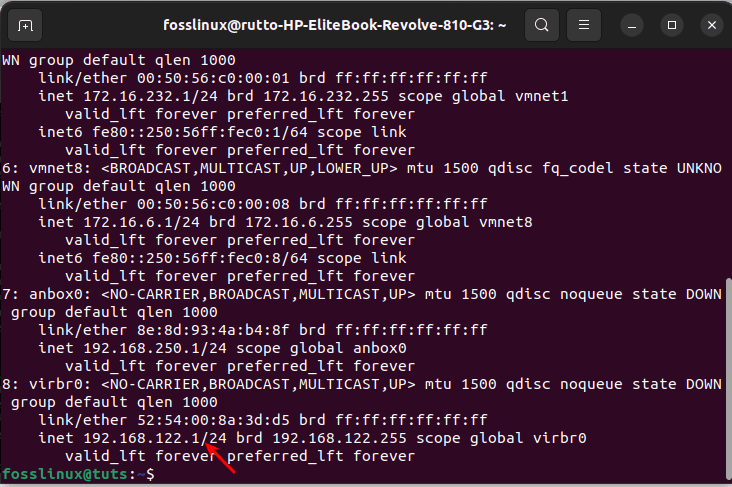
IP address display
Let us now see how we can lunch KVM virtual machines manager
How to launch KVM virtual machines manager
With KVM setup, you can start setting your virtual machines using the virt-manager Graphical User Interface (GUI) tool. To get going, run the following command to open KVM:
sudo virt-manager
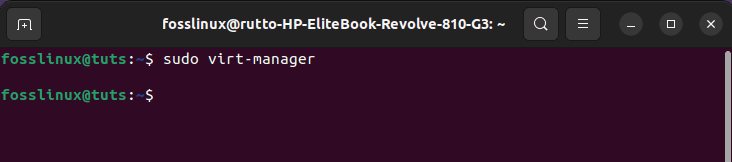
Start KVM
This will launch the virtual machine manager interface
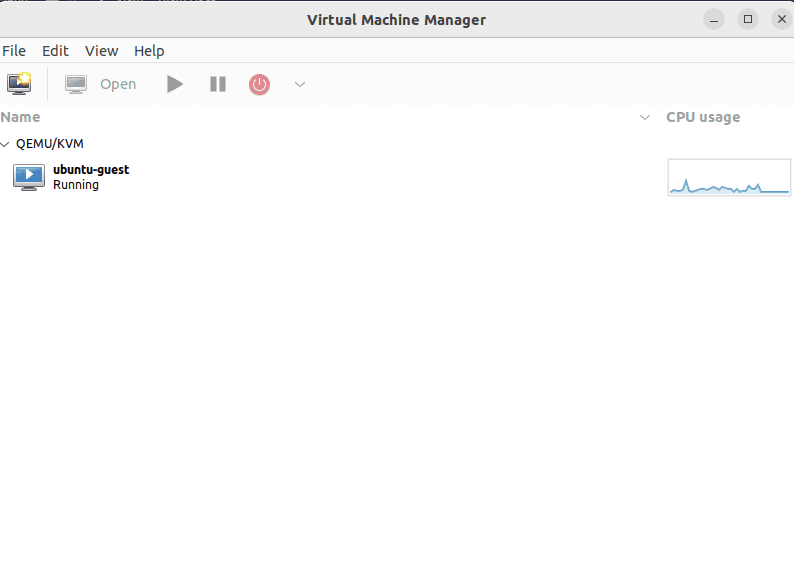
KVM running
Next, click “File” and select “New Virtual Machine.” On the other hand, you can click the computer screen-like button to avoid the long process:
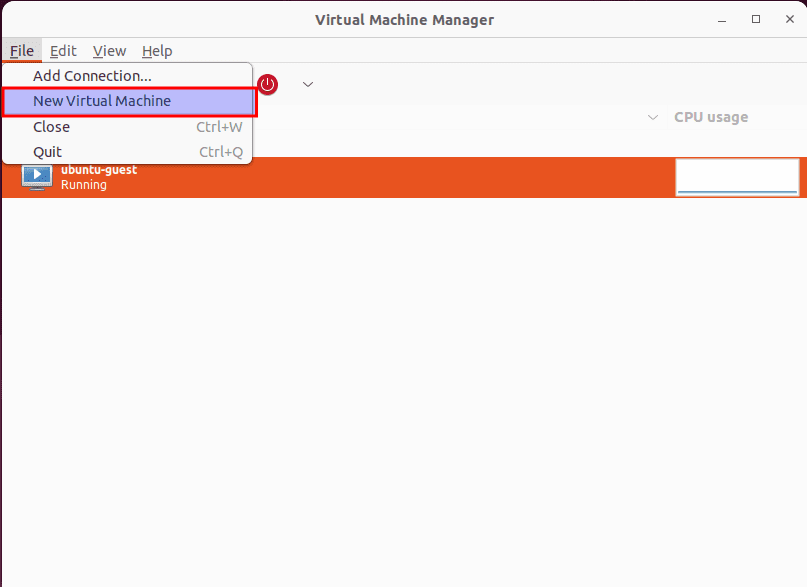
Select new machine
This pops open the virtual machine installation wizard, which presents you with four options, namely:
- Local install media (ISO image or CDROM).
- Network install (FTP, HTTP, and HTTPS).
- Import existing disk image.
- Manual install.
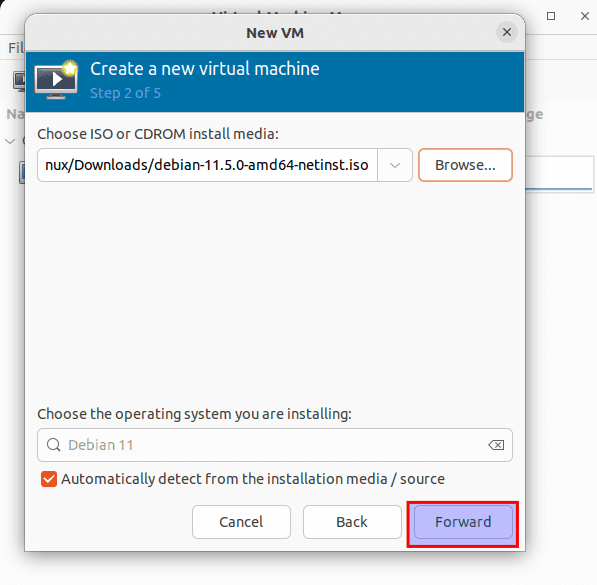
In our instance, we downloaded a Debian 11 ISO image; as such, you must ensure you have an ISO image you intend to install before proceeding. To continue, we suggest you select the first option, “Local install media (ISO image or CDROM) then click “Forward.”
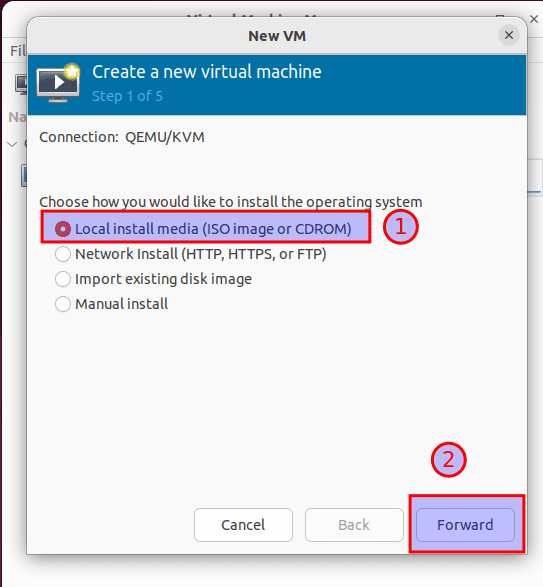
Select the first option
Next, click on “Browse” to maneuver to your ISO’s storage location:
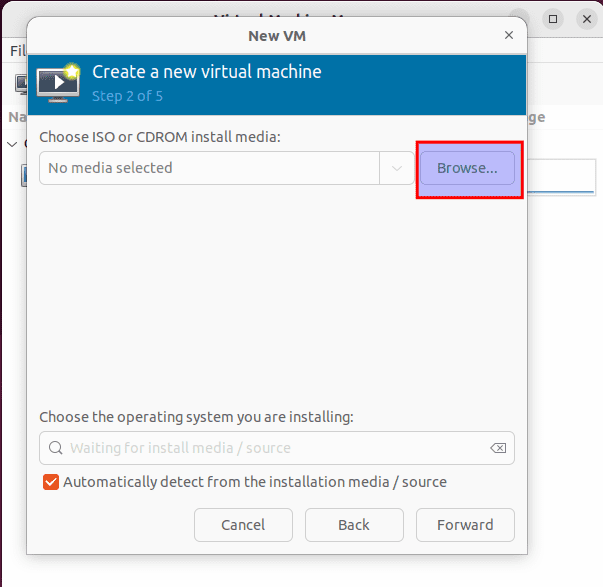
Select browse
Then click on “Browse local” to select the ISO image from the local directories on your Ubuntu system.
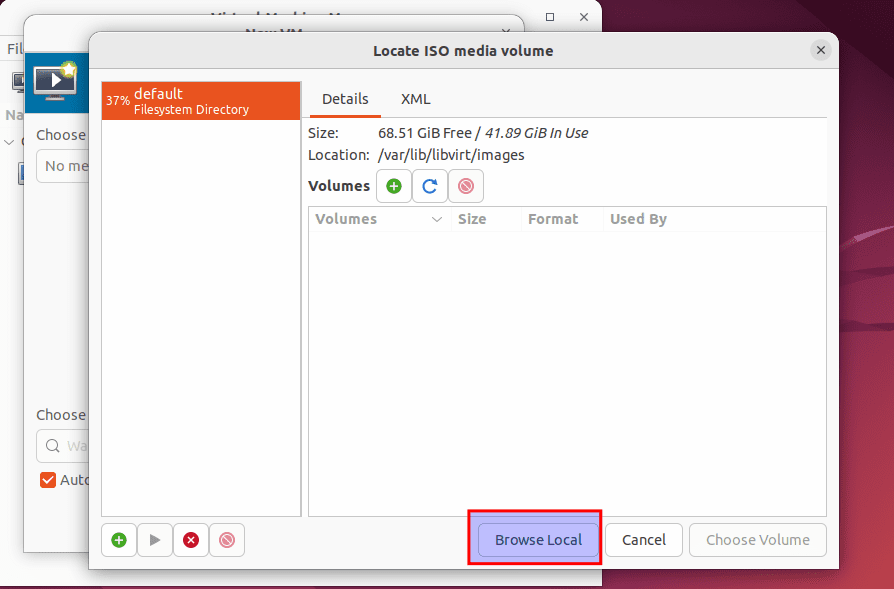
Select browse local
As earlier said, we, in our case, have selected Debian 11 ISO image. So select your ISO image, then click “Open.”
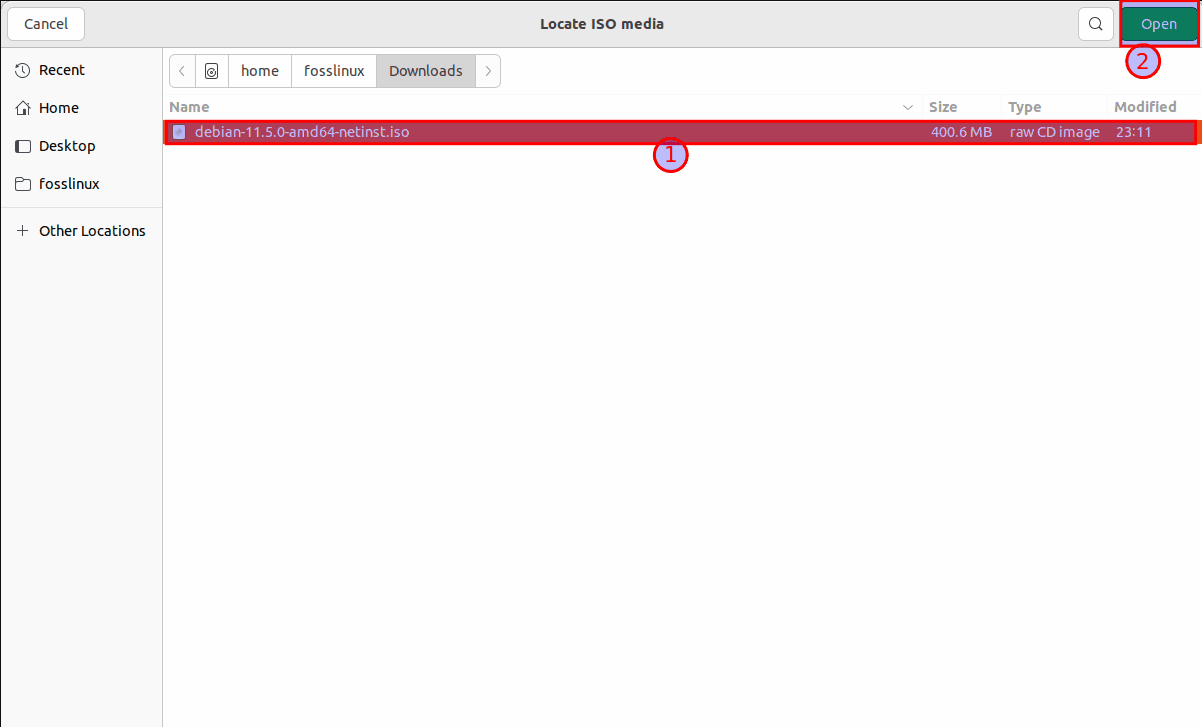
Select the file and click Open
After selecting the ISO image, click “Forward” to move to the next step:
Click Forward
Next, define the number of CPU cores and the RAM for your virtual machine and click “Forward.”
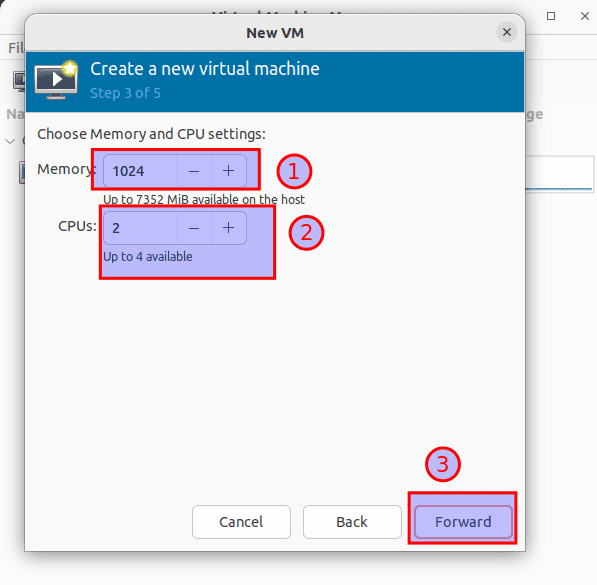
Define memory and CPU
In the next step, choose the disk space you intend your virtual machine to operate in and click “Forward.”
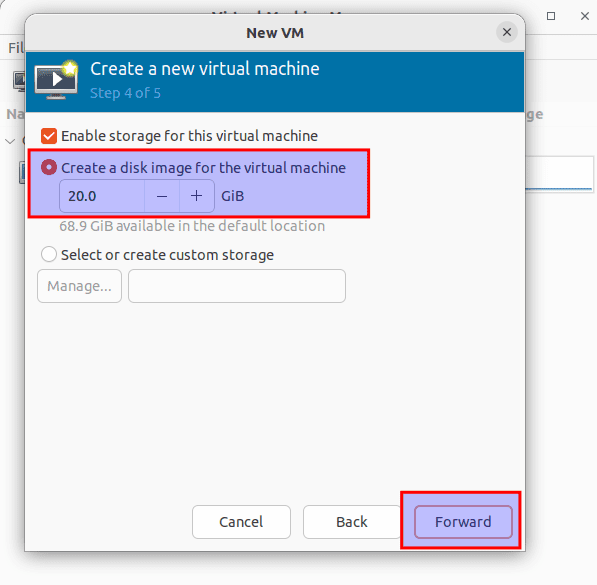
Choose disk space
To associate the virtual machine’s nic to the network bridge, click “Network selection” and choose “br0 bridge.”
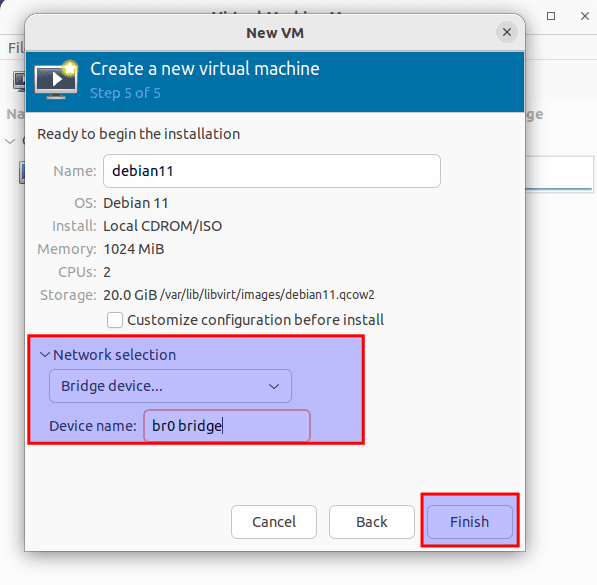
Network selection
At the tail end, click “Finish” to finalize setting the virtual machine.
Shortly afterward, the virtual machine creation will initiate, as shown below:
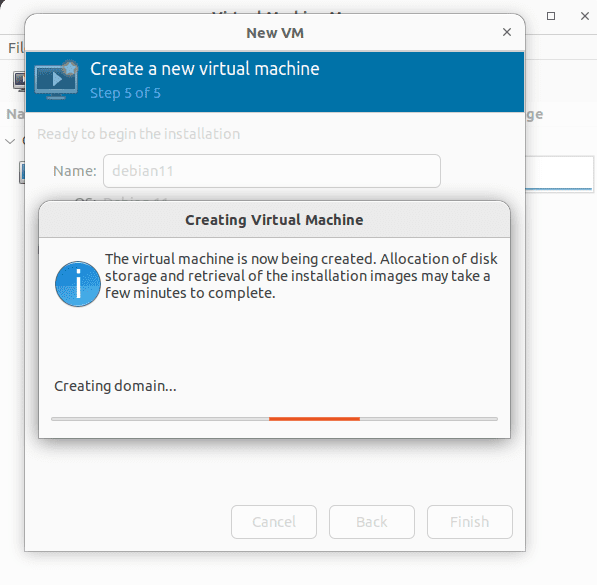
Virtual machines being created
Once done, the virtual machine will begin with the OS installer displayed. Below is a Debian 11 installer listing the options for installation. From here on, you can proceed to set up your preferred OS, as covered in our other article on how to install Debian 11:
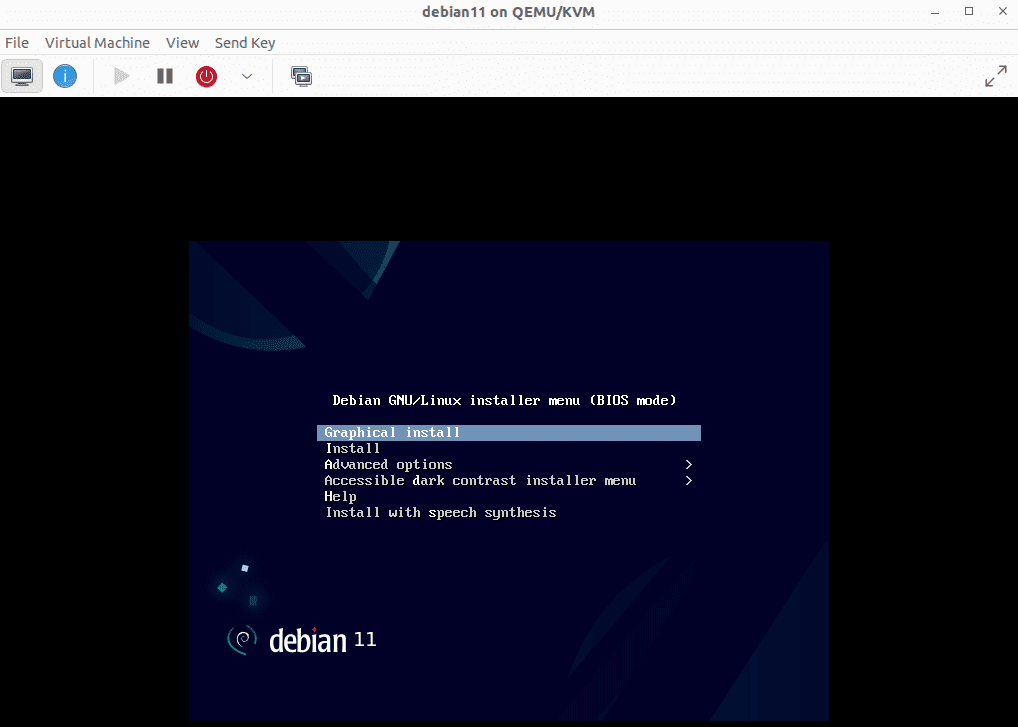
Graphical installation of Debian
Wrapping up
And that should do it, guys! This guide has detailed how to set up KVM on our Ubuntu system. Before setting up the virtualization tool, we checked the compatibility between KVM and our Ubuntu system. After that, we set up the required KVM packages and proceeded to install KVM. We also showed you how to create a configuration file to enable a bridged network. Finally, we showed how to verify changes using an easy-to-follow command. To this end, we believe this post was informative enough; otherwise, keep rooting for FOSSLinux.
1 comment
How do we get our relevant [] entries for:
interfaces: [enp0s25]
addresses: [4.2.2.2]