
We all have to agree that web browsers are the most important and frequently used apps on all or nearly all operating systems to access search results and browse the Internet. Linux Mint, one of Linux’s distros, ships with Mozilla Firefox as the default web browser; however, many users nowadays prefer to set up Google Chrome because of its valuable and advanced features. If you haven’t installed one on your Linux Mint system, you don’t need to worry anymore since this guide has everything for you.
Google Chrome is a cross-platform web browser created by Google. Built with free software functionalities from Apple Webkit and Mozilla Firefox, Google Chrome was first released to the market in 2008 for Microsoft Windows. Later, Linux, iOS, macOS, and Android versions were also released. A good part of Chrome’s source code comes from Google’s free and open-source software project, chromium, but Chrome is licensed as proprietary freeware. The original rendering engine is Webkit, but Google eventually forked it to generate the blink engine; as of now, all Chrome variants except iOS use Blink.
Chrome’s functionality can easily be enhanced by setting up different and useful extensions and web apps. You can also change the browser’s look and feel by installing new themes of your liking.
This article will take you through the installation phase of Google Chrome in Linux Mint using the command line and the graphical user interface approaches. But before that, let us cover some features of this great application.
Google Chrome features
Many people now use Google Chrome as their primary web browser because of its powerful features that make it outstanding. For a fact, you may not have found all the Google Chrome’s best yet. But stick with us; we will ensure you get every aspect of this application.
Cast your tab or desktop
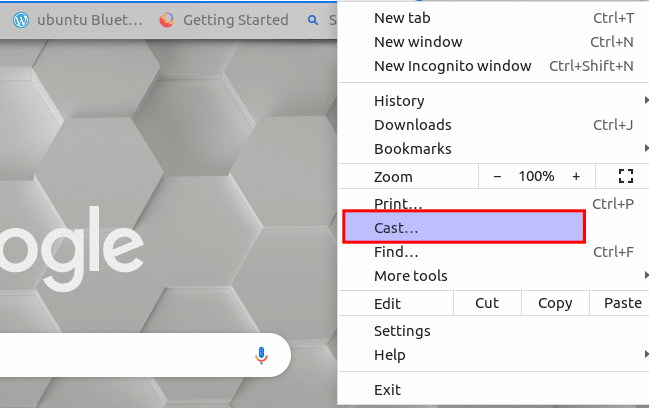
Cast feature
You may think you need some complex program to share a Chrome tab or your desktop to a different screen. Chrome has this functionality built right in and is pretty simple to use.
When casting to a Chromecast or Nest Smart Display, Chrome offers three choices. You can cast a file, your entire desktop, or a tab. This feature is accessible from Chrome’s menu and works on Chrome for Linux, mac, and Windows.
Search Inside with the Omnibox
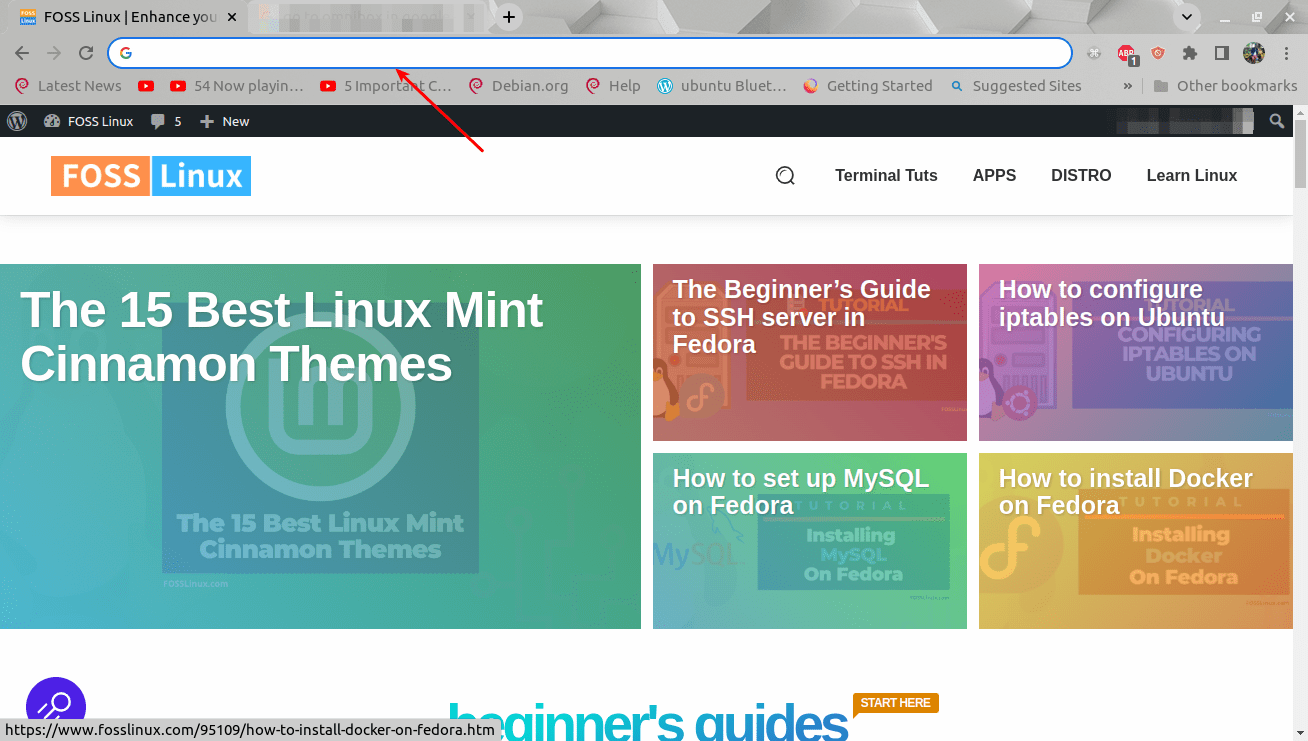
The Omnibox
Chrome’s address bar, popularly known as Omnibox, is named such because it can perform a couple of different things. You may be aware that your preferred search engine allows you to conduct a straight search, but it can also look up certain websites.
Instead of performing a Google search for something like “FOSSLinux google chrome” to find an article on our site, you can search on FOSSLinux directly from Omnibox. For a fact, you can do it with pretty much any site you want. This is truly a time cheat code feature.
Right-click to search highlighted text
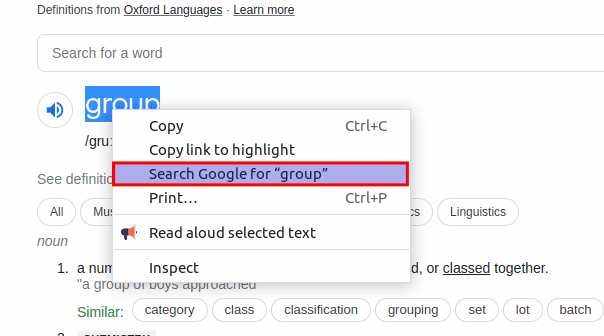
Right-click functionality
This is another excellent search feature in Chrome, with the ability to quickly search for anything just by highlighting the text. This will work with whatever search engine you have chosen to use in Chrome.
All needed for you to do is highlight some text, then right-click and select “search [provider] for [text]. A new table will open with a pre-filled search for the highlighted text. This is quite a tremendous quick shortcut for looking things up.
Tab groups
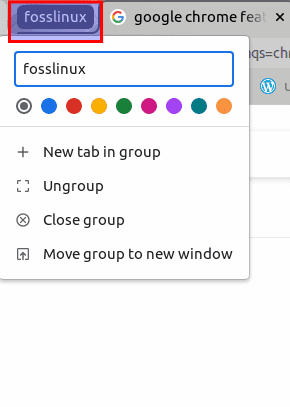
Tab groups
If you have found yourself with so many tabs open in Chrome, you need to be aware of Tab Groups. This feature lets you organize tabs into groups and collapse them to save space in the tab bar.
Tab Groups can be moved collectively and labeled with colors and names. It is a handy feature that several browsers have added, and it has become an indispensable way of maintaining tabs from taking over your browser window.
Search for open tabs
Search active tabs
Another outstanding feature that can aid you in wrangling your messy tabs is the Tab Search. Cannot seem to find that one tab you are in dire need of right now? Just tap the little arrow in the top bar of the Chrome window, or hit the “Ctrl+Shift+A” keyboard combination on your keyboard, and you should be able to view them all in a list. To swiftly access a specific tab you already know, type its name into the search bar and go to that tab.
Automatically change the new tab background
Chrome’s new tab page is astonishingly helpful. It has shortcuts to Google Images, Gmail, a search bar, and your frequently visited websites. You can bring a little extra look and feel to the New Tab page with backgrounds.
Modify your downloads storage location
Here is a slight hint that can ease your life. Chrome, by default, saves all the downloads to the “Downloads” folder on your device. However, you can modify this and redirect your downloads to a location of your preference.
You have two options for your download folder. You can either select any default location you would like or opt to be asked every time. If you find your Downloads folder getting out of hand, changing how Chrome behaves may be a good idea.
Live captions for any video or audio
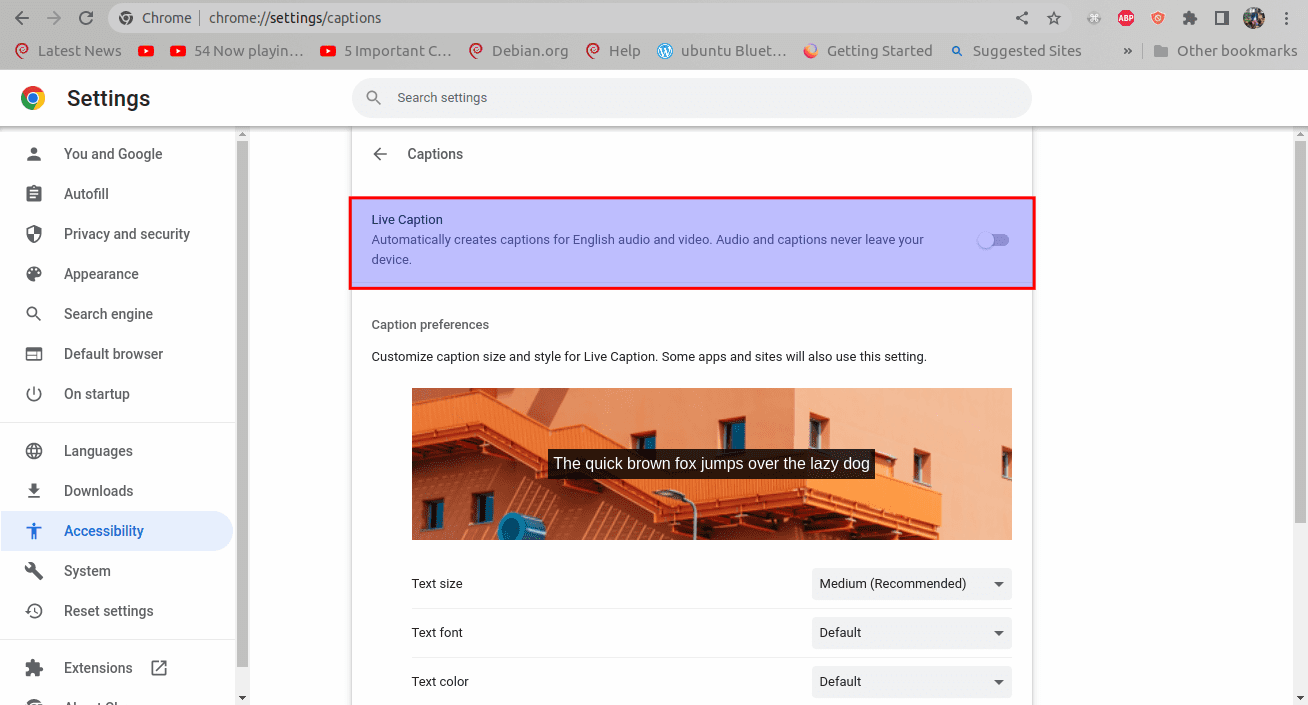
Live caption
Captions are vital features for many users, including those with hearing impairment. Sites like YouTube have good closed captions built-in, but that is not the case everywhere. Chrome can solve that issue for you with Live Captions.
Live caption is a feature that automatically puts captions on the screen for any audio or video playing in your browser. The features are incorporated right into chrome-no feature flags or extensions are needed.
Let us now look at the first installation method; via the command line.
How to install Google Chrome in Linux via terminal
You can set up Google Chrome on your Linux Mint distro via two terminal approaches.
- Install Chrome by adding the Google Chrome repository.
- Install Chrome using the .deb package.
Section 1: Install Chrome by adding the Google Chrome repo
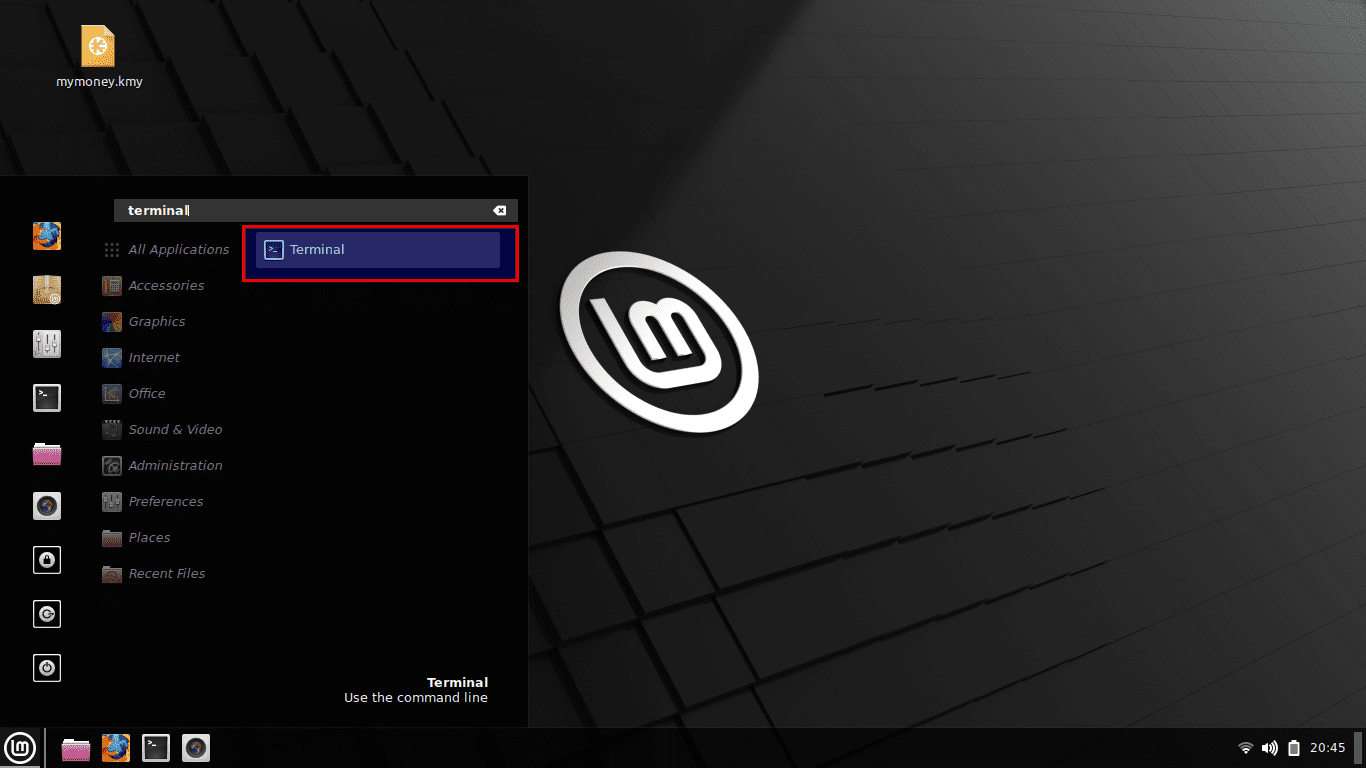
First, open the terminal using your keyboard’s shortcut method Ctrl+Alt+T. You can alternatively access the terminal window from the Start Menu of the Linux Mint distro. To do this, click on the “Start Menu” icon and use the search bar to search for the “terminal” then click on such an icon:
Open terminal
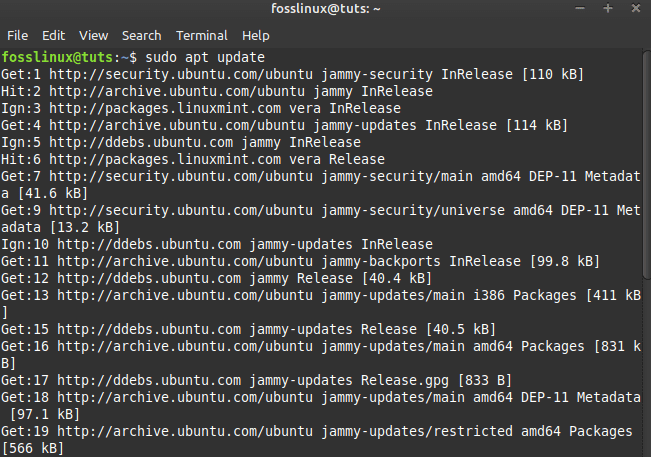
Step 1: Update the apt repo
In Linux, it is recommended that you first update the apt repo before setting up any new packages on your system. As such, issue the following command:
sudo apt update
Update system
Step 2: Add the Google chrome repo
Next, add the Google Chrome repo to your system. To do this, copy-paste the following command on your terminal to help download the Google signing key:
wget -q -O - https://dl.google.com/linux/linux_signing_key.pub | sudo apt-key add -
For a successful download, the “OK” status should be displayed on the command line, as shown below:
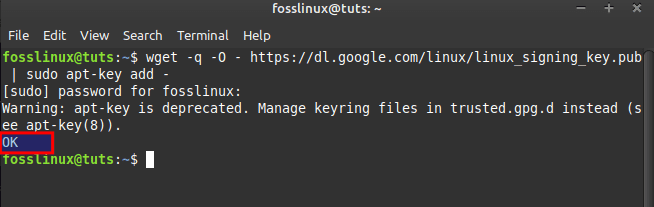
Download Chrome repo
Step 3: Set up the Google Chrome repo
Next, set up the Google Chrome repo on your system by keying in the following command:
echo "deb [arch=amd64] http://dl.google.com/linux/chrome/deb/ stable main" | sudo tee /etc/apt/sources.list.d/google-chrome.list
deb [arch=amd64] http://dl.google.com/linux/chrome/deb/ stable main
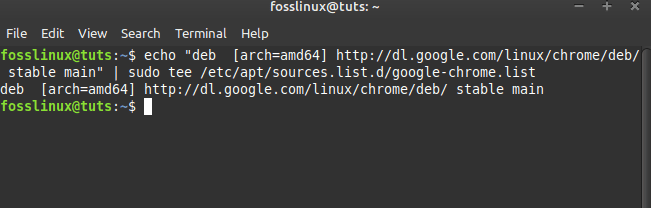
Setup Google chrome repo
Step 4: Update apt-cache again
Then again, update the apt-cache using the following command:
sudo apt update
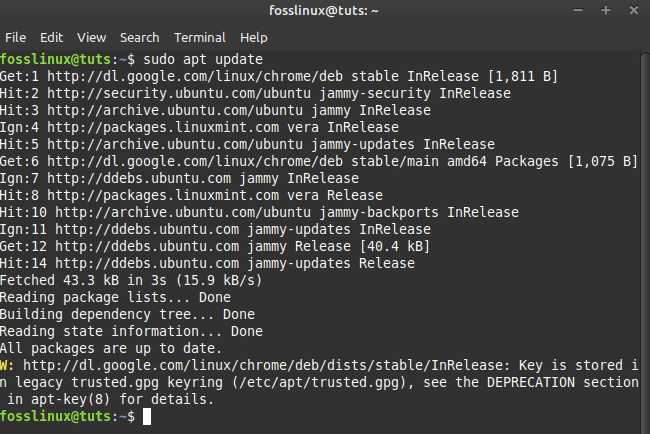
Second update
Step 5: Install Google Chrome
Install the latest, stable version of Google Chrome onto your system by running the following command:
sudo apt install -y google-chrome-stable
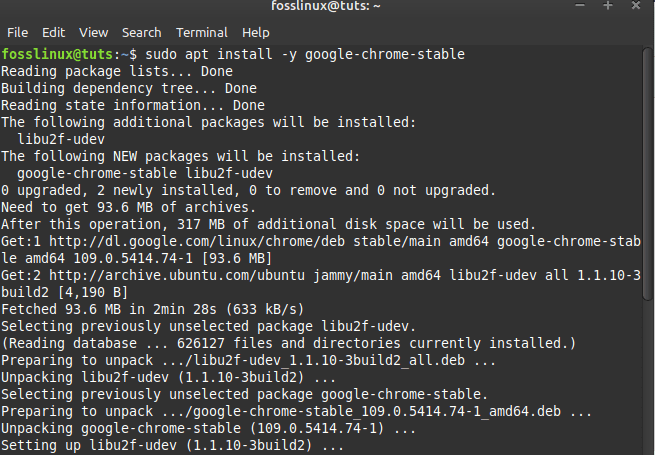
Install Google Chrome
To install Google chrome beta, run this command:
sudo apt install -y google-chrome-beta
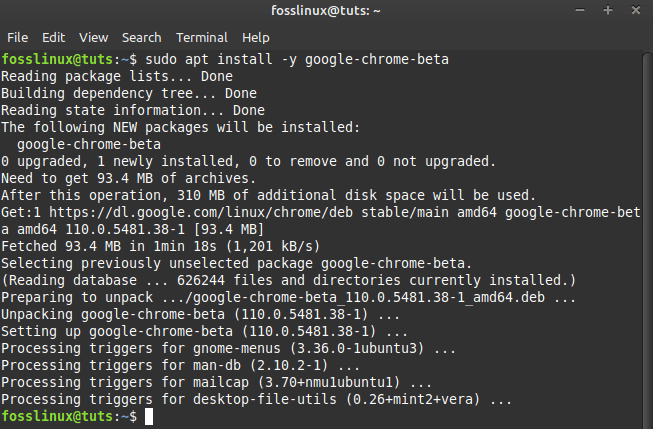
Install Google chrome beta
Let us see the second section.
Section 2: Install chrome using the .deb package
You can download the .deb package for google chrome onto your system by clicking this link. After which, you will be redirected to the Chrome download section. Click on the “Download Chrome” button:
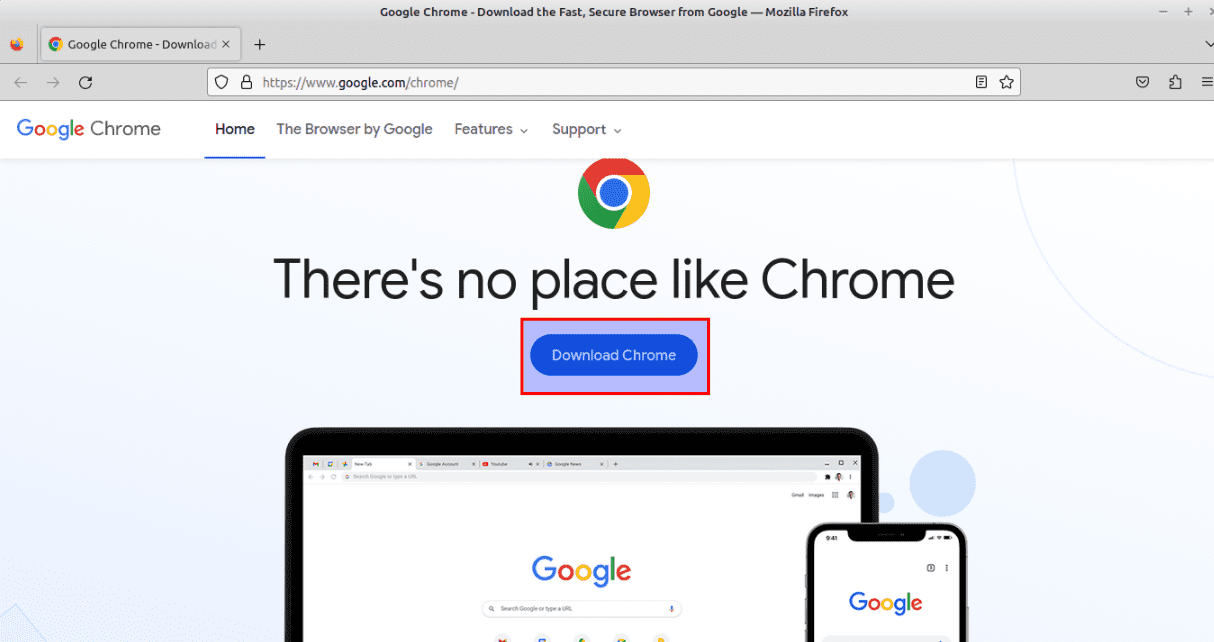
Select Download Chrome
The following dialog will pop up in the window. Select the 64-bit.deb package (for Debian/Ubuntu), and then click the “Accept and Install” option:

Select Accept and install
You should see the download progress as shown below:
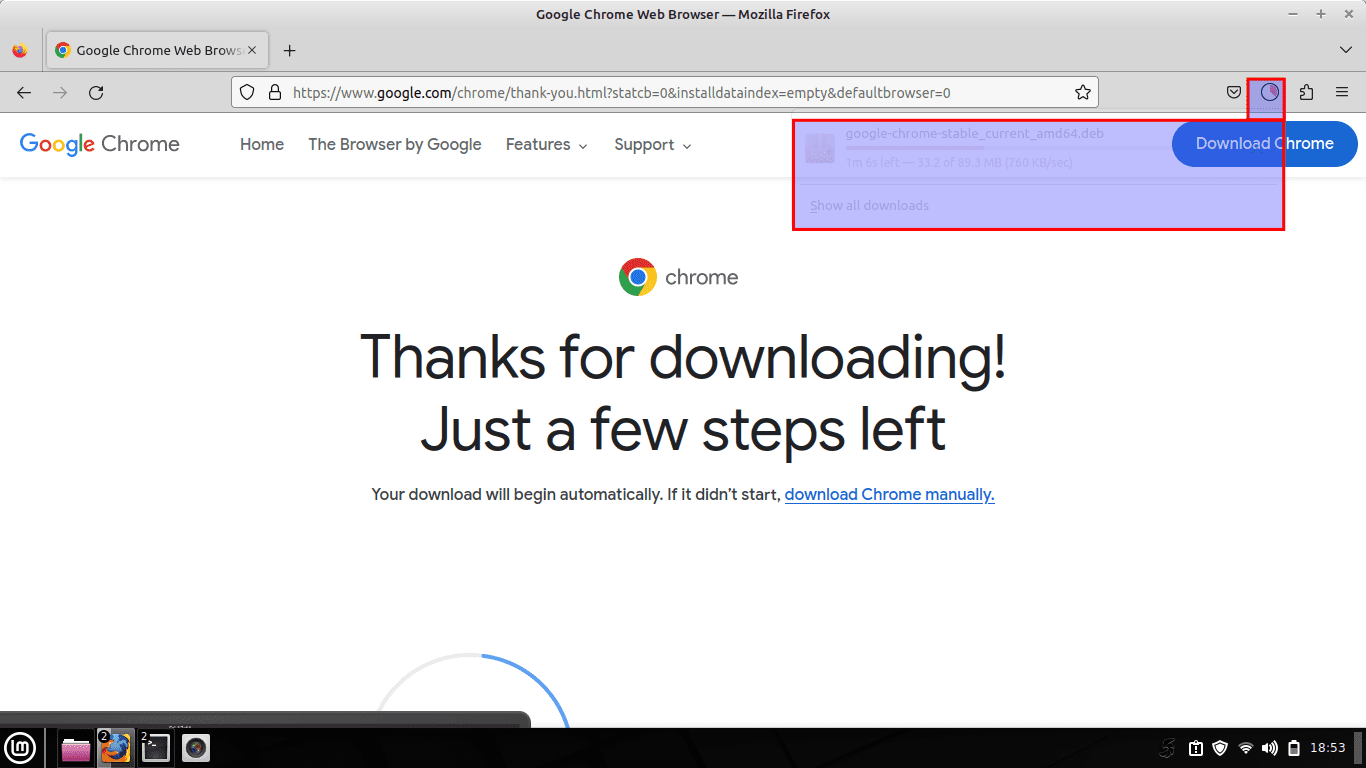
Download progress
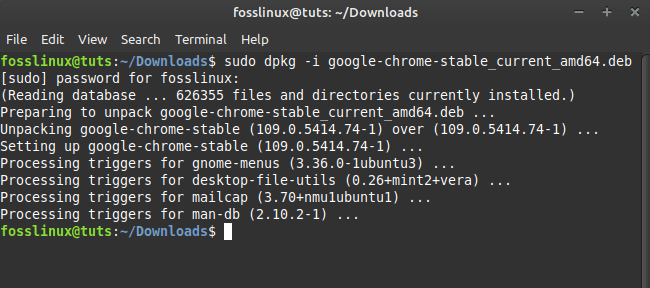
After the download is done, open the terminal and go to the system downloads using the cd command to list the files as follows:
cd Downloads
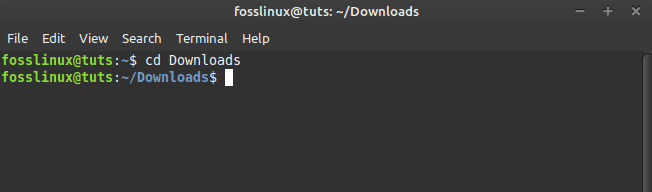
Navigate to Downloads
Here, type in the following command to set up .deb package on your system:
sudo dpkg -i google-chrome-stable_current_amd64.deb
Install Chrome using dpkg
That is that for the above section.
Congratulations! Google chrome has been installed on your system.
Let us now see how we can install Google Chrome on Linux mint via GUI.
Install Google chrome via GUI
This is a straightforward approach to setting up Google chrome compared to the strange command line steps. Here is what you need to do to avoid going the terminal way.
Step 1: Go to Google’s website
First, Click on this link to visit Google chromes site. After that, click on the “Download Chrome” button as highlighted in the snapshot below:
Select Download Chrome
Step 2: Select your Download Package
A dialog box with two options for downloading Chrome on Linux will appear. Go to the Debian/Ubuntu option and hit the “Accept and install” button, as highlighted here:
Select download package
Before initiating the download, Firefox may or may not ask if you want to open the download file with “Gdebi or save.” If it asks, you can choose either option because, ultimately, you will be utilizing Gdebi to set up the deb file. However, in our case, we prefer to save the file first. So after selecting Save file, click on “OK.”
Please be patient as the download finishes.
After the download, navigate to the Downloads folder in File explorer. After that, double-click on the Google chrome .deb file or right-click on it and choose “Open With Gdebi Package Installer.”
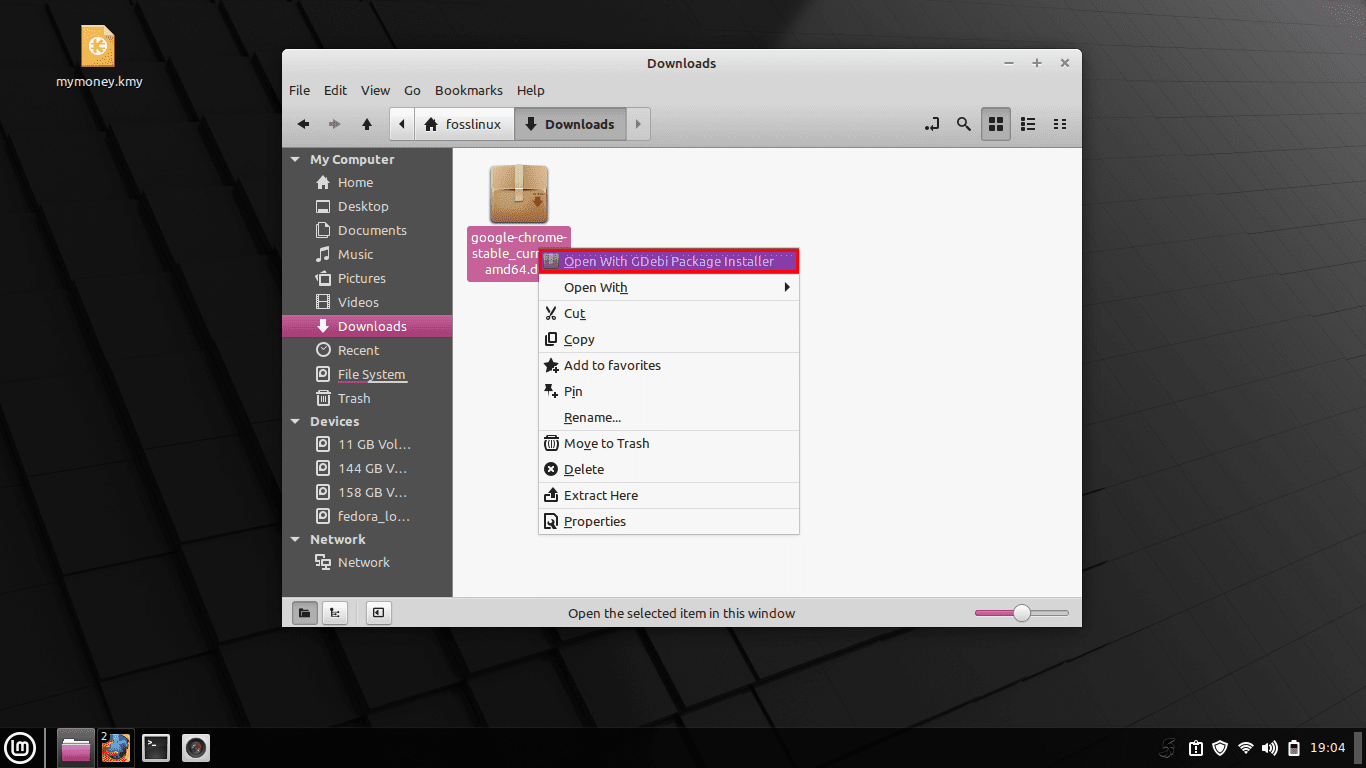
Open with Gdebi
Wait a few more seconds, which should give you the install package option. Click on it:
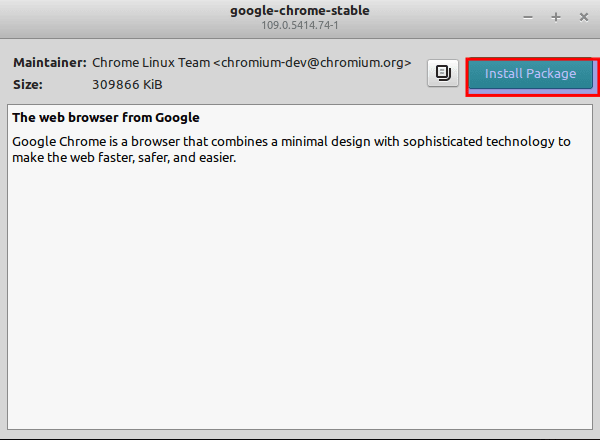
Select Install package
It will then request your to give your Linux Mint account password. In Linux, you must always provide your root password for any app installation. So type your password and hit the “Authenticate” button:
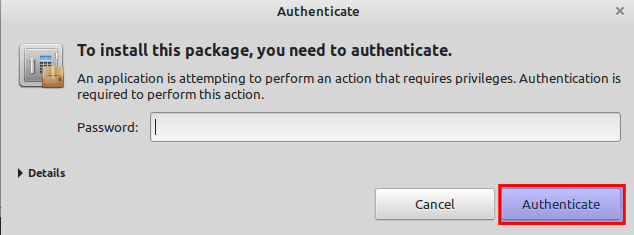
Authentication
The installation will take a couple of seconds or minutes for the setup to complete.
Upon a successful installation, you should see such a screen:
successful installation
Let us now discuss how we can launch Chrome using the terminal and the GUI methods.
Launch Google Chrome
You can use the following command to launch the stable version of the Google Chrome app on your terminal:
google-chrome-stable
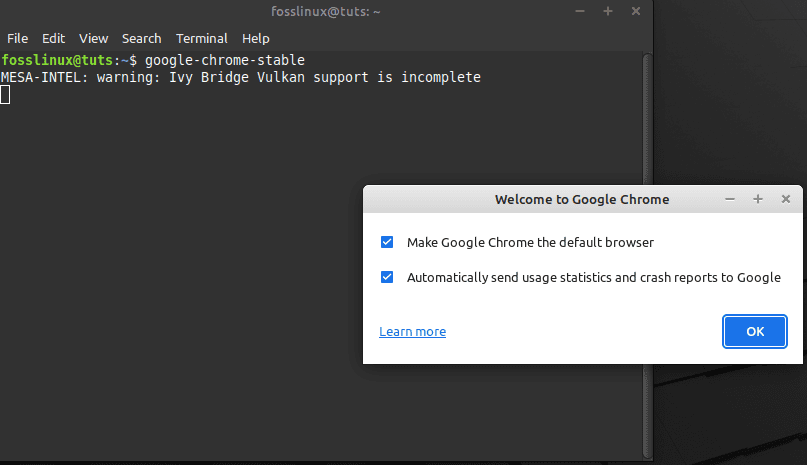
launch Chrome
or
google-chrome
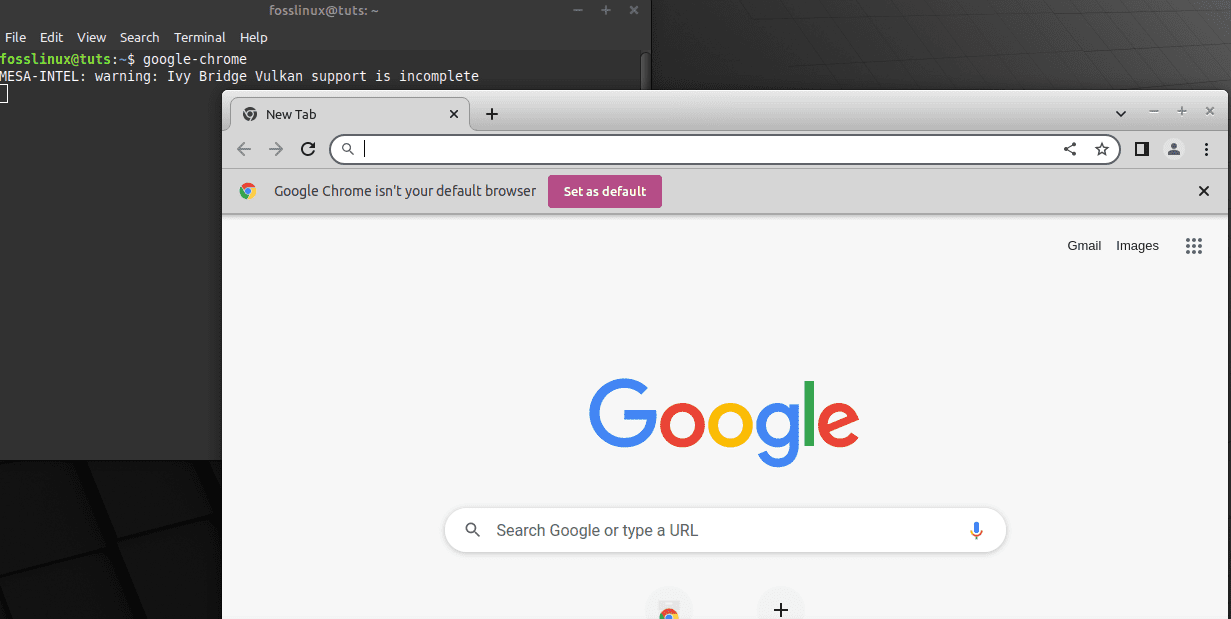
Launch Chrome
Remember we also covered how to install the beta version? Now, you can launch this version of Google Chrome using this command:
google-chrome-beta
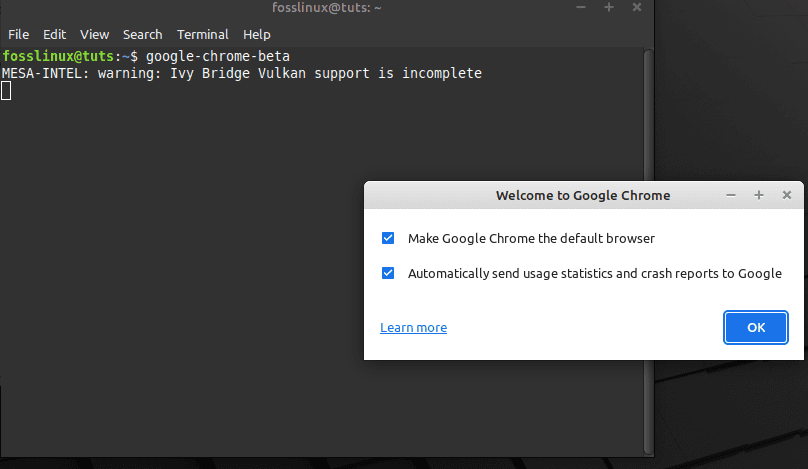
Open beta
Launch via GUI
Go to the application menu and use the search bar and look for Google Chrome, or type “chrome” and click on the highlighted icon:
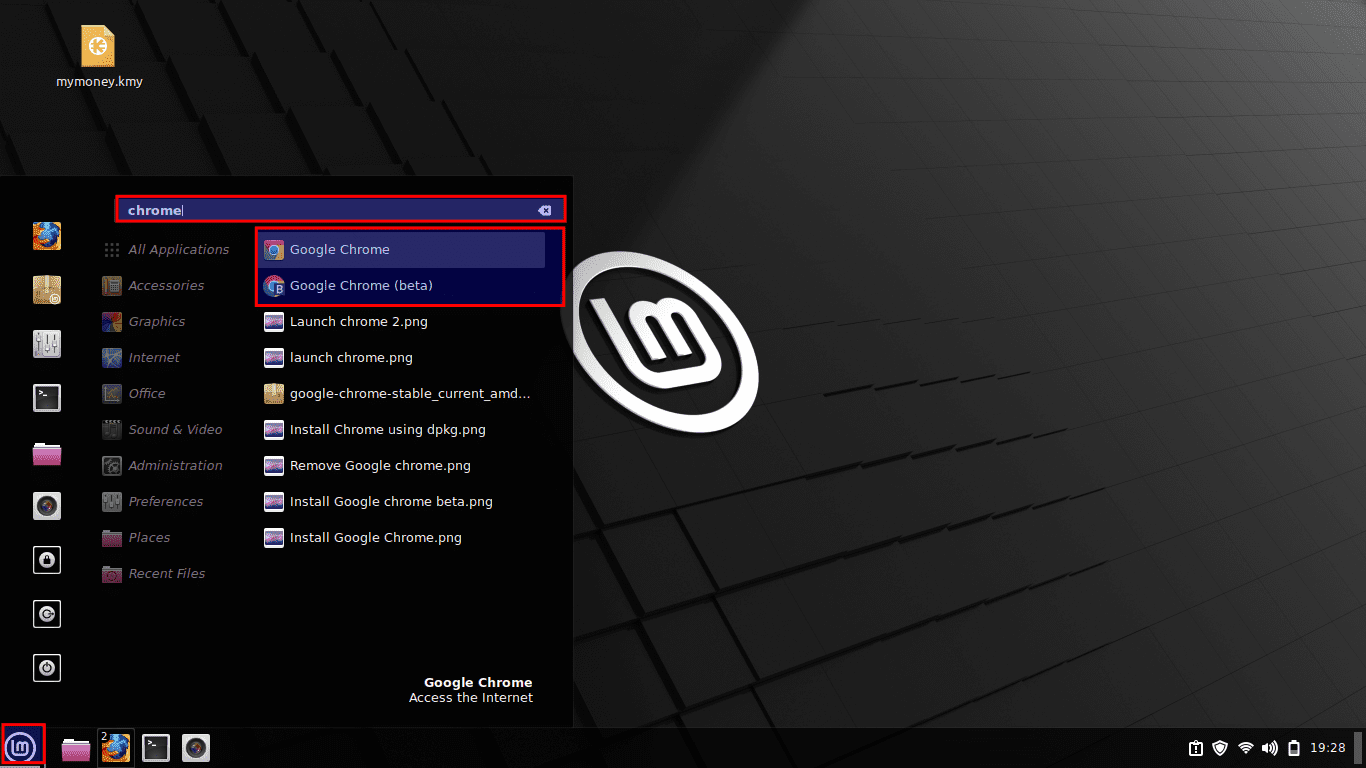
Open Chrome
You can now enjoy Google Chrome on your Linux Mint system:
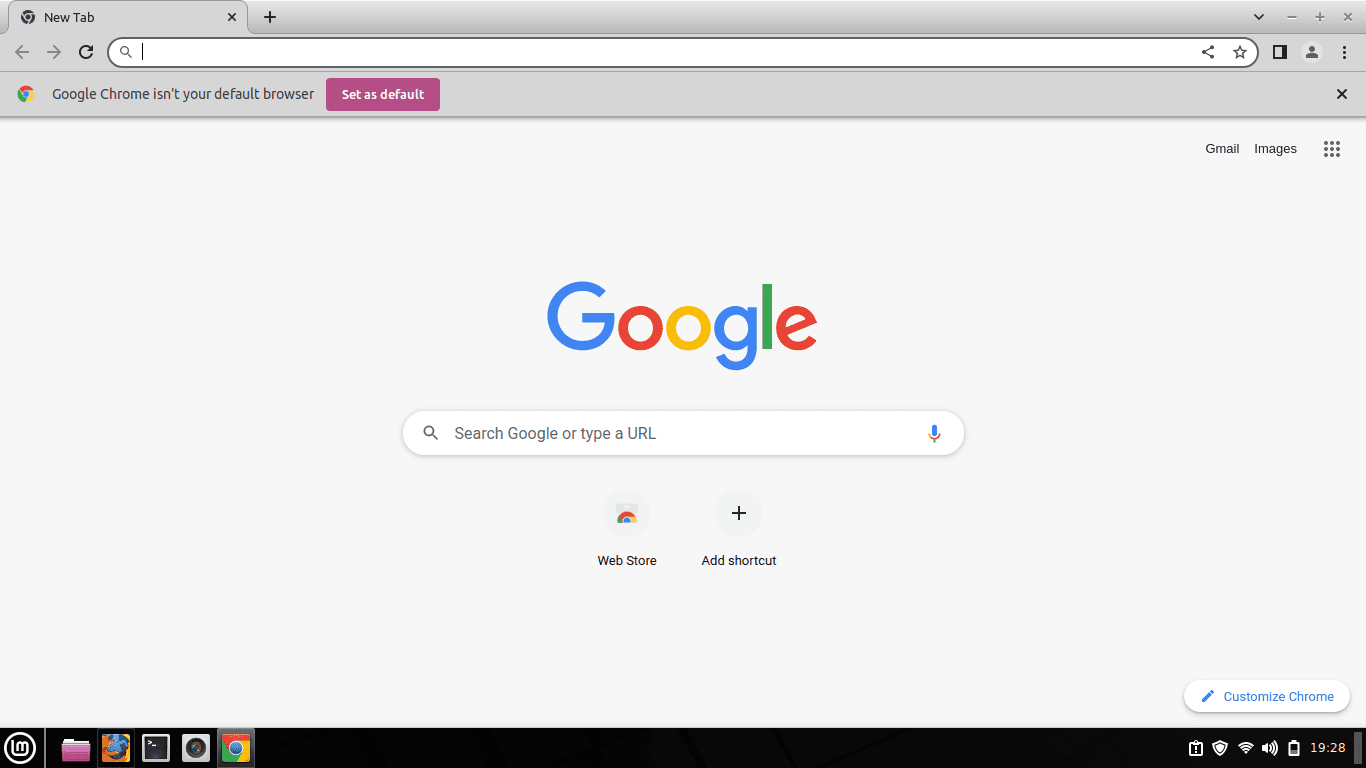
Chrome opened
Let us now see how we can remove Chrome from our Linux Mint system.
How to remove Google Chrome on Linux Mint
If you’re faded up with Chrome for one reason or another, you don’t need to worry anymore. Simply uninstall the app from your Linux Mint. And this can also be done using the terminal, and the GUI approaches.
Remove Google Chrome via terminal:
Copy-paste the following command on your terminal to remove Google chrome from your Linux Mint system altogether:
sudo apt-get remove google-chrome-stable
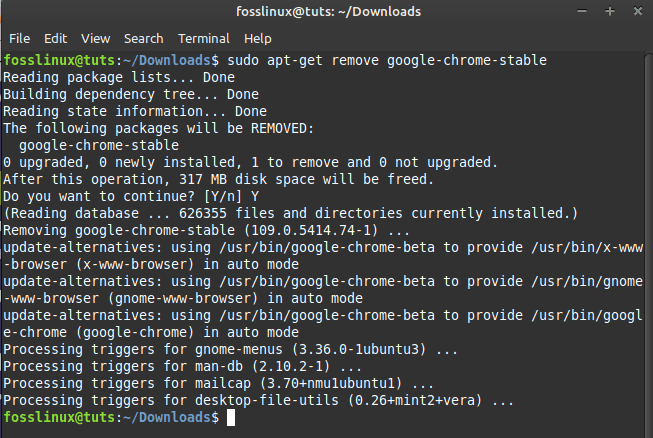
Remove Google chrome
Remove Google Chrome via GUI
To do this, click on the “Start Menu” and search for “Chrome.” After that, right-click on the Chrome icon, and you will see an “Uninstall” button. Select it:
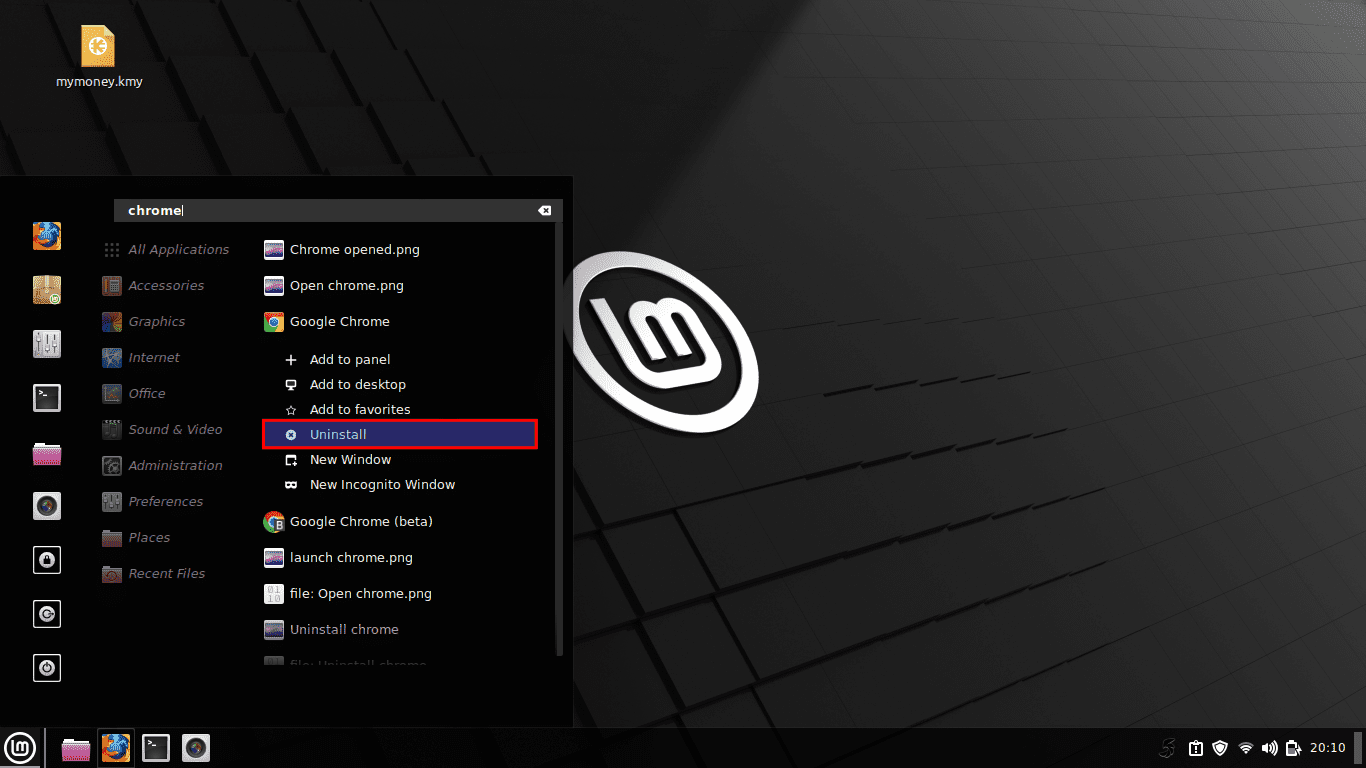
Uninstall Chrome
As usual, you have to input your password. It will show the packages to be removed. Click on “OK” here:
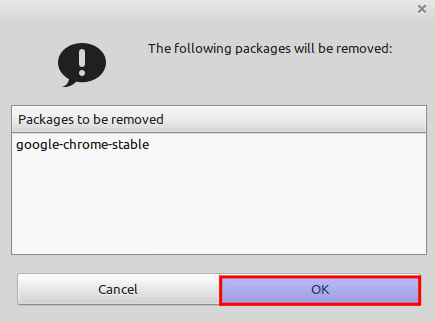
Click on OK
And that should do it!
Final Thoughts
Chrome offers you the best of Google, from offline integration of Docs and Gmail to automatic website translation from Google translate. You also get personalized search results that appear instantly as you enter text. Other important aspects of this application are syncing bookmarks and settings across all your devices. This guide has completely covered two terminal approaches to installing Google chrome plus the Graphical approach for those who are not terminal fanatics. We also covered the vital features of this application, how to launch it, and also the uninstallation phase if, in one way or the other want to delete this app from your system. We hope this came in handy, guys!