
Having Java on your Linux system is necessary for running a lot of essential software. We have put together a comprehensive guide on how to install Java on Pop!_OS. We shall show you how to install the Java Runtime Environment (JRE) as well as the Java Developer Kit (JDK) using the apt command.
Apart from that, we will also show you how to install both OpenJDK and the official Oracle JDK.
Installing Java on Pop!_OS
By default, Pop!_OS 20.04 comes with Open JDK 11 – an open-source version of JRE and JDK. To check if your Pop!_OS installation also has it pre-installed, you need to type the following commands in your terminal.
First, you will need to update the package index using this command:
$ sudo apt update
Next, enter this command to check if Java is installed on your system.
$ Java -version
If Java is installed, it will show you the version number of the JRE. However, in case it is not installed, you will get the following message on screen:
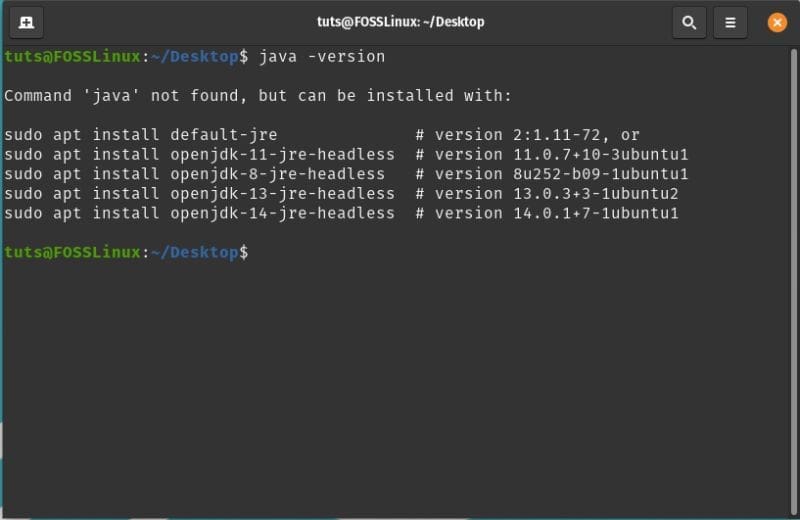
Java not installed
To install Java on your system, you can type in the following command:
$ sudo apt install default-jre
This command will only install the default JRE – Java Runtime Environment from OpenJDK 11. To install the default JDK – Java Development Kit from OpenJDK 11, you will need to enter another command:
$ sudo apt install default-jdk
With both JDK and JRE installed, you will be able to run all Java-based software on your Pop!_OS system. To make sure that Java is correctly installed on your system, enter the same command as before:
$ java -version
This time, you should see an output similar to one shown in the below image:
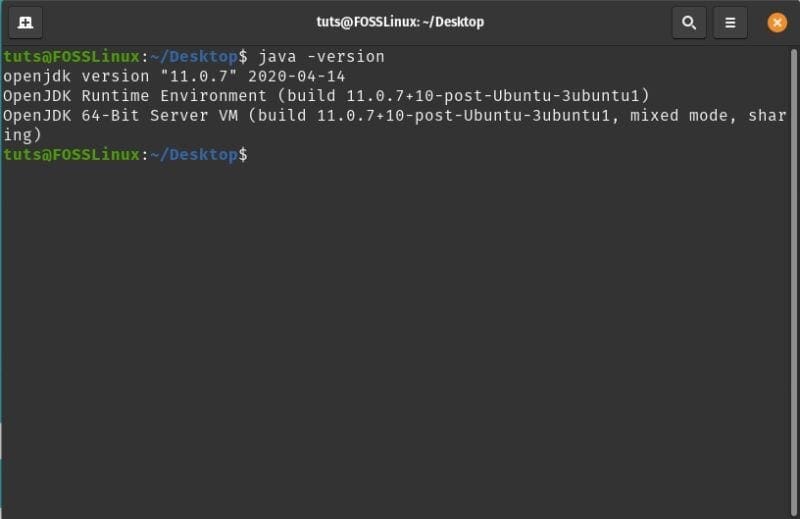
Java installed
To verify that JDK has been appropriately configured, you can check the version of the Java compiler on your system using this command:
$ javac -version
You should see an output similar to the one shown below:
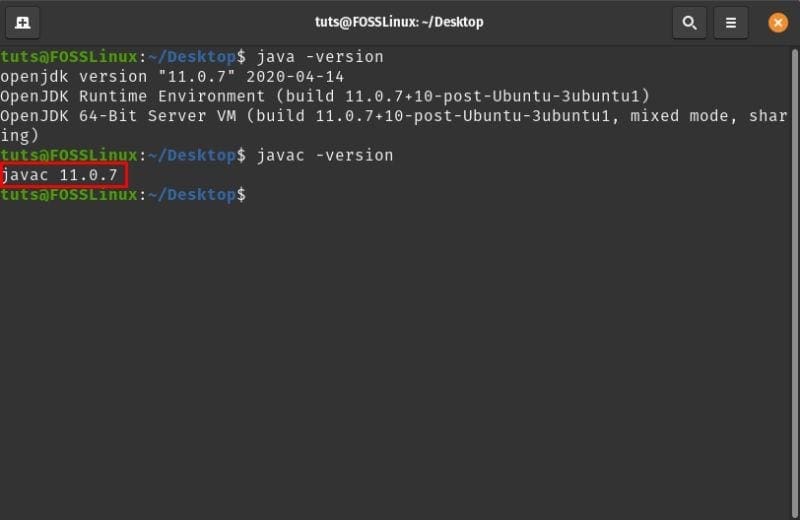
Checking Java version
So, this is how you install JRE and JDK from OpenJDK. However, if you want to install the official Oracle JDK, then you will need to follow a completely different method.
Here’s a step by step guide on that to help you out.
How to install Oracle JDK 11?
OpenJDK should be enough to help you run most Java-based applications on Pop!_OS. However, some software requires you to have the official Oracle Java Development Kit (JDK) installed on your system.
Note: We recommend installing Oracle JDK 11 because it is the current LTS (Long-Term Support) version, and will receive updates and support till 2026.
Unlike OpenJDK, Oracle JDK isn’t available via package managers because of terms related to licensing and distribution. As such, to install Oracle JDK 11 on your system, we must follow a workaround. Here is a step-by-step process, so you can methodically follow the installation procedure.
Step 1: Download the Oracle JDK file
First, you will need to head on over to the official Oracle JDK website and download the latest JDK: jdk-11.0.7_linux-x64_bin.tar.gz as shown in the image below:
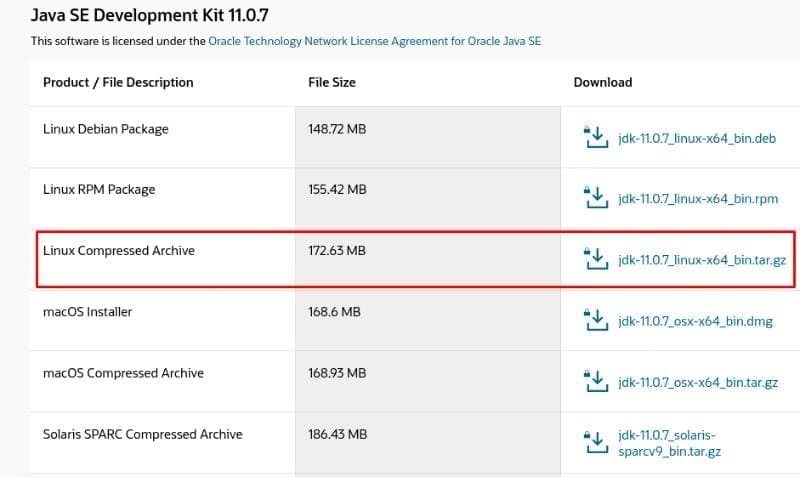
JDK
Step 2: Extract The File To A New “JVM” Directory
Next, you will need to create a new directory folder where you will extract the contents of the downloaded file. To do this, open the terminal and type in the following command:
$ sudo mkdir /usr/lib/jvm
Sometimes, you might already have this file in your system, in which case, the above command will generate an error message telling you the “file exists”.
Either way, your system has the /usr/lib/jvm directory. We will need to enter the following command to change to this directory:
$ cd /usr/lib/jvm
Next, we will extract the downloaded file to this directory using this command:
$ sudo tar -xvzf ~/Downloads/jdk-11.0.7_linux-x64_bin.tar.gz
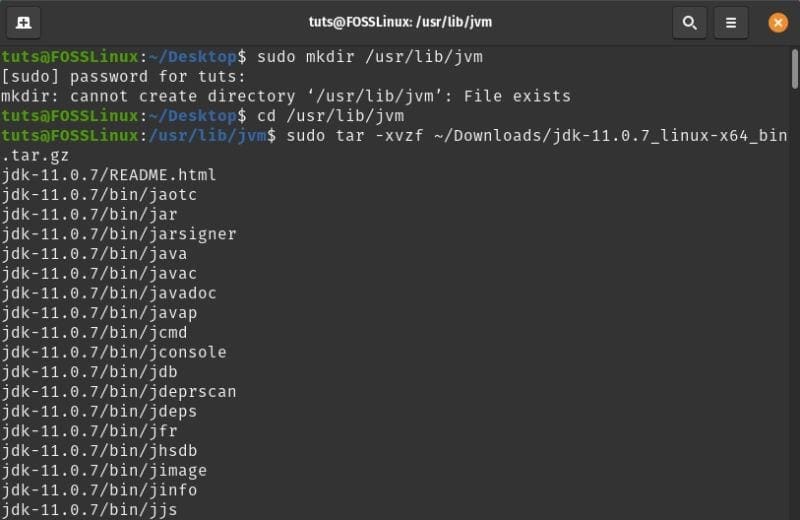
Extracting the downloaded JDK file
Note: This command states that the jdk-11.0.7_linux-x64_bin.tar.gz is located inside the /Downloads folder. If you have downloaded it elsewhere, then change the pathway accordingly.
Step 3: Configure The Java Installation
Next, you will need to configure your system so that Oracle JDK 11 runs smoothly. To do this, first, you will need to open the environment variables files by entering this command in the terminal:
$ sudo nano /etc/environment
We have used the nano text editor for this tutorial. However, you can use any other text editor that you like.
This is how the environment file looks like before any modification:
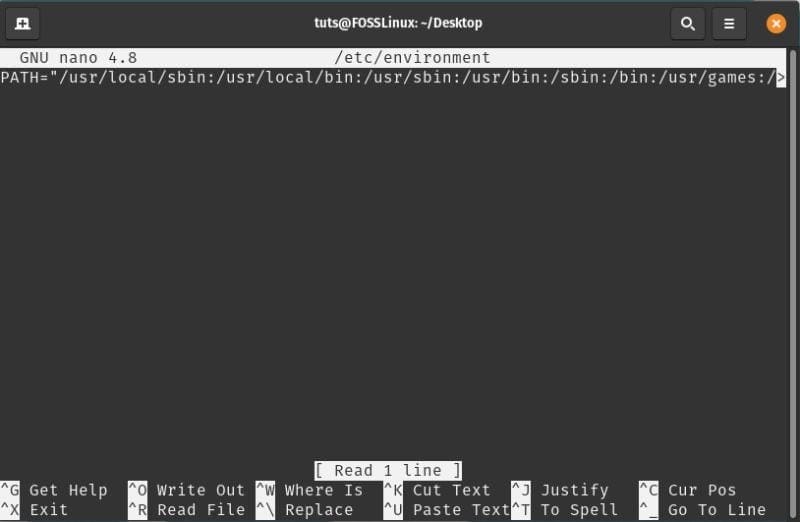
The /etc/environment file before making any modification.
After opening the file, you will need to alter the existing PATH folder by adding the following bin folder:
/usr/lib/jvm/jdk-11.0.7/bin
Make sure that colons separate the PATH variables. Once done, add this environment variable at the end of the file:
JAVA_HOME="/usr/lib/jvm/jdk-11.0.7"
Here is the edited environment file to help you see where you need to add these paths and variables.
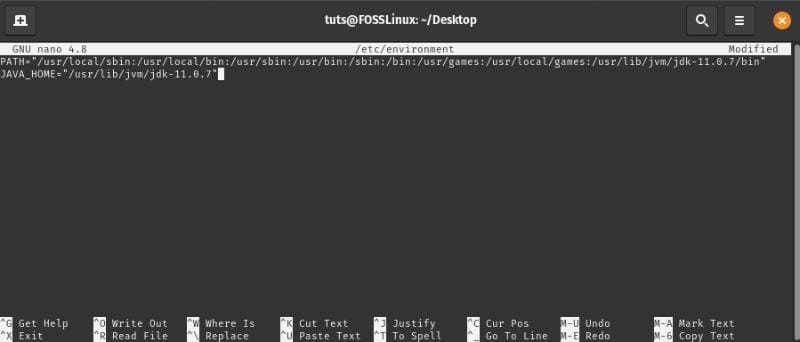
The modified /etc/environment file
Step 4: Inform the System About the Location of the Java Installation
Next, you will need to inform your system where Java is installed on your system. To do this, enter the following command in your terminal:
sudo update-alternatives --install "/usr/bin/java" "java" "/usr/lib/jvm/jdk-11.0.7/bin/java" 0
sudo update-alternatives --install "/usr/bin/javac" "javac" "/usr/lib/jvm/jdk-11.0.7/bin/javac" 0
sudo update-alternatives --set java /usr/lib/jvm/jdk-11.0.7/bin/java
sudo update-alternatives --set javac /usr/lib/jvm/jdk-11.0.7/bin/javac
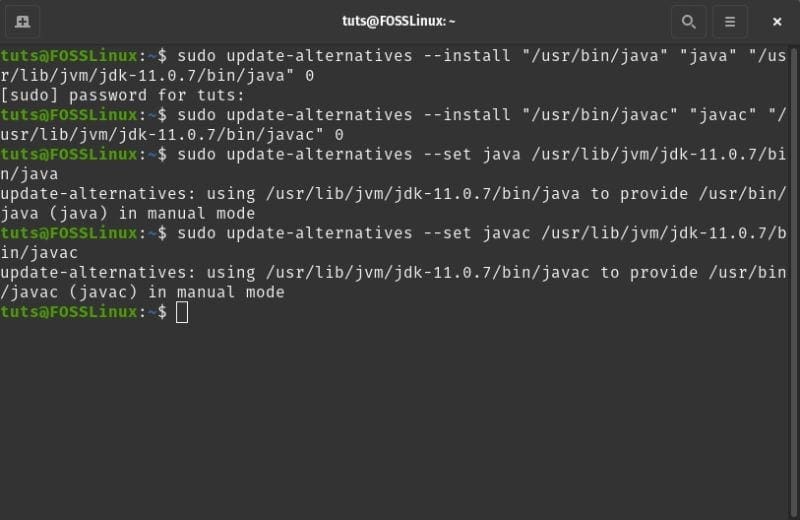
Installing Java
Step 5: Verify if Everything is Working Properly
To finalize the installation of your Oracle JDK 11, it is time to run some commands to see if everything is working correctly.
First, let’s see if the system prints the location of Java and javac as we configured in the previous steps. To do this, enter the following commands in the terminal:
$ update-alternatives --list java
$ update-alternatives --list javac
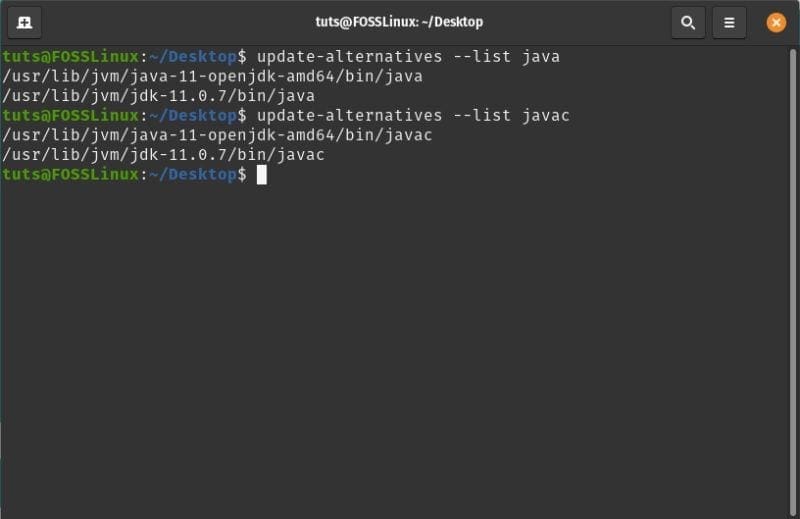
Verifying the Java Installation
As you can see, the system can locate both the OpenJDK installation as well as the OracleJDK installation.
Once you get this output, restart your system. Again, open the terminal and type in the following command:
java -version
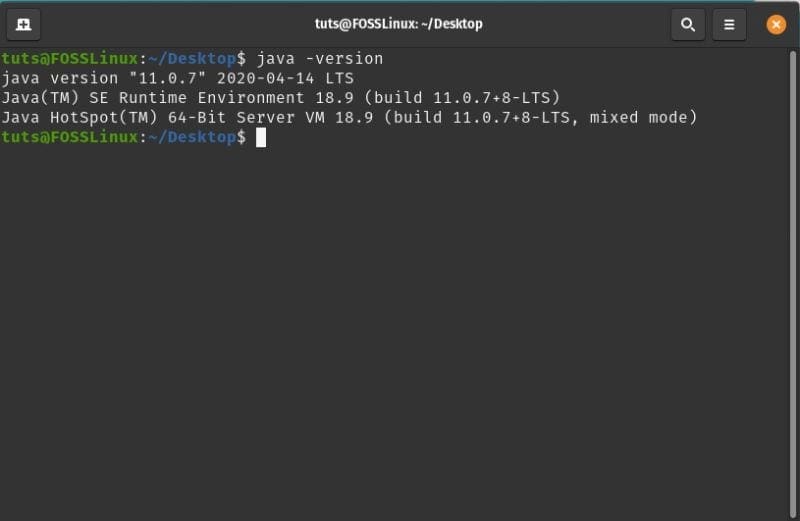
Oracle Java running on Pop!_OS system
Note that in the output, you see Java version instead of OpenJDK version – which was the output when Oracle JDK 11 was not installed. You can also see that the system is running on build 11.0.7 LTS – the one that we installed. If you get the same output, then it means that our installation of the Oracle JDK 11 was successful.
Uninstalling Java on Pop!_OS
We just went over how you can install both OpenJDK and Oracle JDK on your Pop!_OS system. To complete the tutorial, let’s also go over how you can uninstall these packages as well.
Uninstall OpenJDK
Since you already have Oracle JDK installed, you might want to uninstall OpenJDK from your system. This can be quickly done by entering the following command in the terminal:
$ sudo apt-get purge --auto-remove openjdk*
This will remove OpenJDK along with all its dependencies and configuration files.
Uninstall OracleJDK
Instead of removing OpenJDK, you might want to remove Oracle JDK. To do this, you need to enter the following commands.
-
$ sudo update-alternatives --remove "java" "/usr/lib/jvm/jdk[version]/bin/java"
-
$ sudo update-alternatives --remove "javac" "/usr/lib/jvm/jdk[version]/bin/javac"
You need to replace the jdk[version] with the version installed on your system. Since we just installed jdk-11.0.7, we will be using that in this tutorial. Here is a look at the output screen:
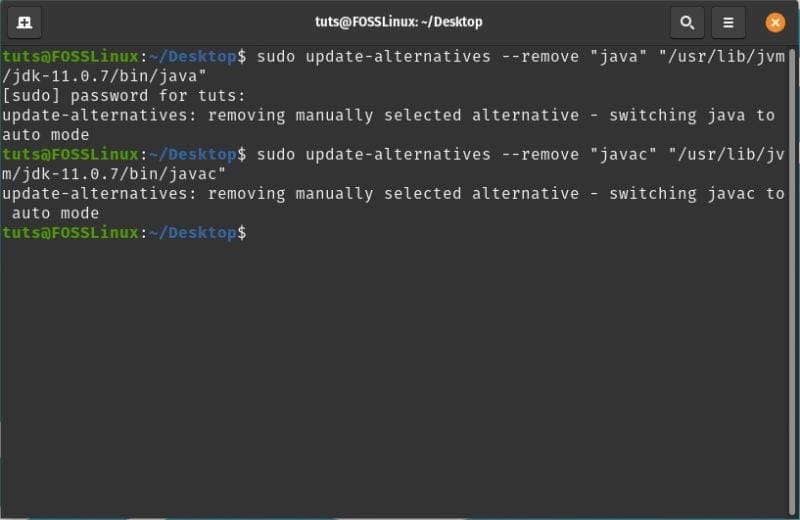
Uninstalling Java
Once done, type in the following command:
$ java -version
If you see this line “command ‘java’ not found”, then it means you have successfully uninstalled Java from your system.
6 comments
This is a very useful tutorial! I’ve struggled with youtube tutorials, but nothing worked!. Finally your work reveals unmeasured sense of simplicity. Jesus bless you man!
Thanks for this tutorial! It’s really great and helpful.
nice
uninstalling OracleJDK is not working here!
Helped 🙂
Thanks for your help