
Kali Linux is a Debian based Linux distribution with a focus on advanced penetration testing and security auditing. This operating system comes loaded with hundreds of tools used in Information gathering, Penetration testing, forensics, reverse engineering, security research, and much more. Like most Linux distributions out there, Kali Linux is installable on your PC, or you can run it as a live OS from a USB drive.
In this post, we will show you how to create a Kali Linux Bootable USB drive. Follow along.
There are two main reasons you might want to have a bootable Kali Linux USB drive:
- You want to install Kali Linux on your PC.
- You want to run a live USB drive of Kali Linux that doesn’t require any installation.
Why run Kali Linux from a Live USB drive?
Let’s put a little more focus on the latter – Running Kali Linux as a live OS. This method comes with quite some advantages over installing Kali Linux on your PC. Below are some of them:
- It’s non-destructive – Using Kali Linux as a live OS does not affect the host’s primary storage. That includes the local data or the installed operating system. Once you are done performing your operations, remove the Live USB drive, and you can use the standard installed OS.
- It’s portable – This is one of the features that fascinate most people, especially pen testers. You don’t have to install Kali Linux on your PC and carry it around with you. Just have a Kali Linux Bootable USB drive and use it to start any PC.
- It’s customizable – You can use your custom Kali Linux ISO image to boot your USB drive and perform your operations.
- It’s potentially persistent – With a Live USB, you can configure a persistent option allowing you to save your data even in case of a reboot.
How to create Kali Linux Bootable USB drive
There are several ways in which you can create a Kali Linux Bootable USB drive. In this tutorial, we will show how you can achieve that using various tools as listed below:
- Etcher
- The DD command
With the tools listed above, you can create a bootable Kali Linux USB drive from almost any Linux distribution available. To get started, first download the latest Kali Linux ISO file from the link below:
1. Creating a Bootable Kali USB Drive Using Etcher
balenaEtcher or Etcher, as commonly referred to, is a free, open-source, and cross-platform utility used to write ISO files on storage media such as USB drives. It is available for Linux, Mac, and Windows. In this post, we are on a Linux platform.
To get started with Etcher, first head over to their download page and download the tool. Luckily for us, they already have an AppImage file for Etcher available.
If you haven’t used an AppImage setup before, all you need to do is make the file executable and run it. Follow the steps below.
i). Launch the Terminal and use the cd command to navigate to the location you have downloaded your Etcher AppImage file. In case it’s downloaded as a zipped file, you will first need to extract it. You can easily do that by right-clicking on the file and selecting the option “extract here.”

Navigate to the Download folder
ii). Use the chmod command below to make the file executable.
chmod +x [file-name]

Make the file executable
iii). Run Etcher, as shown in the command below. Note, you will need root privileges to execute the commands below.
sudo ./file-name
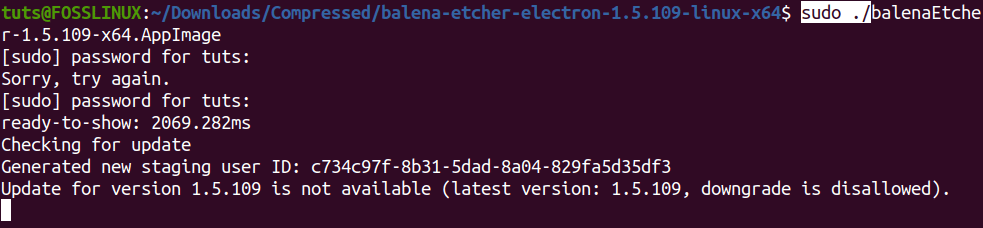
Run Etcher
The Etcher main window will open, as shown below.
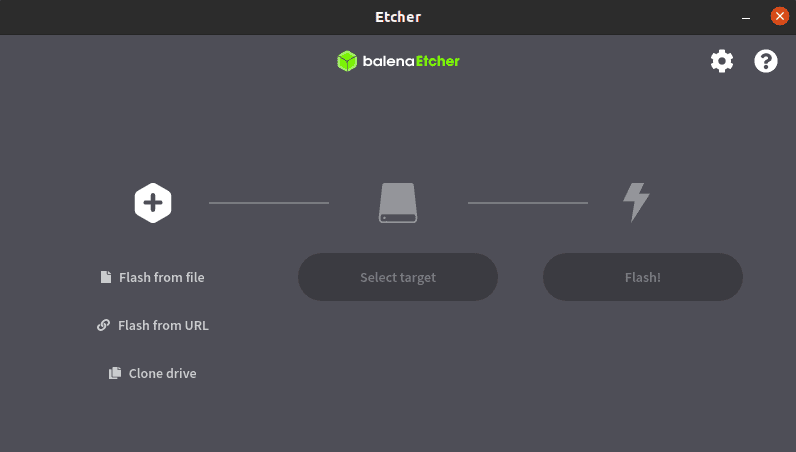
Etcher main window
iv). Now, to get started with creating a Linux bootable USB drive, select the option Flas from File (Am assuming you already have the Kali Linux ISO downloaded on your PC). A window will open, and you can navigate and select your Kali Linux ISO file.
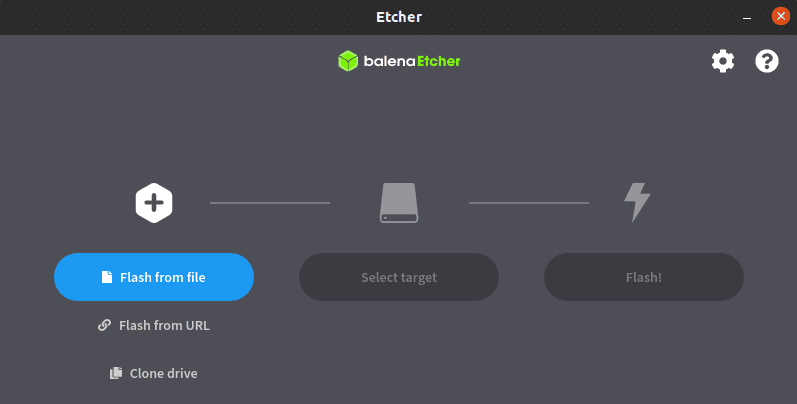
Flash from file
v) Next, you will need to select the USB drive to make bootable. Click on the “Select Target” button.
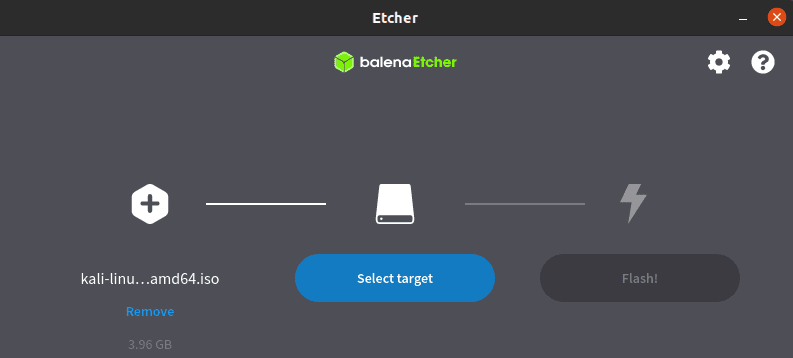
Select Target
A small window will pop-up, and here you can select the USB drive you wish to make bootable. From the image below, I have selected my 8 GB Pendrive. Once done, click the ‘Select’ button.
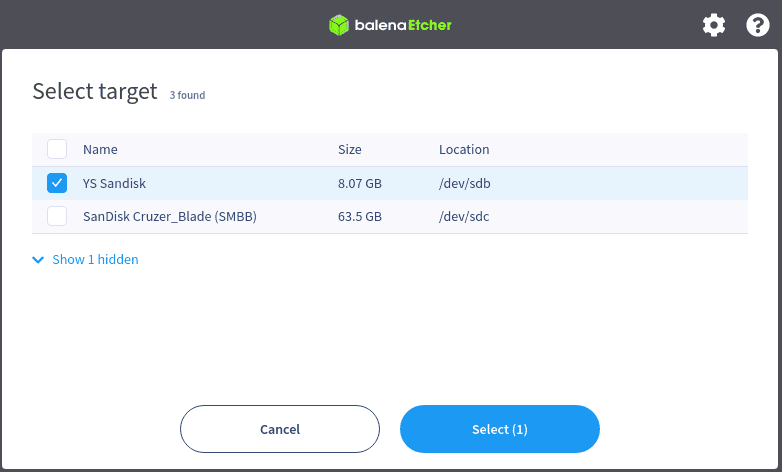
Select USB Drive
vi). Once you have everything correctly set up, you can now proceed to start creating your Kali Linux bootable USB drive. Click on the ‘Flash’ button.
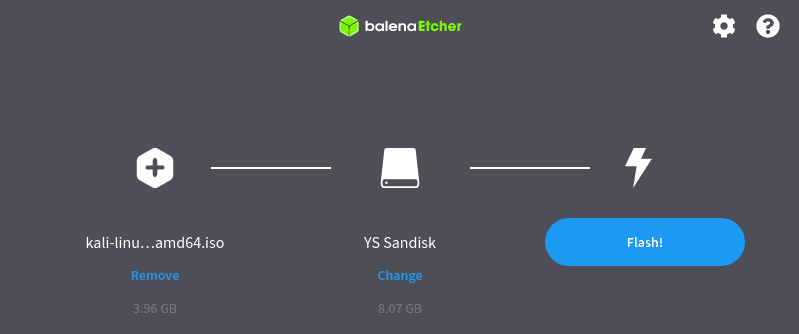
Flash USB Drive
The flashing process will commence writing the Kali Linux image onto your USB drive. On the left side, you can monitor progress from the percentage bar. Once it’s complete, you can go ahead and boot your PC with the Kali Linux bootable USB drive.
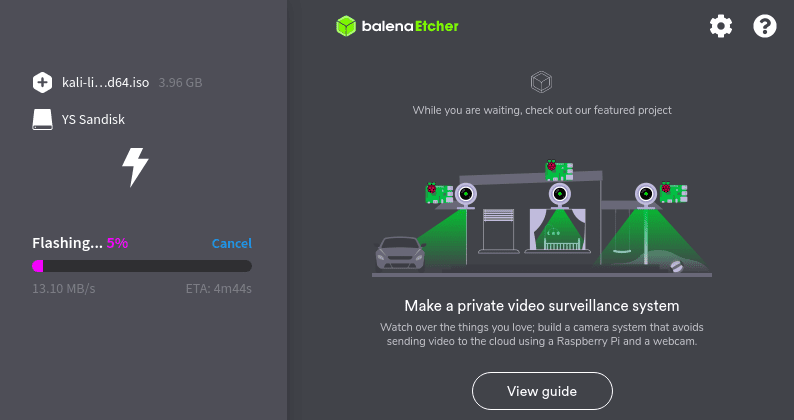
Flashing process
2. Create a Bootable Kali USB Drive with the DD command.
Caution: Unlike the method described above where we are using a graphical tool, the DD utility makes use of Terminal commands. Therefore, you need to be very careful as you can easily tamper with the wrong drive or partition containing your essential data.
To get started, I would highly suggest you first format your USB drive with a tool like Gparted using the FAT or Ext4 filesystem.
i). To get the device path of your USB drive, use the fdisk command below.
sudo fdisk -l
You will get quite a large output depending on the devices and partitions available on your system. Look for your USB drive. There is a high probability it will have a path like /dev/sdb, /dev/sdc etc.
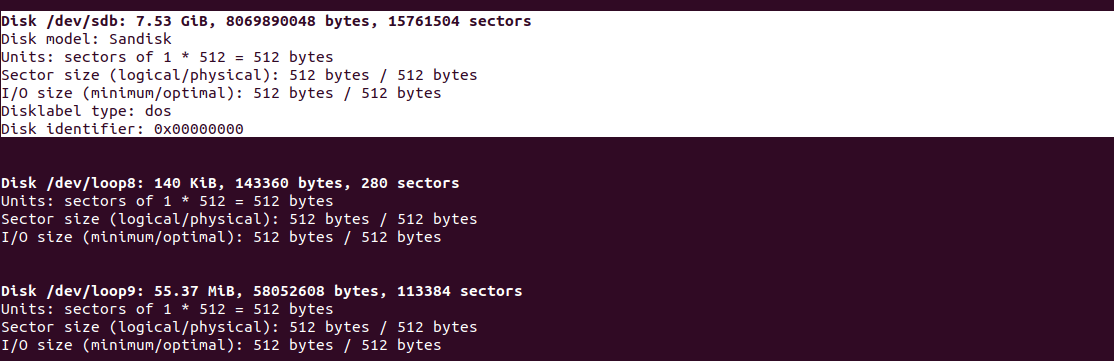
Device path
In my case, as seen in the image above, the device path of my USB drive is /dev/sdb
ii). Now, we can carefully proceed to write the Kali Linux ISO image onto our USB drive with the command below. The example command below assumes my Kali Linux ISO is named “kali-linux-2020.3-installer-amd64.iso,” and it’s in my current working directory – the Desktop. The block size (bs) argument can be increased. However, the recommended value is “bs=4M”.
sudo dd if=kali-linux-2020.3-installer-amd64.iso of=/dev/sdb bs=4M
Note: The dd command has no output. Therefore, you won’t see any progress until it’s complete. Again, it would help if you were patient since this process can take up to 10 minutes.

DD command
Once done, you can proceed to boot your PC with your Kali Linux bootable USB drive.
Conclusion
That’s it. Those are two ways you can use to create a Kali Linux bootable USB drive from any Linux distribution. If you are not very familiar with the command-line, Please use the balenaEtcher tool. If you have challenges with any of the methods described above, please feel free to comment below. If you are a beginner getting started with penetration testing, please check our post on Installing Kali Linux on Virtualbox.
1 comment
Thank you so much for writing this up. Helped me immensely.