
LaTeX is a free and open-source software for typesetting documents. LaTeX is a preparation system for high-quality typesetting and the defacto for large technical documents, computer science, mathematics, and physics documents. TeXstudio makes it easy to edit and format LaTeX documents. You can use LaTeX to create reports, a resume, cover letters, students can present assignments or thesis, and instructors can edit presentations, syllabi, or exams.
Technically, LaTeX is a set of macros and commands for the programming language TeX. Leslie Lamport originally wrote LaTeX to extend the functionality of the TeX typesetting engine by Donald Knuth.
Part 1 of this article is an introduction document typesetting with LaTeX on the TeXstudio app. It will cover formatting, page layout, lists, tables, and graphics. Part 2, document typesetting with LaTeX and TeXstudio on Fedora – Part 2 will cover Math formulas, listing content and references, cross-referencing.
Why LaTeX?
- LaTeX creates beautiful, high-quality documents with outstanding typography that are well suited for scientific and technical projects. It has superior typesetting for mathematical formulas, which is legendary, to say the least!
- It is free, fast, flexible, incredibly stable, and can handle complex and large easily.
- LaTeX has extensive cross-referencing capabilities, with automatic numbering and generation of lists of contents, tables, indexes, figures, glossaries, and bibliographies.
- The LaTeX community has written many formatting extensions and templates for letters, bills, presentations, books, resumes, law documents, music scores, chess game notations, etc.
- LaTeX is highly portable across every operating system like Linux, macOS X, and Windows. Its plain text file format is readable and editable on all operating systems.
- LaTeX generates PDF output that is printable, readable, and looks identical and consistent regardless of the operating system. It also supports HTML, DVI, and PostScript output to print and distribute online, on-screen, electronic book readers, or smartphones.
- LaTeX documents are backward compatible and stored in a human-readable text format, not in word processing format.
- LaTeX documents are text files and do not face threats by viruses.
It is multilingual with language-specific features.
What are the challenges?
The learning curve of LaTeX could be steep, but this article seeks to give you an introductory guide to help you master typesetting with LaTeX.
Though writing LaTeX looks like programming, give it a try. The TeXstudio app on Fedora or your favorite distro will make it easier with auto-completion, keyword highlighting, menus, and dialogs with commands to support you along the way. Moreover, Comprehensive TeX Archive Network (CTAN) maintains a database of over 4,700 LaTeX packages. Packages add extra functionality and make it easy to create documents.
LaTeX Installation
If you’re using Fedora Workstation, you can install TeXstudio through the terminal or the Software app.
If you use a terminal, run the following command to install TeXstudio.
##Fedora
sudo dnf install texstudio
sudo dnf install texlive-scheme-full #install standard TeXLive packages
##Ubuntu
sudo apt-add-repository ppa:blahota/texstudio
sudo apt-get install texstudio
Create your first LaTeX document
To make a document with LaTeX, you create and edit a file ending in the .tex file extension. When you tell LaTeX to typeset the .tex file, it creates a .pdf file and other auxiliary files. It means that if you make changes to the .tex file, you must typeset the document again for the changes to take effect in the PDF file.
Rule of thumb: We encourage you to place every LaTeX file in its own folder because the auxiliary files generated clutter the system.
Open TeXstudio and save a new file (i.e. FirstLaTeXdocument.tex)
LaTeX commands typically start with a backslash (\). Command parameters are enclosed in curly braces { }. First, declare the type of the documentclass (i.e. \documentclass{article}).
Then, mark the beginning and the end of the document with begin and end (i.e., \begin{document}, \end{document}). You can then write a paragraph in between.
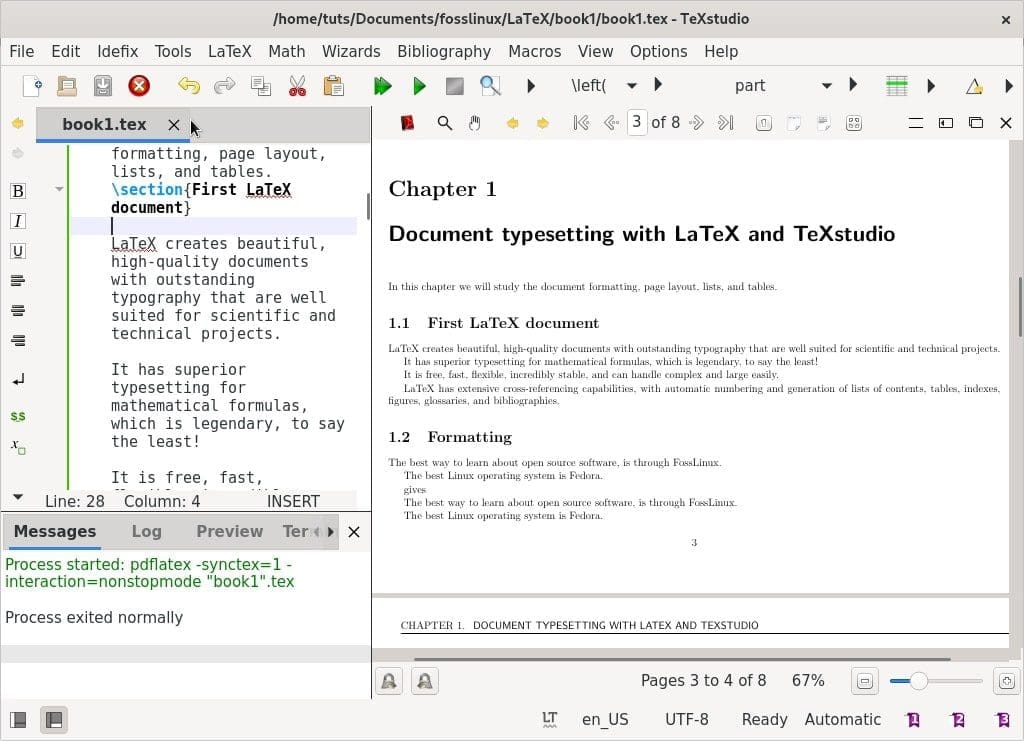
First LaTeX document
\documentclass{article}
\begin{document}
LaTeX creates beautiful, high-quality documents with outstanding typography that are well suited for scientific and technical projects. It has superior typesetting for mathematical formulas, which is legendary, to say the least!
It is free, fast, flexible, incredibly stable, and can handle complex and large easily.
LaTeX has extensive cross-referencing capabilities, with automatic numbering and generation of lists of contents, tables, indexes, figures, glossaries, and bibliographies.
\end{document}
First LaTeX document
Note, any text between \begin{document}, and \end{document} will be incorporated into the document. Consequently, and any text after \end{document} will be ignored.
The space between \documentclass{article} and \begin{document} is called the preamble or the topmatter. It contains commands that modify global document parameters, such as the typeface or the appearance of headers and footers.
A better way to learn typesetting with LaTeX is by working with examples and trying out new features.
1. Formatting
Spaces and Line breaks
Here are a few guidelines to work with spaces and line breaks. To make a space between two words, place a space between them. (No surprises there!) One space is enough as LaTeX condenses interword spaces longer than two characters:
Typesetting “Free open-source Linux!” gives “Free open-source Linux!” LaTeX treats a single line break like an interword space. You can also make a space between two words by placing the second word on the next line.
To make a new paragraph, place an empty line before a text block—for example.
The best way to learn about open source software,
is through FossLinux.
The best Linux operating system is Fedora.
gives:
The best way to learn about open source software, is
through FossLinux.
The best Linux operating system is Fedora.
In essence, spaces separate words, empty lines separate paragraphs.
Font styles
Most typefaces comprise a variety of weights, italics, bold, small caps, and other styles. You can access them with
the following commands.
\textit{italic} %italic
\textbf{bold} %bold
\textsc{small caps} %small caps
\texttt{typewriter} %typewriter
Example II: Switching fonts
\documentclass{article}
\begin{document}
\section{\textsf{\FOSS\ resources on the internet}}
The best place to learn Free and open source software is FOSSLinux.
Its address is \texttt{https://fosslinux.com}.
\end{document}
The example above uses more font commands with the \textsf command. It uses sans-serif font in the heading section. We used the \texttt command to set the typewriter font for the web address.
The standard fonts for letters in LaTeX are serifs fonts. Serifs significantly improve readability by leading the reader’s eyes along the line. They are used in body text. Roman fonts and use the command \textrm. Roman fonts are the default font with serifs in LaTeX. Headings often use the sans-serif font. Sans-serifs are an excellent choice for screen text because of the better readability on lower resolutions, making them a great choice in creating e-books.
The monospaced or a typewriter font create letters with the same width. Currently, they are for writing source code of computer programs, both in print and text editors. Like in our example above, the typewriter font is used to distinguish web addresses and code from the standard text.
Example III: Switching fonts
\documentclass{article}
\begin{document}
\section{\sffamily\FOSS\ resources in the internet}
The best place to learn Free and open source software is FOSSLinux.com.
Its address is \ttfamily https://fosslinux.com/.
\end{document
In the example above, we switched our font to the sans serif font using the command \sffamily. Note, the change is valid only there because the change is inside an argument.
We used the command \rmfamily to switch to a Roman font used from this point onwards. We can use the \ttfamily to return to the typewriter font. Declaration commands don’t produce any output but will affect the next text.
Summary of font commands and declarations
| Command | Declaration | Meaning |
|---|---|---|
| \textrm{...} | \rmfamily | Roman family |
| \textsf{...} | \sffamily | Sans-serif family |
| \texttt{...} | \ttfamily | Typewriter family |
| \textbf{...} | \bfseries | bold-face |
| \textmd{...} | \mdseries | medium |
| \textit{...} | \itshape | italic shape |
| \textsl{...} | \slshape | Slanted shape |
| \textsc{...} | \scshape | SMALL CAPS SHAPE |
| \textup{...} | \upshape | Upright shape |
| \textrm{...} | \normalfont | Default font |
Special characters
Special LaTeX characters
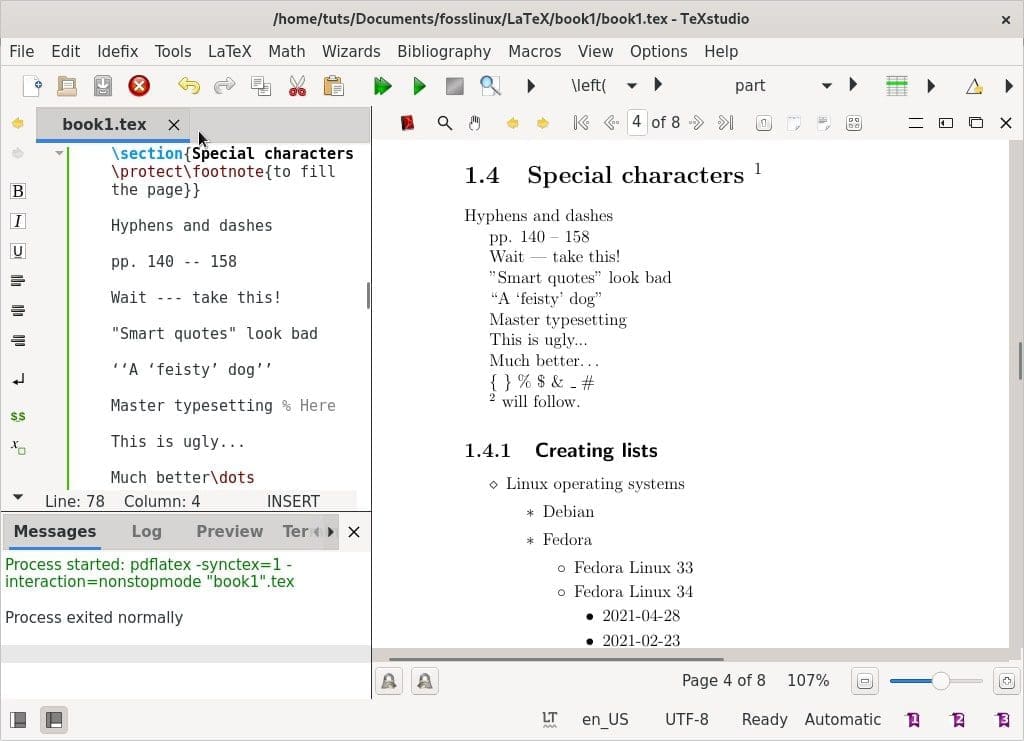
Hyphens and dashes
Hyphens connect a compound word and are printed with a – character. Free, open-source Linux gives Free, open-source Linux.
There are two types of dashes: em and en dashes.
An en dash is printed with – -.
pp. 140 – -158 pp. 126–128
Am em dash is printed with – – -.
Wait—take this! Wait—take this!
Quotation marks
The quotation characters on your keyboard are not ideal in LaTeX and will not typeset as expected.
“Smart quotes” look bad “Smart quotes” look bad.
The proper way to quote is to use” for the left marks and” for the right marks.
‘‘A ‘feisty’ dog’’ “A ‘feisty’ dog.”
Comments
Use the % before a text to prevent LaTeX from typesetting it.
Master typesetting % Here gives Master typesetting.
Ellipses
An ellipsis is a technical term for three periods in succession. Use \dots to print an ellipsis.
This is ugly . . . This is ugly…
Much better\dots Much better . . .
Miscellaneous characters
LaTeX reserves some special characters for its own purposes. You can typeset most of these characters by placing a \ before them. \{ \} \% \$ \& \_ \# output: { } % $ & _ # .
Exceptions include the \. To print \ use the command \textbackslash.
2. Designing pages
Large documents spanning several pages like books or articles should always contain sections, subsections, or even subsubsections. A presentable document requires you to design the overall layout by modifying page margins, creating a table of contents, headers, footers, line-spacing, subsections, and more.
In this section, we will create an example document spanning several pages.
Default LaTeX page layout
Page margins are defined by the type of paper you specified, for example, a4, letter, and the document class: article, book, report, etc. To modify the page margins, you can use the fullpage package or the geometry package, making our work much more straightforward.
The following are the default LaTeX page dimensions.
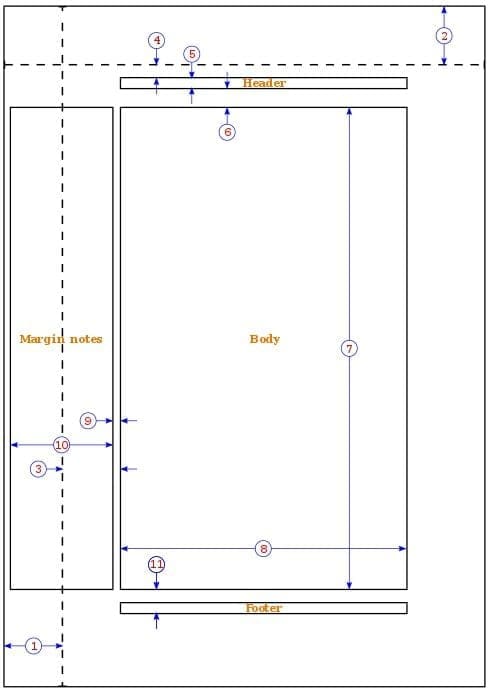
LaTeX page layout
one inch + \hoffset
one inch + \voffset
\oddsidemargin = 31pt
\topmargin = 20pt
\headheight = 12pt
\headsep = 25pt
\textheight = 592pt
\textwidth = 390pt
\marginparsep = 35pt
\marginparwidth = 35pt
\footskip = 30pt
Example IV: Writing a book with chapters
\documentclass[a4paper,12pt]{book}
\usepackage{blindtext}
\usepackage[english]{babel}
\
begin{document}
\chapter{\textsf{Document typesetting with LaTeX and TeXstudio}}
In this chapter we will study the document formatting, page layout, lists, and tables.
\section{Some filler text}
\blindtext
\section{A lot more filler text}
More dummy text will follow.
\subsection{Plenty of filler text}
\blindtext[10]
\end{document}
Illustrations
The document class book is suitable for book-like documents. Books are two-sided and consist of chapters, title pages, bibliography, index, e.t.c.
We have used A4 paper, a font size of 12 pt, and we have let LaTeX define the page margins.
The babel package is for typesetting hyphenation, language-specific characters in languages other than English. The babel package loads blindtext to produce filler text. You have to specify the language, English (American English), in our case.
The \chapter command produces a large heading which will always begin on a new page.
The \section command produces the second sectioning level and generates a smaller heading than \chapter. Sections are automatically numbered per chapter.
The \blindtext command generates dummy text to fill the space with some text.
The \subsection command refines the sectioning of the book. The top margin looks very tall because of the chapter heading. The bottom margin contains the page number.
Defining margins using the geometry package
Use the following example to modify the margin size in our book example above.
\usepackage[a4paper, inner=1.3cm, outer=3cm, top=2cm,
bottom=3cm, bindingoffset=1cm]{geometry}
Our modifications used A4 paper size, outer margin of 3 cm, an inner margin of 1.5 cm, top margin of 2cm, bottom margin of 3cm, and specified a value of 1 cm for the binding correction.
The geometry package
Arguments in the geometry package can be passed in the form “key=value,” separated by commas or by calling \geometry{argument list}.
The following options are available to set the paper size and orientation using the geometry package.
- paper=name states the paper name (paper=a4paper). Other paper sizes include letterpaper, executivepaper , legalpaper , a0paper, a6paper , b0paper, b6paper, and more.
- paperwidth, paperheight lets you choose the paper dimensions like paperwidth=7.5in, paperheight=11in.
- papersize={width, height} defines the width and height of the paper. i.e papersize={7.5in,11in}.
- Landscape defines paper orientation as landscape mode.
- Portrait sets the paper to portrait mode, which is the default layout in LaTeX.
The following options are available to modify the textarea.
- textwidth, textheieght sets the width and height of the text area, like textwidth=130mm, textheight=160mm.
- Lines can also specify the text height by specifying the number of lines, like lines=21.
- includehead causes the header to be included in the body area.
includefoot causes the footer to be incorporated into the body area.
Create a two-column landscape document
You can create a two-column document adding the options landscape and twocolumn to the \documentclass statement. Add the following code to the preamble in the book example.
\documentclass[a4paper,12pt,landscape,twocolumn]{book}
The geometry package offers a lot of features which you can learn through its extensive manual.
Creating a table of contents
Let’s extent our book example to include a table of contents. Add \tableofcontents right after \begin{document}. Your book example document should now look like the one below.
Example V: Table of contents
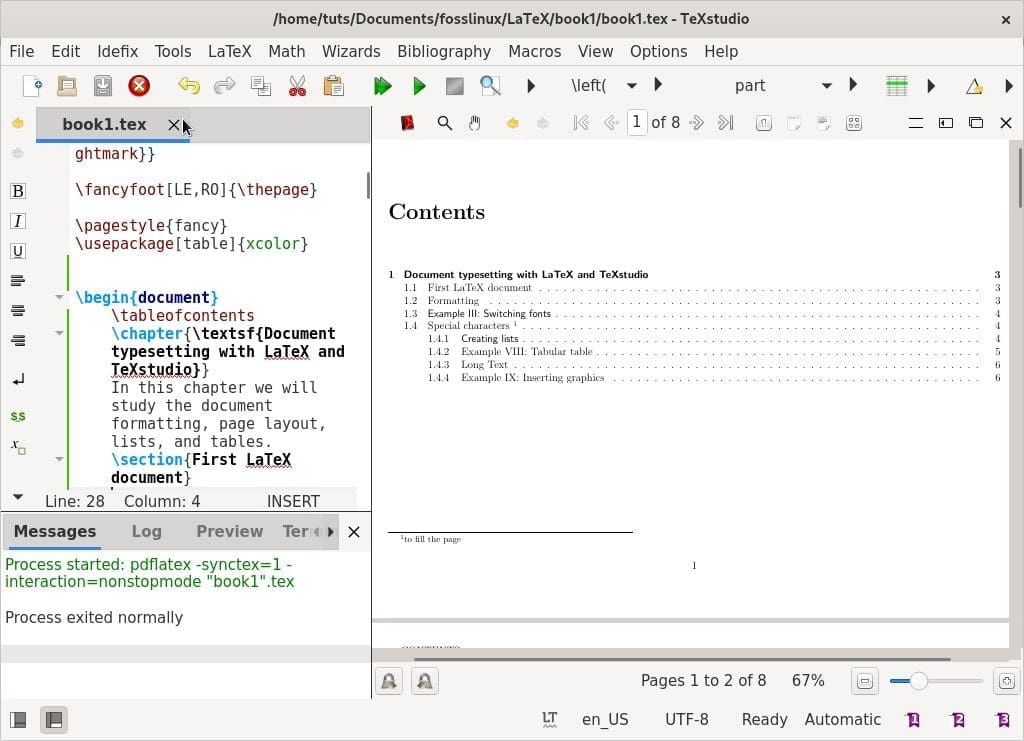
LaTeX Table of Content
\documentclass[a4paper,12pt]{book}
\usepackage[english]{babel}
\usepackage{blindtext}
\usepackage[a4paper, inner=1.3cm, outer=3cm, top=2cm,
bottom=3.5cm, bindingoffset=1cm]{geometry}
\begin{document}
\tableofcontents
\chapter{\textsf{Document typesetting with LaTeX and TeXstudio}}
In this chapter we will study the document formatting, page layout, lists, and tables.
\section{Some filler text}
\blindtext
\section{A lot more filler text}
More dummy text will follow.
\subsection{Plenty of filler text}
\blindtext[10]
\end{document}
Designing headers and footers
By default, pages in LaTeX have page numbers. However, we can customize the headers and footers using the fancyhdr package to meet our requirements.
Load our book example and add the following lines to use a bold typeface and use capital letters only for the chapter title instead of all the header text.
Example VI: Headers and footers
\documentclass[a4paper,12pt]{book}
\usepackage{blindtext}
\usepackage[english]{babel}
\usepackage{fancyhdr}
\fancyhf{}
\fancyhead[LE]{\leftmark}
\fancyhead[RO]{\nouppercase{\rightmark}}
\fancyfoot[LE,RO]{\thepage}
\pagestyle{fancy}
\begin{document}
\chapter{\textsf{Document typesetting with LaTeX and TeXstudio}}
In this chapter we will study the document formatting, page layout, lists, and tables.
\section{Some filler text}
\documentclass[a4paper,12pt]{book}
\usepackage[english]{babel}
\usepackage{fancyhdr}
\usepackage{blindtext}
\fancyhf{}
\fancyhead[LE]{\leftmark}
\fancyhead[RO]{\nouppercase{\rightmark}}
\fancyfoot[LE,RO]{\thepage}
\pagestyle{fancy}
\begin{document}
\chapter{Explore the page layout}
In this article, we will study the layout of pages.
\section{Some filler text}
We have used the fancyhhdr package with the following options.
\leftmark to store the chapter title together with the chapter number. Capital letters are used as default.
\rightmark to store the section title together with its number.
We used the \fancyhead with the argument LE to put the chapter title into the header. LE is left-even, if set, will put the chapter title on the left side of the header on even-numbered pages.
We also used the \fancyhead with RO to put the section title into the header. RO stands for right-odd, if set, displays the section header on the right side of the header on odd-numbered pages.
We used the \fancyfoot with LE and RO to display page numbers in the footer on even and on odd pages.
\pagestyle{fancy} commands modify the page style with the fancy style provided by the fancyhdr package.
Understanding page styles
By default, LaTeX provides 4 page styles.
- plain: The page style has no header, and the page number will be printed and centered in the footer.
- Empty: Neither a footer nor header is shown.
- Headings: The header section contains titles of chapters, sections, and subsections, depending on the class and also the page number, while the footer is empty.
- myheadings: The header section contains a user-defined text and the page number while the footer is empty.
You can use the following commands to choose the page style.
\pagestyle{name}: Your document switches to the page style ‘name’ from this point onwards.
\thispagestyle{name} defines the page style ‘name’ only on the current page.
Inserting page breaks
LaTeX takes care of page breaking, but you might want to insert a page break at specific points of your document. The command \pagebreak breaks a page, and the text is stretched to fill the page down to the bottom.
The command \newpage breaks the page, but it doesn’t stretch the text. The remaining space will stay empty.
Using footnotes in text and headings
Extend your book example with the \footnote command to insert footnotes. You can also use the option \protect before the footnote.
Example VII: Footnotes
Two-column LaTeX page
\documentclass[a4paper,12pt]{book}
\usepackage{blindtext}
\usepackage[english]{babel}
\begin{document}
\chapter{\textsf{Document typesetting with LaTeX and TeXstudio}}
In this chapter we will study the document formatting, page layout, lists, and tables.
\section{Some filler text \protect\footnote{serving as a placeholder}}
\blindtext
\section{A lot more filler text}
More dum dum text\footnote{serving as a placeholder} will follow.
\subsection{Plenty of filler text}
\blindtext[10]
\end{document}
The \footnote[number] {text} produces a footnote marked by optional number which is an integer. The option with \protect\footnote is used inside an argument to prevent errors from being raised when processing the footnote.
3. Creating lists
Lists create reader-friendly text, and you can use them to present several ideas in a clear structure. Standard lists in LaTeX include itemized (unordered or bullet lists), enumerated (numbered or ordered lists), and description (definition lists).
To define a list, prefix each list item with the command \item. Precede and add the list of items with the \begin{<type>} and \end{<type>} commands respectively. <type> defines the type of list you are building.
We will extend our book example with a section of the different types of lists available in LaTeX.
Building an itemized list
Add the following code to your example to build an itemized list of Linux operating systems.
\begin{itemize}
\item Fedora
\item Debian
\item Ubuntu
\item Zorin
\end{itemize}
Building an enumerated list
Add the following code to your example to build an enumerated list of Linux operating systems.
\begin{enumerate}
\item Fedora
\item Debian
\item Ubuntu
\item Zorin
\end{enumerate}
Building a descriptive list
Add the following code to your example to build a descriptive list of Linux operating systems.
\begin{description}
\item[Fedora] Freedom Friends
\item[Ubuntu] Ubuntu 21 is now available
\end{description}
Spacing list items
You can customize the default list spacing by using the enumitem package. The enumitem package enables the \itemsep and \noitemsep commands. Add \usepackage{enumitem} to the preamble. Use the noitemsep option to remove the default spacing in LaTeX. Enclose the noitemsep option in square brackets and place it on the \begin command.
\begin{itemize}[noitemsep]
\item Fedora
\item Debian
\item Ubuntu
\item Zorin
\end{itemize}
Use the \itemsep to indicate how much space you want between the list items.
\begin{enumerate} \itemsep1.50pt
\item Fedora
\item Debian
\item Ubuntu
\item Zorin
\end{enumerate}
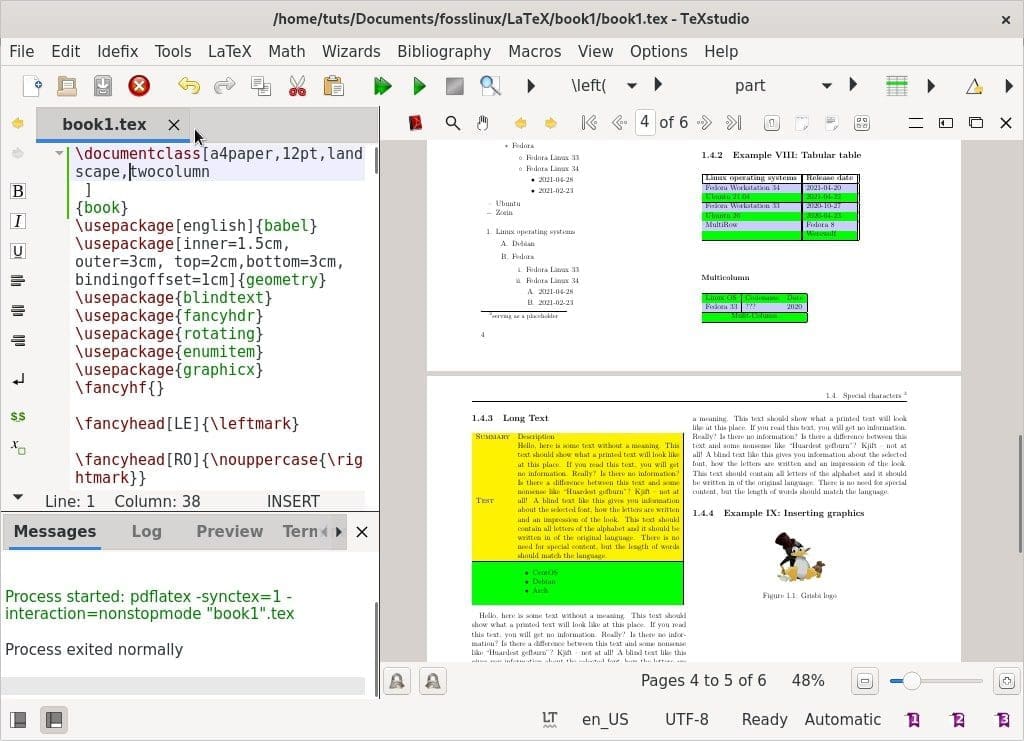
Building nested lists
LaTeX supports the creation of nested lists up to four levels deep.
laTeX list
Nested itemized lists
\begin{itemize}[noitemsep]
\item Linux operating systems
\begin{itemize}
\item Debian
\item Fedora
\begin{itemize}
\item Fedora Linux 33
\item Fedora Linux 34
\begin{itemize}
\item 2021-04-28
\item 2021-02-23
\end{itemize}
\end{itemize}
\end{itemize}
\item Ubuntu
\item Zorin
\end{itemize}
Nested enumerated lists
\begin{enumerate}[noitemsep]
\item Linux operating systems
\begin{enumerate}
\item Debian
\item Fedora
\begin{enumerate}
\item Fedora Linux 33
\item Fedora Linux 34
\begin{enumerate}
\item 2021-04-28
\item 2021-02-23
\end{enumerate}
\end{enumerate}
\end{enumerate}
\item Ubuntu
\item Zorin
\end{enumerate}
Setting list styles
LaTeX has the following default list style according to depth. You can confirm the default styles from the nested list example we have built.
| Level | Enumerated | Itemized |
|---|---|---|
| 1 | Number | Bullet |
| 2 | Lowercase alphabet | Dash |
| 3 | Roman numerals | Asterisk |
| 4 | Uppercase alphabet | Period |
Define custom list styles.
You can create custom list styles to include the following options for enumerated and itemized lists.
| Enumerated | Itemized |
|---|---|
| \alph* | $\bullet$ |
| \Alph* | $\cdot$ |
| \arabic* | $\diamond$ |
| \roman* | $\ast$ |
| \Roman* | $\circ$ |
| $-$ |
You can set custom list styles using either of the following three options.
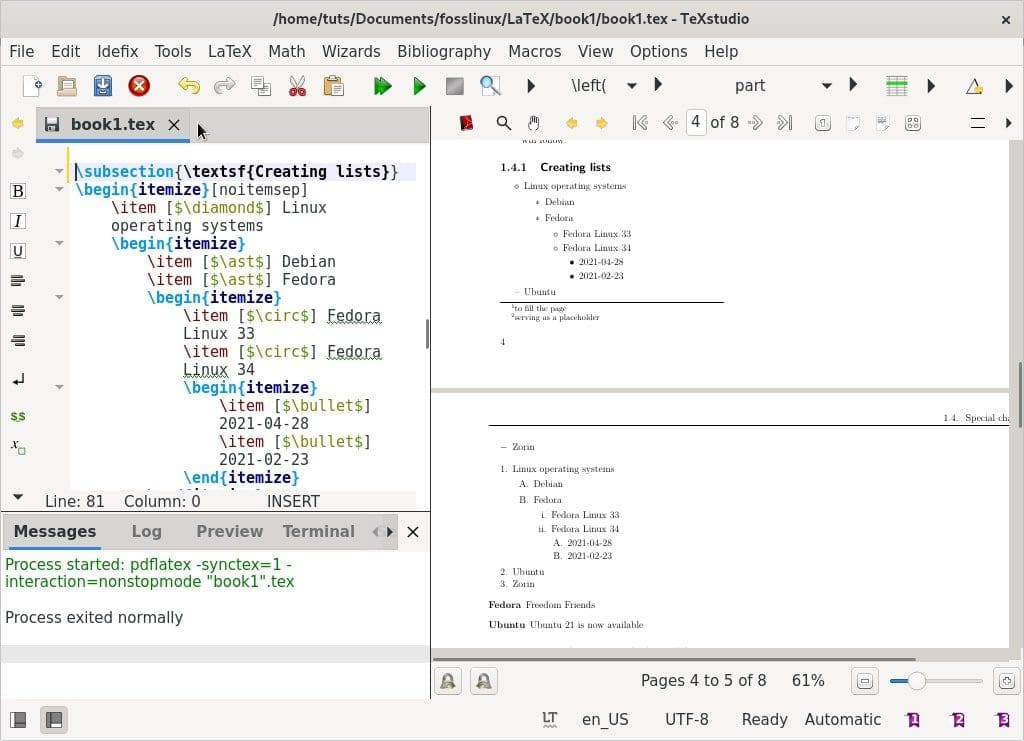
Option 1 – List styling per item
Define the name of the desired style in square brackets and place it on the \item command
\begin{itemize}[noitemsep]
\item [$\diamond$] Linux operating systems
\begin{itemize}
\item [$\ast$] Debian
\item [$\ast$] Fedora
\begin{itemize}
\item [$\circ$] Fedora Linux 33
\item [$\circ$] Fedora Linux 34
\begin{itemize}
\item [$\bullet$] 2021-04-28
\item [$\bullet$] 2021-02-23
\end{itemize}
\end{itemize}
\end{itemize}
\item [–] Ubuntu
\item [$-$] Zorin
\end{itemize}
Option 2 – List styling on the list
Prefix the name of the desired list style with label=. Place the parameter, including the label= prefix, in square brackets on the \begin command.
\begin{enumerate}[noitemsep]
\item Linux operating systems
\begin{enumerate} [label=\Alph*.]
\item Debian
\item Fedora
\begin{enumerate}
\item Fedora Linux 33
\item Fedora Linux 34
\begin{enumerate}
\item 2021-04-28
\item 2021-02-23
\end{enumerate}
\end{enumerate}
\end{enumerate}
\item Ubuntu
\item Zorin
\end{enumerate}
Option 3 – List styling on the document
This option changes the default list style for the entire document. Use the \renewcommand to set the values for the labelitems. The example below sets different labelitem for each of the four label depths.
\renewcommand{\labelitemii}{$\diamond$}
\renewcommand{\labelitemi}{$\ast$}
\renewcommand{\labelitemiii}{$\bullet$}
\renewcommand{\labelitemiv}{$-$}
Find out more about the LaTeX list here: LaTeX List structures.
Fun Fact:
LaTeX is pronounced in two ways: /ˈlɑːtɛx/ LAH-tekh or /ˈleɪtɛx/ LAY-tekh.
4. Designing tables
Documents are always attractive and understandable when presenting information and data in tables and using diagrams or drawings to visualize them. LaTeX provides the tabular and tabularx environments to build and customize tables.
Create a table
To create a table, specify the environment \begin{tabular}{columns}. Let’s extend our book example to include the following table.
Example VIII: Tabular table
\begin{tabular}{c|c}
Linux operating systems & Release date \\ \hline
Fedora Workstation 34 &2021-04-28 \\
Ubuntu 21.04 & 2021-03-28 \\
Fedora Workstation 33 &2021-10-11 \\
Ubuntu 20 & 2020-04-28 \\
\end{tabular}
Illustration
- & – the ampersand defines each cell and is only used from the second column.
- \ – terminates the row and starts a new row.
- | – specifies the vertical line in the table (optional).
- \hline – specifies the horizontal line (optional).
- *{num}{form} – it provides an efficient way to format many columns and limit repetition.
- || – specifies the double vertical line.
- The “{c|c}” option in the curly bracket refers to the position of the text in each column. Other position arguments for the table include the following:
| Position | Argument |
|---|---|
| c | Position text in the center |
| l | Position text left-justified |
| r | Position text right-justified |
| p{width} | Align text at the top of the cell |
| m{width} | Align text in the middle of the cell |
| b{width} | Align text at the bottom of the cell |
Customizing tables
Modify the table example above with the following code.
\begin{tabular}{*{3}{|l|}}
\hline
\textbf {Linux operating systems} & \textbf {Release date} \\ \hline
Fedora Workstation 34 &2021-04-28 \\ \hline
Ubuntu 21.04 & 2021-03-28 \\ \hline
Fedora Workstation 33 &2021-10-11 \\ \hline
Ubuntu 20 & 2020-04-28 \\ \hline
\end{tabular}
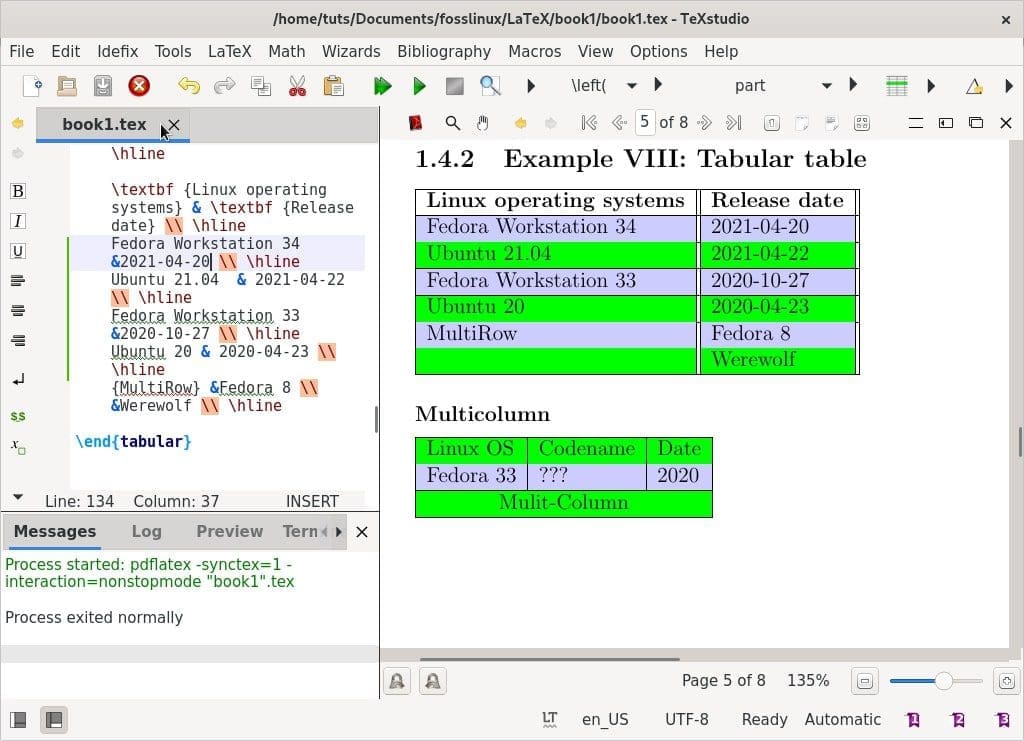
Designing multi-row and multi-column tables
If you need to merge rows and columns, add multi-row to the preamble.
Multi-row
Add the following multi-row argument to the book example. The argument takes the following format, \multirow{number_of_rows}{width}{text}
\begin{tabular}{*{3}{|l|}}
\hline \textbf {Linux operating systems} & \textbf {Release date} \\ \hline
Fedora Workstation 34 &2021-04-20 \\ \hline
Ubuntu 21.04 & 2021-04-22 \\ \hline
Fedora Workstation 33 &2021-10-27 \\ \hline
Ubuntu 20 & 2020-04-23 \\ \hline
{MultiRow} &Fedora 8 \\ &Werewolf \\ \hline
\end{tabular}
Multicolumn
Add the following command to create multicolumn table, \multicolumn{number_of_columns}{cell_position}{text}
\begin{tabular}{|l|l|l|}\hline
Release &Codename &Date \\ \hline
Fedora Core 4 &Stentz &2005 \\ \hline
\multicolumn{3}{|c|}{Mulit-Column} \\ \hline
\end{tabular}
Working with long text in tables
If you are working with lengthy text, you need to format your table so that the text will not exceed the page width. You can specify the column width or utilize the tabularx environment.
Using column width to manage long text
\begin{tabular}{|l|m{14cm}|} \hline
Summary &Description \\ \hline
Test &\blindtext \\ \hline
\end{tabular}\vspace{3mm}
Using tabularx to manage long text
Add the following table to your book example.
\begin{tabularx}{\textwidth}{|l|l|} \hline
Summary & Debian Description\\ \hline
Text &\blindtext \\ \hline
\end{tabularx}
Working with colors in tables
You can color to text, an individual cell, an entire row, or create alternating colors. Add the \usepackage[table “” not found /]
{xcolor} package into the preamble. Alternate colors take the following argument.
\rowcolors{start row colour}{even row colour}{odd row colour}.
Add the following arguments to your book example
LaTeX tabular table
\rowcolors{2}{green}{blue!20}
\begin{tabular}{*{3}{|l|}}
\hline
\textbf {Linux operating systems} & \textbf {Release date} \\ \hline
Fedora Workstation 34 &2021-04-28 \\ \hline
Ubuntu 21.04 & 2021-03-28 \\ \hline
Fedora Workstation 33 &2021-10-11 \\ \hline
Ubuntu 20 & 2020-04-28 \\ \hline
{MultiRow} &Fedora 8 \\ &Werewolf \\ \hline
\end{tabular}
Specify color for each row
Add the following arguments to the book example under “Long Text” to change the color of a specific row. The argument, \rowcolor{yellow}\textsc{\color{black, will specify the row color and text color.
\begin{tabular}{|l|m{9cm}|} \hline
\rowcolor{yellow}\textsc{\color{black}Summary} &Description \\ \hline
Test &\blindtext \\ \hline
\end{tabular}\vspace{3mm}
Working with lists in tables
You can use either tabularx or tabular to specify the column with the list.
List in tabularx, tabular
\begin{tabular}{|l|m{9cm}|} \hline
\rowcolor{yellow}\textsc{\color{black}Summary} &Description \\ \hline
\rowcolor{yellow}\textsc{\color{blue}Test} &\blindtext \\ \hline
&\begin{itemize}[noitemsep]
\item CentOS
\item Debian
\item Arch
\end{itemize}
\end{tabular}\vspace{3mm}
There are plenty of ways to customize tables with LATeX, and you can find more examples at LaTeX Wiki.
5. Inserting graphics, pictures, and figures
LaTeX provides a simple way to include pictures, graphics, or drawings to your document with the graphicx package. Add the graphicx package to the preamble and move your images to the same directory as your .tex file.
The includegraphics command takes one argument, the path to the image file. You can also add a caption for your image with the figure environment. Add the following example to your book example.
Example IX: Inserting graphics
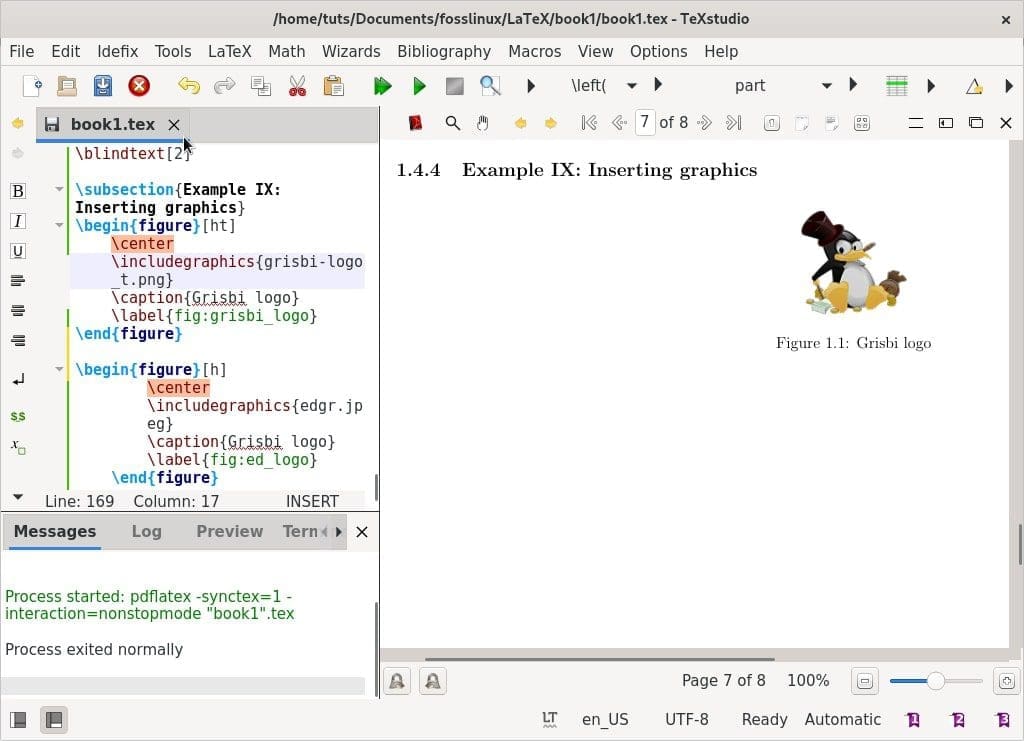
LaTeX graphics
\usepackage{graphicx} %add graphicx package
\begin{figure}[h]
\center
\includegraphics{grisbi-logo_t.png}
\caption{Grisbi logo}
\label{fig:grisbi_logo}
\end{figure}
The figure environment takes an optional command which controls where the image is placed on the page. You can specify image position as [h] here on the page, [b] bottom of the page, or [t] top of the page. Use, \begin{figure}[!b], argument to let the figure float.
Book Example
Find attached the complete book.tex example.
\documentclass[a4paper,12pt,landscape,twocolumn]{book}
%packages
\usepackage[english]{babel}
\usepackage[inner=1.5cm, outer=3cm, top=2cm,bottom=3cm, bindingoffset=1cm]{geometry}
\usepackage{blindtext}
\usepackage{fancyhdr}
\usepackage{rotating}
\usepackage{enumitem}
\usepackage{graphicx}
\fancyhf{}
\fancyhead[LE]{\leftmark}
\fancyhead[RO]{\nouppercase{\rightmark}}
\fancyfoot[LE,RO]{\thepage}
\pagestyle{fancy}
\usepackage[table “” not found /]

{xcolor}
\begin{document}
\tableofcontents
\chapter{\textsf{Document typesetting with LaTeX and TeXstudio}}
In this chapter we will study the document formatting, page layout, lists, and tables.
\section{First LaTeX document}
LaTeX creates beautiful, high-quality documents with outstanding typography that are well suited for scientific and technical projects.
\section{Formatting}
The best way to learn about open source software,
is through FossLinux.

The best Linux operating system is Fedora.

\section{\textsf{Example III: Switching fonts}}
The best place to learn Free and open source software is FOSSLinux.
Its address is \texttt{https://fosslinux.com}.
\section{Special characters
\protect\footnote{to fill the page}}
Hyphens and dashes
pp. 140 -- 158
Wait --- take this!

"Smart quotes" look bad
‘‘A ‘feisty’ dog’’

Master typesetting % Here

This is ugly...
Much better\dots
\{ \} \% \$ \& \_ \#

\footnote{serving as a placeholder} will follow.
\subsection{\textsf{Creating lists}}
\begin{itemize}[noitemsep]
\item [$\diamond$] Linux operating systems
\begin{itemize}
\item [$\ast$] Debian
\item [$\ast$] Fedora
\begin{itemize}
\item [$\circ$] Fedora Linux 33
\item [$\circ$] Fedora Linux 34
\begin{itemize}
\item [$\bullet$] 2021-04-28
\item [$\bullet$] 2021-02-23
\end{itemize}
\end{itemize}
\end{itemize}
\item [–] Ubuntu
\item [$-$] Zorin
\end{itemize}
\begin{enumerate}[noitemsep]
\item Linux operating systems
\begin{enumerate}[label=\Alph*.]
\item Debian
\item Fedora
\begin{enumerate}
\item Fedora Linux 33
\item Fedora Linux 34
\begin{enumerate}
\item 2021-04-28
\item 2021-02-23
\end{enumerate}
\end{enumerate}
\end{enumerate}
\item Ubuntu
\item Zorin
\end{enumerate}
\begin{description} \itemsep5.75pt
\item[Fedora] Freedom Friends
\item[Ubuntu] Ubuntu 21 is now available
\end{description}
\subsection{Example VIII: Tabular table}
\rowcolors{2}{green}{blue!20}
\begin{tabular}{*{3}{|l|}}
\hline
\textbf {Linux operating systems} & \textbf {Release date} \\ \hline
Fedora Workstation 34 &2021-04-20 \\ \hline
Ubuntu 21.04 & 2021-04-22 \\ \hline
Fedora Workstation 33 &2020-10-27 \\ \hline
Ubuntu 20 & 2020-04-23 \\ \hline
{MultiRow} &Fedora 8 \\ &Werewolf \\ \hline
\end{tabular}
\subsubsection{Multicolumn}
\begin{tabular}{|l|l|l|}\hline
Linux OS &Codename &Date \\ \hline
Fedora 33 & ??? &2020 \\ \hline
\multicolumn{3}{|c|}{Mulit-Column} \\ \hline
\end{tabular}
\subsection{Long Text}
\begin{tabular}{|l|m{9cm}|} \hline
\rowcolor{yellow}\textsc{\color{black}Summary} &Description \\ \hline
\rowcolor{yellow}\textsc{\color{blue}Test} &\blindtext \\ \hline
&\begin{itemize}[noitemsep]
\item CentOS
\item Debian
\item Arch
\end{itemize}
\end{tabular}\vspace{3mm}
\blindtext[2]
\subsection{Example IX: Inserting graphics}
\begin{figure}[ht]
\center
\includegraphics{grisbi-logo_t.png}
\caption{Grisbi logo}
\label{fig:grisbi_logo}
\end{figure}
\end{document}
Additional online resources
If you would like to learn more, the following resources are available for learning and mastering LaTeX.
- The LaTeX Wikibooks include basic and advanced information about LaTeX.
- TeX Stack Exchange is a question-and-answer site about TEX, LaTeX, and friends. The users are pros and can answer any question you have.
- The Comprehensive TEX Archive Network (CTAN) houses over 4500 packages and their documentation.
Wrapping up
That brings us to the end of document typesetting with LaTeX and TeXstudio on Fedora – Part 1. The article covers an introduction to the LaTeX typesetting system, formatting, fonts, creating lists, tables, designing pages, and inserting graphics into documents. I have used plenty of examples (book.tex) that are simple to follow.
The second part of the article, document typesetting with LaTeX and TeXstudio on Fedora – Part 2 has plenty of awesome typesetting tricks to learn. It will cover Math formulas, listing content and references, cross-referencing, troubleshooting errors, and how to enhance your document with hyperlinks and bookmarks.
Get typesetting, will you!