
Ubuntu-based distros feature several package management systems for installing, upgrading, managing dependencies, and removing software. Advanced Packaging Tool (APT) is the default package manager for distros like Ubuntu, Debian, Linux Mint, and POP!_OS.
APT works with the apt command in Ubuntu to provide access to over 60,000 software packages, dependencies, metadata, and instructions to install software applications in your system.
This article guides users on working with APT through the apt command, searching, installing, updating packages, upgrading a system, and adding extra repositories for additional software. It will also introduce other package managers like aptitude and dpkg.
Advantages of package management systems
Ubuntu’s package management systems typically manage DEB packages or files with the extension .deb, which usually exists in repositories. Here are a few reasons why you should be using package management systems in your favorite distro.
- It makes it straightforward to query installed and available packages.
- You can completely remove a package or old application with all its files.
- You can verify the integrity of package files.
- It keeps your applications updated with bug fixes and package upgrades. It also removes all old version files, which might break your system.
- You can easily downgrade packages to previous versions.
- It keeps your system light by managing redundant libraries and software dependencies.
- It makes it straightforward to install or remove groups of packages.
Features of APT
- Supports multiple repositories.
- It features a simple configuration and interface.
- DEB-consistent behavior.
- It features package group support and multiple-repository groups.
APT commands
The apt command is a powerful command-line tool to search, install, remove packages, and so on.
Search for a package or software
Before you install any software, you may need to confirm if it exists in Ubuntu repositories. Use the common name of the application with the apt search command. For example, you can search if the Cockpit server management application is available for install.
$ sudo apt search zsh
apt search zsh
Install a package
After you have confirmed that a package exists, you can install it with the apt install command.
$ sudo apt install cockpit
Show package metadata
Sometimes it might be necessary to find more information about a package before deciding if you want to install it. Use the apt show command to find out more and browse a package’s metadata for information such as the project’s URL, license, detailed description, and so on.
$ sudo apt show cockpit
Find a package that provides a file
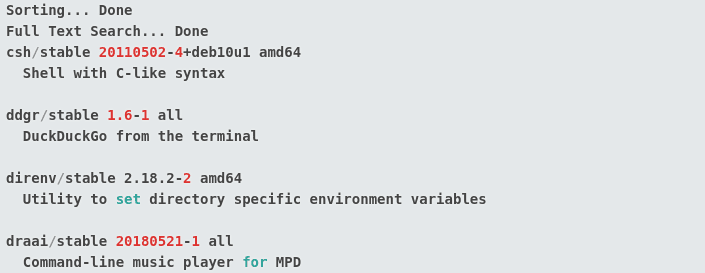
Sometimes you might have to search for a package using one of its files name. For example, an apt search query for a dependency like qmake-qt5 does not find the package you need.
$ sudo apt search qmake-qt5
   Sorting... Done
    Full-Text Search... Done
If your search does find what you are looking for, you can explore inside a package with the apt-file command:
$ sudo apt-file search qmake-qt5
   qt5-qmake-bin: /usr/share/man/man1/qmake-qt5.1.gz
apt-file command
Explore files included in a package
You might find that an application is already installed in your system in certain instances, and you want to know what files are included in the package. To find out such details, you need to use the apt-file list command. The command looks at the repository metadata about the package and returns all files provided by the given package.
$ sudo apt-file list cockpit
 cockpit: /usr/share/doc/cockpit/TODO.Debian
 cockpit: /usr/share/doc/cockpit/copyright
 cockpit: /usr/share/metainfo/cockpit.appdata.xml
Remove a package
If you no longer need a package in your system, use apt remove to uninstall it. The command will remove all the installed package files and any unnecessary dependencies.
$ sudo apt remove cockpit
Remove a package and configurations files
Adding the –-purge option to apt remove will remove also remove the package configuration files. However, be cautious when using the –purge option as it might bring some undesired effects to your system.
$ sudo apt purge cockpit
When two or more packages require the same dependency, removing a package does not automatically remove all the dependencies. As such, you might end up with stray packages after installing and uninstalling many applications and packages. To clear any unused packages and perform some housekeeping, use the apt autoremove command.
$ sudo apt autoremove
Update the package index
APT package index is a list of all available packages from repositories defined in your system under the /etc/apt/sources.list file and /etc/apt/sources.list.d directory. Run the following command to update the local package index with the latest changes in your repositories.
$ sudo apt update
Upgrade system packages
You can update packages directly with the apt command to get important patches, bug fixes, and security updates. Before upgrading your system packages, update the package index and then upgrade using the apt upgrade command.
$ sudo apt upgrade
View apt command logs
All actions of the ATP command are logged in the /var/log/dpkg.log file and can come in handy if you run into trouble and want to troubleshoot ATP.
APT guide
$ sudo apt help
Extra repositories
Apt stores a list of software repositories in the file /etc/apt/sources.list and any file with the extension .list under the directory /etc/apt/sources.list.d/. You can edit these files to add, remove, or disable repositories.
Before you start editing any sources.list files, it is recommended that you create a backup of the file. For the obvious reason that breakages are inevitable! Create a backup with the following command.
$ sudo cp /etc/apt/sources.list /etc/apt/sources.list.backup
Adding repositories
Apart from the officially supported package repositories for Ubuntu, you can add community-maintained repositories like universe and multiverse or even Launchpad PPA repositories.
Adding universe and multiverse repositories
You can enable additional repositories by uncommenting the corresponding apt lines to a repo you desire to use. For example, uncomment the universe or multiverse repo by deleting the ‘#’ before each line:
deb http://us.archive.ubuntu.com/ubuntu/ release_name universe
deb-src http://us.archive.ubuntu.com/ubuntu/ release_name universe
deb http://us.archive.ubuntu.com/ubuntu/ release_name-updates universe
deb-src http://us.archive.ubuntu.com/ubuntu/ release_name-updates universe
You can also add a repository with the add-apt-repository command:
$ sudo add-apt-repository "deb http://us.archive.ubuntu.com/ubuntu/ release_name universe multiverse"
$ sudo add-apt-repository "deb http://us.archive.ubuntu.com/ubuntu/ release_name-updates universe multiverse"
Tip: Type lsb_release -sc to find out your release.
Adding partner repositories
Enable partner repositories by uncommenting the following lines:
deb http://archive.canonical.com/ubuntu release_name partner
deb-src http://archive.canonical.com/ubuntu release_name partner
You can then update the package list for changes to take effect with the following command:
$ sudo apt update
Adding Launchpad PPA repositories
You can add Launchpad PPA (Personal Package Archive) repositories with the add-apt-repository command.
$ sudo add-apt-repository ppa:<launchpad_PPA_repository_name>
Other repositories
In certain cases, you might be required to add a non-Ubuntu repository. To add a non-Ubuntu repo, add the apt repository line of your software source to the sources.list file.
Caution: Only add trustworthy repositories.
deb http://mirror3.ubuntulinux.nl/ repo_name pckg
As always, don’t forget to update your changes:
$ sudo apt update
Learn more about apt from its official man pages: man apt.
Automatic updates
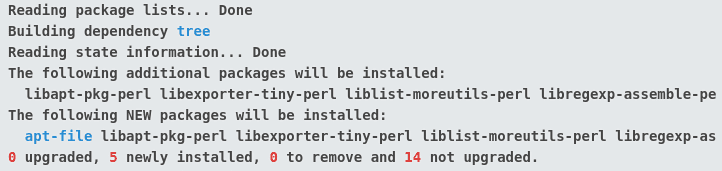
Apt provides the unattended upgrades package that you can use to manage and configure automatic updates. You can install the package with the following command:
$ sudo apt install unattended-upgrades
The next step is to edit the /etc/apt/apt.conf.d/50unattended-upgrades.
Unattended-Upgrade::Allowed-Origins {
"${distro_id}:${distro_codename}";
"${distro_id}:${distro_codename}-security";
// "${distro_id}:${distro_codename}-updates";
// "${distro_id}:${distro_codename}-proposed";
};
Note: The sign “//” denotes comments and, therefore, will not be evaluated.
You can also exclude certain packages from automatic updates by adding them to the Package-Blacklist list:
Unattended-Upgrade::Package-Blacklist {
// "vim";
// "libc6";
// "libc6-dev";
}
The next step is to enable automatic updates by editing the /etc/apt/apt.conf.d/20auto-upgrades with appropriate configuration options. For example, the following configuration updates the package list and installs available upgrades every five days. Moreover, it instructs apt to clean the local download archive bi-weekly.
APT::Periodic::Update-Package-Lists "5";
APT::Periodic::Download-Upgradeable-Packages "5";
APT::Periodic::AutocleanInterval "14";
APT::Periodic::Unattended-Upgrade "5";
Upgrade to a new Ubuntu release
Ubuntu supports upgrades from one LTS to the next LTS in sequential order. For example, you can only upgrade Ubuntu 16.04 LTS to Ubuntu 18.04 LTS then perform another upgrade to Ubuntu 20.04 LTS. Therefore, before you upgrade to a news release, fully update the system with the following commands:
$ sudo apt update
$ sudo apt upgrade
It is recommended that you use the do-release-upgrade command to perform a system upgrade.
$ sudo do-release-upgrade
Before the process begins, the system will prompt you to accept the changes and only proceed after accepting them. It is safe to grab a coffee at this point and let the system complete the upgrade process. After all the packages are updated, the system will prompt you again to remove any obsolete packages.
Finally, reboot the system and log on to your upgraded system.
Aptitude
Aptitude is a Ncurses-based front-end for the APT system that you can launch either as a text-based front-end or command-line tool. Using Aptitude is straightforward, and you can accomplished common package management functions with single-key commands. Type the following command to start the menu-driven interface.
$ sudo aptitude
The command will bring up a menu bar containing categories such as New packages and Not installed Packages. You can then perform functions like install, remove, update package index, or upgrade packages.
The following are examples of common keys used to describe the state of packages:
- i: Installed packages.
- c: Package not installed.
- p: Purged packages from the system.
- v: Virtual package.
- u: Unpacked files.
- C: Half-configured, i.e., package configuration failed and needs to be fixed.
- B: Broken package.
- H: Half-installed, i.e., removal failed.
- U: Unpacked files but are yet to be configured.
- q: Press the q key to exit Aptitude.
Learn more about aptitude from its man pages: man aptitude
Command Line Aptitude
You can also use Aptitude as a command-line tool with the aptitude command. The apt and aptitude commands function similarly. For example, to install a package, you can substitute apt for aptitude, as illustrated below.
$ sudo aptitude install cockpit
Remove a package:
$ sudo aptitude remove cockpit
dpkg
dpkg is yet another package manager for Debian-based systems. You can view dpkg as the “back-end” package manager used by Apt and Aptitude to do most of their functions. You can use it to manage local packages, install, remove, and build packages. However, one caveat of dpkg is that it cannot automatically download and install packages and dependencies.
The following are examples of how to use dpkg.
List all installed and uninstalled packages in your system:
$ dpkg -l
View a specific package with pipe and grep:
$ dpkg -l | grep cockpit
List the files installed by a package:
$ dpkg -L cockpit
Find a package that installed a file:
$ dpkg -S /etc/host.conf
  base-files: /etc/host.conf
Install a local .deb file:
$ sudo dpkg -i new_package_1.0.1_amd64.deb
Uninstall a package:
$ sudo dpkg -r new_package
Note that uninstalling packages using dpkg is not recommended as it might break dependencies in your system. A better alternative is apt, which can handle dependencies and ensure the system packages are consistent.
Learn more about dpkg from its man page: man dpkg
APT/APT-GET commands compared with DNF
If you are not a typical user of RHEL distros like CentOS, you may want to familiarize yourself with Fedora’s DNF package manager, which is “synonymous” with apt in Debian-based distros. Here we list some common APT commands with their DNF equivalents.
| APT commands | DNF commands |
|---|---|
| apt update apt-get update | dnf check-update |
| apt upgrade apt-get upgrade | dnf upgrade |
| apt full-upgrade apt-get dist-upgrade | dnf distro-sync or dnf system-upgrade |
| apt remove apt-get remove | dnf remove |
| apt purge apt-get purge | --- |
| apt autoremove apt-get autoremove | dnf autoremove |
| apt search apt-cache search | dnf search |
Wrapping up
Getting to know and use the apt package manager is straightforward. As we have highlighted in the article, apt is a powerful and robust tool to query and install applications and software in Ubuntu and other Debian-based distros.
Users who predominantly prefer GUI can check out Synaptic and GNOME software, giving you access to Ubuntu packages and software.