
IPv6 is the present version of the Internet Protocol. It is the communications protocol that offers an identification and location system for computers on networks and routes traffic. The internet is gradually running out of IPv4 addresses as it ushers in the new IPv6 addresses.
IPv6 was developed by IETF(Internet Engineering Task Force) to fix the IPv4 weaknesses, most preferably the scarcity of available IP addresses, known as IP address exhaustion. This new version of the IP address is 128-bit long and offers many address pools to select from.
IPv6 handles the network layer; its functionality provides a path to address machines, convey data to the preferred destination, and handle data fragmentation if needed. Fragmentation, in this case, refers to the time protocol splits packets into chunks with a magnitude that relies on the network links to be used on the path and reassembles them in their bona fide order of arrival.
The IPv6 configuration is akin to IPv4, configured in the /etc/network/interfaces file. If you want your network to be globally accessible, you must ensure that you have an IPv6-competent router that relays traffic to the worldwide IPv6 network.
Adding an IPv4 or IPv6 address in Debian
In this tutorial, you will learn how to add IPv4 and IPv6 addresses on Debian version 11 “Bullseye.”
Requirements
- Sudo user privileges.
Let us get underway with the first section of the article covering the addition of IPv4 IP address on our Debian system.
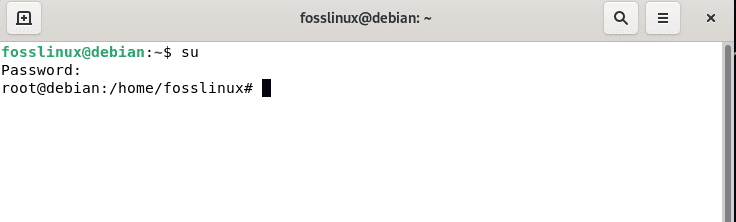
Step 1: Log in as a root user.
First, log in as a root user by running the following command:
su

login as a root user
Step 2: Check available network interfaces
Here, we will utilize the “ip” command to get the details about our system’s currently available network interfaces. The IP command is a utility software used by network and system admins in Linux-based distros to configure network interfaces. We will then add “link,” a subcommand to view and modify the network interface in the IP command. As such, run the following command combination on your terminal:
ip link
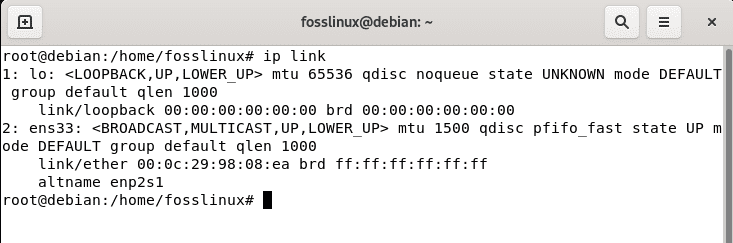
IP link command
Use the output from the above command to note down the name of your active network interface; in our case, it is ens33. This is the network interface to which we will add the IPv4 address.
Step 3: Set up IPv4 static IP address on your system
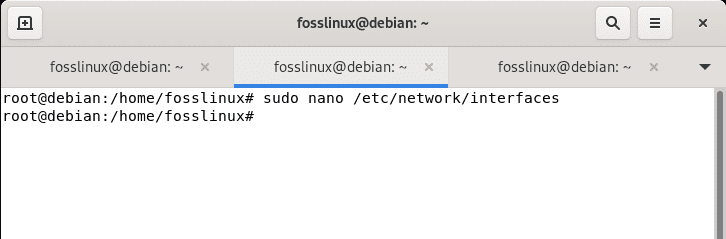
To achieve this, open the config file of the network interfaces by running the following command on the terminal:
sudo nano /etc/network/interfaces

nano command
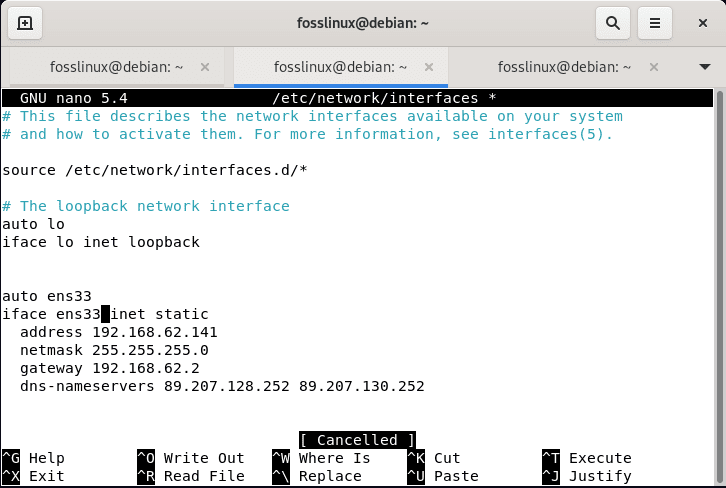
If you have not added any network IP address on your Debian system, then your network interfaces config file should, by default look like this:
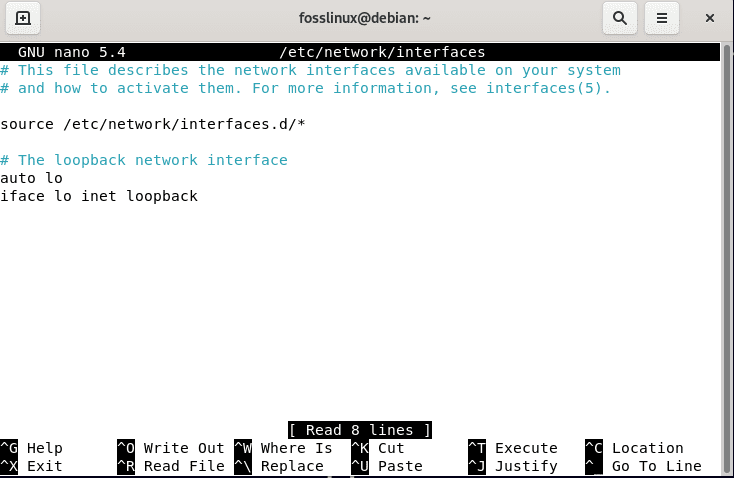
nano editor
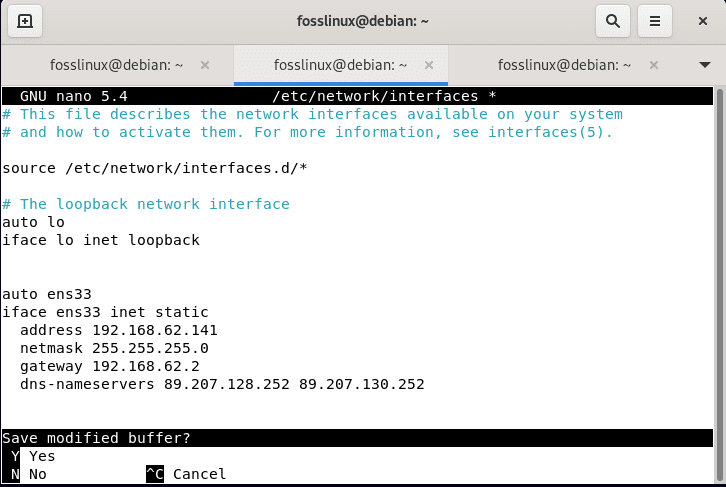
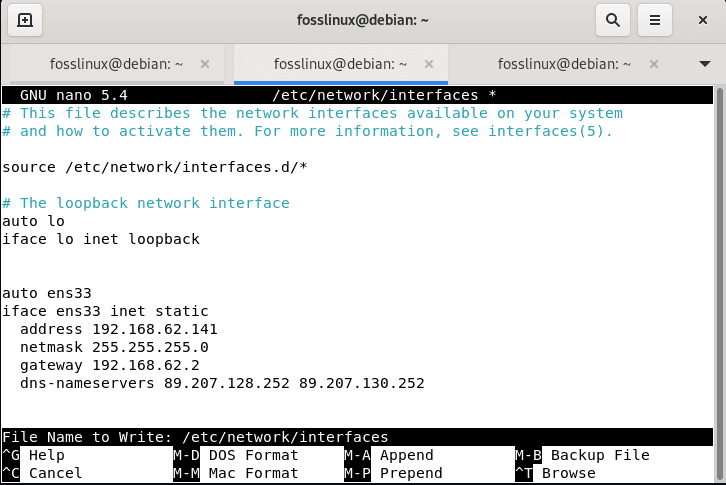
To set up IPv4, add the following details entailing your network interface in the /etc/network/interfaces file.
auto ens33
iface ens33 inet static
address 192.168.62.141
netmask 255.255.255.0
gateway 192.168.62.2
dns-nameservers 89.207.128.252 89.207.130.252

official
Then save the changes by hitting the “ctrl+x” key combination on your keyboard.
official ctr+x
Then “y” to save.
In the end, press “Enter” to exit the nano editor.
Step 4: Restart network service
After a successful configuration of the IP address for the ens33 network interface, you will restart the service using the following systemctl command:
sudo systemctl restart NetworkManager.service
Then issue the following command to verify if it was configured:
ip a
From the snapshot below, it is true to say that we have successfully added IPv4 to our Debian system.

IPv4 added
Section 2: How to add IPv6 IP address on Debian
This section will append the IPv6 to the already set up IPv4 address. Here are the simple steps to get this right.
Step 1: Log in as a root user
First things first, login as a root user by issuing the following command on your terminal:
su
login as a root user
After issuing the command, type in your PC’s password and hit the “Enter” button on the password prompt.
Step 2: Search for network interfaces.
Next, we will run a background search of our Debian system’s available active network interfaces by running the following command:
ip link show

Ip link show the command
As seen in the snapshot above, there are two active interfaces. The first is the loopback interface designated by “lo” initials. This refers to a special design of an internal virtual interface that the system uses to communicate with itself.
The second visible interface is the ens33. Here is an active adapter that our PC utilizes to connect to the internet.
Now that we have discovered the adapter interface, we will assign the IPv6 to this interface. Also, note that the adapter name may not be the same as yours, which should not worry you.
Step 3: Ascertain the IP address assigned to the interface
We can use several methods to get the IP address assigned to the interface. Here are some of them.
Method 1: Finding the IP address with the ip command
The “ip” command is one of the most-known commands for finding the IP addresses assigned to the network interfaces of your Linux servers, in this case, Debian. You are likely to find this command preinstalled on every modern Linux distro.
To find all the IP addresses of all the network interfaces connected to your Debian system, run the following command :
ip address show
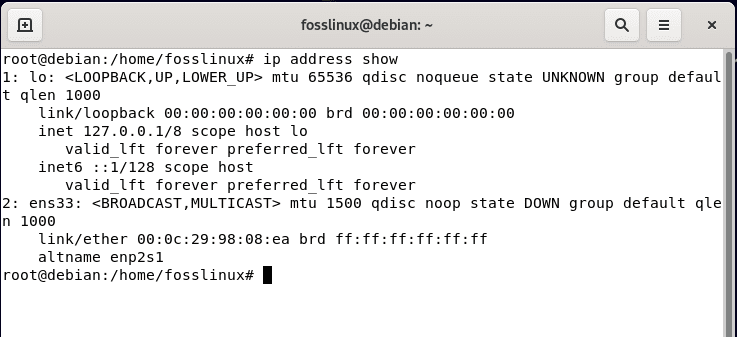
IP address show
Or
ip addr show
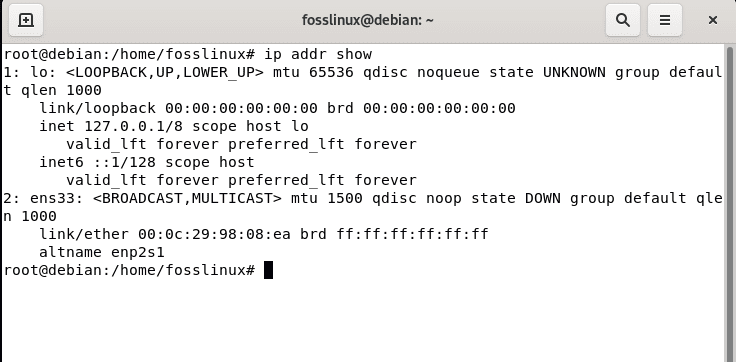
alternative
Method 2: Finding the IP address with the ifconfig command
ifconfig is a very ancient command for finding the IP addresses of Linux servers and workstations. However, the command is very simple to use.
To find the IP addresses of all the network interfaces on your Debian system, run the following command:
/sbin/ifconfig
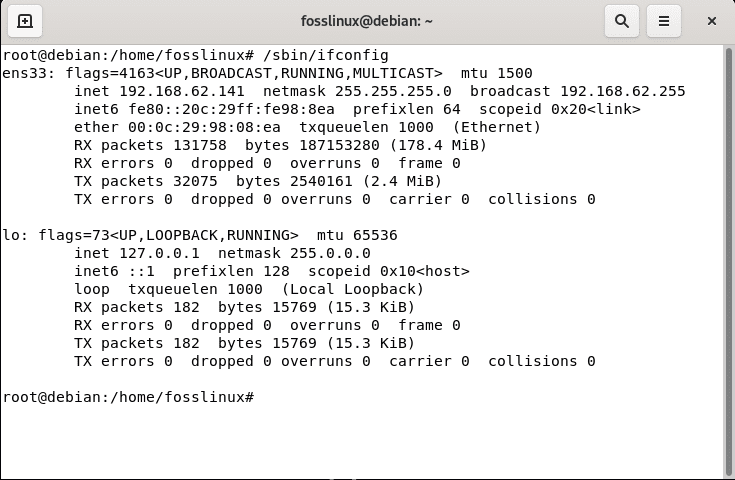
ifconfig
Now, let us proceed to the crucial part of the article, which is assigning IPv6 to our Debian system.
Step 4: Assigning IPv6 address to our Debian system
To do this, edit the network configuration file by issuing the subsequent command.
sudo nano /etc/network/interfaces
nano command
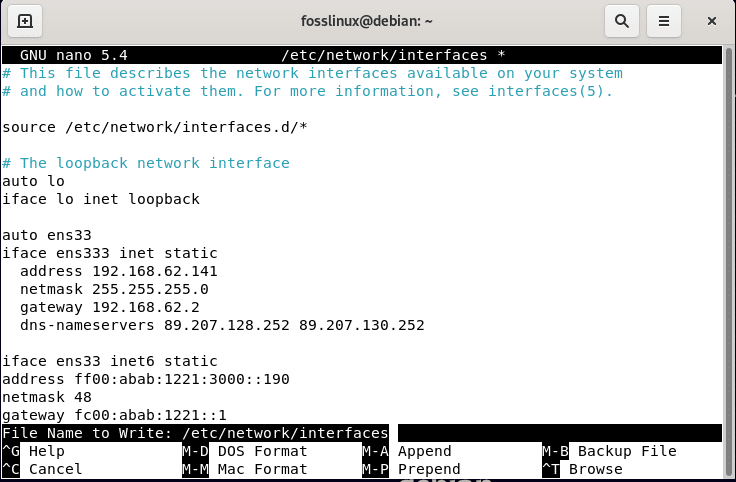
This is what the file may look like since we already configured the IPv4 address:
File display with IPv4
Next, you will add the following IPv6 config details at the end of the file.
iface ens33 inet6 static
address ff00:abab:1221:3000::190
netmask 48
gateway fc00:abab:1221::1
After the modification, the file should resemble the following snapshot:
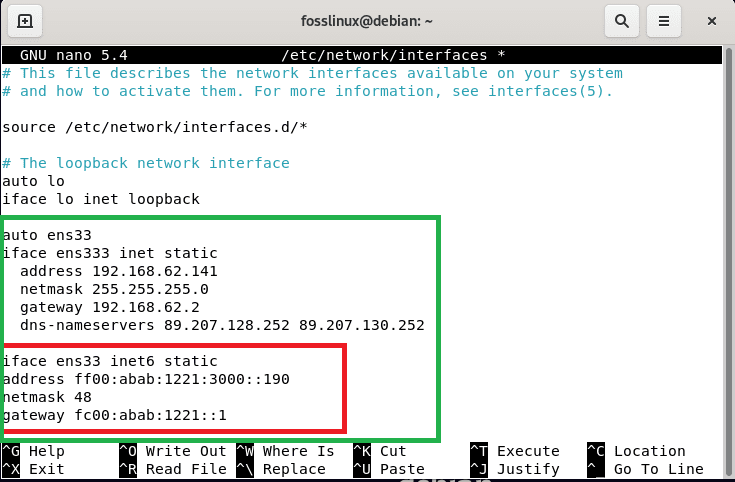
IPv6 added
Then save by hitting the following combo of keys:
“ctrl+x”
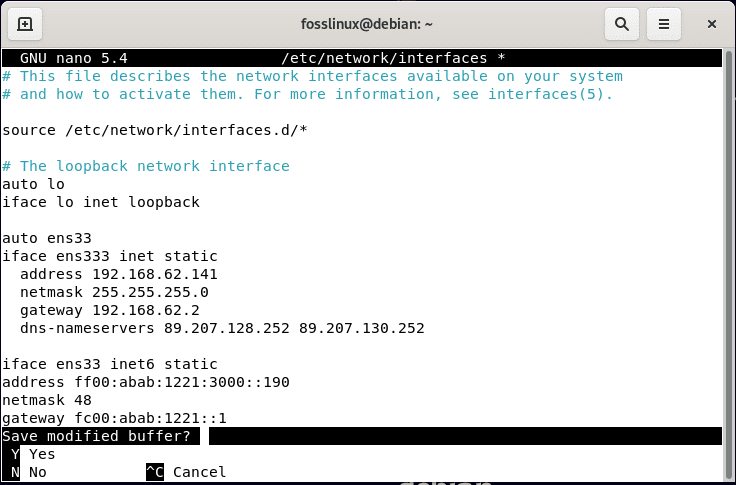
type Ctrl+x
After that, press “y” and hit the “Enter” button to exit from the editor.
Hit “y” to save
Step 5: Reboot the networking service
At this point, everything should be set. However, changes made to the file will not take effect without rebooting our network service. This reboot will update the configurations made to the file. To do this, run the following command:
sudo systemctl restart networking

network reboot
Step 6: Check if IPV4 and IPv6 are added
At this point now, you can check if the IPv6 IP address is set up by running the following command:
ip a
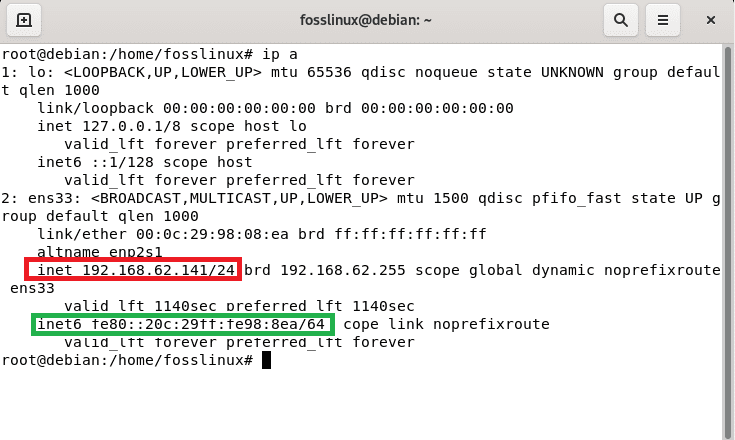
IPv4 and IPv6 added
Check Via GUI
Go to activities on the left corner of the desktop, then use the search button to search for “settings.”
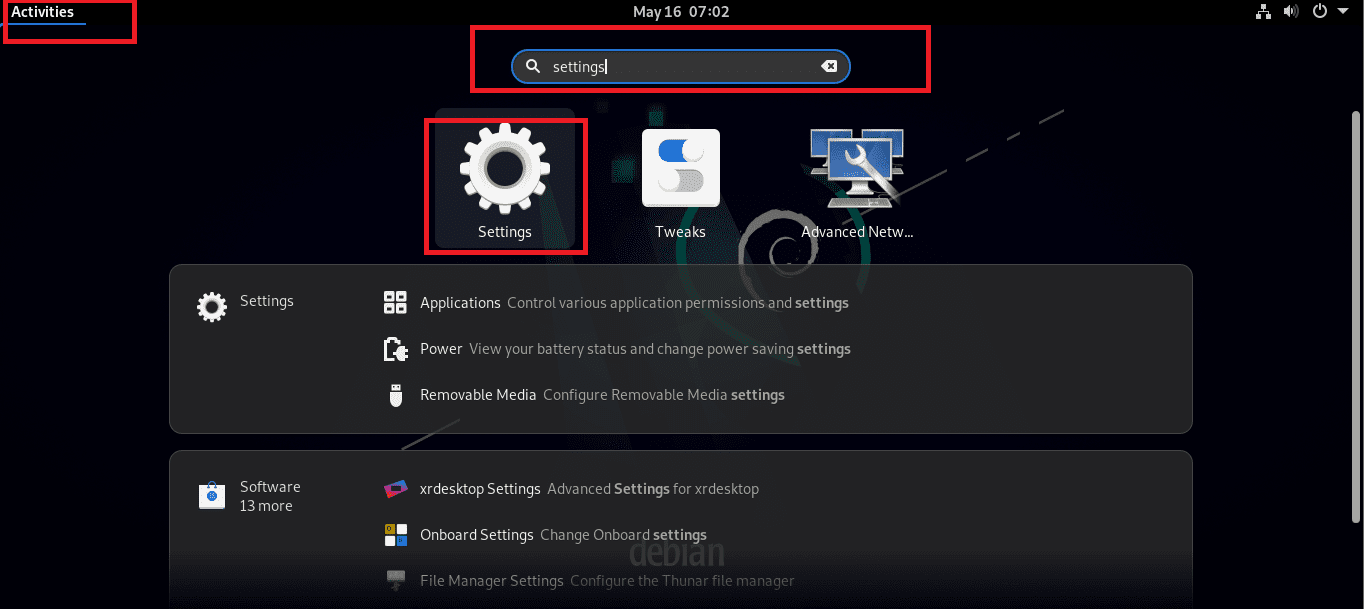
settings
After that, go to “network” and select the gear icon.
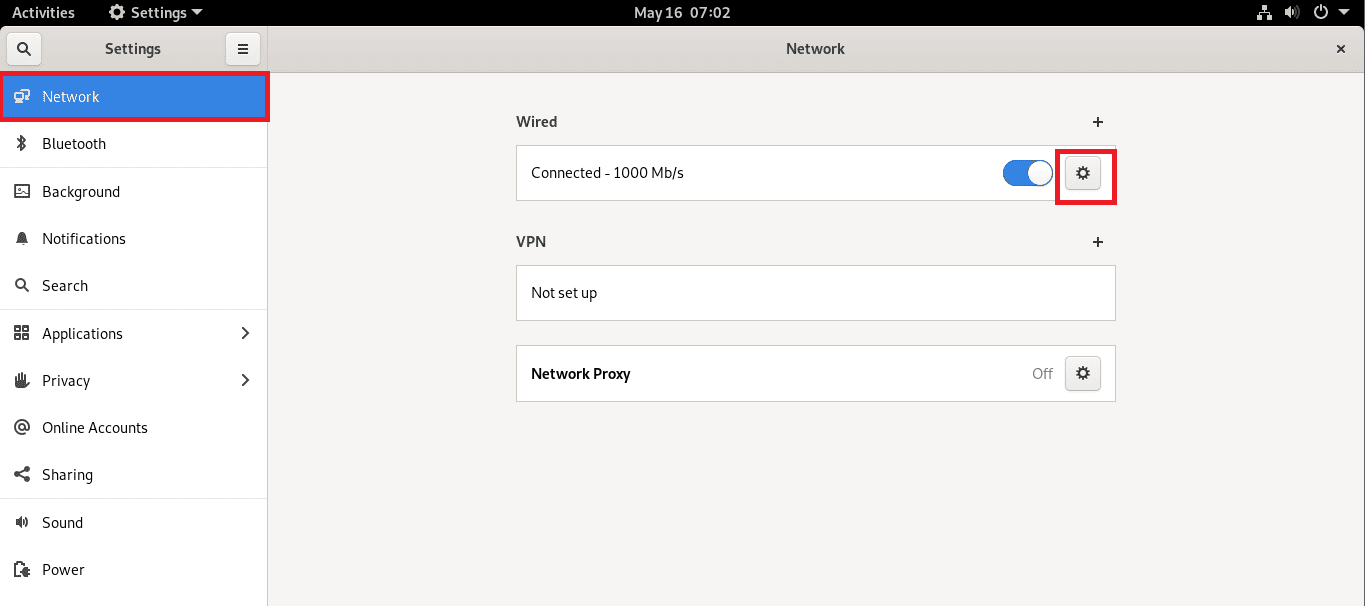
select gear icon
You should see both IPv4 and IPv6 installed:
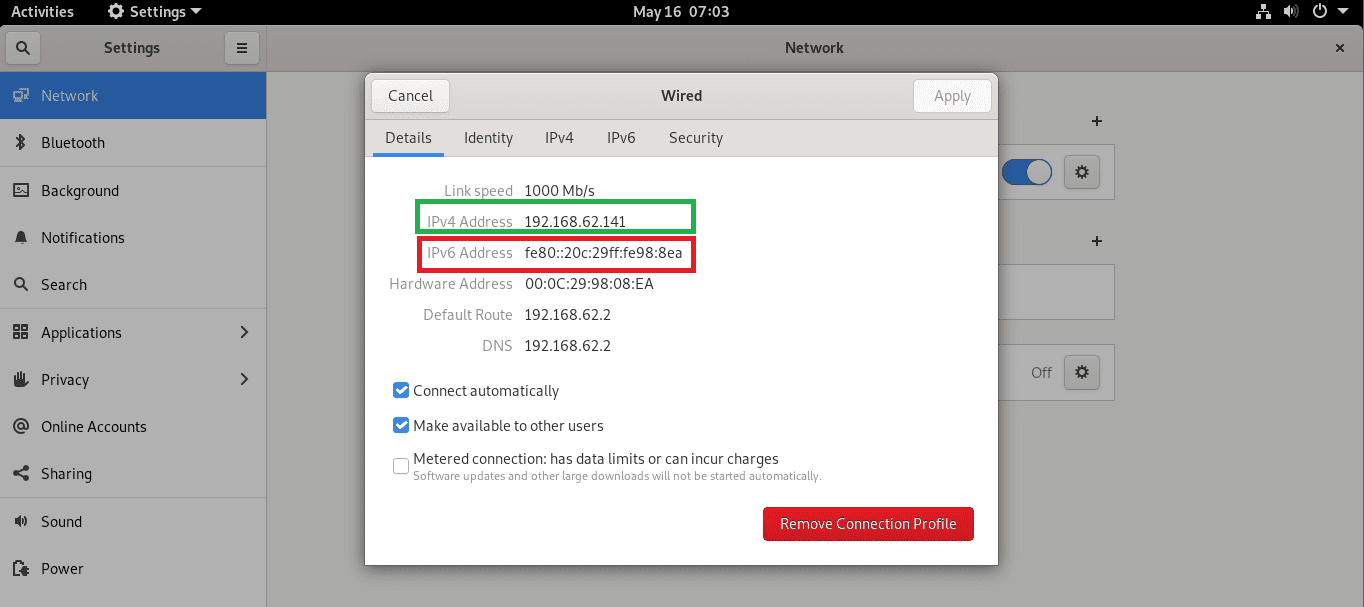
IPV4 and IPv6 added
Final thoughts
There it is, guys! This article has taken you through the basic steps to configure the IPv4 and IPv6 on Debian 11 “bullseye”. At this point, you should have the two addresses configured on your system. Thanks for reading, and keep following FOSSLinux for more.