
Sudo stands for superuser do. It is a command-line utility that permits trusted users to run commands as another user by default root. When prefixed with any command, the superuser temporarily gives another user rights as an alternative root. If you, for instance, want to access any system-related setting or, rather say, update a system or edit system files, you must log in as a “root” user in Linux.
Ideally, root users have the right to perform any system task. However, sudo privileges can also be assigned to other users to act as a root. The basic philosophy is to give as few privileges as possible but still permit users to complete their work. Additionally, sudo is an effective way to log who ran which command and when.
It is also advised to utilize this command carefully as it contains all the admin rights. As such, any misuse of the command may lead to severe damage to the system. In the latest release of Debian, version 11 (Bullseye), the sudo user’s info is stored in the sudoers file, located in the “/etc/sudoers” directory.
Why Sudo?
If you have been asking yourself why sudo, here is the right answer. Using sudo is safer than opening a session as root for several reasons that we will look at:
- Logging/Auditing: When a sudo command is executed, the original username and the command are logged.
- It is simpler only to run the command that needs special privileges via sudo; the rest of the time, you can work as an unprivileged user, which, in one way or the other, lowers the chances of you accidentally causing damage to your system.
- No one needs to know the root password as sudo prompts for the current user’s password). Extra privileges can be offered to individual users temporarily and then snatched without the need for a password modification/change.
Note: Switching to root using sudo -i or sudo su) is usually deprecated as it cancels the above features.
Adding sudoers in Debian
With that covered, we will in this article take you through the simplest ways to append any user to the sudoers file and assign sudo privileges to that user. Let us get going.
Method 1: How to add a user to sudoers using the command line
Step 1: Login as a root
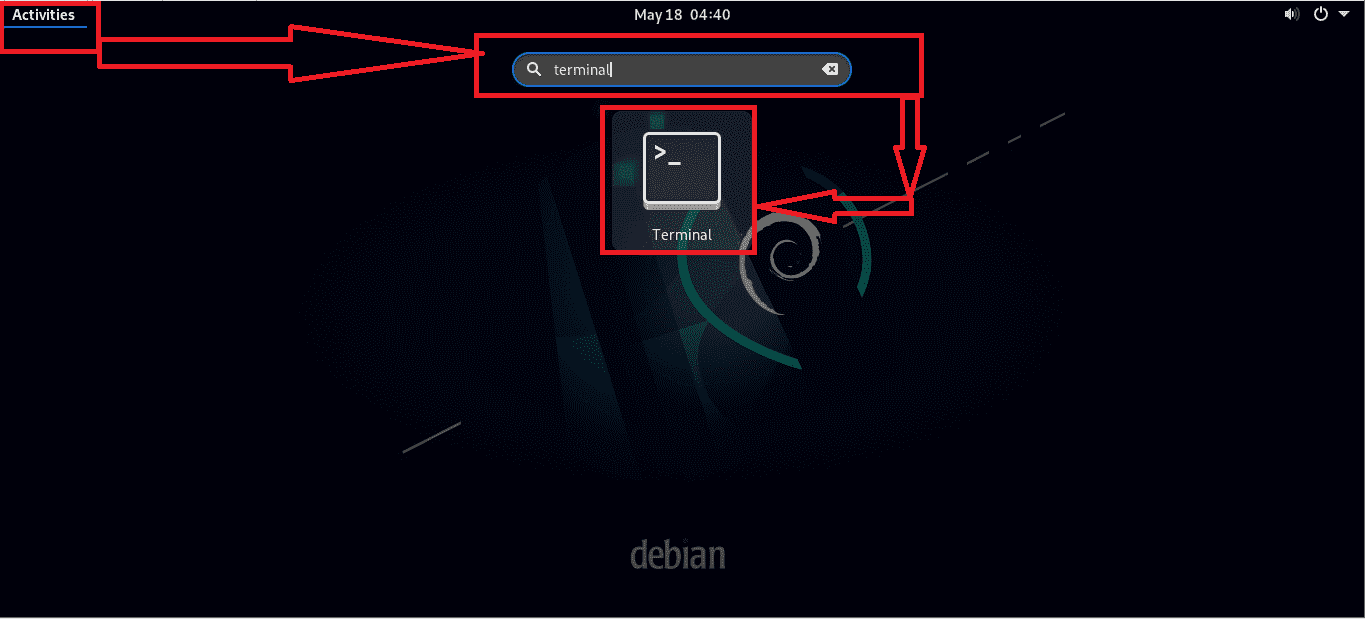
First, launch the terminal on your Debian system by clicking on “Activities.” After which, it will prompt a search section. Go ahead and type “terminal” On the search section, then click on the icon to open it as shown below:
Search for terminal
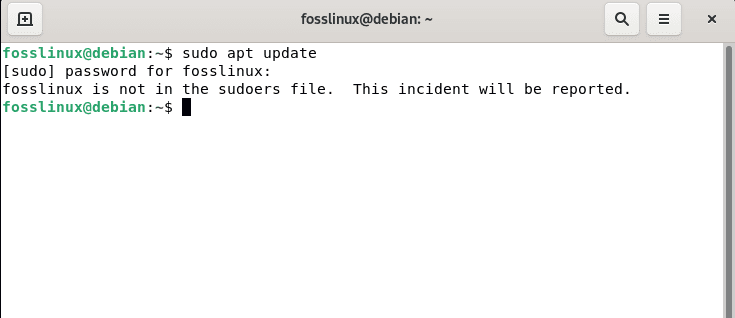
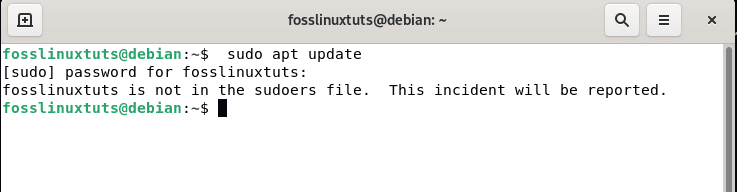
Once your terminal is up, you must sign in as a root user. This is because Debian and Linux-based distros don’t just allow anyone to carry out admin functionalities without verification. The following snapshot is a clear image of what we are talking about:
sudo error alert
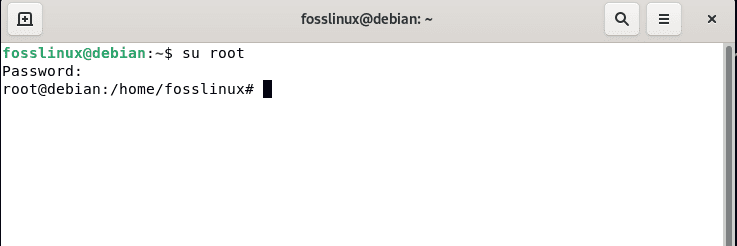
So you will switch the user to superuser using the following command:
su root
Upon running the command, you will be checked against the login credentials of the current superuser. To pass this test, type in the root user’s password, and you should be good to proceed.
login as root
Step 2: Add a new user to sudo
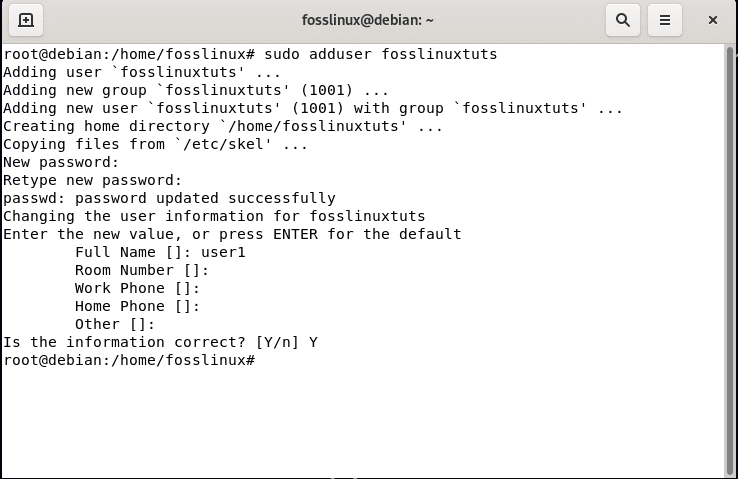
After logging as root, use the following command to add the new user to sudo:
sudo adduser fosslinuxtuts
At the end of the above command, you will be tasked to provide the full name and several other info. Here, we suggest that you only answer the “Full Name” section. Remember that you are free to select a name of your liking; in our case, we will go with “user1.” Then press “Enter” on the remaining options. In the last section, you will be asked if the information is correct; type “Y” and press “Enter.”
add new user
At this point, the new “fosslinuxtuts” sudo user should be created.
Step 3: Switch to the new user
Make use of the following syntax to switch to the newly created user:
su - <new_user>
Here is the final look of the command after the above syntax:
su - fosslinuxtuts

switch user
The user will then be switched, as seen in the above snapshot. However, there will be no execution of any sudo-related commands as <new_user>, in our case, “fosslinuxtuts.” This is because the <new_user> has not yet been appended in the sudoers file, which takes us to the next section.
Step 4: Add the user to the sudoers file
Let us try this out by running the update command:
sudo apt update
error alert
Our “fosslinuxtuts” user does not exist in the sudoers file. In this event, we will utilize the usermod command with several flags to append “fosslinuxtuts” to the sudoers file. Here are the two usermod flags that we will use:
- “-a” is the first flag of usermod that aids in appending a specific user to a specific group.
- “-G” is the second flag of usermod applied to designate the group name to which the newly created user will be appended.
Take a look at the following example, where we will use the two flags to add “fosslinuxtuts” to the sudo group. After that, we will put this to test by switching to fosslinuxtuts and then updating the system package info by issuing the following commands:
sudo usermod -a -G Sudo fosslinuxtuts

su - fosslinuxtuts

sudo apt update
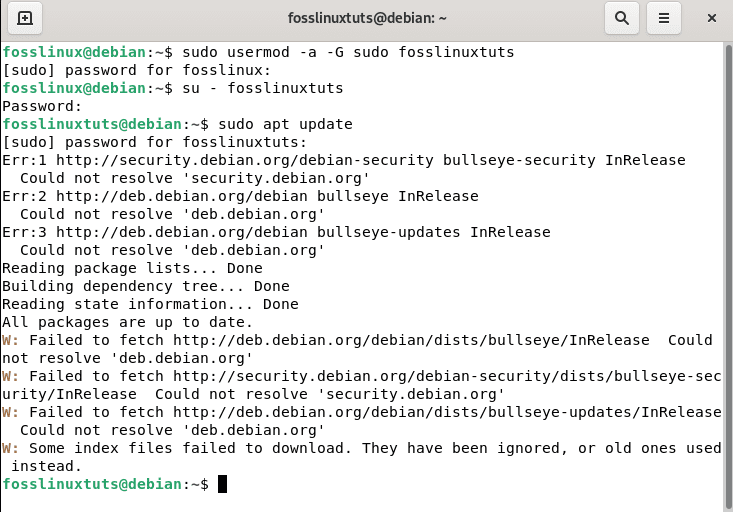
update function works
The successful execution of the command means that fosslinuxtuts has been added to the sudoers file.
Note: Don’t mind the download errors above because we were not connected to the internet while running the command, but yours should work perfectly well if you are connected to the internet.
Method 2: Add user to sudoers using the Graphical User Interface(GUI) format in Debian
Use the following steps to add a new user with sudo privileges.
Step 1: Open settings by maneuvering to “Activities.” After which, you will use the search button to search for “settings,” as shown below:
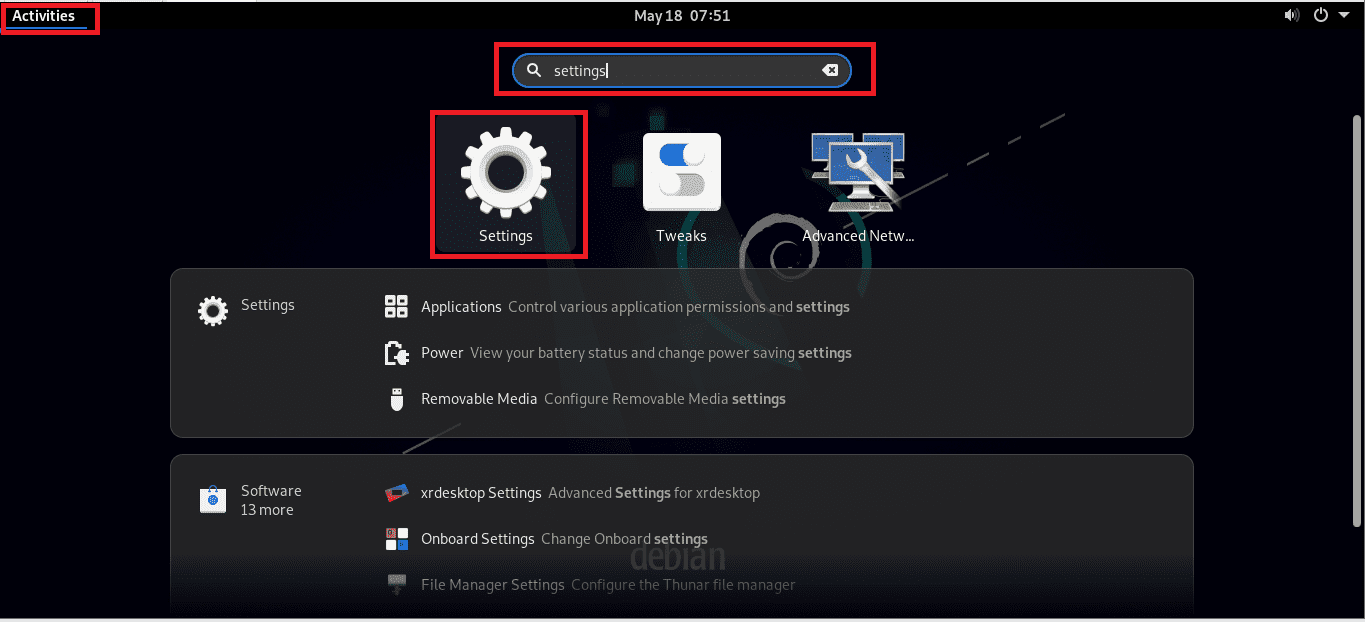
Open settings
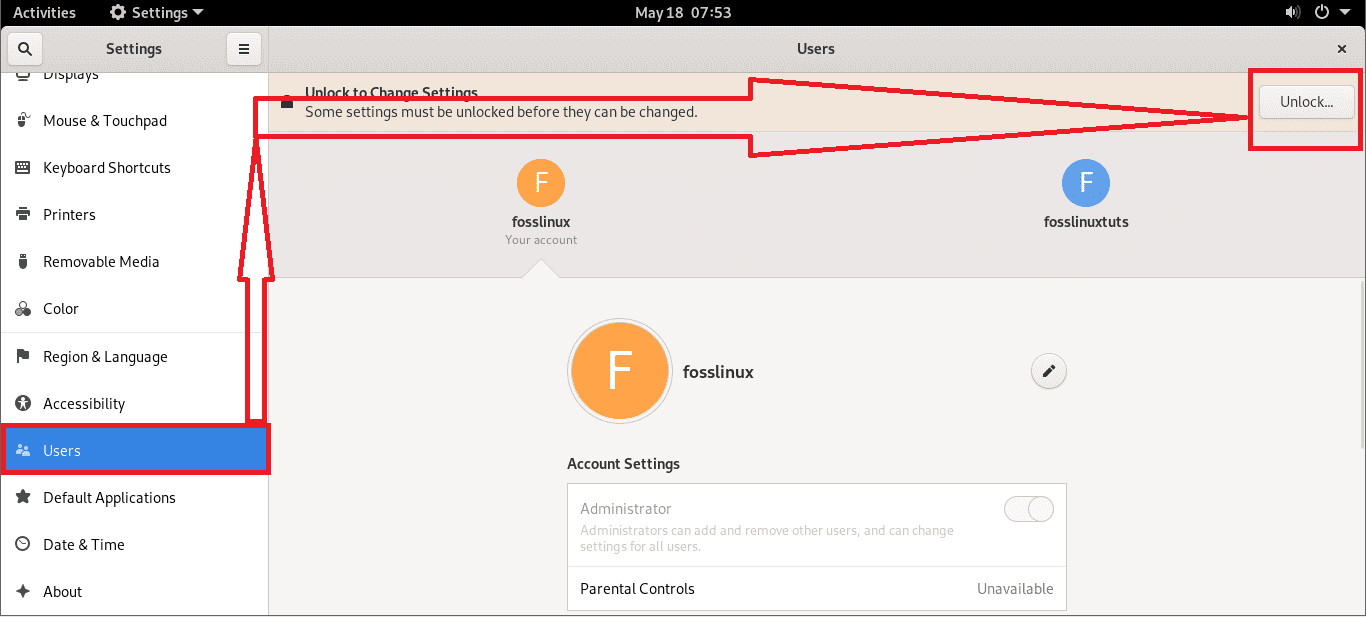
After opening settings, scroll down on the left side of the pane and select “Users.” Here, you will have a glimpse of the existing users. But before adding a user, you have to click “unlock” to make any changes in the admin section.
Select users
After clicking the “Unlock” button, you will be queried to input the user password; type in your PC’s password and click on the “Authenticate” button.
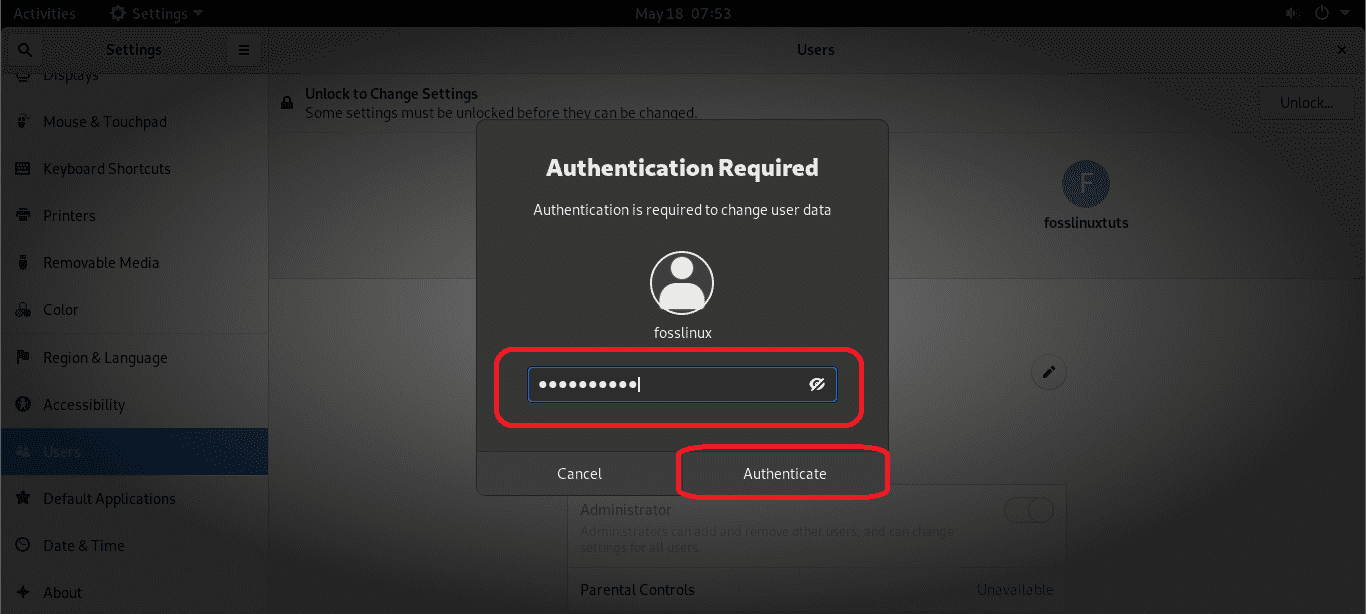
credentials section
After authentication, you should locate an “Add User” button on the right corner of the user’s window. Click on it.
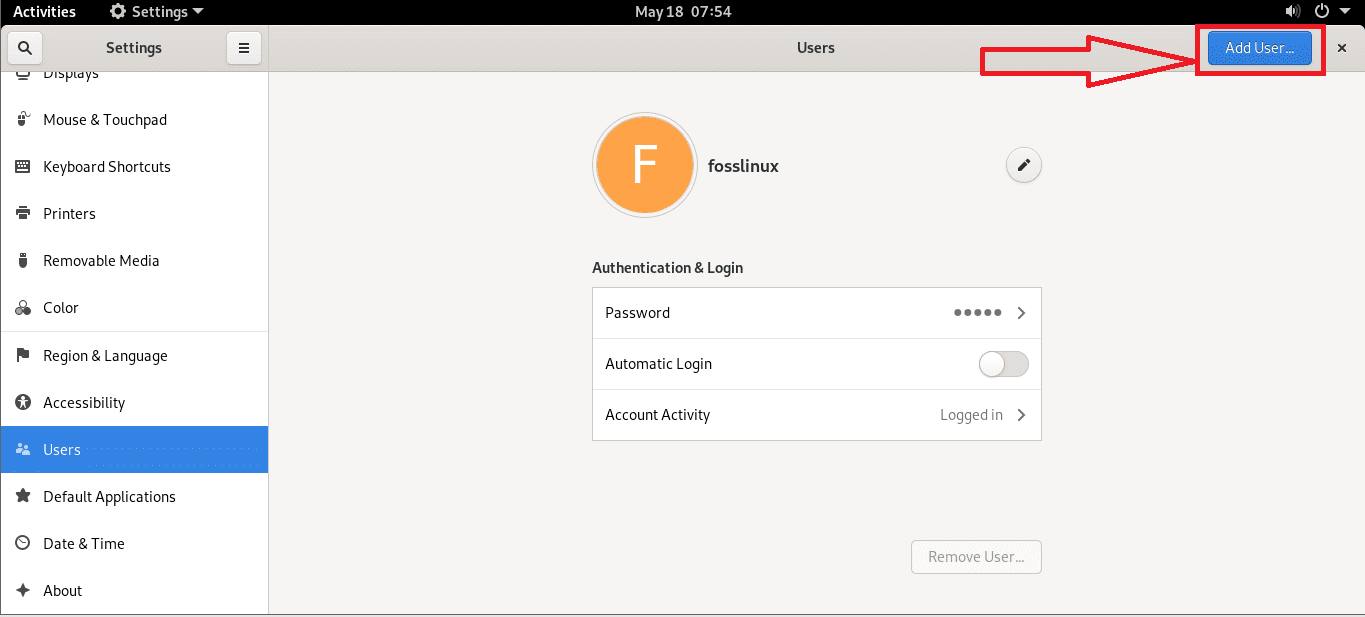
select add user
Note: The above “Add user” button will only be accessible after you have unlocked the user’s pane.
A new window will then be displayed after clicking on “Add User.” Now, here are the changes you have to apply.
Step 1: First, set the “Account Type” to “Administrator”:
Step 2: Proceed by inputting the full name and username; in our case, we will use “Fosslinux tutorials” as the full name of the new user and “user1” for the username:
Step 3: Next, go for “Set Password now” and input the password for “user1.” Finally, repeat the same password in the “Confirm” section and hit the “Add” button as marked in the snapshot below:
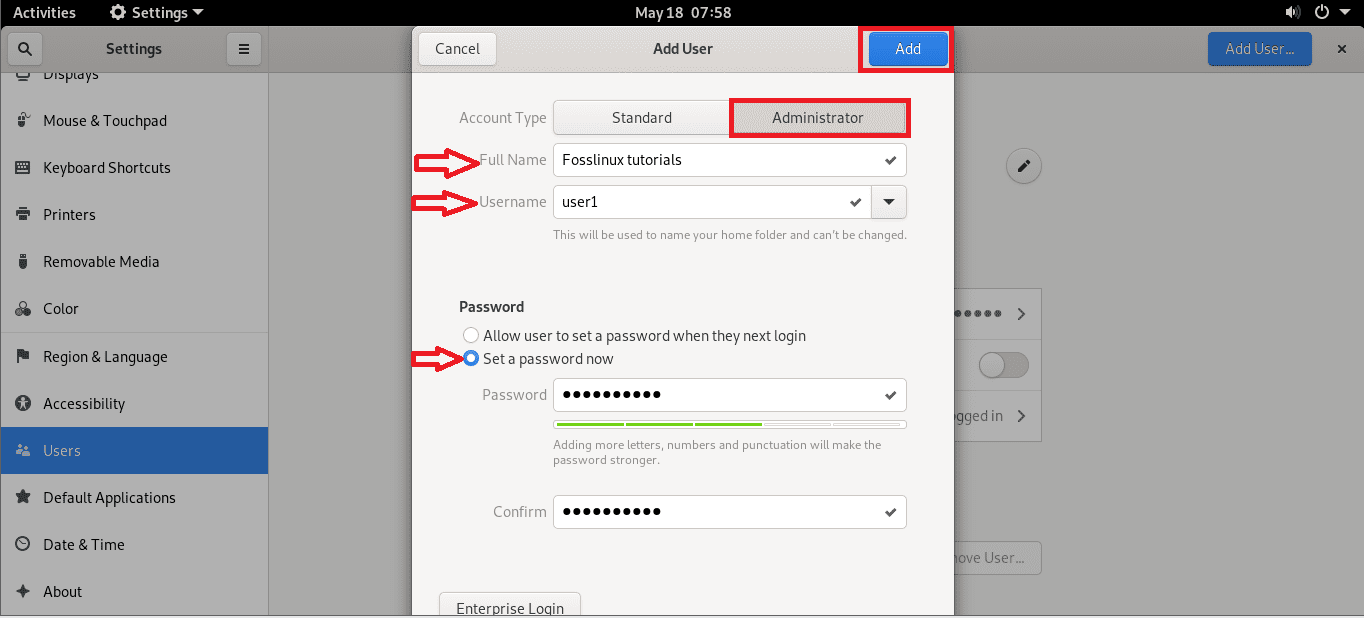
Setting new user
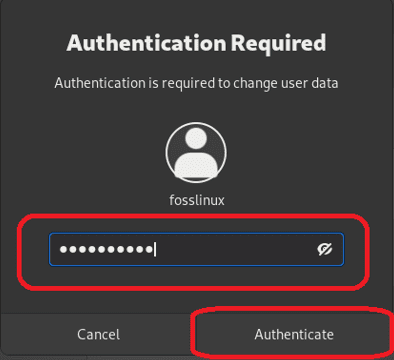
Next, you will authorize the addition of the new user by keying in the password and hitting the “Authenticate” button.
authorize
Note that the user will automatically be created in some instances without requiring the above authentication section.
Upon successful authentication, you should be able to see the newly created “Fosslinux tutorials” user on the user’s window. The new user should, at this point, have the administrative privileges to perform sudo tasks.
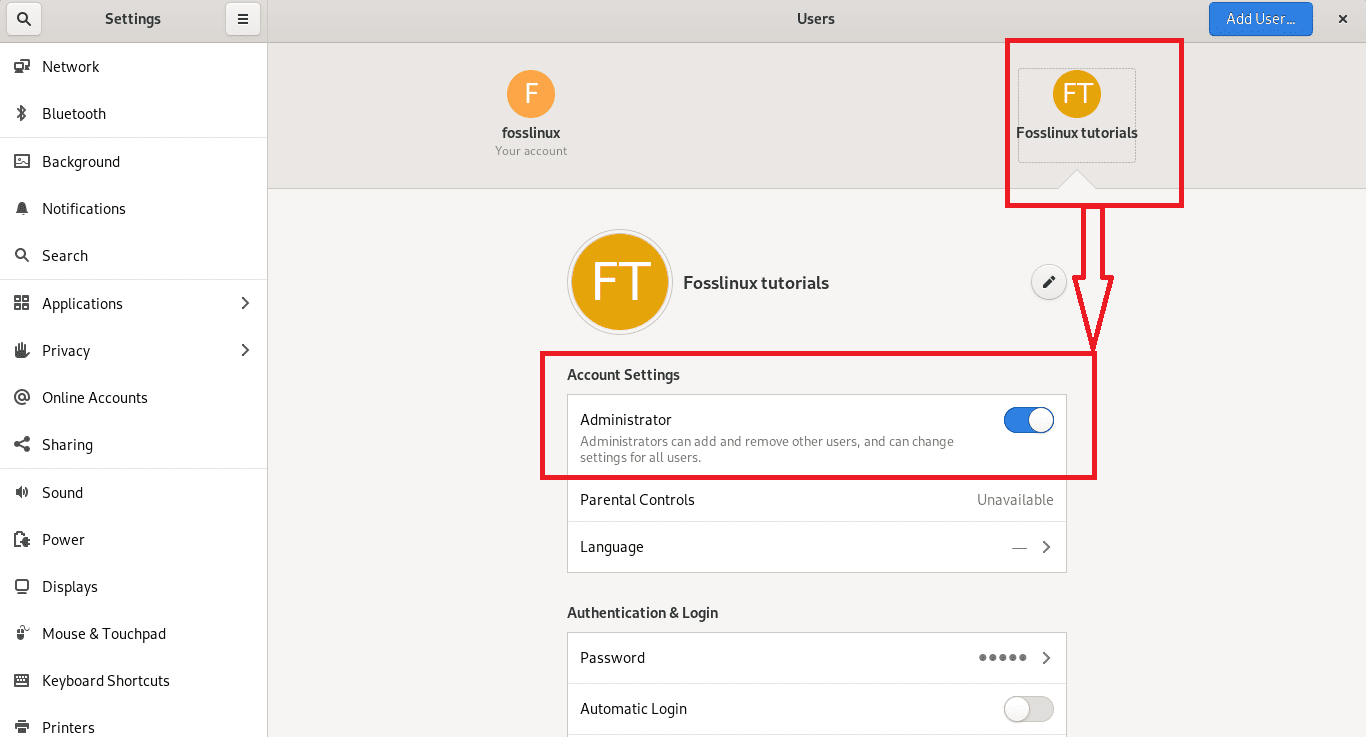
fossLinux tutorials user create
Method 3: Manually change the sudoers file.
In this final method, we will access the sudoers file by opening and appending a few other lines that would depict that a particular user has now claimed sudo rights.
To do this, navigate to the file by issuing the following command:
sudo nano /etc/sudoers
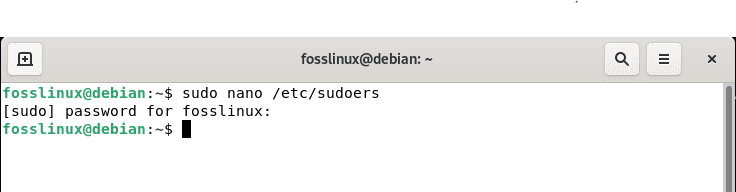
open sudoers file
The sudoers file should, by default, open like this:
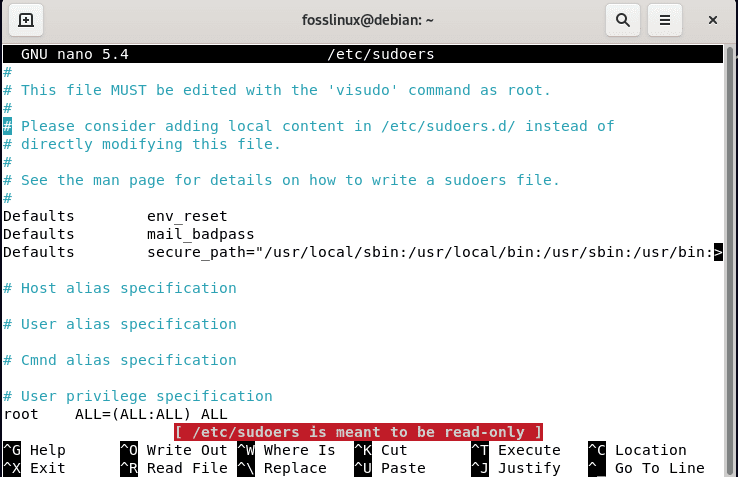
file open by default
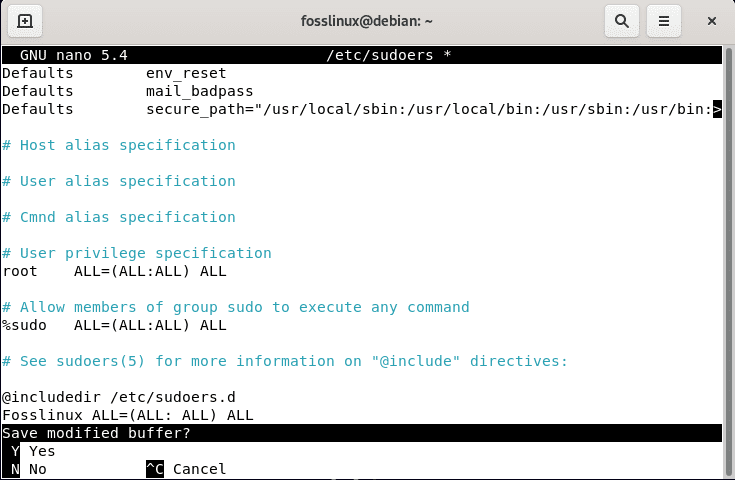
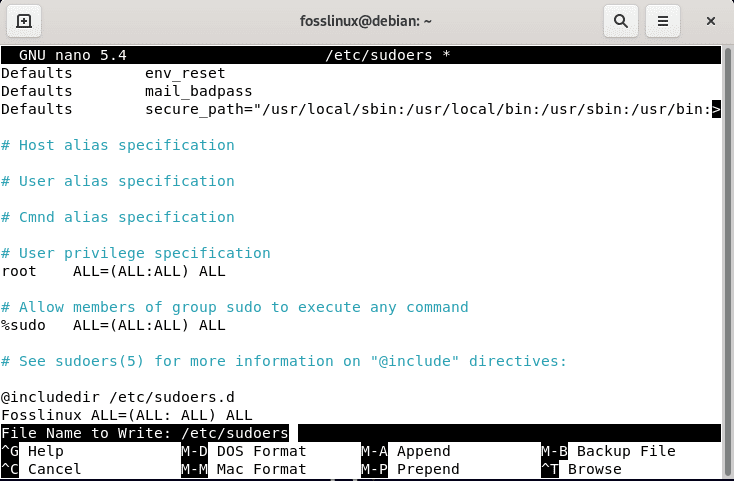
Next, navigate to the bottom of the file and manually type in the following syntax, replacing the first section, “username,” with the user’s name designated to obtain the “su” rights. But it would be best to copy it from here to avoid any typographical errors directly.
username ALL=(ALL: ALL) ALL
In our case, we will give the user “Fosslinux” su rights. As such, the command would be shaped like this:
Fosslinux ALL=(ALL: ALL) ALL
The end of your sudoers file will look like the following snapshot:

edited file
Now, close up the file by pressing “ctrl+x.”
press “ctr+x”
And save it by typing “y” and then hit the “Enter” key to exit the editor.
type “y ” to save
And there it is, guys!
Now, you can run your existing user with sudo rights on your Debian 11 bullseye, and the same can be applied on Debian 10, Buster.
Final thoughts
Appending users to Sudoers in Debian 11 may seem daunting, but it is quite a straightforward task to achieve. Sudoers are the user with admin rights in a Linux-based system. Sudo rights are the necessary privileges for running certain commands in Linux-based OSs. This article has covered three methods one can use to add a user to the list of Sudoers. The first method is for terminal fanatics, the second method is GUI, and the third method is manual. You can decide on any of the methods. We believe you found this informative enough. Keep following FOSSlinux for more.
2 comments
Tried all these options. No success.
To the best of my knowledge Sudoers file should be edited using VISUDO