
Over the years, Pop!_OS has gained popularity among users who want a sleek and customizable desktop environment. Customizing your desktop can help you personalize the workflow and make your computing experience more enjoyable. In this article, we will explore how to customize the Pop!_OS desktop, including modifying the dock, changing the background, customizing the theme, adding extensions, using the tiling and stacking feature, and more. By the end, you’ll have plenty of knowledge and tools to create a desktop environment that suits your needs and preferences. So, without further ado, let’s get started right away.
Installing Pop!_OS
This section will explain how to download and install Pop!_OS on your computer or a virtual machine. To download Pop!_OS, visit the System76 website and click the Download button. You’ll be presented with two options: Intel/AMD and NVIDIA. Choose the appropriate option based on your system’s hardware. If you’re unsure, choose Intel/AMD.
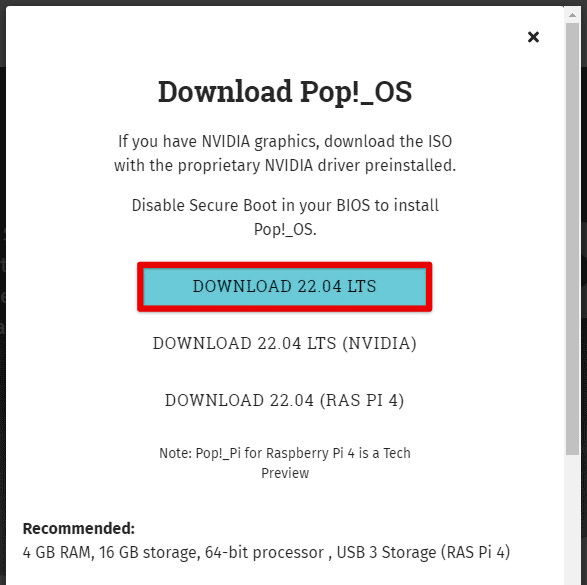
Downloading Pop!_OS
Once you’ve downloaded the Pop!_OS ISO file, create a bootable USB drive. You can use a tool like Etcher to do so. Insert the USB drive, select the Pop!_OS ISO file, and click the Flash button to proceed.
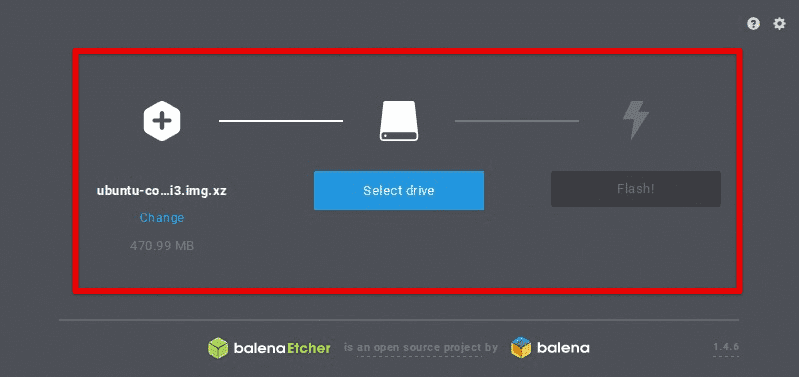
Creating a bootable USB drive with Etcher
After creating the bootable USB drive, restart your computer and boot from the USB drive. This can usually be done by pressing a key during the boot process, such as F12 or Esc. Once you’ve booted from the USB drive, you’ll be presented with the Pop!_OS installer.
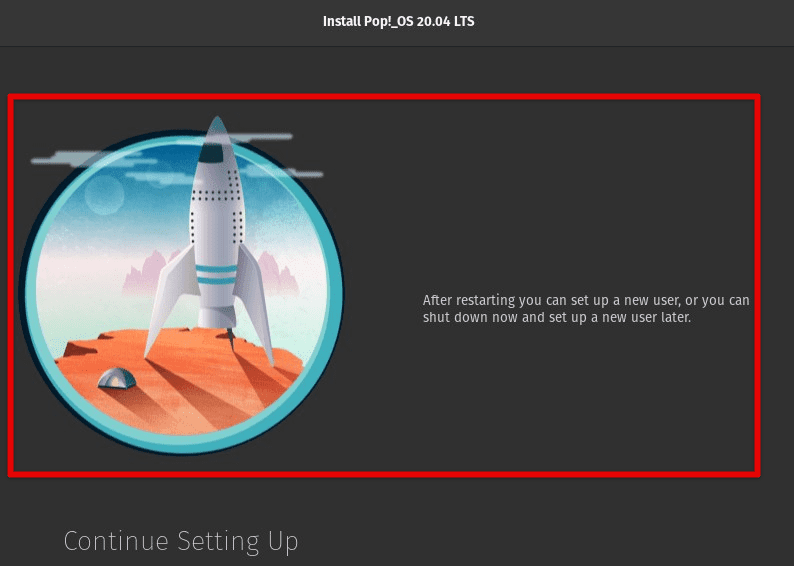
Pop!_OS installer
Follow the on-screen instructions to install Pop!_OS on your computer. You’ll be prompted to choose your language, keyboard layout, and timezone. You’ll also need to create a username and password for your user account.
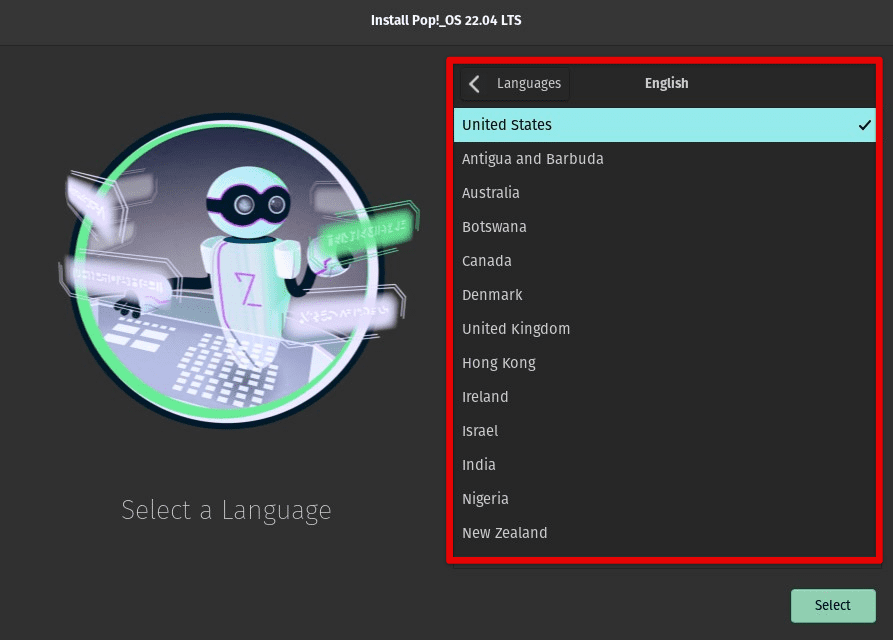
Installing Pop!_OS
If you prefer to install Pop!_OS on a virtual machine, you can use a tool like VirtualBox or VMware. Then, simply a new virtual machine, select the Pop!_OS ISO file, and follow the on-screen instructions to install Pop!_OS on the system.
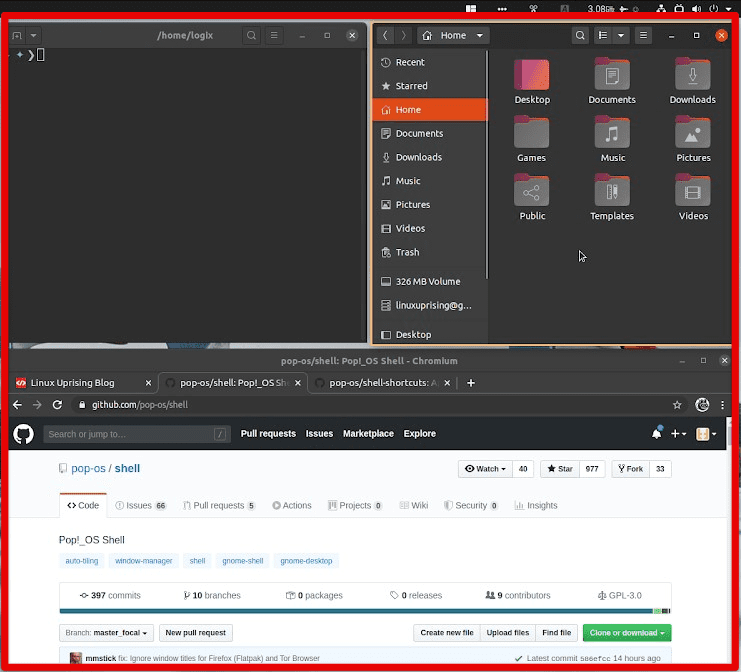
Understanding the desktop environment
To effectively customize the Pop!_OS desktop, it’s essential to understand its layout and components. This section will describe the various elements of the Pop!_OS desktop environment.
Dock: The Dock is at the bottom of the screen and contains icons for your favorite applications. You can launch an application by clicking on its icon in the Dock. You can add or remove applications from the Dock, change their location, and modify their size.
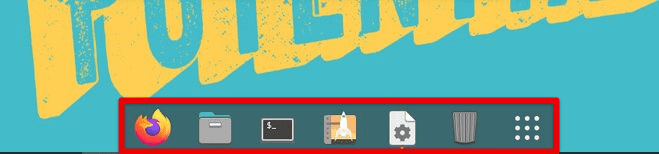
Dock
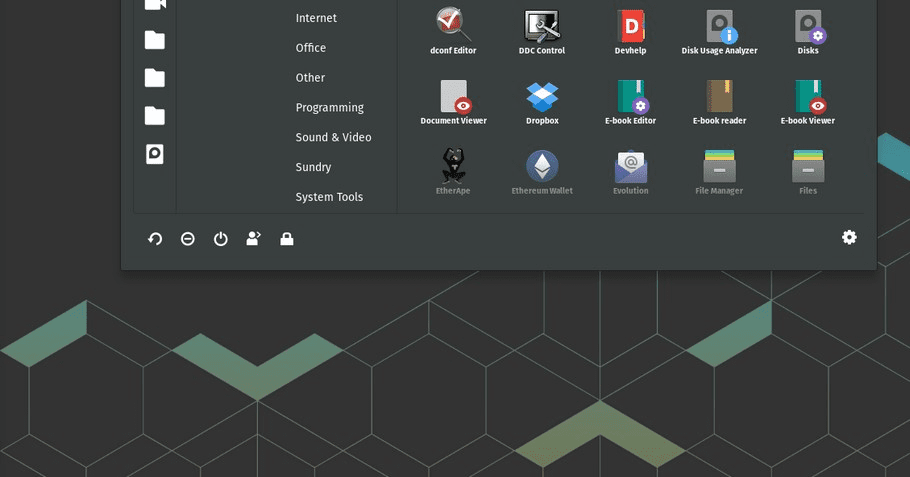
Applications menu: The Applications menu is located in the top left corner of the screen and contains a list of all installed applications. You can open the Applications menu by clicking the “Activities” button or pressing the “Super” key on your keyboard.
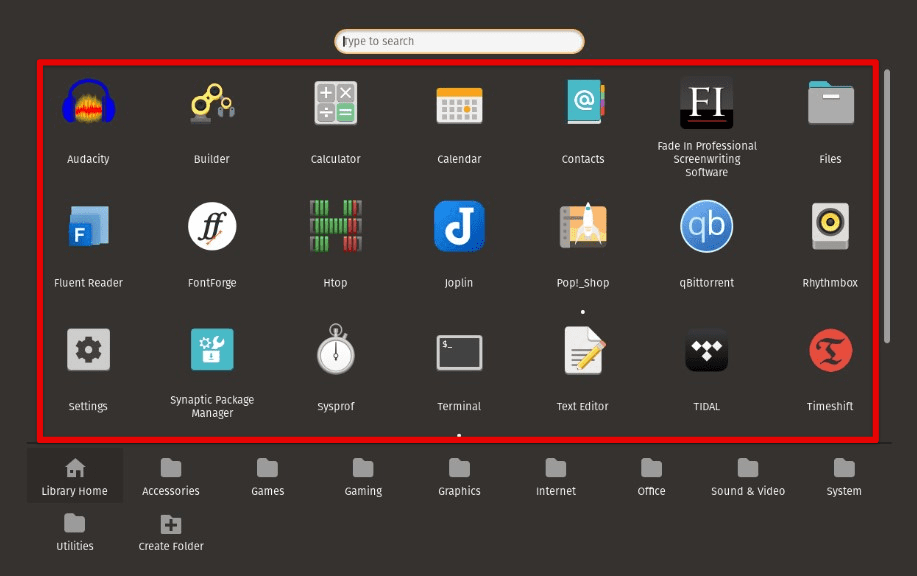
Applications menu
Workspaces: Pop!_OS uses workspaces to help you organize your desktop. By default, Pop!_OS has four workspaces, which can be accessed by pressing the “Super” key and the number key corresponding to the workspace you want to switch to. You can also add or remove workspaces, change their names, and assign specific applications to open in particular workspaces.
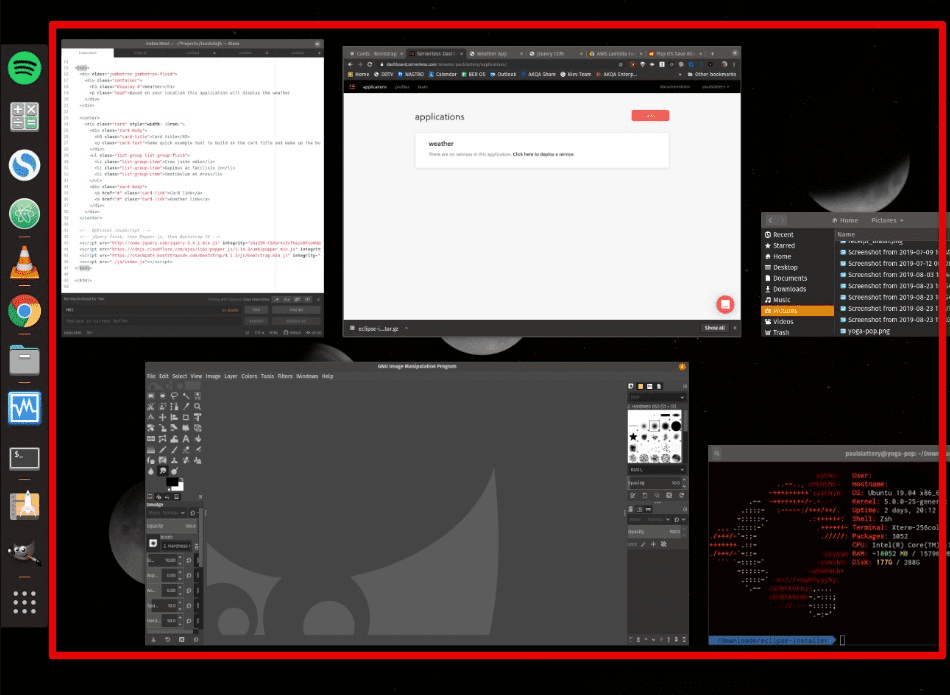
Workspaces
Status area: The Status area is located in the top right corner of the screen and contains various system indicators, including the date and time, volume control, and network status. It can also be relocated to the center of your screen.
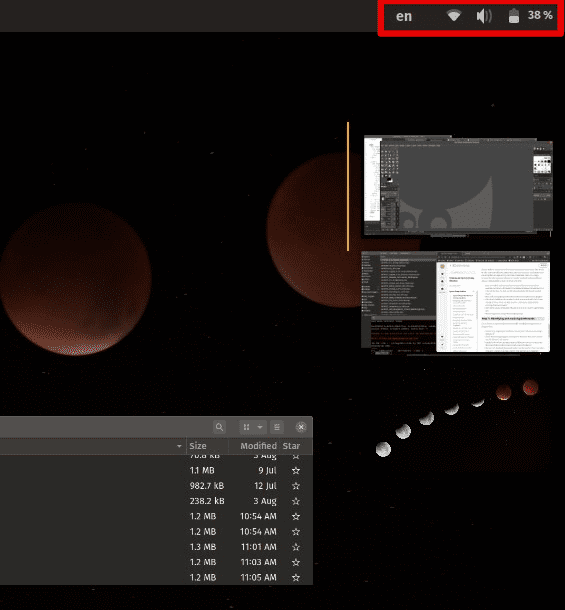
Status area
Window controls: The Window controls are located in the top right corner of each window and allow you to minimize, maximize, and close windows. You can also drag windows to different workspaces or snap them to the left or right side of the screen using keyboard shortcuts.
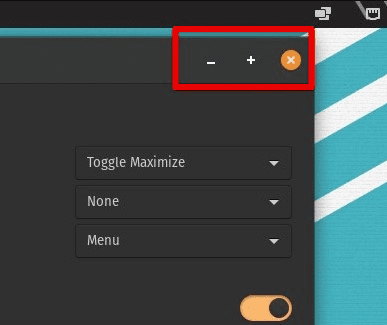
Window controls
Desktop background: The Desktop background is the image or color that appears behind all open windows and applications. You can change the desktop background by right-clicking on the desktop and selecting “Change Background” from the pop-up menu.
Desktop Background
Pop!_OS theme: A system’s theme is the overall look and feel of the desktop environment, including icons, fonts, and window decorations. You can customize the Pop!_OS theme by using the GNOME Tweak Tool or other customization programs.
Pop!_OS theme
Understanding various elements of the Pop!_OS desktop is crucial for effective customization. By understanding the layout and components of its desktop, you’ll be better equipped to make changes and adjustments to create an environment that suits your preferences and requirements.
Customizing Pop!_OS dock
Dock is an essential component of the Pop!_OS desktop, and customizing it is a simple yet effective way to make the system’s desktop environment more efficient and user-friendly.
Adding or removing applications: To add an application to the Dock, open the Applications menu, find the application you want to add, right-click its icon, and select “Add to Favorites”. The application will now appear in the Dock. To remove an application from the Dock, right-click on its icon and choose “Remove from Favorites”.
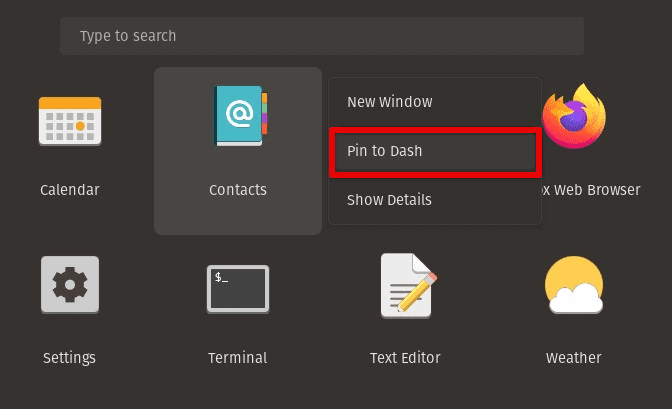
Pinning to Dash
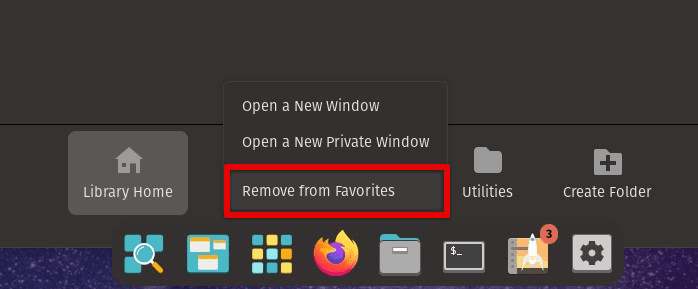
Removing from Favorites
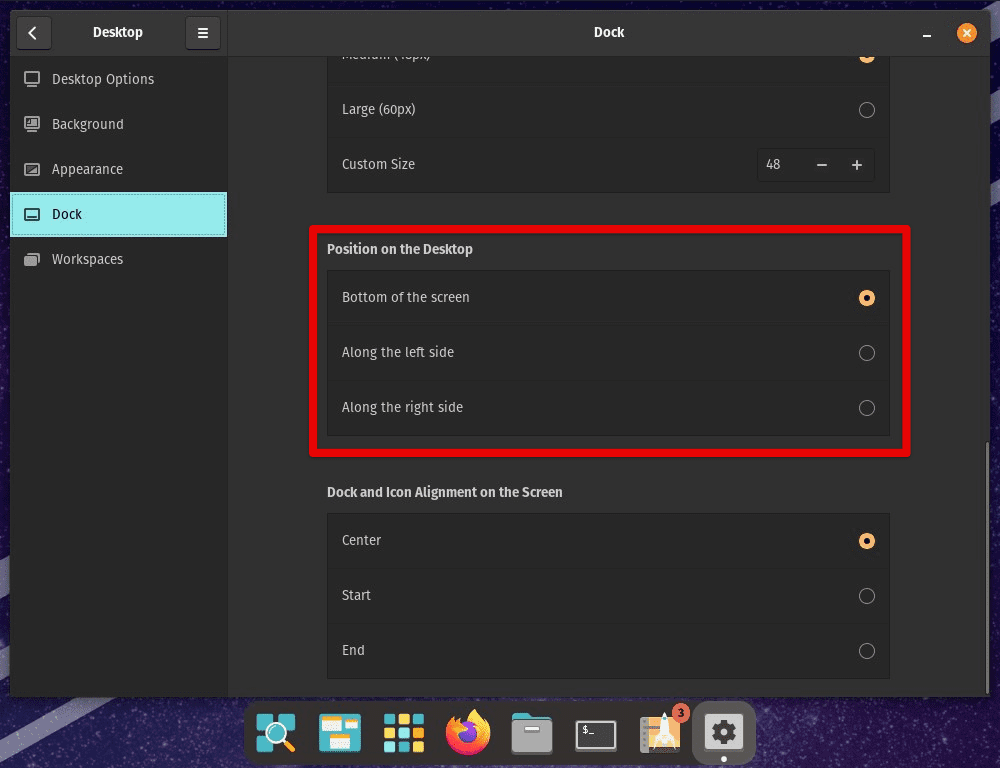
Relocating Dock: The Dock is at the bottom of the screen by default. However, you can move it to the left or right side of the screen if you prefer. To change the Dock’s location, open the GNOME Tweak Tool, go to the “Extensions” tab, and click the gear icon next to “Dash to Dock”. From there, you can change the position of the Dock by selecting “Left” or “Right” from the “Position on screen” drop-down menu.
Relocating Dock
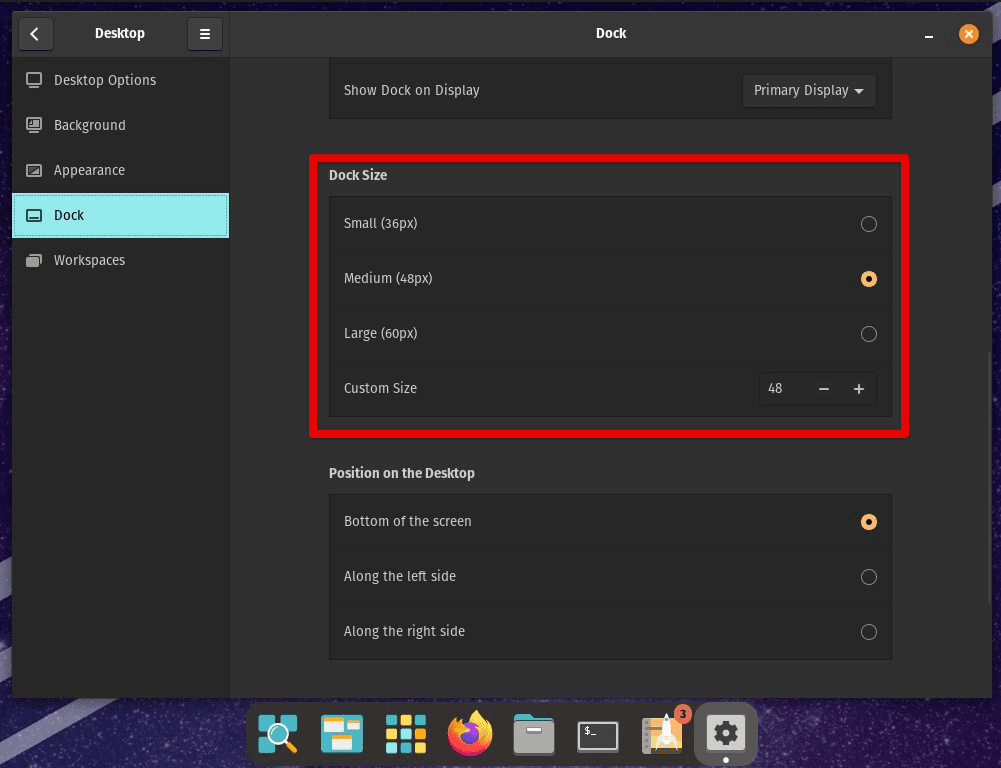
Modifying Dock’s size: You can also modify the size of the Dock to make it larger or smaller. To do so, open the GNOME Tweak Tool, go to the “Extensions” tab, and click the gear icon next to “Dash to Dock”. From there, adjust the size of the Dock by dragging the “Icon size” slider to the left or right.
Modifying Dock size
Changing the Dock’s appearance: The Dock’s appearance can be customized to suit your preferences. To change the appearance of the Dock, open the GNOME Tweak Tool, go to the “Extensions” tab, and click on the gear icon next to “Dash to Dock”. Here, you can change the Dock transparency (opacity), adjust its animation settings, and modify some other aspects.
Modifying the desktop background
Modifying the desktop background gives your system a fresh look and feel. This section will explain how to change the desktop background and choose a new image or color.
Changing the background image: To change the background image, right-click on the desktop and select “Change Background” from the pop-up menu. This will open the Background settings window, where you can choose from a variety of pre-installed wallpapers or select an image from your own collection. To choose a new wallpaper, click on the image you want to use, and it will immediately replace the current background.

Changing the background image
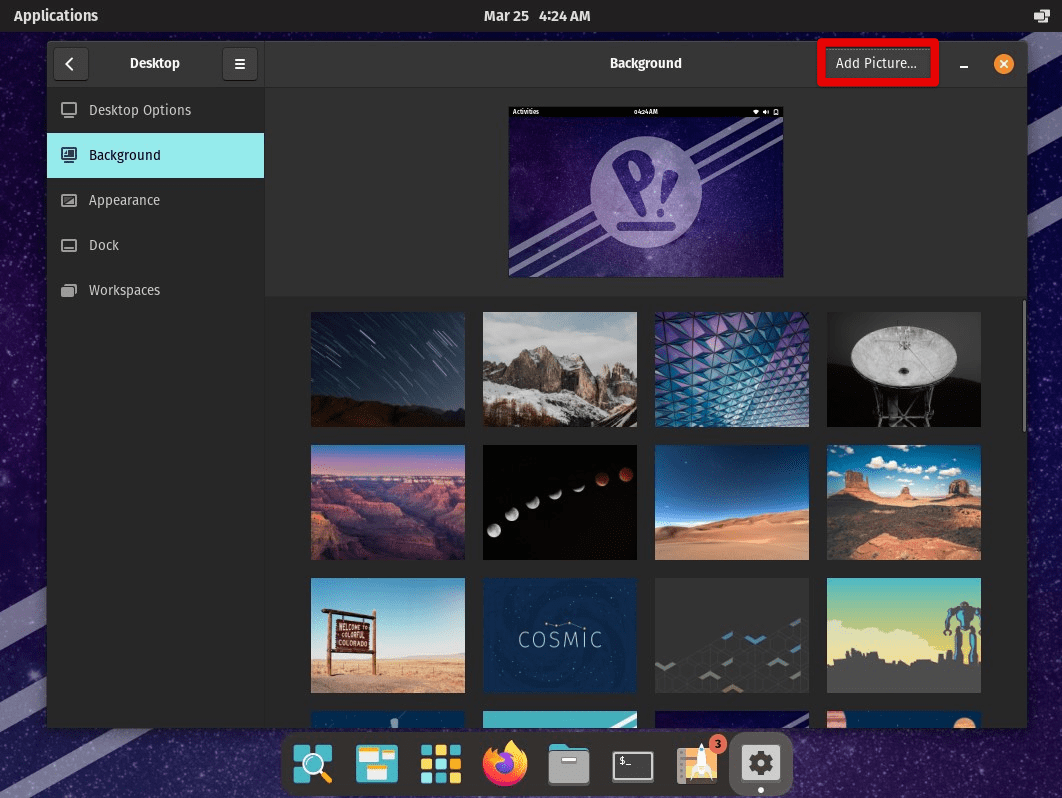
Using a custom image: If you want to use a custom image as your desktop background, click on the “Add picture” button in the Background settings window. This will allow you to select an image from your computer or an external storage device.
Using a custom image
Choosing a solid color: Select one from the Background settings window if you prefer a solid color as your desktop background. Next, click on the “Colors” tab, and you’ll see various pre-selected colors to choose from. If you don’t know the color you want, create a custom palette by clicking the “+” button and selecting “Custom Color”.
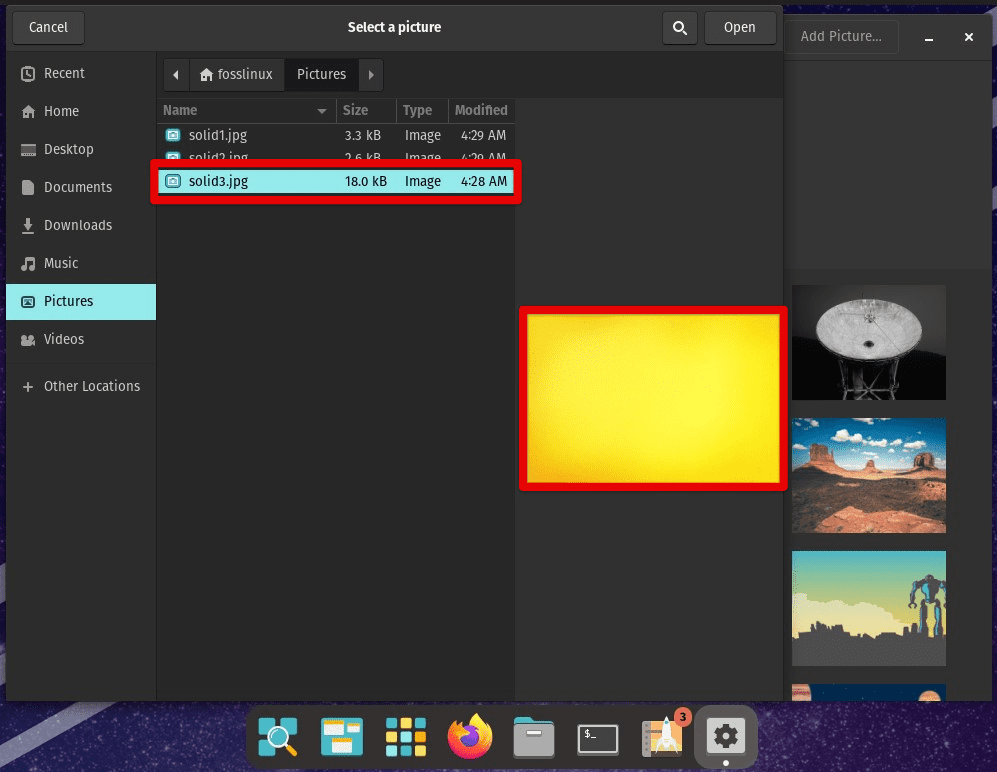
Choosing a solid color
Additional options: In the Background settings window, you can adjust the background settings to display a slideshow of images, change the image position, or enable automatic background changes based on the time of the day.
Customizing themes
Customizing the theme in Pop!_OS can significantly change your desktop environment’s overall look and feel, including the window borders, icons, fonts, and a lot more.
Using pre-installed themes: Pop!_OS has a set of pre-installed themes that can be easily integrated. To access the theme settings, open the GNOME Tweaks tool by typing “tweaks” in the application launcher or pressing the super key and typing “tweaks”. Once open, go to the “Appearance” tab, and click on the drop-down menu next to “Applications”. From there, choose from various pre-installed themes, including dark and light themes and themes with different color schemes.
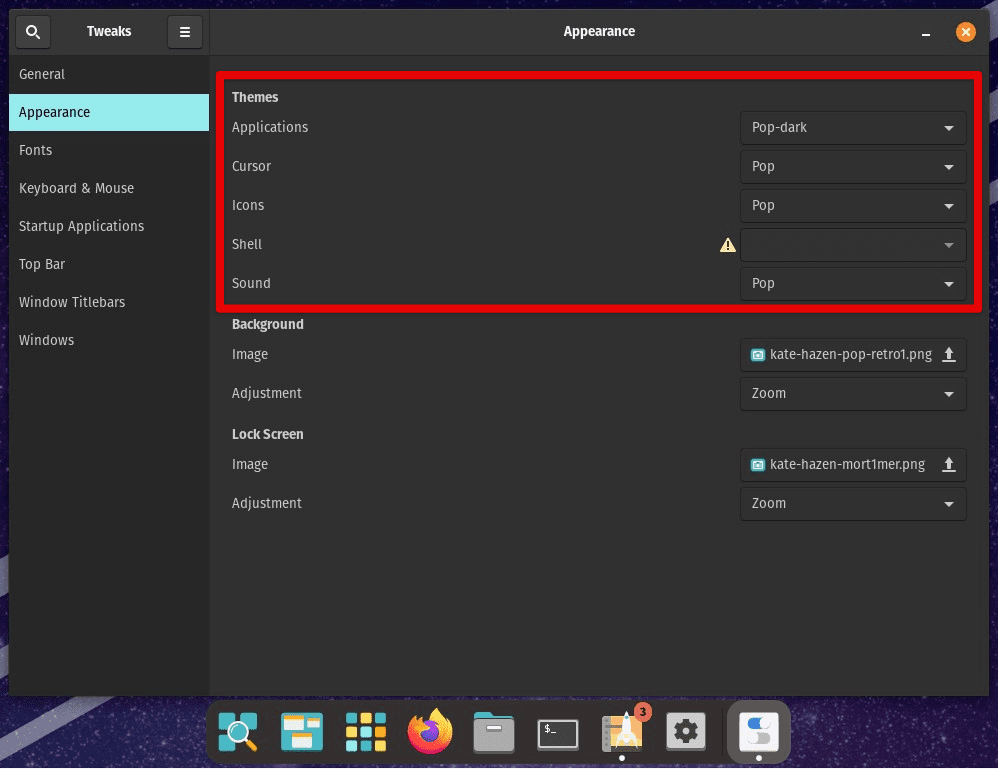
Using pre-installed themes
Installing new themes: If you want to use a custom theme not included in Pop!_OS by default, install it from the GNOME Look website or the Pop!_OS Store. To install a new theme from the Pop!_OS Store, open the “Pop!_Shop” application and search for “themes”. You’ll find various them you can install with just a few clicks. To install a new theme from the GNOME Look website, download the theme files and extract them to the ~/.themes directory in your home folder. You may need to create this directory if it doesn’t already exist.

Installing new themes
Customizing icons To do this, go to the GNOME Tweaks tool, select the “Appearance” tab, and click on the drop-down menu next to “Icons”. Next, choose from the pre-installed icon themes or install a new icon pack using the earlier method.
Customizing icons
Customizing fonts: Go to the GNOME Tweaks tool, select the “Fonts” tab, and choose the font you want to use for various parts or sections of the desktop environment, such as window titles, interfaces, and documents.
Adding and removing extensions
One of the great features of Pop!_OS is its ability to add extensions to the GNOME desktop environment, which can add new functionality or change the desktop’s appearance.
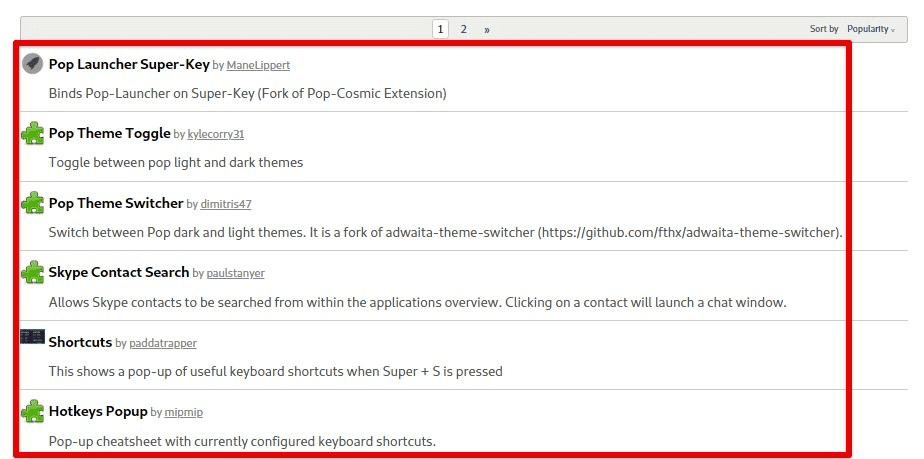
Installing extensions: The easiest way to install extensions is through the GNOME Extensions website. To get started, open this link in the Firefox web browser. From there, you can browse a variety of extensions and install them with just a few clicks.
Installing extensions
To install an extension, click on the extension you want to add, and then click on the “On/Off” switch to turn it on. You may need to install a browser extension to enable the installation of extensions as well. Follow the prompts to install the required browser extension if needed.
Removing extensions: To remove an extension, return to the GNOME Extensions website, click on the extension you want to remove, and then click on the “On/Off” switch to turn it off. This will remove the extension from your system.
Removing extensions
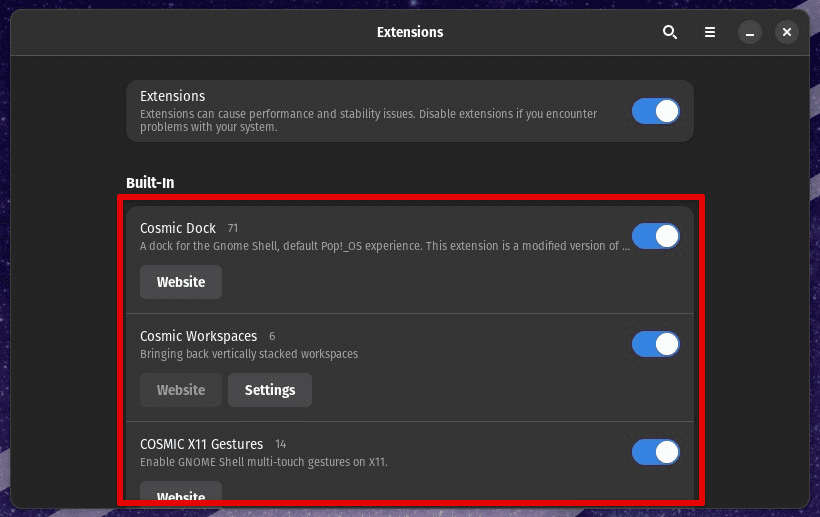
Enabling and disabling extensions: Once you’ve installed an extension, you may want to enable or disable it at certain times. Open the GNOME Tweaks tool, select the “Extensions” tab, and see a list of all the installed extensions. From there, you can enable or disable specific extensions by toggling the switch right next to each one of those entries.
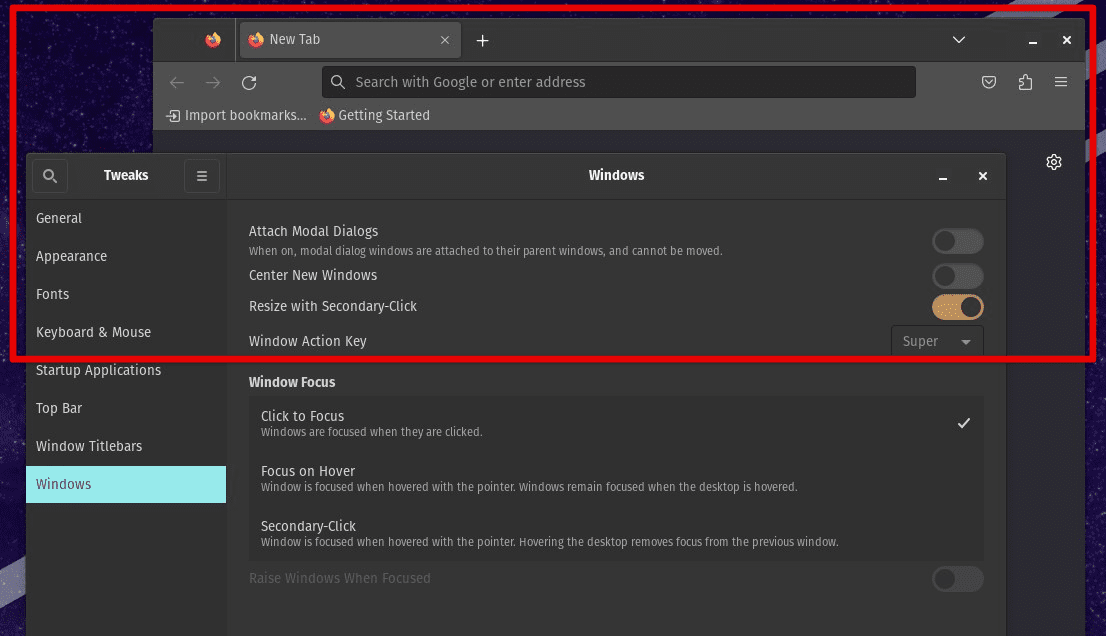
Tiling and stacking
Pop!_OS has a built-in tiling and stacking feature that lets you quickly arrange windows on your screen. To enable tiling and stacking, first, open the GNOME Tweaks tool. In the “Windows” tab, you can allow the “Tile windows” and “Cycle through windows on all workspaces” options.
Once tiling and stacking have been enabled, you can quickly arrange windows on your screen. To tile a window, drag it to the left or right edge of the screen, and it will automatically resize to take up half of the screen. You can then drag another window to the opposite side of the screen to tile it alongside the first window.
Tiling windows
To stack windows, drag one window over another, and they will stack on top of each other. You can switch between the stacked windows using the “Cycle through windows” keyboard shortcut.
Stacking windows
You can install a GNOME Shell extension called “Pop Shell” to customize the tiling and stacking behavior. Pop Shell adds additional tiling features, such as resizing windows using keyboard shortcuts and moving windows between workspaces.
Customizing keyboard shortcuts
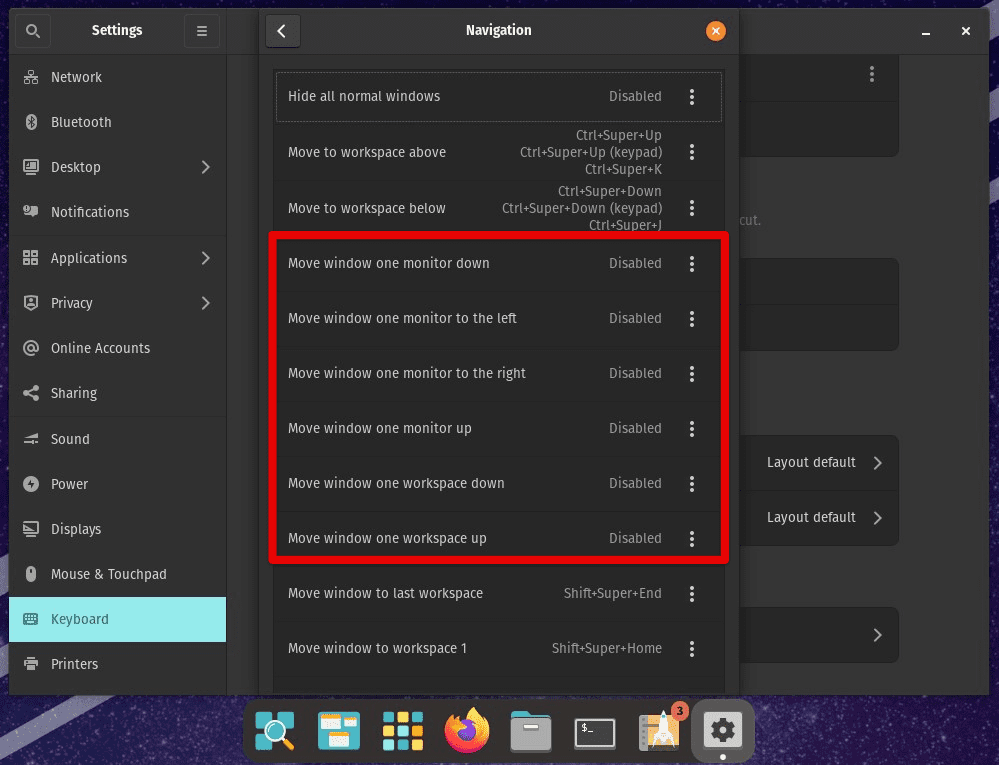
Customizing keyboard shortcuts is an essential part of any desktop customization process. To access the keyboard settings in Pop!_OS, first, open the “Settings” application. Then click on the “Keyboard Shortcuts” tab on the left-hand side of the window.
Customizing existing shortcuts: For customizing an existing shortcut, click on the shortcut you want to modify and press the new key combination you would like to be assigned to it.
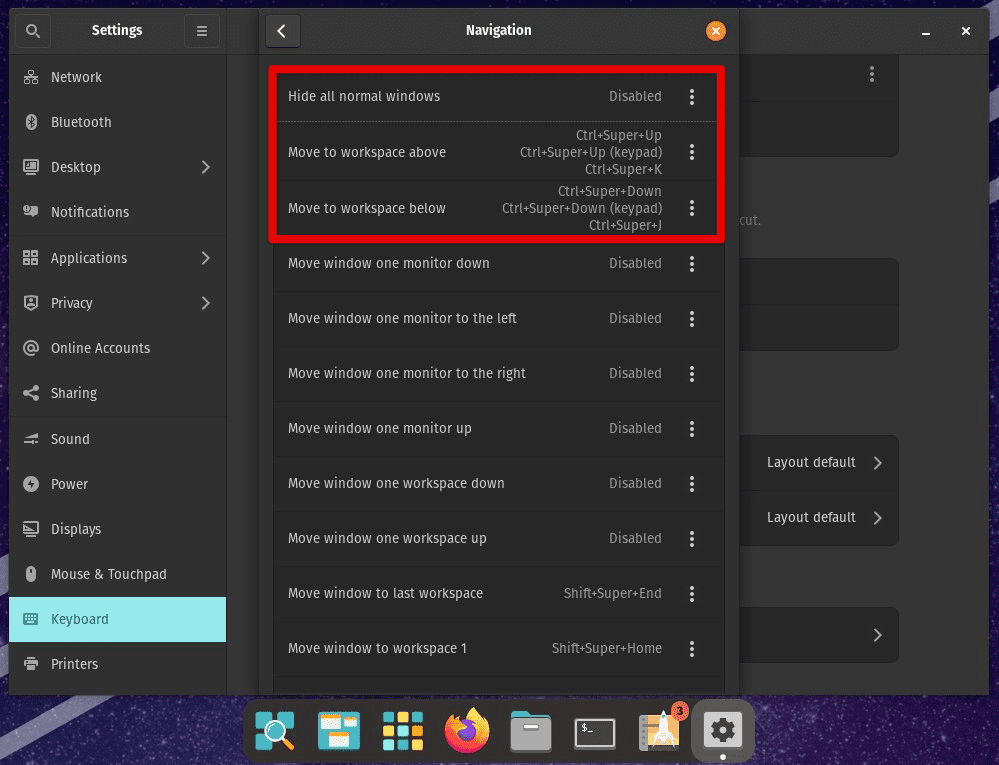
Customizing existing shortcuts
Creating new shortcuts: To create a new shortcut, click on the “+” button in the window’s top right corner. A new dialog box will appear, asking you to enter the shortcut’s name and key combination. Once you’ve entered this information, click “Add” to make this a part of the system’s shortcuts.
Removing shortcuts: To remove a shortcut, click on the shortcut you want to remove and press the “Backspace” key on your keyboard. Doing so instantly removes it from that list.
Removing shortcuts
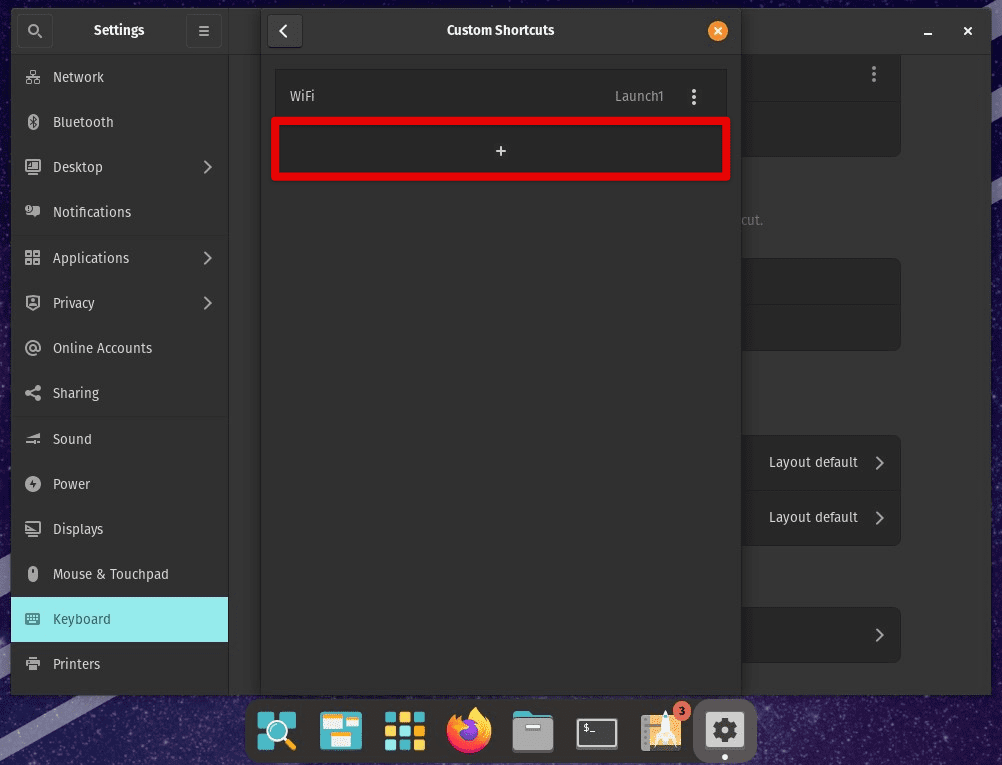
Customizing application-specific shortcuts: If you want to customize shortcuts for a specific application, click on the “Custom Shortcuts” button at the bottom of the window and then click on the “+” button to create a new custom shortcut. In the “Command” field, enter the command you want to execute and assign a key combination.
Conclusion
Customizing the Pop!_OS desktop can be a fun and rewarding experience. With the ability to modify themes, keyboard shortcuts, and even the behavior of windows, you can create an environment perfectly tailed for your unique needs. By following the steps outlined in this article, you should now understand how to customize various aspects of the Pop!_OS desktop. Remember, the possibilities are endless, so don’t be afraid to experiment and find what works best for you.
Have you ever worked in a Linux or Unix-based environment and used the command line interface to interact with your system? If so, then you’ve likely used Bash, a powerful shell. Learn how to customize Bash with tips and tricks for a personalized environment.
1 comment
There is no “Colours” tab in the background settings. The screenshot in the post clearly shows you’ve downloaded/created some solid colour jpegs which you’ve placed in the Pictures folder, and you’re picking them from there as if they full photos. There’s also no options out of the box to change to a slideshow, change positioning etc. Some options like positioning are in the Gnome Tweak tools you mention in other parts of the post, but the solid colours are not. Very confusing.