
Samba is a free, open-source tool suite that permits us to share files and printers between Linux and Windows workstations. Because most Linux file explorers include samba compatibility, a Samba share is quite simple to set up and use. However, in other cases, we can mount a Samba share at startup, just like a regular filesystem on a given mount point.
SMB (Samba) is a popular open-source networking program that allows workstations running Unix or Linux to share network resources from Windows networks, such as files and printers. It is not confined to Windows; we may install and use it on Unix / Linux-based servers or desktops to share resources across the network. Samba is built on the Common Internet File System (CIFS, an open version of SMB) and common protocols Server Message Block (SMB). The term “Samba” is just a nickname for “SMB.”
This article will illustrate how to install and configure the SMB server. After that, we shall focus on mounting a Samba shared directory on Linux using cifs-utils.
Samba Server installation and configuration on Linux Mint
Follow the steps provided here to complete the installation and configuration of the Samba Server on your Linux Mint:
Step 1: Perform a system update.
Although not required, use the system update line of code to rebuild the repo cache and ensure that all system-installed packages are up to date.
sudo apt update
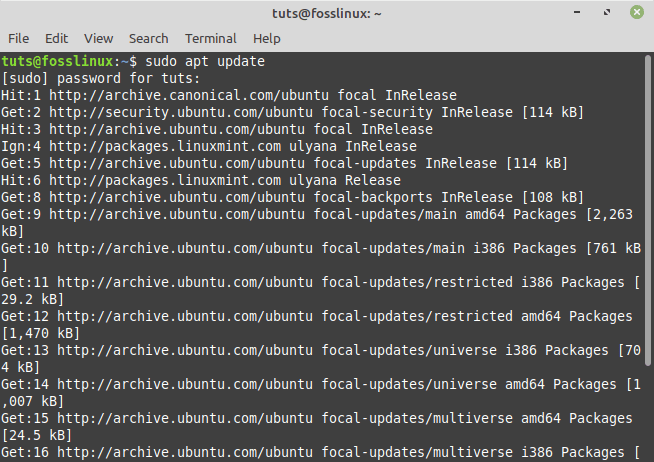
Update Linux Mint repo cache
Step 2: Samba installation in Linux Mint
Next, utilize the APT package manager in your command prompt to install Samba on your Linux Mint. The packages required to set it up are already in the system repository, so we don’t need to install anything further.
sudo apt install samba
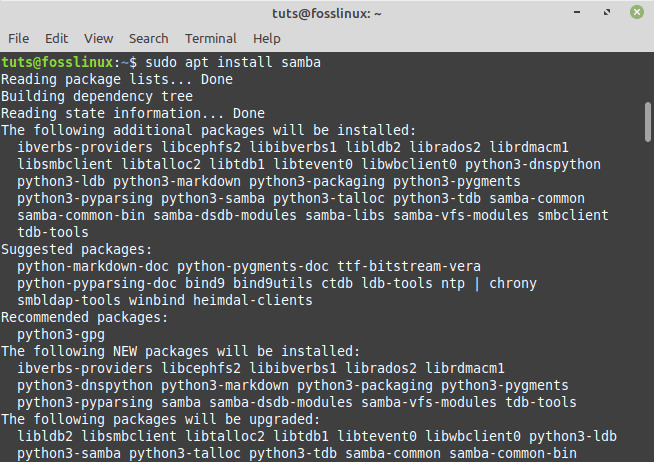
Install Samba
Once it has been installed, run the command below to ascertain that the service is up and running:
sudo systemctl status smbd
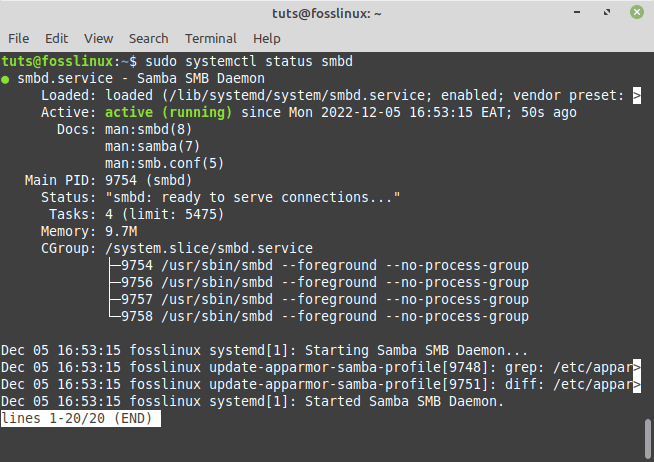
Check the Samba server status
If the service is not active, execute the following line of code:
sudo systemctl --enable now smbd
Step 3: Allow Samba across the Linux Mint Firewall
To connect to and access shared files using SMB protocol, we must whitelist and enable access to its service from outside the machine. As a result, we will allow it in the firewall.
sudo ufw allow samba
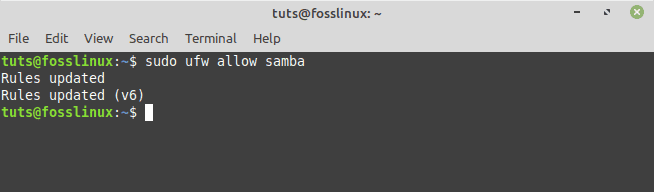
Allow Samba across the firewall
Step 4: Include your user in the Samba group.
Allow the current System user to access all files and folders shared under it by adding it to the SambaShare group. To do so, execute the following line of code:
sudo usermod -aG sambashare $USER
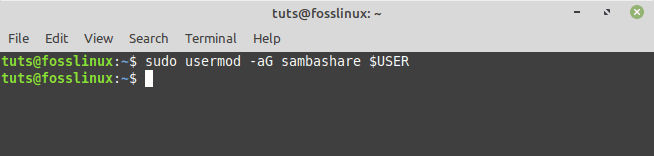
Add user to Sambashare group
Next, set the share password: This should be distinct from your system password.
sudo smbpasswd -a $USER
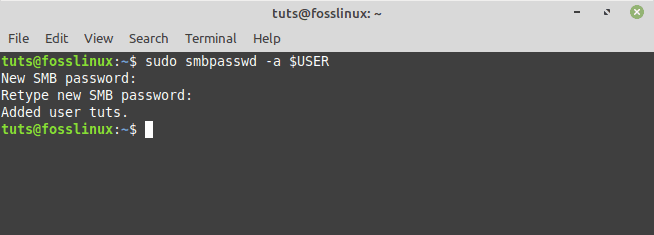
Set SambaShare password
Note that $USER refers to your current user; if you wish to set a different user, replace $USER with the user’s name. Furthermore, the file or folder you want to share must be available to that specific user.
Alternatively, to add more users to the SAMBA group, use the following command:
sudo usermod -aG sambashare your-user
To set a password, execute the following line of code:
sudo smbpasswd -a your-user
That’s it. SMB (Samba) has been installed and configured correctly on our Linux Mint OS. To test it out, we shall try the following:
Share a Linux Mint folder
Assuming I want to share the “Shared” folder or any other folder on my Linux Mint that my current user owns. Navigate to that folder, right-click it, and pick the “Sharing options” tab.
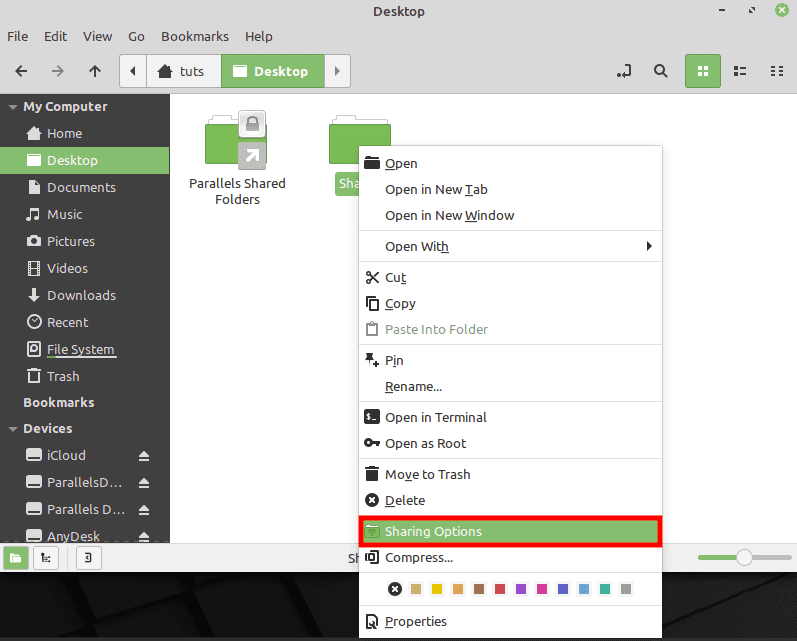
Click sharing option
Note: Occasionally, you might realize that the “Share this folder” option has been toggled off. To enable sharing, toggle on that option and check the “Allow others to create and delete files in this folder”. Once you are done, input the shared folder name and comment if need be and click the “Create share” button.
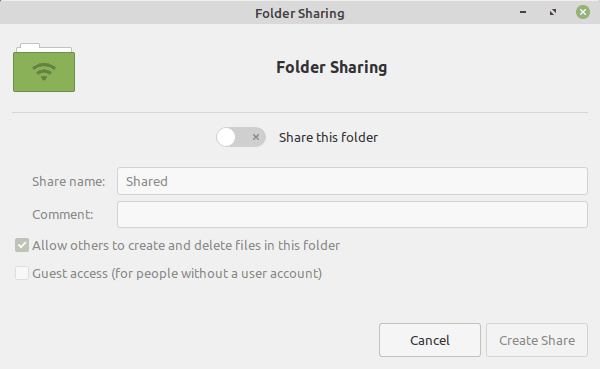
Turn on the share folder toggle
Access the shared folder on Linux or Windows
We may now mount the Linux Mint shared file/folder on other Windows or Linux computers in the same network or domain.
How to access the folder on Windows 10/8/7/Vista/XP
Select the Add network location icon from the top menu when you open My Computer or This PC.
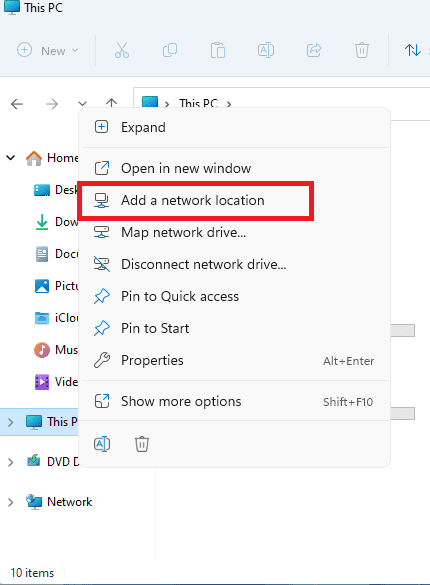
Add a network
Add your Linux Mint server address and shared folder path. For example, if we shared the Pictures folder, the path would be:
\\10.211.55.4\Shared
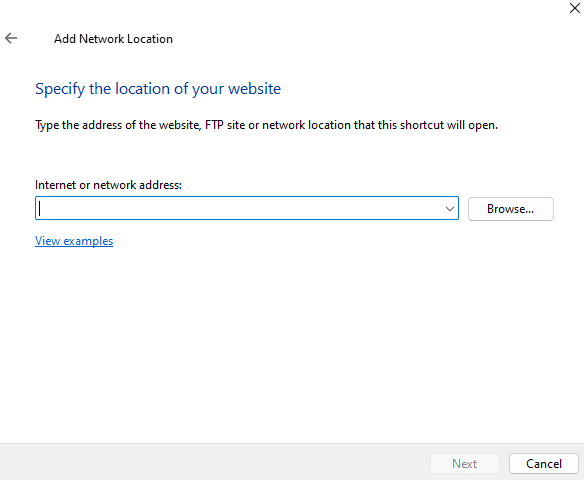
Input your network address
Enter your Samba username and password.
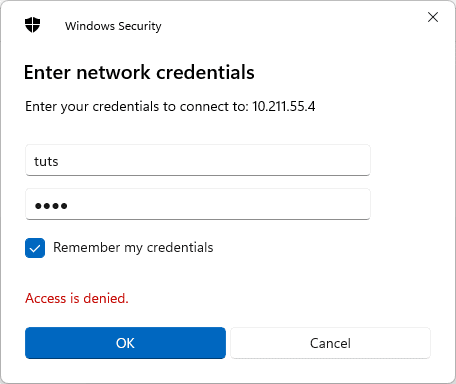
Enter network credentials
The system will provide an arbitrary designation for your shared folder; however, you should alter it to something memorable.
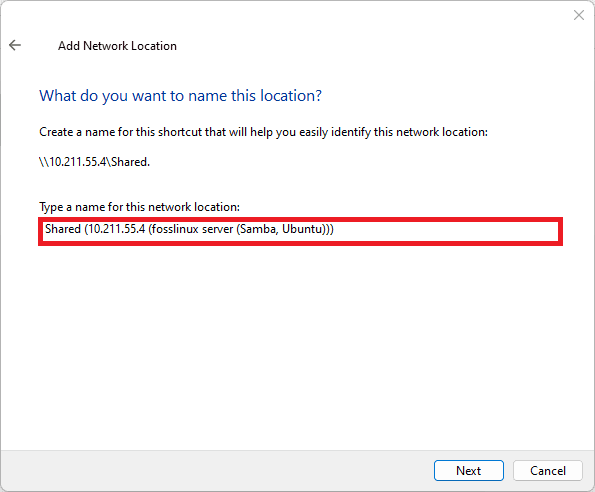
Change the name of the network location
You now have access to the shared folder with read and write privileges.
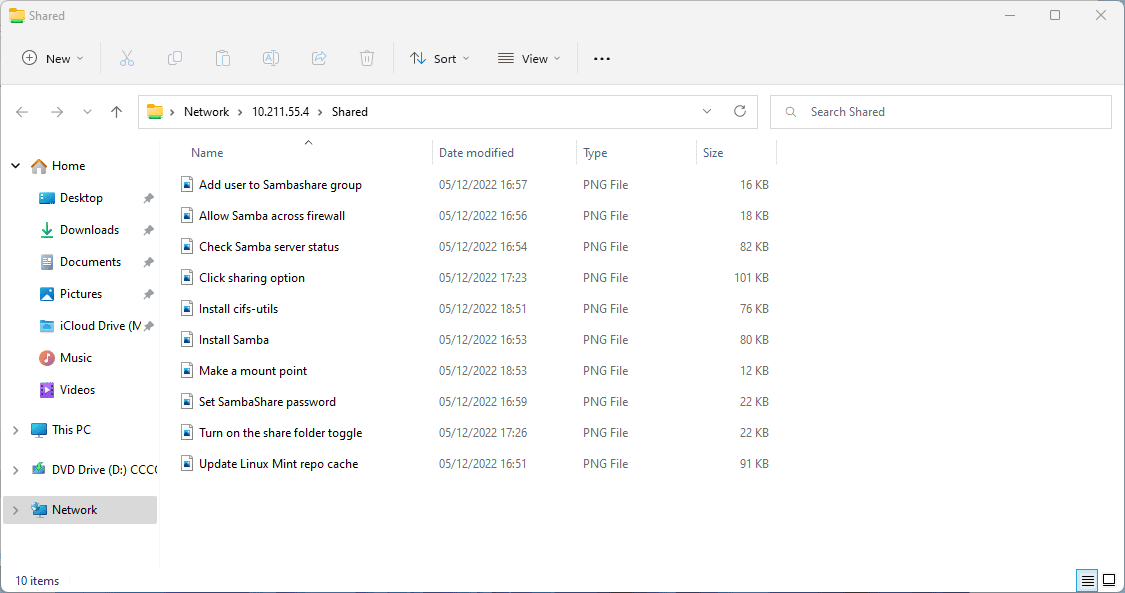
Shared folder
How to access the folder on Linux platforms like Ubuntu
Depending on the desktop environment, various Linux distributions may have different locations where the Samba server should be connected.
Here, we provide a GNOME-based Ubuntu sample.
- Launch File Manager
- Choose Other Locations from the list on the window’s right side.
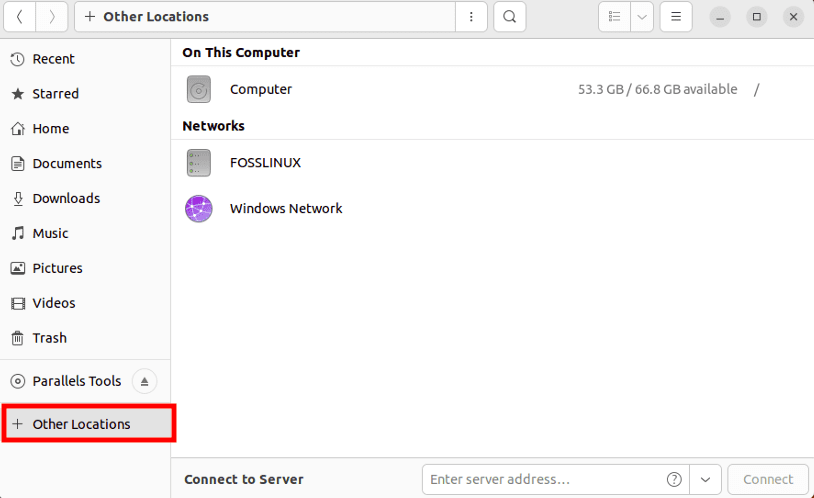
Choose Other Locations
- Choose “Connect Server” in the box at the bottom and type: smb://server-ip/shared-folder-path
smb://server-ip/shared-folder-path
Note: Input the path we previously used
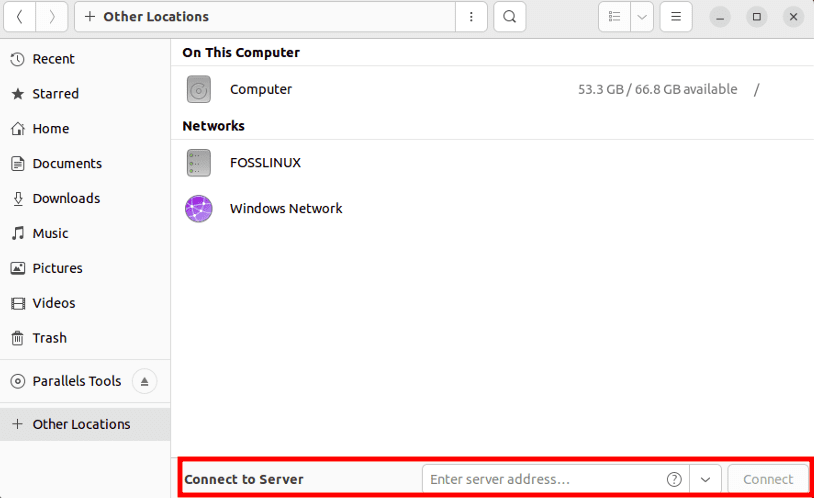
Connect to server
- Select Connect.
- Enter your username and password after selecting Registered User.
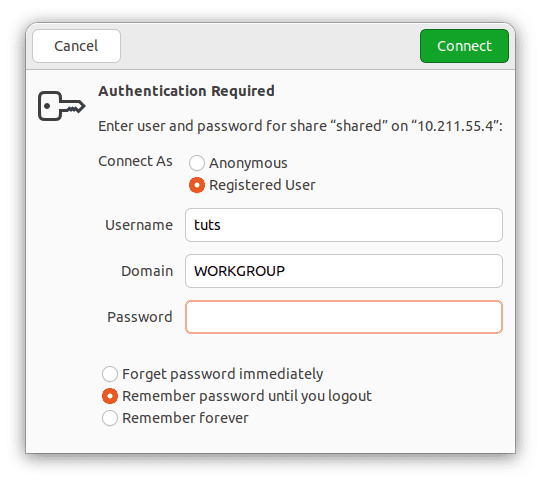
Input network credentials
How to create a Linux Mint Sambashare user
The actions listed below should be followed if you wish to create a new user that can only access the folder you want to share.
To create a user, execute the following line of code:
sudo useradd new-user
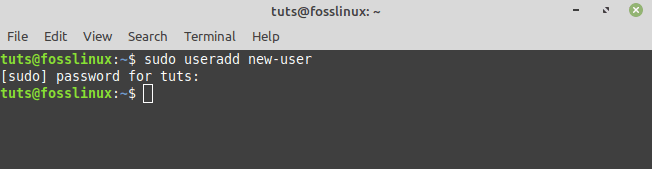
Create new user
To add an existing user to a Sambashare group:
sudo usermod -aG new-user sambashare
Change the folder privileges of a shared folder to write and read for all users so that our new users can access it.
sudo chmod 777 folder-path
Example:
To access the shared folder, your code should be similar to this one:
sudo chmod 777 '/home/tuts/Desktop/Shared'
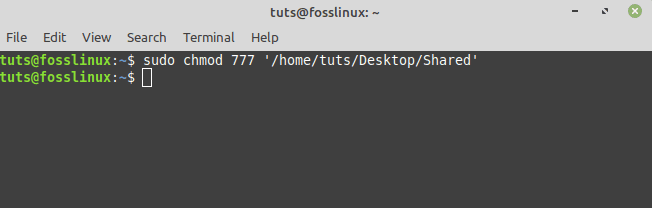
Allow read and write permissions
You may now access the shared file/folder using the new user and password.
Now that we have installed and configured SMB (Samba) on our Linux Mint let us proceed and learn how to mount SMB Shares.
How to mount SMB share on Linux Mint
Follow this guide keenly to learn how to mount SMB shares on Linux Mint.
Installing cifs-utils
The cifs-utils bundle, available in the repositories of all major Linux distributions, includes a set of utilities for managing Samba-shared folders as if they were ordinary Linux filesystems. Before using this software bundle, we need to install it, and I will illustrate how to install it on different Linux distros.
How to install cifs-utils on Fedora
All required to install the program on Fedora is to run the following command:
sudo dnf install cifs-utils
How to install cifs-utils on Debian
The most straightforward approach to installing packages on Debian and its numerous variants, such as Ubuntu and Linux Mint, is to use the apt wrapper, which facilitates the usage of lower-level utilities such as apt-get:
To install cifs-utils on Debian, execute this line of code:
sudo apt-get install cifs-utils
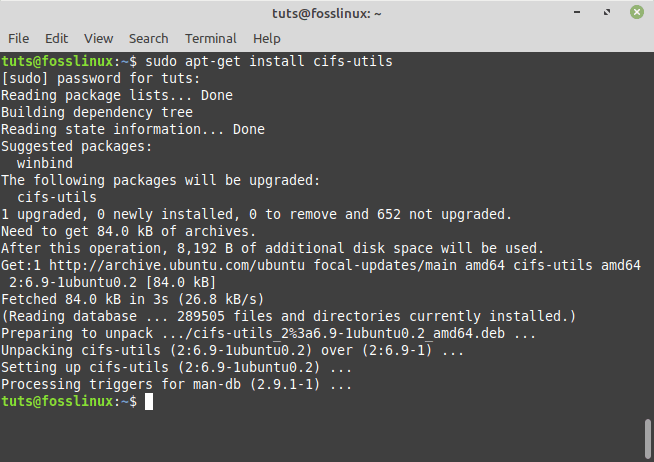
Install cifs-utils
How to install cifs-utils on Archlinux
The pacman package manager may be used to accomplish the installation on Archlinux. The package cifs-utils is available in the Extra repository:
To install the application on Archlinux, run this line of code:
sudo pacman -Sy cifs-utils
Now that cifts-utils has been successfully installed let us check how it can mount the SMB share on Linux Mint. To do so, follow the steps provided herein:
Step 1: Make a mountpoint
To mount the Samba share at startup, we first need to build a mountpoint on our local filesystem. For the sake of this essay, we shall construct and use the “/mnt/samba” directory. We may use the following command to create the directory:
sudo mkdir /mnt/samba
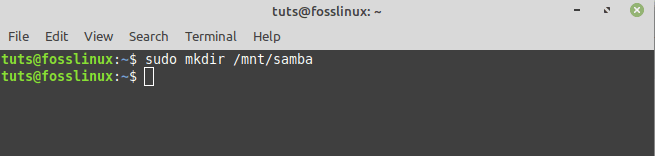
Make a mount point
Our mountpoint is now complete. Next, we need to add a Samba share entry to the /etc/fstab file.
Step 2: Add an entry to /etc/fstab
The /etc/fstab file on any Linux system includes the instructions for mounting filesystems during startup. A Samba share can be protected by username/password credentials or available as a guest user, depending on how it is configured on the server. This element influences the mount settings we must use in /etc/fstab.
How to create a password-protected Samba share entry to /etc/fstab
In most circumstances, Samba shares are password-protected, and access to them requires a login and password. We don’t want those credentials to be requested interactively since we need to automount the Samba share at startup. We can give credentials without interaction in two methods, one significantly more “secure” than the other.
Method 1: Less secure method
The first and less secure method is to set the Samba share’s username and password as values of the special cifs mount options in the /etc/fstab file. Let’s look at an example. Here’s how our fstab entry would look:
sudo -s
nano /etc/fstab
//10.211.55.4/Shared /mnt/samba cifs username=tuts,password=0456 0 0
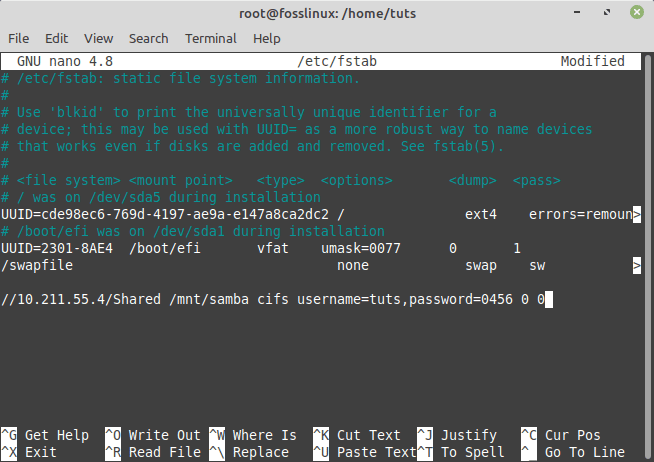
Less secure method to automount samba
Code breakdown:
We specify the filesystem to mount in the first input field. When working with ordinary filesystems, we usually refer to them by their UUID, LABEL, or path. In this scenario, we must specify the IP address of the Samba server as well as the name of the Samba share.
The file system mountpoint is specified in the second field of the entry. Furthermore, the third column is required to identify the filesystem type. Literally, “cifs” must be used as a value in the third field.
The fourth field specifies mount options: as previously stated, we utilized the username and password options to transmit our Samba share credentials here. Because everyone in the system may view the file, this method of specifying credentials has apparent problems. Even if the file had more restrictive permissions, the mount options would be accessible in the mount command output, which yields a list of the mounted filesystems and the associated mount settings when executed without any parameters.
The fstab entry’s last two fields are used to define if the filesystem should be dumped and in what sequence the filesystem should be examined.
Method 2: More secure method
The second and slightly more secure method is to save the Samba credentials for the shared directory in a separate file and then use the path as the credential mount option value. For the sake of this tutorial, we’ll name the file /root/smbcredentials. This is what we will write in our file:
user=mysambauser

password=mysambapassword
After we save the file, we can change its permissions so that it is only readable by its owner. This is the case with the root user. However, this may be unnecessary because the file is in the /root directory owned by the root user and the root group by default. It has authorizations set to 550, so only the root can access it and list its contents. Now that we have the file, let’s edit our fstab entry:
//10.211.55.4/Shared /mnt/samba cifs credentials=/root/smbcredentials 0 0
Once we save the item in the fstab file, we can simply run the following line of code to ensure that the Samba share is appropriately mounted.
sudo mount -a
The Samba share must be mounted on “/mnt/samba” after we run the command above. However, we can only read the content of the directory. If we try to build, alter, or do away with a file inside the share as an unprivileged user, we get an error message. Why is this? If you list the directory contents and investigate the directory permissions, you will notice that the root user only holds them due to the uid and gid cifs mount settings.
When the Samba server does not offer ownership information, the uid and gid mount options are used to set the uid and gid of the files in the shared directory on the client system. The default value for these parameters is 0, which corresponds to the root user’s uid and gid. How do we address this issue? Setting the value of these selections to the uid and gid of the local user who should be permitted to write on the share is one approach (it goes without saying that writing should be permitted in the share config on the server with the read-only option set to “no”). Assuming that the uid and main gid of the user who should be permitted to write to the shared directory are both 100, we would write:
//10.211.55.4/Shared /mnt/samba cifs credentials=/root/smbcredentials,uid=100,gid=1000 0 0
Another alternative is to use the noperm cifs option. When this option is selected, the client, in this case, our local system, do not run permission checks on the Samba share since permissions are enforced only by the server side. This addresses the problem but has the disadvantage of possibly enabling all local system users to write to the share after it is mounted:
//10.211.55.4/Shared /mnt/samba cifs credentials=/root/smbcredentials,noperm 0 0
Making an entry for a guest-permitted Samba share
Sometimes, the samba server can be configured to provide anonymous access to a shared folder. How do we mount such a share during boot? Before we proceed, it is essential to note that when a Samba share is configured to enable access as unauthenticated users, it is a good practice to limit access to those users and not utilize the share with authentication, as mentioned in the official Samba manual. Setting the guest-only option to “yes” in the share settings will compel all users to access the share using the guest account, which is mapped to the “nobody” UNIX user by default. According to the documentation, the following is an example of a guest-accessible share:
[Shared]

# This share permitts anonymous (guest) access without authentication!

path = /srv/samba/data

read-only = no

guest ok = yes

guest only = yes
Assuming we have this configuration on the server and our client user is still recognized by uid and gid 100, our fstab line becomes:
//10.211.55.4/Shared /mnt/samba cifs uid=100,gid=100,guest 0 0
We utilized a new option, as you can see: guest. When we select this option, we will not be prompted for a password. That should be sufficient to mount a Samba share as an anonymous user.
That’s it. You can now mount SMB shares on your Linux Mint OS.
Conclusion
This in-depth article covered the installation of SMB (Samba) and how it can be used to share files and folders between Windows and Linux PCs. This article will suit you if you intend to share your files using the SMB utility tool. In addition to installing and configuring SMB on Linux Mint, we comprehensively covered how to mount SMB share on Linux Mint. We also went a mile further and covered how to mount the SMB shares at boot. I hope you enjoyed the article.
1 comment
I exactly followed the procedure, but could not able access the shared folder. Getting error “failed to retrieve share list from server: Invalid argument”