
Previously we have shown you how to remotely connect to your Linux machine from a Windows one (Click here). Now, what if you need to transfer some files between your Windows and Linux systems?
Well, a USB drive comes handy for simple data transfers. For a large number of files at different times, you need another efficient method. Transferring your data between Linux and Windows using your local network is the recommended option. With an easy and quick one time setup, you can share your files between various machines.
File Sharing between Linux and Windows Systems
In this tutorial, we shall walk you through sharing your files between Ubuntu and Windows machines over a local network, and we shall also show you how to transfer files between Windows and Linux on the same PC.
Over the Network
Transferring files between Ubuntu and Windows can be done in many ways, but in this tutorial, we are going to discuss the following popular methods:
- Transfer files between Ubuntu and Windows via the SSH.
- Transfer files between Ubuntu and Windows using Samba.
- Transfer files between Ubuntu and Windows using Shared Network Folders.
Method 1: Transfer Files Between Ubuntu And Windows Via SSH
In this method, you need to install and enable SSH service on Ubuntu. Also, we need an SSH client application on Windows. In this tutorial, we shall be using Putty. Next, we are going to use the command line to share your files across the network.
Step 1. Install the SSH package on Ubuntu using the next command.
sudo apt install openssh-server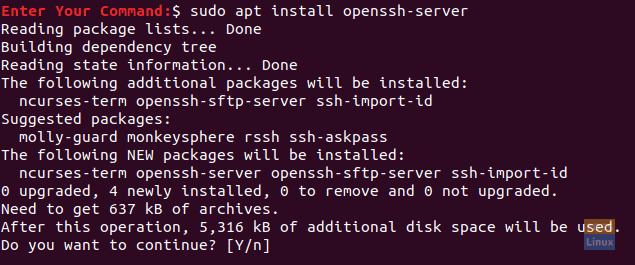
Install The Open SSH Package On Ubuntu
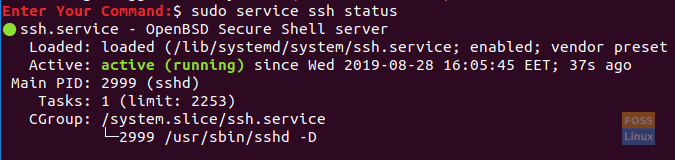
Step 2. After installation finishes successfully, you can check the SSH service status using the following command.
sudo service ssh status
The output of the command should look like the below screenshot:
Check The SSH Service Status
If the service is not running, you can use the following command to start it:
sudo service ssh start
Also, to enable the SSH service to start every time your system starts up, you can use the following command:
sudo service ssh enable
Step 3. Install the net-tools package.
sudo apt install net-tools

Install net-tools package
Step 4. Execute the next command to get your Ubuntu machine IP.
ifconfig

Ubuntu Machine IP
Step 5. From your Windows machine, we need an SSH client (which is Putty) and a PSCP. PSCP is considered a secure copy tool that is used alongside with Putty to transfer files securely over a network.
You can download both (Putty and PSCP) from the Putty official website. (Click here.) Kindly note that Putty will need to be installed while the PSCP won’t. You have to put the PSCP.exe in the “C:\” drive to be used, as you should see shortly.
Step 6. Now open the file explorer and use the next command to start transferring your files from your Windows machine to Ubuntu.
c:\pscp "C:\Ubuntu Tutorials\Windows Shared Folder\Windows Shared Folder.txt" hendadel@192.168.1.8:windowssharedfile.txt

Copy File From Windows To Ubuntu Via SSH
Step 7. Next, you should enter your Ubuntu password.
Enter Your Ubuntu Password
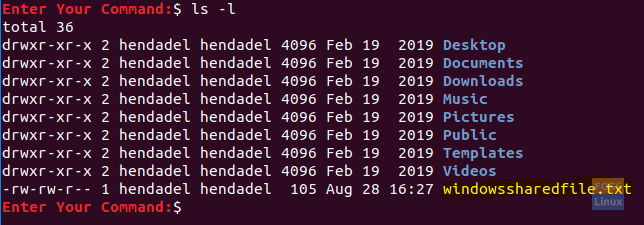
Step 8. After entering the password successfully, the command shall copy the text file from your Windows machine to your Ubuntu home. You can check your home directory now, and you should find the file there.
Check The Copied File
Step 9. Now in case you need to transfer your files from Ubuntu machine to Windows, open the file explorer from your Windows machine and use the next command. Be careful, and do not forget the dot at the end of the command.
c:\pscp hendadel@192.168.1.8:ubuntushared .

Copy File From Ubuntu To Windows Via SSH
By executing the previous command, you should enter the password of your Ubuntu machine. Next, the file gets transferred from Ubuntu to the Windows current directory.
File Copied Successfully
Method 2: Transfer Files Via Samba
In this method, we are going to install the Samba package on Ubuntu. Moreover, use the Windows run application to connect to the Ubuntu shared directories.
Step 1. Install the Samba package on Ubuntu using the following command.
sudo apt install samba
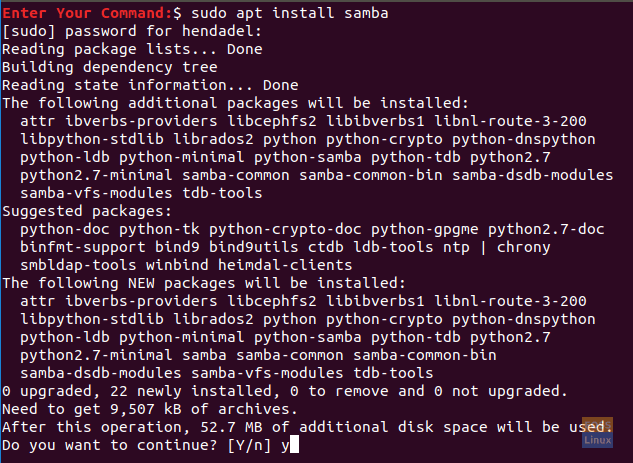
Install Samba Package On Ubuntu
Step 2. You can set a password to the samba share as follows.
sudo smbpasswd -a hendadel

Add A User For Samba Share
where hendadel is an Ubuntu user that you shall use while accessing the Ubuntu shared directory.
Step 3. Let’s create a directory that is used for sharing your files.
mkdir /home/hendadel/UbuntuSharedDir

Create Directory For The Shared Data
Step 4. Using your favorite text editor, open the samba configuration file.
sudo vi /etc/samba/smb.conf
Open Samba Configuration File
Step 5. Add the next lines at the end of the samba configuration file.
[UbuntuSharedDir]
path = /home/hendadel/UbuntuSharedDir
available = yes
valid users = hendadel
read only = no
browsable = yes
public = yes
writable = yes
The samba configuration file should like the below:
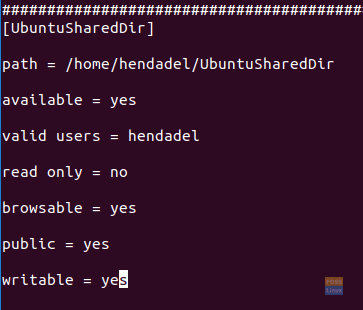
Edit Samba Configuration File
Save and exit the samba configuration file.
Step 6. Restart the samba service using the following command:
sudo service smbd restart
Restart Samba Service
Step 7. From the Windows machine, open the run application from the Start menu and enter the Ubuntu machine IP with the shared directory name as follows.
\\192.168.1.8\UbuntuSharedDir
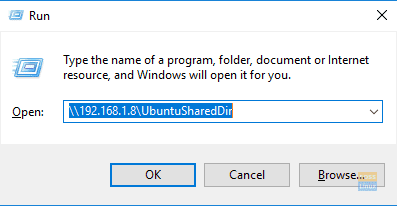
Remote Access To Your Ubuntu
Press the OK button to continue.
Step 8. A Windows Security message will appear, you should have to enter your samba username and password. Then press the OK button to continue.
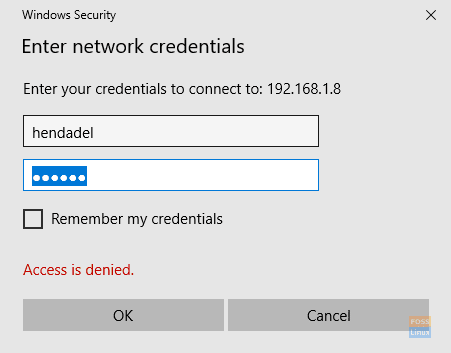
Authentication Required
Step 9. Now you should have access to your Ubuntu shared directory, and you can transfer files.
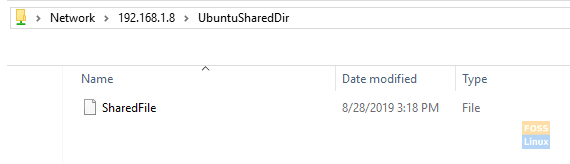
Welcome To Your Ubuntu Shared Directory
Method 3: Shared Network Folders
This is the easiest method among all. In this method, we share any folder from the Windows machine to be visible in the Ubuntu machine.
Step 1. From the Windows machine, right-click on the network connections icon in the right bottom of the taskbar.
Right Click On Network Connections
Step 2. Choose the “Open Network & Internet Settings.”

Open Network and Internet Settings.
Step 3. Next, choose “Sharing Options.”
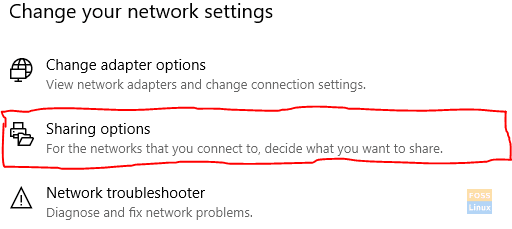
Open Sharing Options
Step 4. Now from your current network profile, choose the following options:
- Turn on network discovery.
- Turn on file and printer sharing.
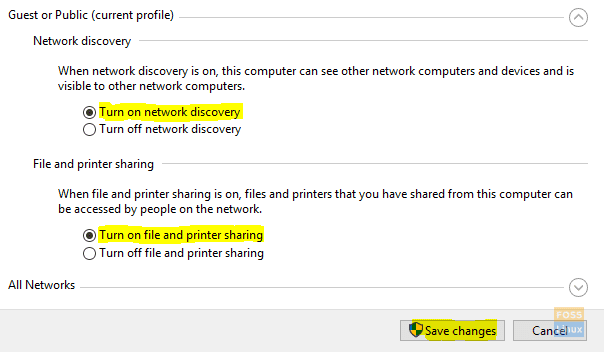
Choose Options And Save Changes
Don’t forget to save your changes.
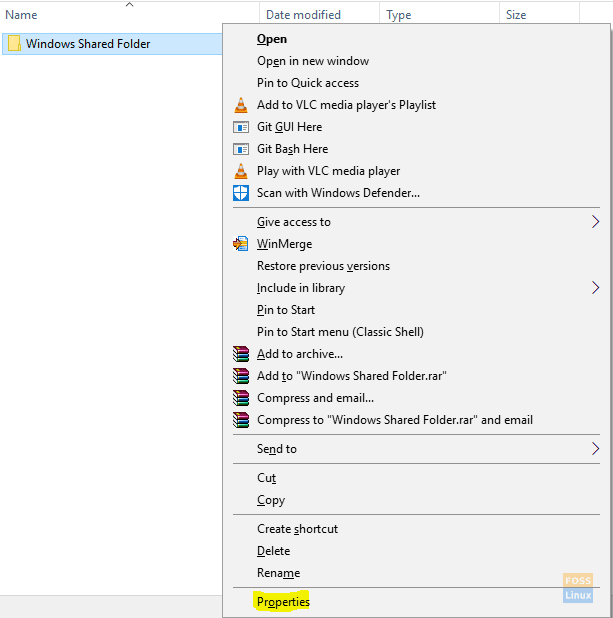
Step 5. Now open your file explorer and go to the directory that you need to share. Right-click on the folder then select Properties.
Open Folder Properties
Step 6. After opening the folder properties, let’s choose the Sharing tab. Also, select the Advanced Sharing button.
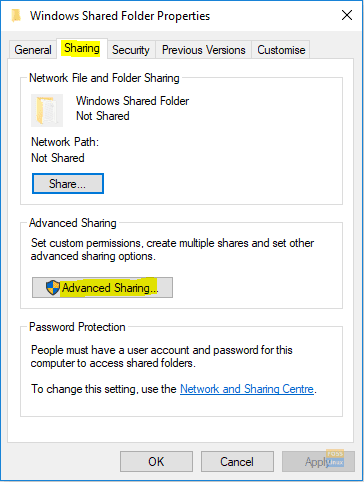
Open Advanced Sharing
Step 7. Mark “Share this folder” box.
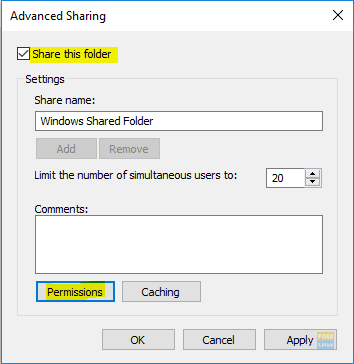
Check The Share This Folder
In case you need to set permissions on the shared folder like (Read, Write), you can select the permissions button and set your permissions.
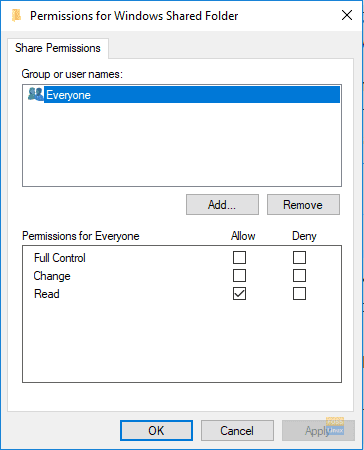
Set Sharing Permissions
Press the OK button to continue.
Step 8. Now from the Ubuntu machine, open the file browser.
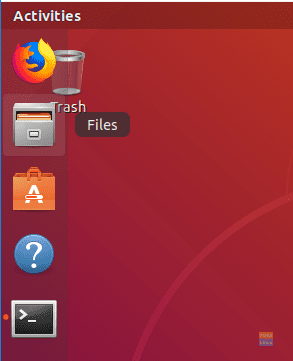
From Your Ubuntu Open The File Browser
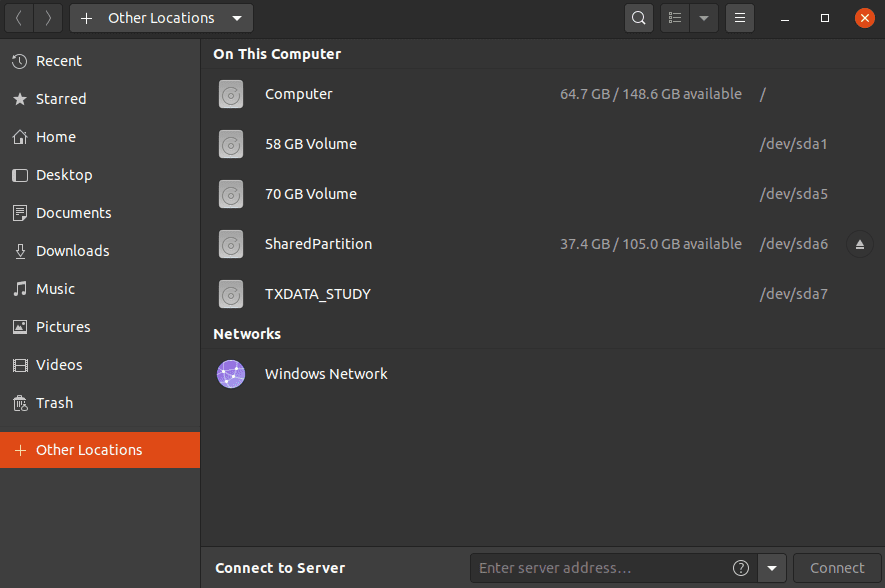
Step 9. From the left panel, choose “Other Locations.”
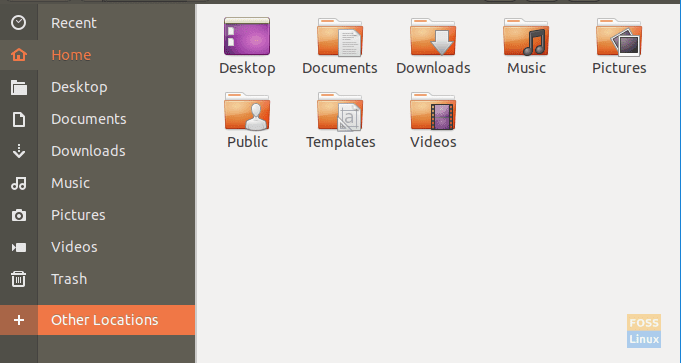
Open Other Locations
Step 10. In the bottom bar, enter your Windows machine IP and path to the shared folder as follows:
smb://192.168.1.6/Windows Shared Folder
Connect To Windows Shared Folder
Then press the Connect button.
Step 11. An authentication message should appear. Enter your username and password. Press the Connect button to continue.
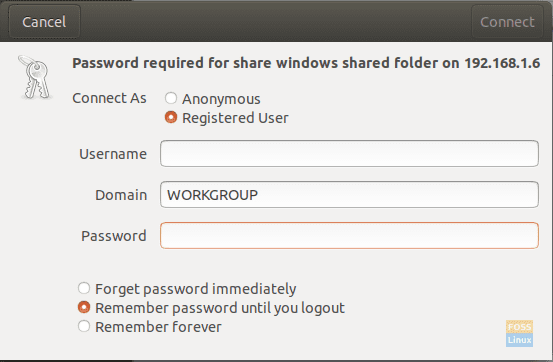
Enter Your Windows Machine Username And Password
Step 12. Next, you should be able to see your Windows shared folder. Now you can transfer files between the two machines.
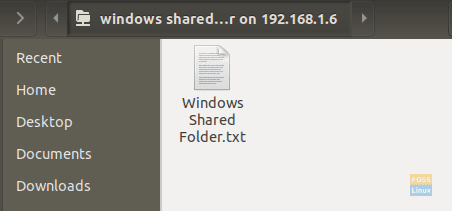
Welcome To Your Windows Shared Folder
Transferring files between Windows and Linux on the same machine
Previously, we looked at how we can share files between a Linux PC and a Windows PC over a network. Some of the utilities used included SSH, Samba, and Shared Network Folders. Here, we will look at a relatively similar situation only that this time around, it will be on the same machine.
You might be wondering why can’t we copy files directly from a Linux partition to a Windows partition and Vice-versa? The simple answer is that; It will work for one but doesn’t work for the other. Let’s look at the reasons behind this.
Why it isn’t easy
The NTFS partition format used by Windows doesn’t support Linux file permissions. Therefore, we can’t consider installing Linux on an NTFS partition other than the Ext4. On the other hand, Windows cannot read the Linux file system even though Linux systems can read an NTFS partition. In most cases, the Linux partition is not listed in the “This PC” section on Windows in a dual boot. Therefore, you can copy a file from the Windows partition on Linux but not the vice-versa.
A simple solution
With the above information in mind, we need to find a way to favor both operating systems and wouldn’t pose any data corruption issues. For example, if you delete or alter any file in the Windows partition while accessing it with Linux, there is a high probability that Windows might raise some errors on boot.
Since Linux can’t run on an NTFS or FAT32 partition and Windows can’t read a Linux file system, we will need to configure a third partition that can be accessed by both operating systems. This third partition will contain commonly shared files between the two. Let’s call it the SharedPartition.
We can use other methods to share files, including external storage like USB or online storage like Google Drive and DropBox. However, these are tedious as one will require a reboot to switch from one OS to another while the other method is dependent on bandwidth.
Create a SharedPartition
Whether you have an SSD or Hard drive, we will require at least Four partitions:
- Linux Partition
- Windows Partition
- A SWAP space
- The SharedPartition (NTFS)
I believe you already have the first three. To create the SharedPartition, you can safely check our post on ‘Creating or resizing partitions in Linux.‘ Ensure you format it to NTFS. Additionally, you might need to understand the partition Table used on your Drives. That can be GPT or MBR. Our post on ‘Booting Linux or Windows from a USB drive‘ gives you a comprehensive guide on this. You will also understand the advantage of one over the other.
Up to here, we already have a SharedPartition that can be accessed by both Operating Systems. However, we might need to perform some configurations like Auto-mount on Linux and setting it as the default location for various files.
Configure Auto-Mount on Linux
We will need to execute several commands on the command-line. If you are just getting started with, don’t panic. Please copy and paste the commands as they are below. Our Linux distribution of choice in this post is Ubuntu 20.04 LTS.
Note: Remember to replace the name SharedPartition with the label of your new partition in any of the commands.
Step 1. Install the ntfs-3g driver, which enables Linux to read and write NTFS partitions.
sudo apt install ntfs-3g

Install NTFS-3g
Step 2. Create a directory where we will mount our new partition.
sudo mkdir /media/SharedPartition

Create Mount directory
Step 3. Get the UUID (universally unique identifier) of the new SharedPartition with the command below.
sudo blkid
You should see an output like this.

Know your UUID
Copy the UUID of the SharedPartition. The UUID identifies the partition in the /etc/fstab file.
Step 4. Since we will be editing the /etc/fstab file, create a backup with the command below.
sudo cp /etc/fstab /etc/fstab.backup
Step 5. Execute the command below to edit /etc/fstab using the nano editor.
sudo nano /etc/fstab
You should see a window like the one below. Add the following line at the end but remember to replace the UUID with yours.
# SharedStorage
UUID=66E53AEC54455DB2 /media/SharedPartition/ ntfs-3g auto,user,rw 0 0
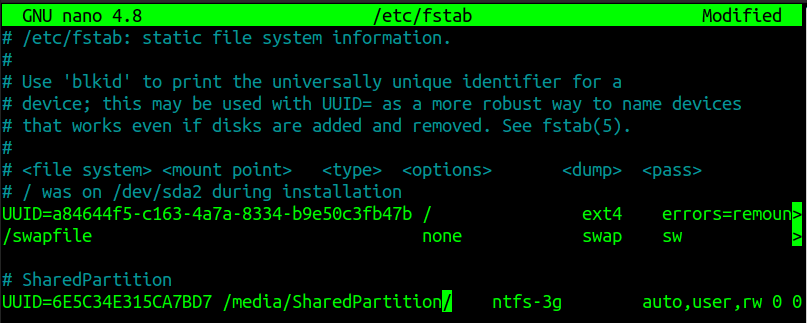
Edit etc-fstab
After this step, reboot your PC. You should now see the SharedPartition mounted under the ‘Other Locations’ menu.
SharedPartition
Configure your Special Folders (Linux)
Special folders in Linux are those present on your Home directory. They include Desktop, Documents, Videos, etc. Execute the below command to edit their paths.
sudo nano .config/user-dirs.dirs
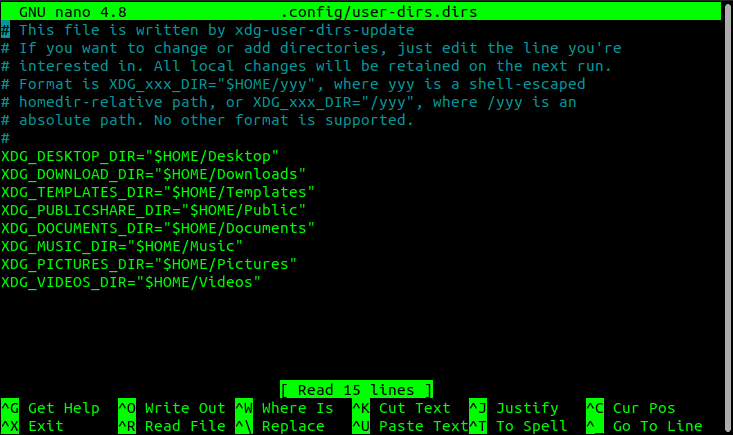
Special Folders
Now, we need to edit the paths to point to our SharedPartition mounted in /media/SharedPartition. For example, for Downloads, we will add the path “/media/SharedPartition/Downloads” and delete the “$HOME/Downloads” path. After applying the changes, you should have something similar to this:
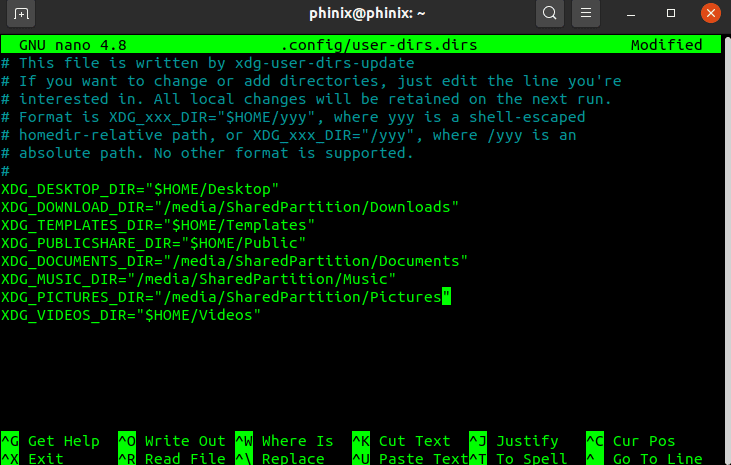
Special Folders
Save your changes and close the Nano editor.
Configure your Special Folders (Windows)
Step 1. Open the File Explorer and type %userprofile% on the address bar. Hit enter.
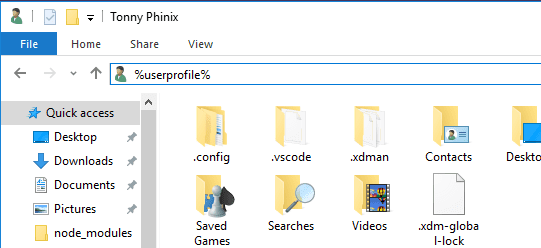
User Profiles
Step 2. Select a folder, say Downloads, that you want to access in both operating systems. Right-click and select the properties option.
Step 3. On the pop-up window that opens, select the Location tab.
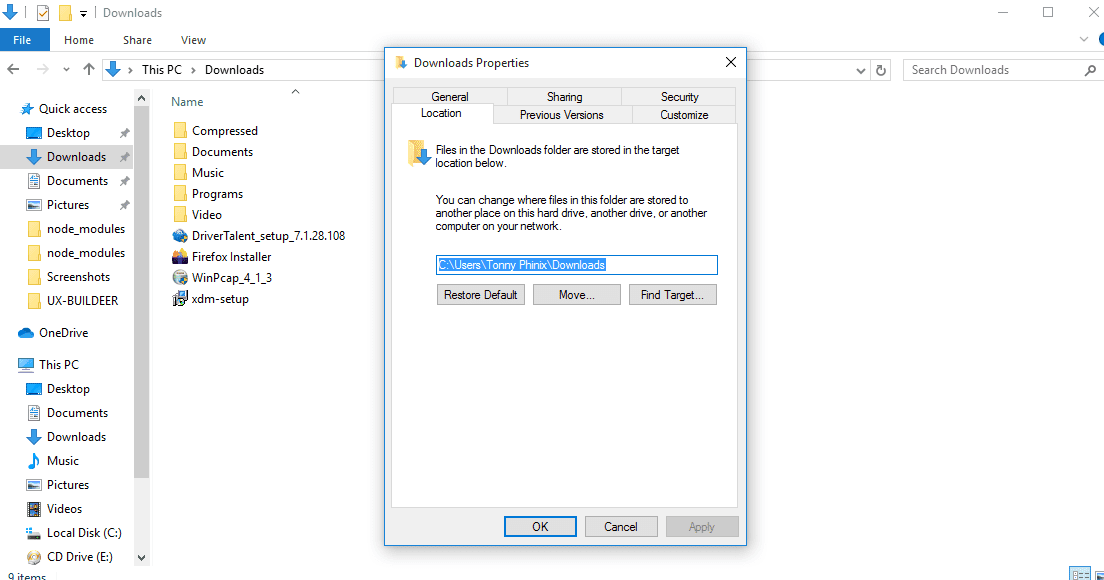
Location Tab
You will see the default path to your Downloads location.
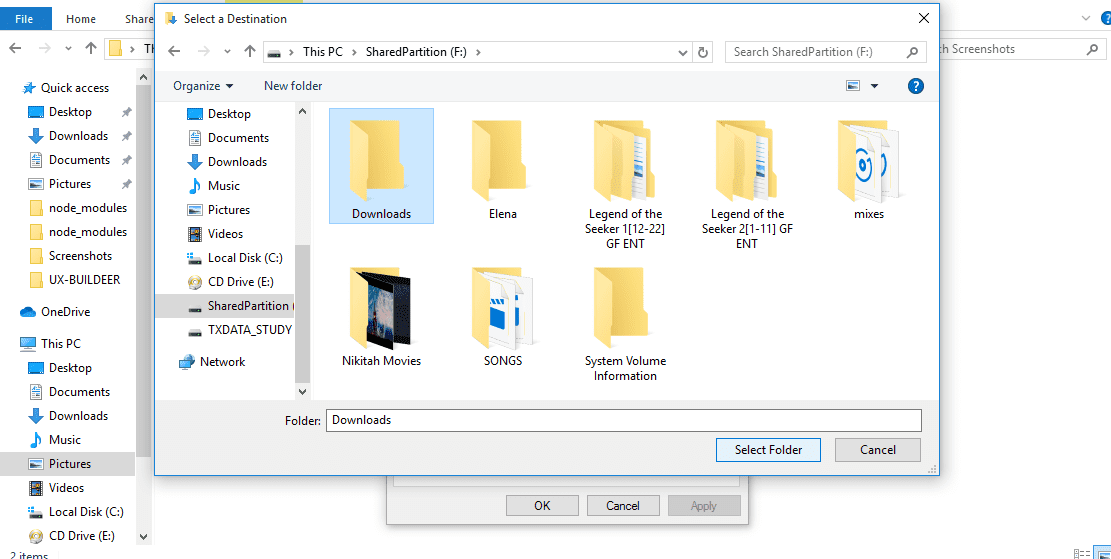
Step 4. Click on the Move button. That will open a window where you will select your new Downloads path. Navigate to your SharedPartition and choose the Downloads folder already created in Linux. Click on the Select Folder button.
Select Destination Folder
Step 5. Click on the Apply button to set the changes.
You will see a pop-up window prompting you to move the content in the old folder to this new location. Click OK.
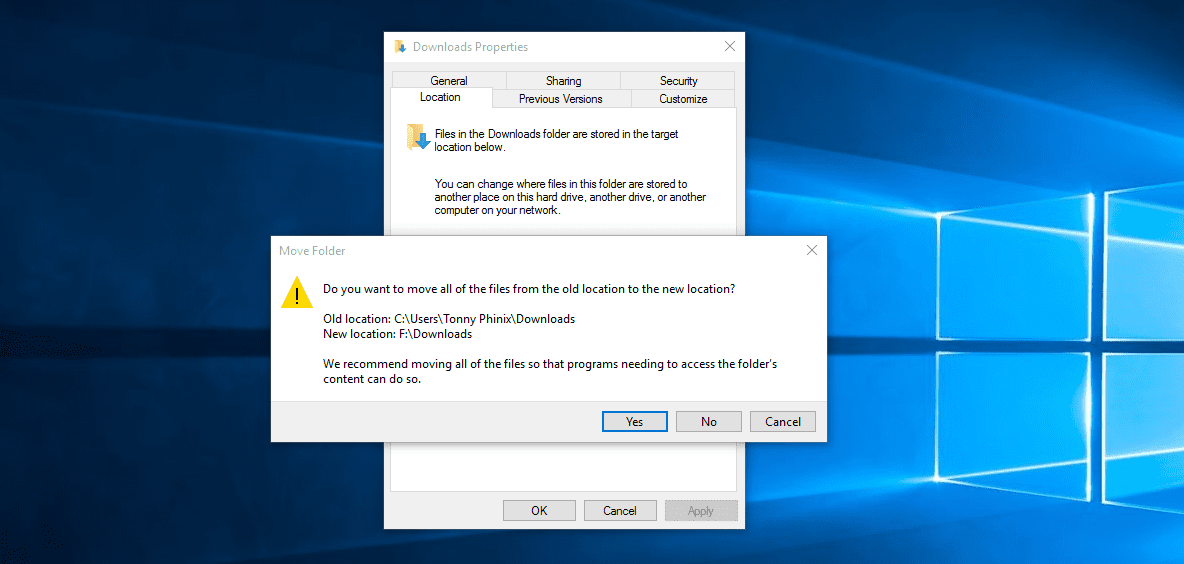
Apply Changes
That’s it. You can now proceed to do the same for the other Folders. Now, anything you save on these folders, e.g., Documents on Windows, will be accessible on Linux in the Documents directory.
Using another partition to share files between the two operating systems is the most reliable option since Windows cannot read the Linux file system without using third-party software. With this method, you don’t need to have duplicate files. Both operating systems can read and write on the same partition.
9 comments
Well sounded cool!
I am trying the 3rd option but i got error in password login window step 11.
this sucks. the description implies this is instructions on how to transfer from linux to windows. however, the instructions shows windows to linux which i want to do. worthless
You can use Putty scp both ways, also you can use scp on Linux both ways. And if you’re not familiar with command line interfaces, you can use web trasfer using in Windows Rejetto HFS Http File Server (something similar on Linux is Droppy or python2 SimpleHTTPServer module)
How to share and transfer files between Linux and Windows on same machine?
Article is updated to show the data transfer within the same PC.
Can you please help? I am following the Same PC entry and this is what I am getting when I try to create the SharedPartition.
I get a UUID of type vfat and one for type=”ext4″ but I do not see any with type ntfs and you do not seem to have one called SharedPartition in your blkid output. Can you tell me what I am doing incorrectly? I am unable also to snip the blkid to this website or cntrl shift c to here so if there are question please respond as to retype all of that would be very difficult. suffice it to say that I do not have any UUID of type ntfs even though I successfully downloaded ntfs.
I am using an ubuntu vm on a windows 10 machine and am trying to get some files saved on a mac to windows with the right control characters on the lines therefore trying to go from windows file in Mac format to unix with dos2unix and then back to dos.
I use Flip Transfer for transfering files. It works fine for me
with windows 10 entreprise, maybe it is easyer with NFS