
Docker is an open platform tool that offers a container run time environment. With the help of this software, programmers can develop, ship, and execute their code as a container anywhere, like on-prem or public cloud. Docker utilizes OS-level virtualization to spin up containers. Docker Engine is the host on which the Docker is installed, and containers are spun.
If you are an app developer who desires to operate under an open-source environment, you will appreciate what Docker offers in Debian version 11(Bullseye). To add on, this software makes the delivery faster because targeted apps and their preferred development infrastructures are sovereign of each other.
Docker takes control of the software development and testing infrastructure, whereas developers manage actively running apps or those still undergoing development. As such, Docker’s methodology ominously decreases the timeline between writing functional code and getting it ready for production. It results in speedy testing, shipping, and deployment of application codes.
The Docker project has basically made it easier for DevOps to package their apps as a “build once and run anywhere” strategy, meaning you create an app once, and it can run or execute anywhere.
The Docker Container
You can think of them as executable images. With Docker Application Programming Interface (API) or Command Line Interface (CLI), you can carry out diverse operations in a Docker container. It also allows you to connect a container to one or more networks, accord any storage on it, or create a new Docker image from an already existing state.
A container is habitually well separated from its host and default machine. You have jurisdiction over the private network of a container, its storage, and other fundamental subsystems. The image of a container and any conformation constraints you offer is utilized in creating or initializing it. Any alterations or modifications to a container’s state that are not saved in persistent storage are lost upon the container removal.
Below are some of the terminologies/Docker components
Docker container: This is a running sample of a docker image with an application and its dependencies. It is important to note that each container has a distinctive identification (ID) and is secluded from other containers. One thing containers share is the kernel.
Docker Client: This is a command-line tool the user uses to interact with the Docker daemon.
Docker daemon: Also known as Docker Engine. It refers to a background process that runs on the host system responsible for generating and running containers.
Docker registry: This is an app responsible for managing the storage and delivery of Docker container images. It can either be private or public.
Docker image: This is an immutable file just a screenshot of a container. A docker image contains a file system and app dependencies needed for running apps.
Prerequisites:
- User with sudo rights
- 64-bit system
- Stable network connection
- Minimal Debian 11 installation
Installing Docker on Debian 11
Step 1: How to install Docker Dependencies
First, open up your terminal using “CTRL+ALT+T” and run the following command that will ensure your system is up to date:
sudo apt-get update
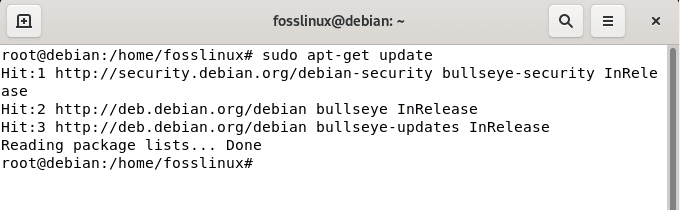
update system
Next, we will append the required Docker dependencies to the Debian system using the following command:
sudo apt -y install apt-transport-https ca-certificates curl gnupg2 software-properties-common

add dependencies
Note: Ensure there is a successful installation of the dependencies for the proper running of the software.
Step 2: Add Docker’s official GPG key:
Before setting up the repository for downloading and installing docker packages, you are required to append Docker’s official GPG key in the Keyrings. The main objective of this key is to ensure the validity of downloaded docker packages. To attain this, run the following command:
curl -fsSL https://download.docker.com/linux/debian/gpg | gpg --dearmor -o /usr/share/keyrings/docker-archive-keyring.gpg
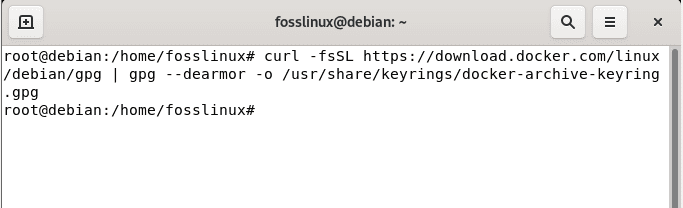
add GPG key
Step 3: Add stable repository
In this phase, you need to add the stable repo using the following command to download the current version of docker packages. So we will set up the repo
echo "deb [arch=amd64 signed-by=/usr/share/keyrings/docker-archive-keyring.gpg] https://download.docker.com/linux/debian $(lsb_release -cs) stable" | sudo tee /etc/apt/sources.list.d/docker.list

add stable repo
Step 4: Update Package Cache
After appending repo info, you need to update the packages cache with all the package info from the newly added repo using the apt command as shown below:
apt-get update
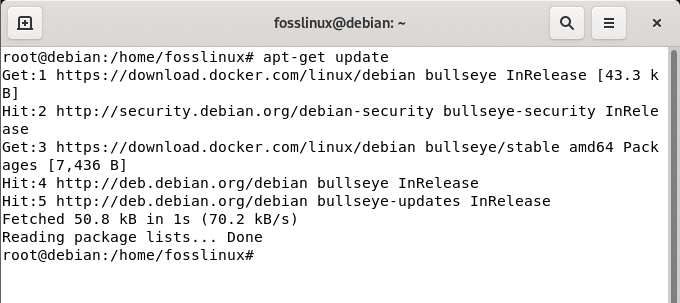
update cache
Step 5: Install Docker Engine
Next, download and install the latest version of the Docker engine and container using the following command:
apt-get install docker-ce docker-ce-cli containerd.io
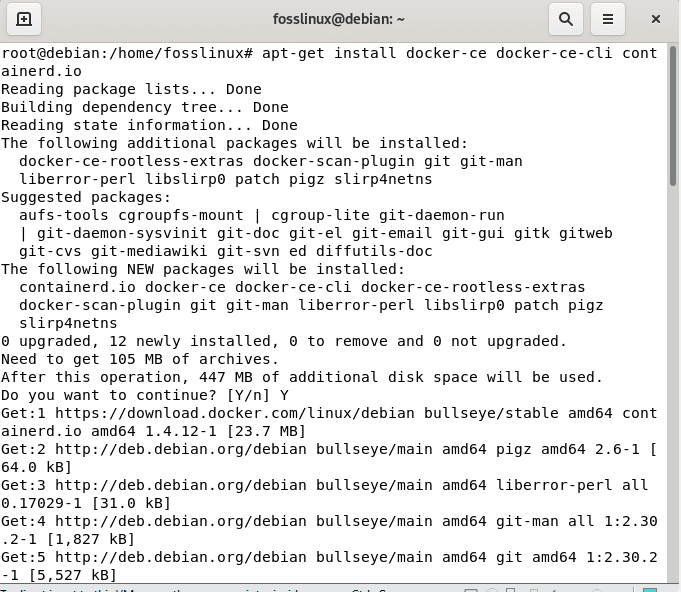
install docker-engine
Step 6: Check Docker Version
After successful installation, you can run the following command:
docker –version

Docker version
Step 7: Check Docker Service
The next step is to check the Docker status after a successful installation. We will do this using the “systemctl” command. This command is used to control various services in a system. In our course, we will run the “systemctl” command with the “status” option to see if the Docker service is active or inactive on our Debian system:
sudo systemctl status docker
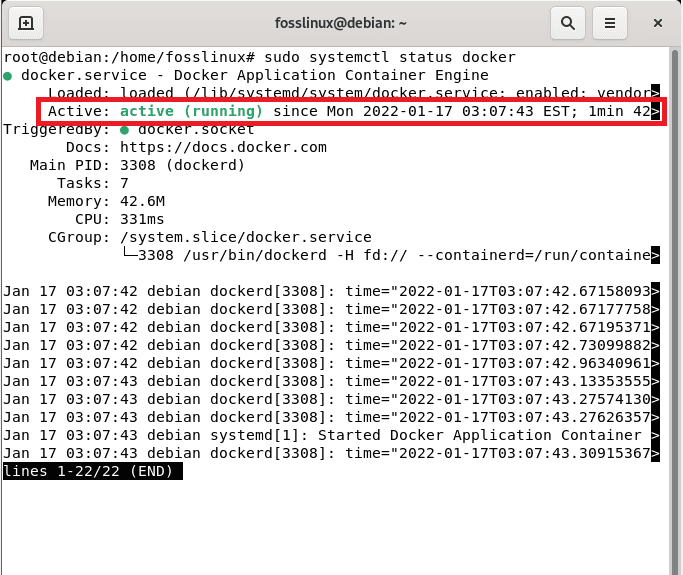
Docker status
If the Docker is active, like in our case, you should see an active (running) green writing as highlighted in the snapshot above.
The Docker service will automatically start after setup, but you can always check using the systemctl status docker command we earlier covered. If obligatory, you can also start the service using the systemctl start docker command or restart the service by using the systemctl restart docker command:
Step 8: Test Docker
To this far, we have now installed Docker and checked its status on our Debian system. Now, what next? You may ask. We will examine the functioning of Docker by executing a sample container. In essence, we will try to run a “hello-world” global docker container.
Run Hello World Image
You can now use the docker engine to create your first container from the hello-world image. This can be achieved by running the hello-world command as shown below:
docker run hello-world

Docker run hello-world
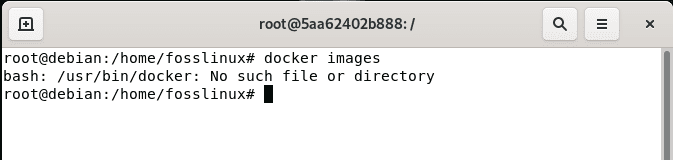
Step 9: List Docker Images
Next, you can run the list of all the available images using the docker images command. Please take note of the resemblance between the docker images command and the docker image command, as they both serve different purposes. You can utilize the docker image <command> syntax if you anticipate managing your Docker images. Conversely, this is not the case as we want only to list the images. As such, run the following command:
docker images
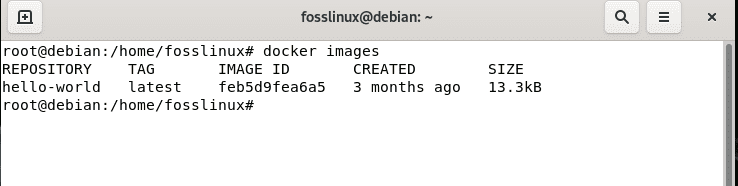
Docker images
Step 10: Run a Ubuntu Container
Here you can utilize the docker run -it ubuntu bash command to run a Ubuntu Container. If you don’t provide a particular tag with the image, it will by default search for ubuntu: latest image. In cases where the image is not available in your local system, it will be downloaded from the Ubuntu Library then the container will be created using that image. To attain this, run:
docker run -it ubuntu bash
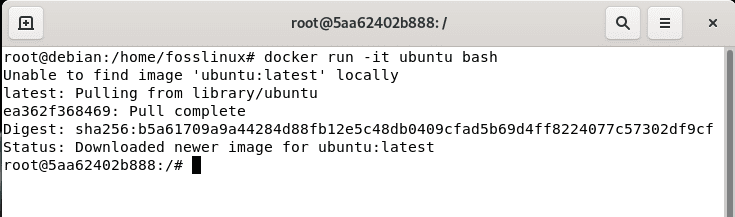
Docker images
Step 10: List Docker Containers
To list all the containers embedded in this software, use the following command to list all the containers regardless of their state.
docker ps -a
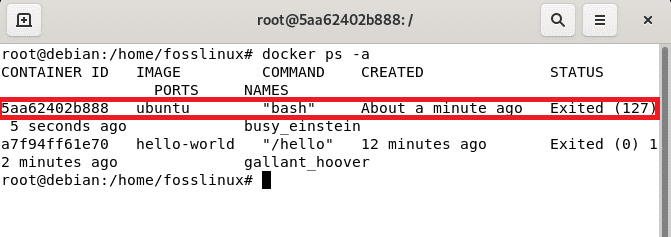
list docker containers
Step 11: Manage Docker Containers
In case you want to initialize a container, then you need to use the following syntax:
docker start <container_id>
For instance, you can start a container with, say, ID 5aa62402b888 for the ubuntu bash we created, as shown in the snapshot below:
docker start 5aa62402b888
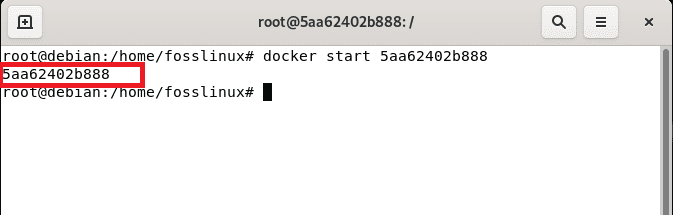
docker start
Then, run the ps command to check the status of the container
docker ps
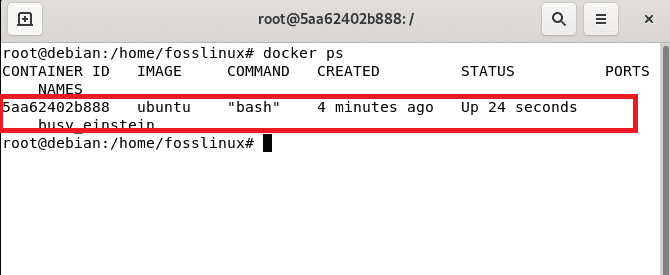
check the status of the containers
Correspondingly, if you want to stop a container, you can make use of the following syntax:
docker stop <container_id>
In essence, we want to stop the Ubuntu bash Container with ID 5aa62402b888. Here, we will run the above-given syntax substituting the <container_id> section with our running container’s actual id as displayed below:
docker stop 5aa62402b888
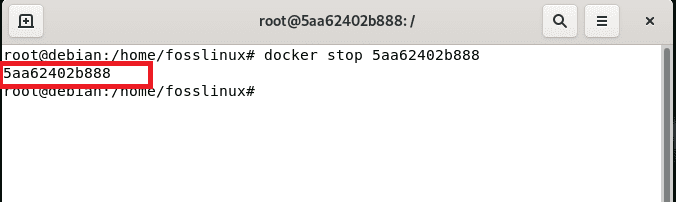
Docker stop
Then again, use the ps command as earlier covered to check the status:
docker ps

check status
As you can see, the container with ID 5aa62402b888 is not running anymore.
Also, you can delete the image using the following image syntax:
rm <container_id>
In this event, we are removing the container with ID 5aa62402b888 as shown below:
docker rm 5aa62402b888
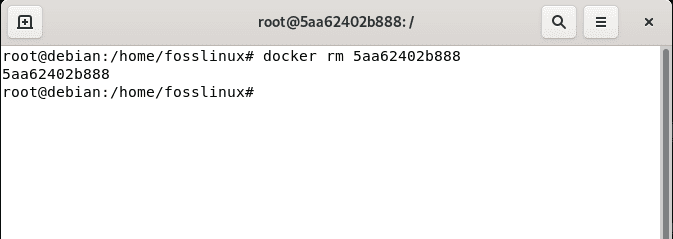
rm command
Now check the list of images using the docker images command, and you should see that container with ID 5aa62402b888 is no longer available:
docker images
no such file
Step 12: Push Images to Docker Hub Repository
In cases where you want to store images in repositories like Docker Hub Repository, you first need to log in to that repository using your user account credentials. If you don’t have an account, you can Sign up here. After that, log in using the following command:
docker login
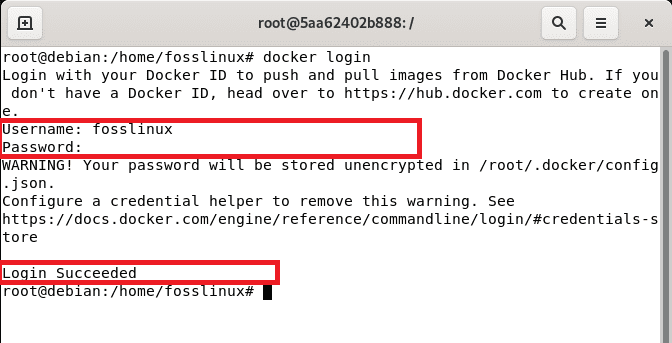
successful login
Afterward, key in your username and password and press enter to log in. For the approval of a successful login, you should see a “Login Succeeded” message at the bottom. Now that you have successfully signed in, you can now push your images using the following syntax:
docker push <Image_name>
It is critical to note that you may need to tag the image before pushing it to Docker Hub Repository.
Step 13: Remove Docker
To erase the docker engine from the system, we need to uninstall the Docker Engine, CLI, and Containerd packers using the following command:
apt-get remove docker-ce docker-ce-cli containerd.io

uninstall Docker
Note that images, containers, volumes, or customized configuration files on your host are not spontaneously removed. As such, you have to manually delete all images, containers, and volumes using the following commands:
sudo rm -rf /var/lib/docker
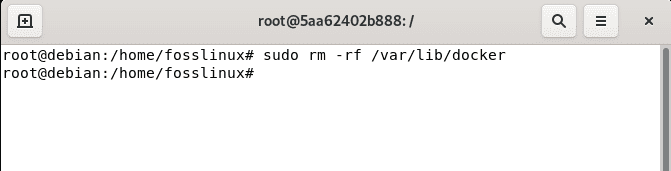
remove Docker
Remove containerd using:
sudo rm -rf /var/lib/containerd
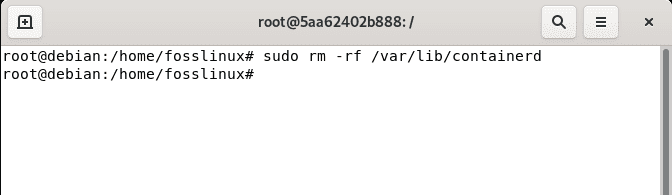
remove containerd
Benefits of Docker
One of the critical profits of using an open-source project software like Docker is the freedom to choose the technology you want to use to finish up any task. Docker is suitable for programmers who need a small size, lightweight, and clean environment for testing purposes and desire to avoid extensive management and configurations.
The software can also test, ship, and deploy code quickly, which aids reduce the delay between writing code and executing it in an environment.
Final Thoughts
Docker is a framework software used to generate, test, and develop apps quickly. This software arranges apps or packages into containers, including all that your application needs to function, like system tools, runtime, libraries, and code. Docker allows you to deploy and scale applications in any environment promptly.
This article has deeply covered how one can set up Docker on their Debian 11 system from the fundamental point to the complex point of uninstalling the software. Besides installation, we have equipped you with the basic commands that you will encounter in your day-to-day activities with this software. That’s it, guys. We hope you enjoyed reading.
3 comments
Fails on step 2, because can’t write to keyrings. This is on a fresh install of Debian 11, and using both the code as written and sudo’ng it.
Read John’s comment below. I bet you tried sudo curl -fsSL https://download.docker.com/linux/debian/gpg | gpg –dearmor -o /usr/share/keyrings/docker-archive-keyring.gpg. If you did so, only the curl “portion” was executed under sudo
Forgot the sudo before gpg:
curl -fsSL https://download.docker.com/linux/debian/gpg | sudo gpg –dearmor -o /usr/share/keyrings/docker-archive-keyring.gpg