
We all agree that Linux users install most programs from their centralized official repo listed in the source.list file. However, they might find a situation where the software or program is not listed in the repo list; In such instances, they will have to use the PPA (Personal Package Archive) or apt (advanced package tool) to install the program.
PPA is a software repo created for Ubuntu or Linux users and is simple to set up compared to other third-party repositories. PPAs/apt are frequently used in distributing pre-release software for testing.
PPA is an unofficial repo made available to Linux users by Canonical to allow developers to upload their source package. Then, Launchpad makes those packages available for users to install the applications from.
On this distro, several packages come pre-installed. However, the default packages are never enough. You may want to set up a file server, a database, web server, or something else that needs additional packages that are not in Linux by default. In such scenarios, we use a package manager like PPA/apt, a free software user interface that works conjointly with core libraries to handle the installation and removal of software on Debian and its distros.
This package manager downloads and sets up packages from a package repo. In this case, the package repo is an HTTP or FTP server on the web. Multiple packages are stored on the internet. The package metadata that a package manager like apt/PPA downloads and uses to check out the packages available on the package repo. Surprisingly, if you have your local package repo, you can add it on Debian since it is open-source software. So to say, apt ideally checks the health of all packages and dependencies before installing them.
Suppose you ask yourself what could be the difference between apt and PPA. Then you need not since there are no technical differences between the two. Both are software repositories that provide packages, from an APT point of view, are the exact mechanisms of installing packages. PPA is a repo of packages that only uses Launchpad as the backend.
In this article, we will ride you via a step-by-step procedure of how you can append some extra repositories to your Debian, and in this case, we will go with Debian 11, which is the latest at the time of this writing. We will also help you clean up the APT sources file in the process to make things tidier for you. So let us get right into it without more ado and get our hands dirty.
Why the missing repositories?
Debian boasts itself on absolute freedom and open-source nature. Although you may not live without your third-party repository packages on Linux, people at Debian plead to disagree. This is principally why you don’t see any third-party repositories enabled in an APT source file on Debian. Although this might seem lousy at first, it is all about advocating and promoting total freedom with Debian.
Luckily, there are repositories supported that can easily be added to your source file and of which contain lots of the packages that you will likely want to install.
How to add a package Repo to Debian
We can utilize three methods to add a package repo to our Debian-based machine. You need not worry about the methods since this article will cover each of them bit by bit and in detail. The methods include:
- Adding a package Repository manually on Debian.
- Adding a package Repo using add-apt-repository.
- Adding the repository to Debian using the Graphical User Interface (GUI).
With that said, let us turn out focus to the first method.
Method 1: Adding a package Repository manually on Debian.
The package repo information is stored on the /etc/apt/sources.list file. To add a new package repository, you may need to directly edit the /etc/apt/sources.list file. The items in this file have the following syntax:
Archive-Type Repository-URL Distribution Component1 Component2 Component3
Explanation of the syntax
Archive Type- This refers to the first letter of the line that can either be deb or deb-src. Deb indicates the archives hold .deb packages, and deb-src shows the archive with the source packages.
Repository URL- This is the URL input from where the package will be downloaded.
Distribution- This can either be the release code name, like a bullseye in our case, or the release class (stable, testing, unstable, old stable), respectively.
Component-This refer to the main, contrib, or non-free. The main contains the DFSG (Debian Free Software Guidelines) compliant package section of the Debian distro. The contrib has the DFSG compliant package not supported in the main. Finally, the non-free has packages that are not compatible with DFSG.
In essence, let us look at the VirtualBox repository to Debian Bullseye. First things first, you need to log in as the root user before you can modify the /etc/apt/sources.list file.
Login as root user using this command:
su
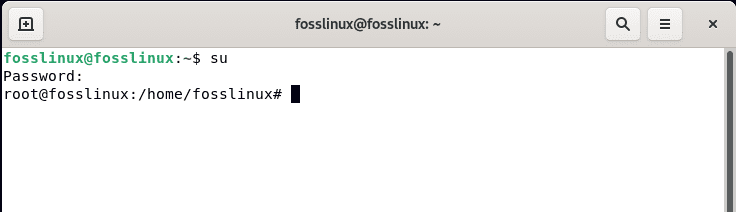
log in as the root user
Then proceed to open the nano editor file to edit the /etc/apt/sources.list file using the following command:
sudo nano /etc/apt/sources.list
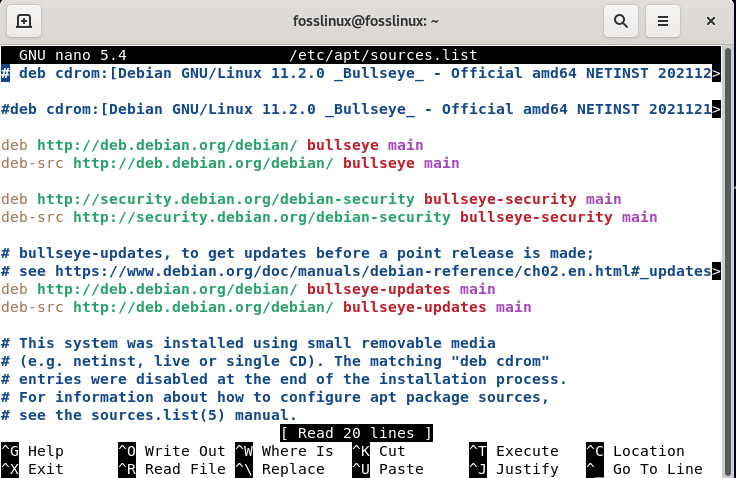
nano editor
Upon opening the nano editor, you can proceed to add the package repository line to the file:
deb [arch=amd64] http://download.virtualbox.org/virtualbox/debian bullseye contrib

virtual box added
After adding the file, you can have a nice look at the /etc/apt/sources.list from our Debian 11 system terminal, and it should have some of the official Debian repo we just added.
Now we need to save the repo we just added by pressing “Ctrl + X.”
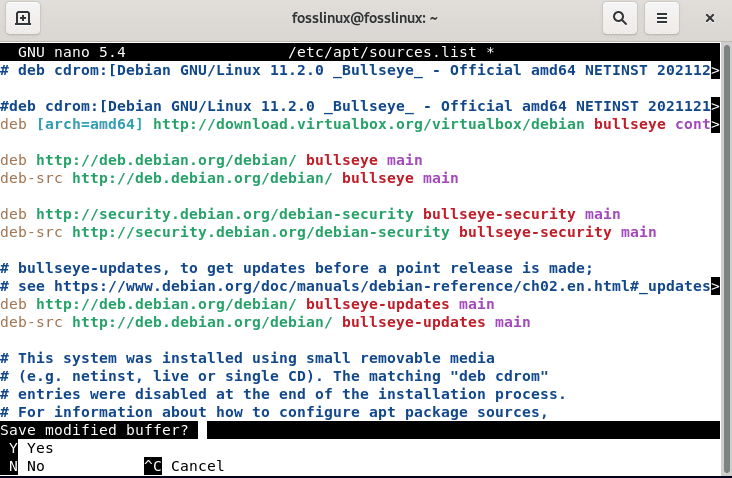
press ctrl x
Then press “Y” to save:
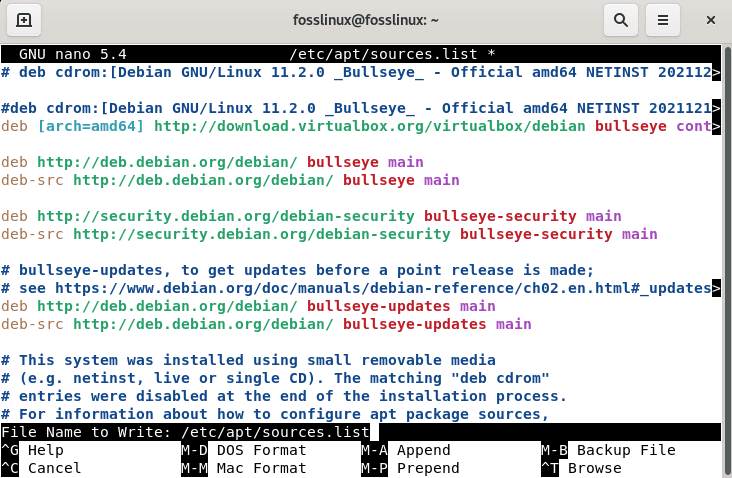
then y to save
And that is it on the manual addition of Debian repo.
At times you might boycott adding changes to the /etc/apt/sources.list file by creating your custom file with .list extension inside and adding the repository in that file as it also works perfectly.
Note: Ensure you constantly update the package index when the apt repository is added using the following command:
sudo apt update
Method 2: Adding a package Repo using add-apt-repository
The add-apt-repository is a Python script utilized to append a regular APT repository or PPA. This utility program is included in the software-properties-common package. Below is the basic syntax of the add-apt-repository
add-apt-repository [options] repository
When you are done adding the apt repo, update the repository list and install the package using the following command:
sudo apt-get update

apt install package_name
Let us look at a sample of adding Jonathonf repo to our Debian system, which we will later on come and use to install FFmpeg, an audio/video software.
To add this PPA to our system, copy-paste the following command:
sudo add-apt-repository ppa:jonathonf/ffmpeg-4
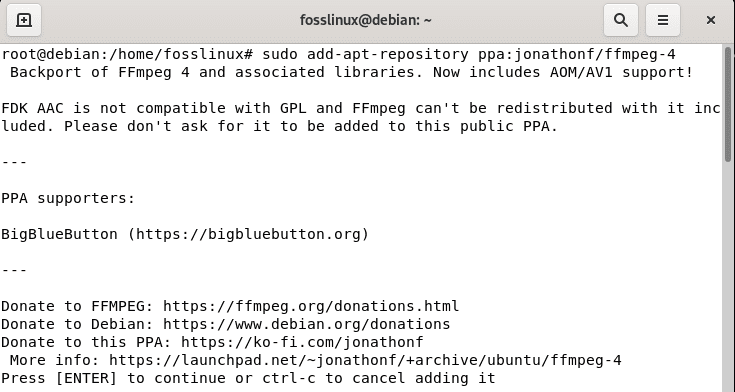
jonathonf PPA
Immediately the PPA for FFMpeg is appended, use the following command to update the software list in your machine:
sudo apt update
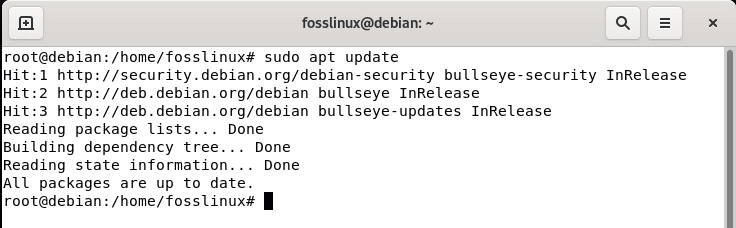
update system
After that, go ahead and install the software on your machine:
sudo apt-get install ffmpeg

install FFmpeg
And that is it on adding a repository to our Debian system using the add-apt-repository method.
Method 3: Adding the repository to Debian using the Graphical User Interface (GUI)
As an alternative, Debian offers its users the graphical addition of the repository for those who are not accustomed to the terminal functionalities. In our case, we will still implement this using Debian 11 with the Gnome Desktop environment.
From your desktop, hit the “activities” menu and go to the search button, and type in “Software and updates,” and you should see such an app:
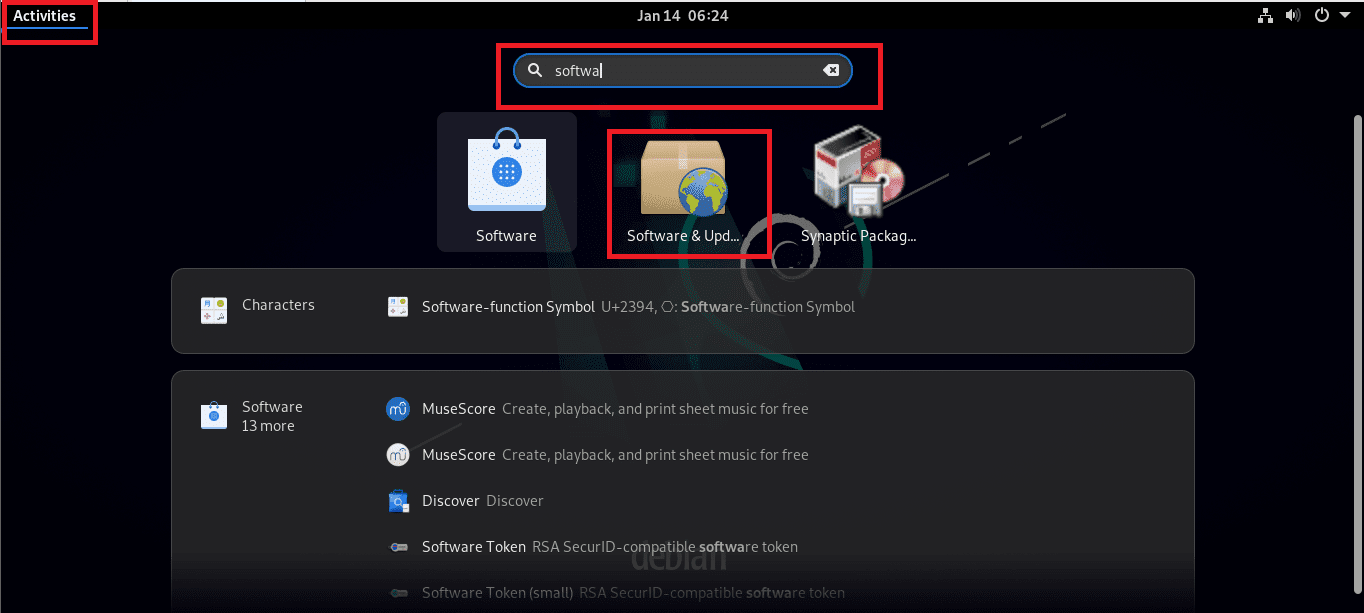
software and updates
Click on the app to open it:
software update app
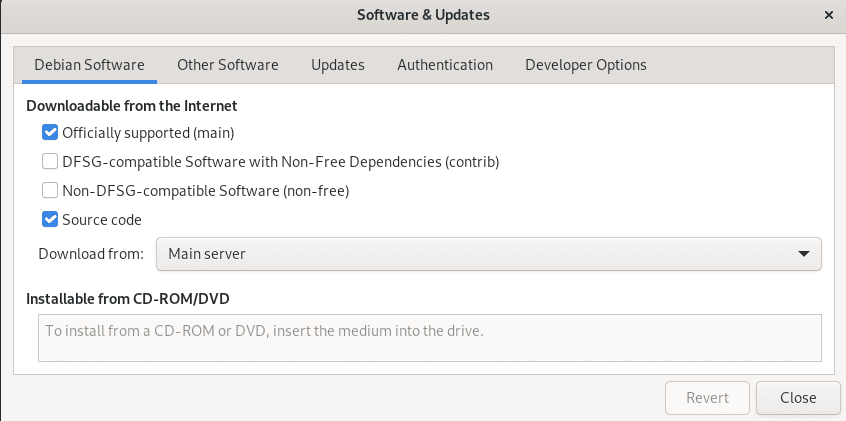
When the software and updates app is open, maneuver to “Other Software.”
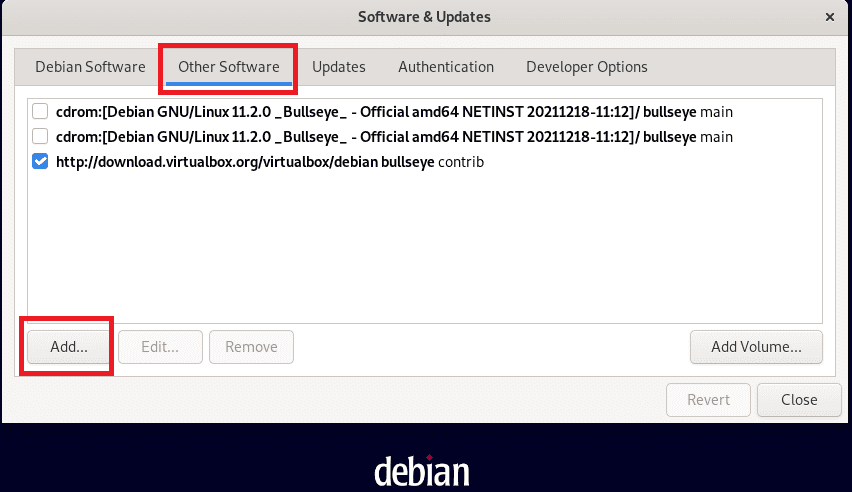
other software
At the bottom, you should notice an “Add” button; click on it, add the repository on the APT line input button, and click on the “Add Source” button to update the /etc/apt/sources.list file.

add source
And boom! You are good to go.
In case you want to obliterate the added repo, you only need to carry out one of the following steps, and all will be well:
Method 1: How To Remove a PPA Repository
To do away with the enabled repository, use the following syntax:
add-apt-repository –remove ppa:ppa_name
This command will only remove the PPA from your system and not the package installed through this PPA. For example, to remove the PPA of the FFmpeg we earlier added in, we will run the following command:
sudo apt-get remove ffmpeg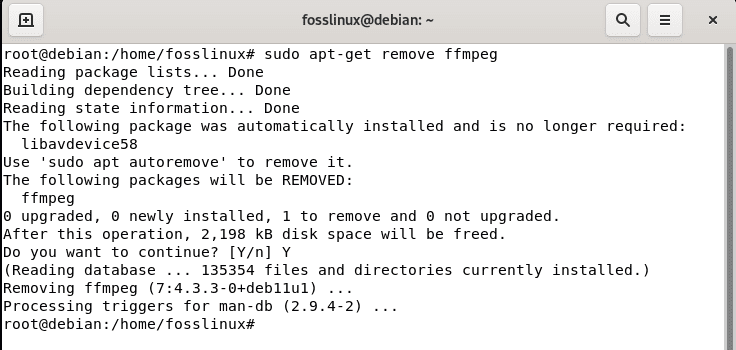
uninstall software
Method 2: Purging a Repository
This is another word to say remove a repository. Purging a repository means completely removing a package from the Linux system. This includes the configuration files and personalized settings. This can be easily achieved in Linux using the utility PPA Purge. To install this utility, copy-paste the following command in your terminal:
sudo apt-get install ppa-purge
Once you are done installing, you can then carry out a repository purge using the following syntax:
ppa-purge ppa:ppa_name
or
sudo apt-get purge ppa_name
Method 3: Manually Remove a PPA repository
To remove a PPA repository, go to the “Other Software” tab in the “software & updates” utility. Then select the repo you want to remove
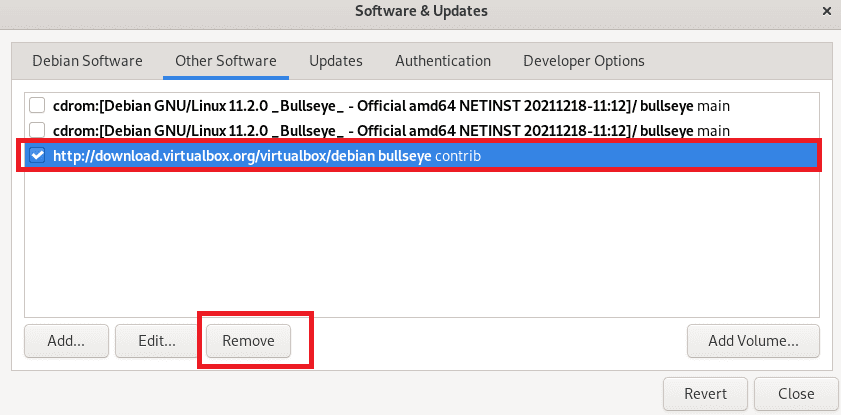
select file
And click the remove button. Upon hitting the remove button, you should be asked to affirm your decision by inputting your PC’s password.
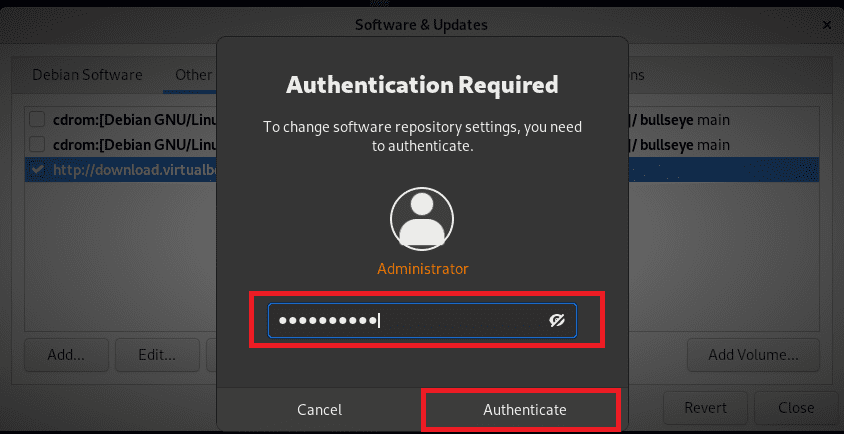
hit authenticate
After keying in your PC’s password, hit the “authenticate” button, and the software should be obsoleted from the list.

PPA deleted
Be reminded that Debian is mirrored on hundreds of servers on the internet. Using a server near your premises will most likely speed up your download and lower the load on central servers and the net as a whole. The Debian archive is always available via HTTP at the /Debian location on the server.
Below are some Alternative Debian Mirrors by Country:
United States:
deb http://ftp.us.debian.org/debian/ bullseye main contrib non-free

deb-src http://ftp.us.debian.org/debian/ bullseye main contrib non-free
Sweden mirror:
deb http://ftp.se.debian.org/debian/ bullseye main contrib non-free

deb-src http://ftp.se.debian.org/debian/ bullseye main contrib non-free
Taiwan Mirror:
deb http://ftp.tw.debian.org/debian/ bullseye main contrib non-free

deb-src http://ftp.tw.debian.org/debian/ bullseye main contrib non-free
Conclusion
As you can see, enabling non-free and contrib packages on Debian 11 repo is pretty straightforward. Enabling non-free is recommended for special firmware or drivers or if you want to work with proprietary software. However, it is not suggested to allow for non-free and contrib repo unless necessary due to security concerns. Also, remember that appending a repo in the second method we covered, GUI, may impact your download speed.
This tutorial has taken you through many important steps to help add, install, update, upgrade, and uninstall packages from the Debian backports repo. But you should be careful with the cool things because you may end up breaking your system and better still introduce security threats if you are not keen enough.