
There are many reasons to select Debian over other Linux distributions out there. First of all, it’s free and open-source, software updates and upgrades can be done smoothly on the terminal, the packages are very secure to download, and it comes with LTS(Long Term Support). In case of glitches, they can be solved by the readily available community of Devs out there.
Finally, Debian offers a variety of flavors known as distributions or distros in the geek world for one to choose from; variety gives a user the liberty to choose the distro that one feels most comfortable with. We have Ubuntu, Kali, Arch, etc. For a detailed list, check Debian-based Linux distributions, and for more info on Debian, check out their official website.
Things to do after installing Debian
As I wrote this article, I had Debian 10 already installed on my Virtual Box, ready to roll. A surfeit of things can be achieved on Debian; we can’t even finish in a day, let alone one article. So let’s dive right into it:
1. Changing your user account (profile) photo
As much as this might seem trivial, we always start with the simplest of things as we advance in the usability of the Debian OS. Open the application menu and scroll through to locate the “Settings” icon. Click on it to open the Settings window. Once it opens, head to the left side of the windowpane, and search for ‘Users.’ Next, click on the circular icon, and a bunch of system images will appear for you to choose from, or better yet, you can choose from a file and select your preferred picture.
Close the ‘Settings’ window when done to apply the changes. The next time you log in to your system, you’ll have a different profile pic.
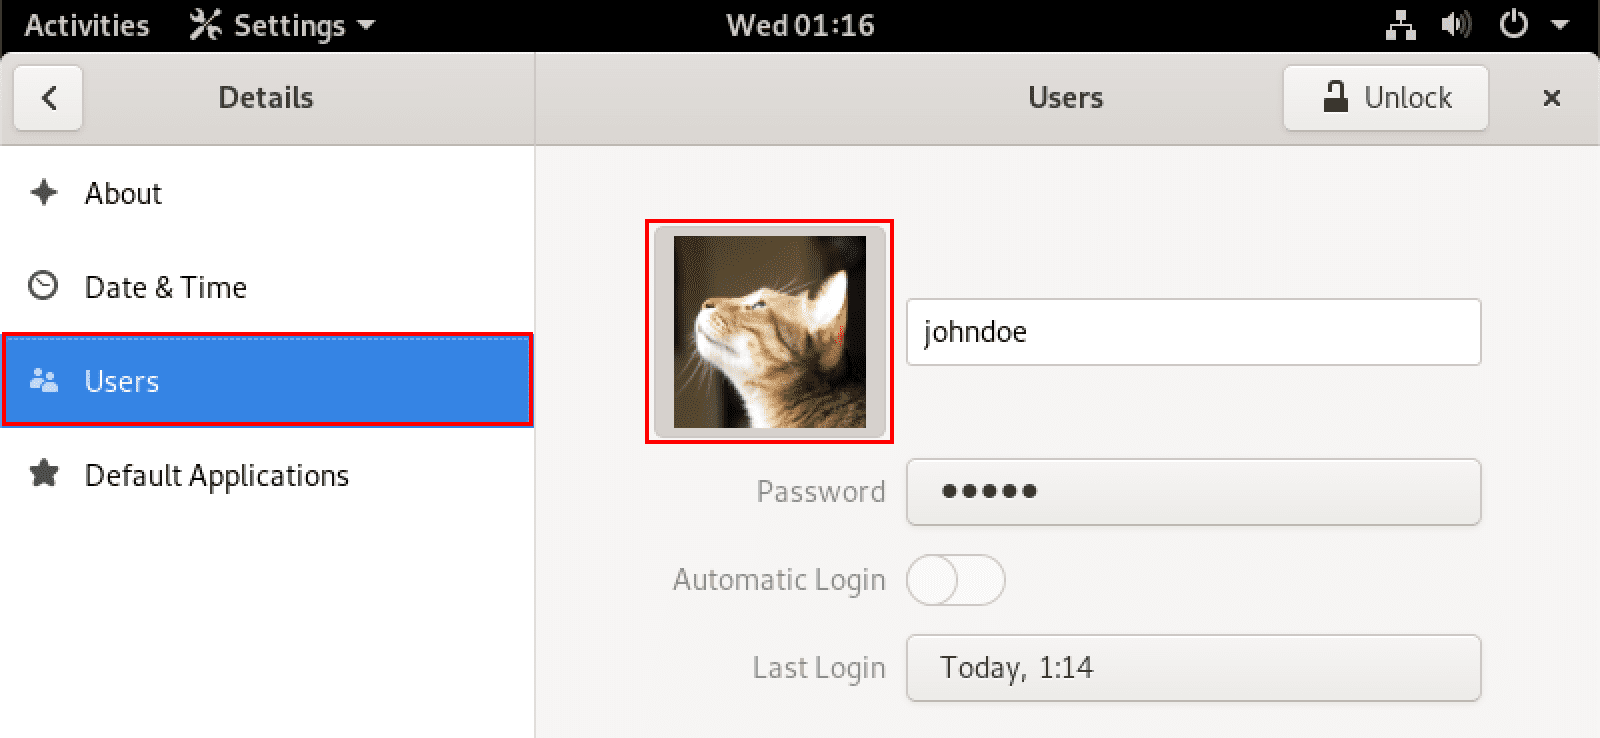
Change user profile picture
2. Accessing the help menu
Now that you have your favorite Profile picture in place every time you log in, what next after you log in? Do you want to type, browse, play music, create folders, etc.? The Help menu has got you covered. You can find everything to get you started before consulting Google for help. On the Desktop Home menu, click on the white and red icon below. Alternatively, you can launch the app from your applications menu by searching for “Help.”
Help icon
A window with a similar image as below will open. Most of the basics to guide a beginner will be here as you become a pro on the CLI(Command Line Interface).
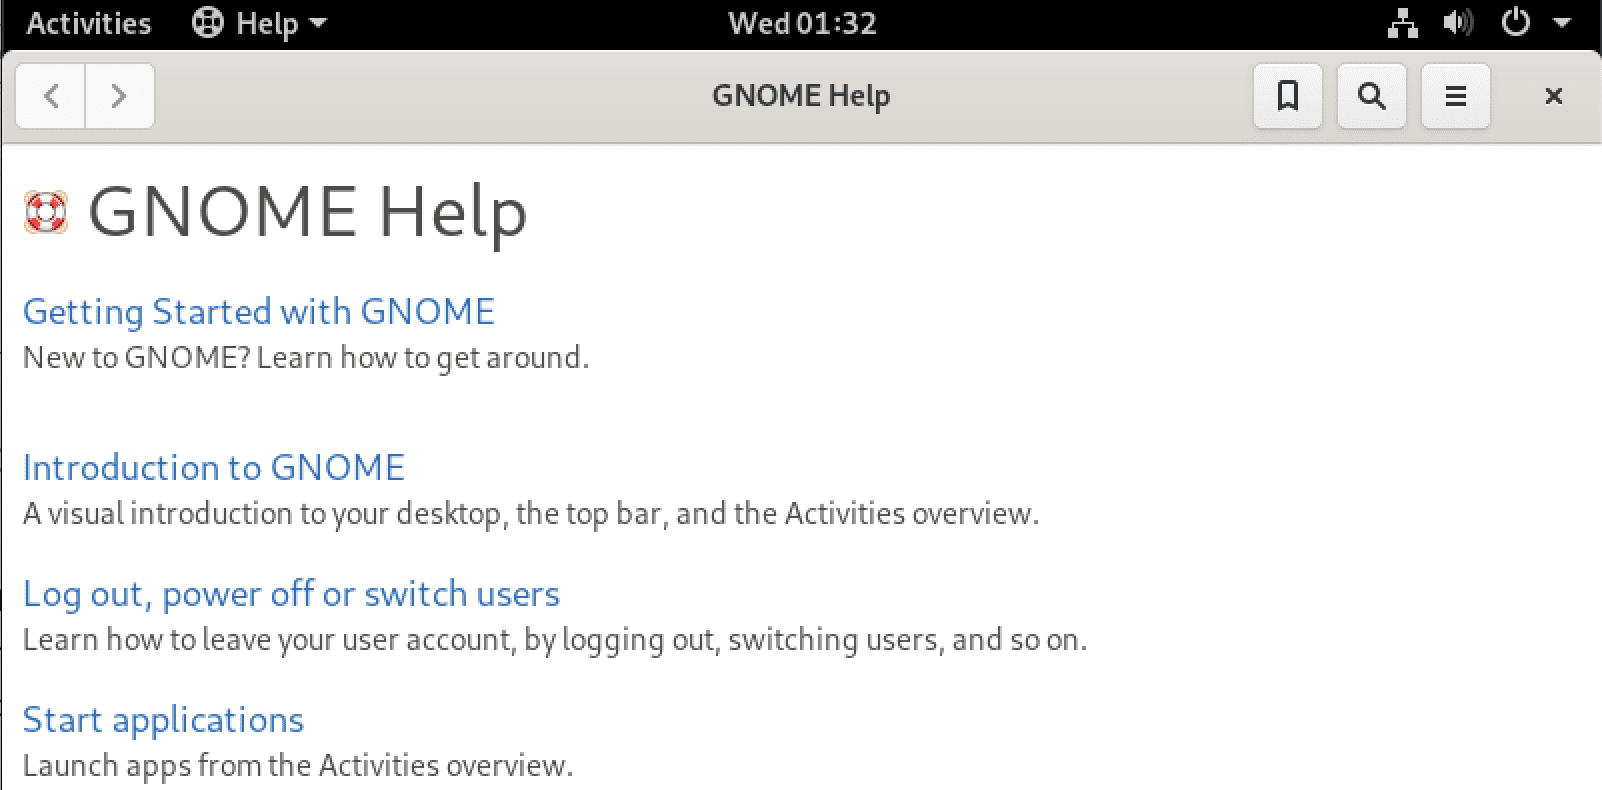
GNOME Help
3. Browsing the web
A computer without internet connectivity is as dull as driving a car without music turned on.. okay at least to me, that is boring. In this day and age, internet connectivity has become an essential need. The internet has revolutionized the world. Guys search for everything from searching for advice, simple, complex, weird, trendy… name it. The average person checks their phone every 2 minutes, showing how dependent our social lives are on the net. FOMO is the fear of missing out. Debian enables us to access the internet using the preinstalled Firefox that comes with it.
Firefox icon
On your Desktop menu, click the Firefox icon, the top most left icon to your left, and boom, you’re connected to the world… okay, not really, but as long as you have internet, you can browse the web. I know the internet and the web is confusing in a way, but know for you to browse the web, your machine must be connected to the internet either by Wi-Fi or Ethernet cable. Troubleshooting connectivity issues is a topic for another day. If the connection is successful, you’ll get a web page similar to the image below, and you can search for almost anything.
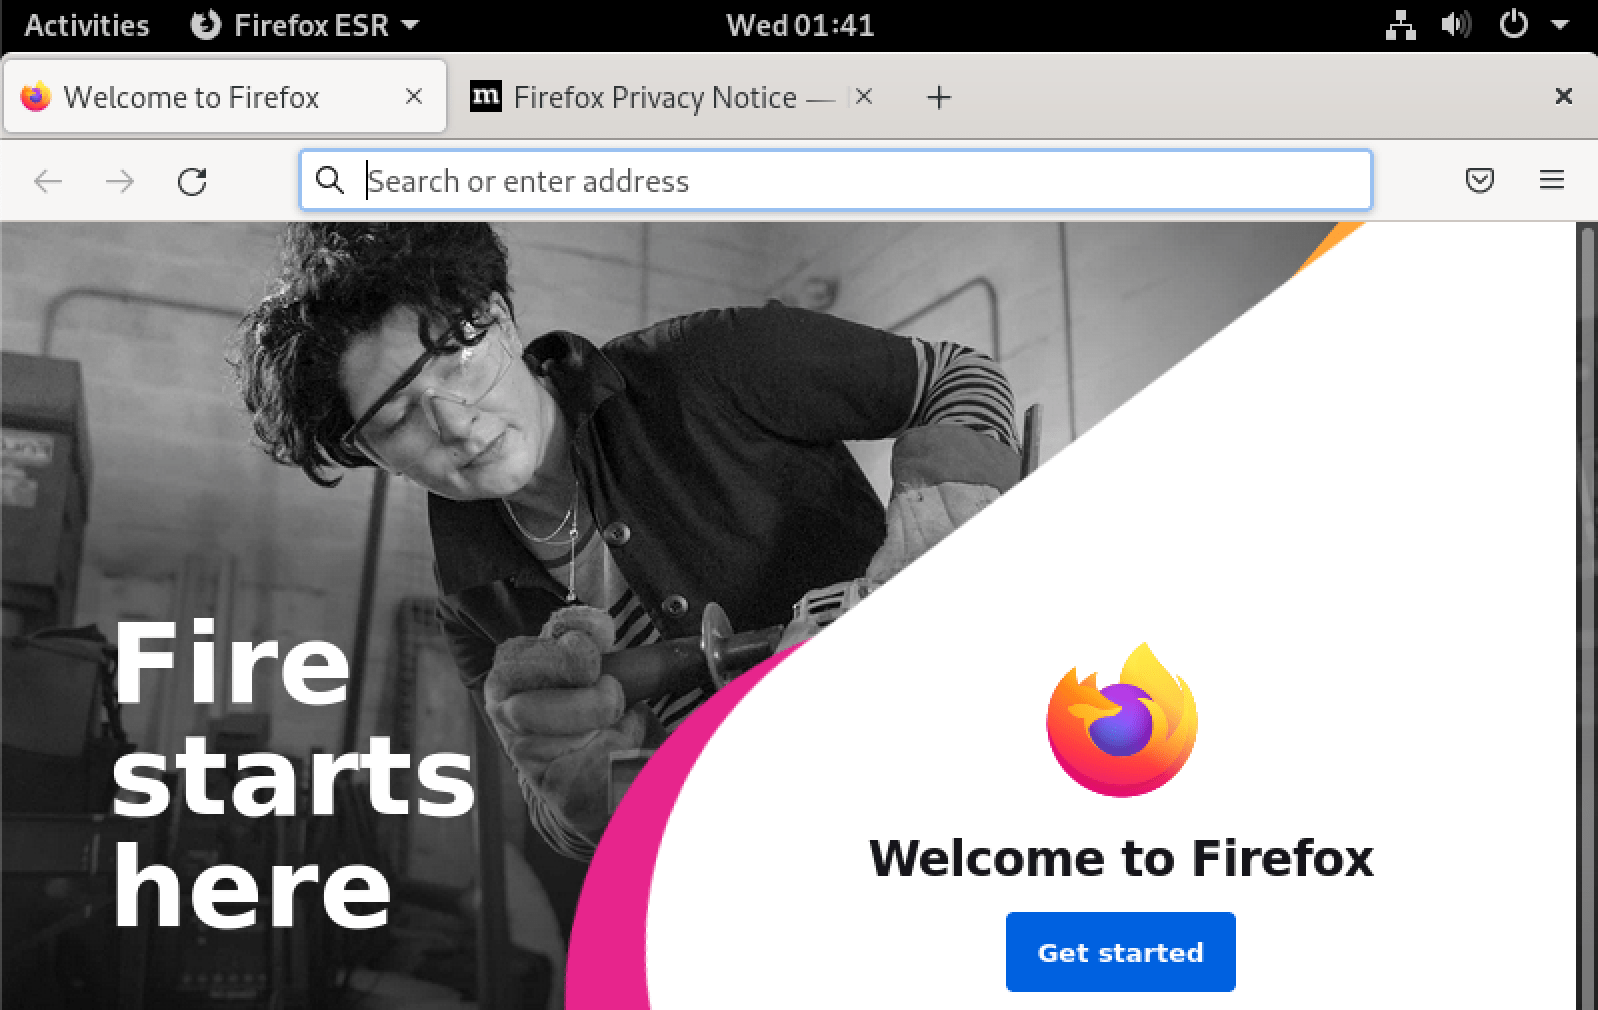
Firefox Browser
Remember that you can also launch firefox on the terminal by typing firefox and pressing the return key(Enter button).
firefox
4. Enable dark mode
Nowadays, dark mode seems to be the new theme in tech. Every user wants every application to have a dark theme, including code editors like VsCode and Sublime text. Luckily, Debian comes pre-installed with the GNOME Tweak tool, which will help you achieve just that.
Search for “Tweaks” in the applications and open the app. On the left-hand side pane, click on ‘Appearance.’ Next to the applications drop-down menu, select the “Adawaita-dark” option. Debian will immediately apply a dark theme for all your applications, including the directories and the Terminal.

Enable dark mode
5. Add ‘user’ to the sudoers file
When you try executing any command on the Terminal with sudo privileges on a freshly installed Debian, you will encounter the error – “user is not in the sudoers file. this incident will be reported.” When you do some research online, you will notice that this issue has been reported on various developer community platforms like StackOverFlow and many more. Luckily the solution is quite simple. Follow the steps below.
Launch the Terminal and execute the command below. (Please, take note of the hyphen at the end of the command – it’s important)
su -

Switch user
You will be prompted to enter the root password you set during the installation process. Then, execute the command below to open the sudoers file with the nano editor.
nano /etc/sudoers
On the file that opens, add the line below at the bottom. Please remember to replace the word “johndoe” with your user name.
johndoe ALL=(ALL:ALL) ALL

Add user to the sudoers file
Save the file (Ctrl + S) and Exit (Ctrl + X).
4. Creating files and folders
Folders enable us to keep files organized and separate according to our preferences and objectives. Files saved in a structured manner are easy to identify and retrieve. A file can be any data identified by a name and stored for future reference. Depending on the user, files can be stored in the same or separate folders.
So how do we create a folder? Using GUI, we right-click our mouse anywhere on the desktop, and a menu will pop up. Choose a new folder, name it and press ‘Enter’ to save.
Since we are power users, we can’t evade the terminal to create a file and folder. Fire up your terminal and note that the touch command is used to create files while the mkdir command creates a directory. The syntax is;
touch [name of the file]
mkdir [name of the directory]
Let’s see how that looks on the terminal. First, we change our current working directory to the ‘Documents’ folder using the cd command. Then we list the contents of the Documents directory with the ls command. We only have three items in our Documents directory, i.e., two files, namely ‘Test article.docx‘ and ‘My favorite car.txt‘ and the ‘Python‘ directory.
So we create a file called ‘file-one.txt’ using the touch command, and after listing the contents of our directory, we see that our file ‘file-one.txt’ has been created. Next, we create a directory called ‘my_first_directory’ with the mkdir command. After running the ls command, the ‘my_first_directory’ is now listed.
cd Documents
touch file-one.txt
ls
mkdir my_first_directory
ls
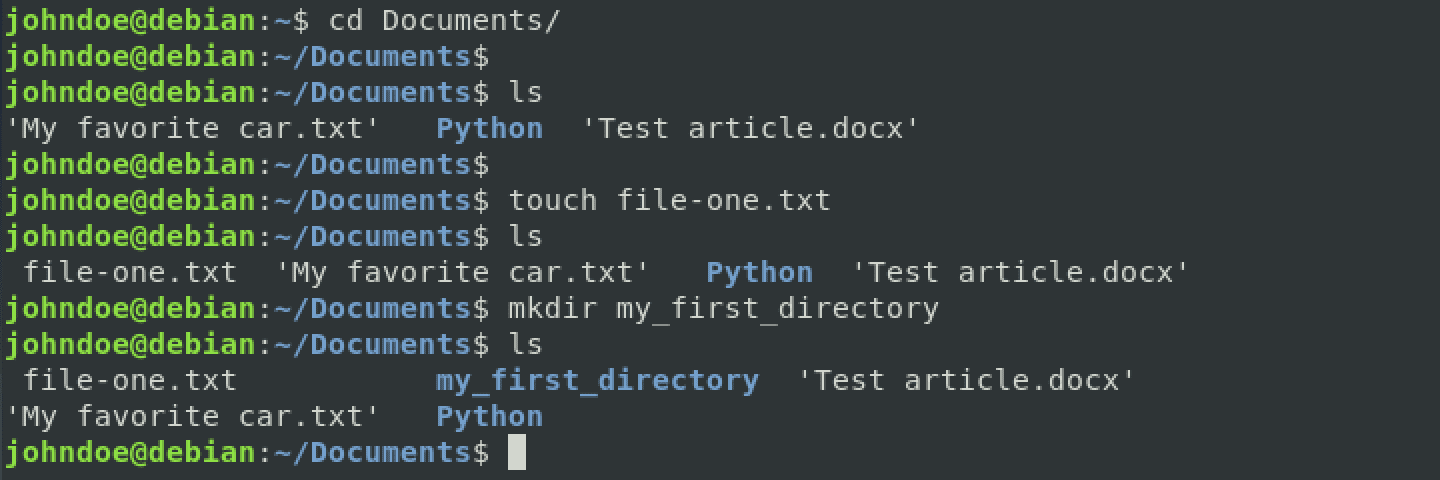
Create directories and folders
Note: Directories are usually highlighted in a different color to differentiate them from files
5. Activating Night Light
A night light is a feature in devices that decreases the amount of blue light emitted by devices by displaying warmer colors at night, consequently reducing the user’s eye-straining. However, too much blue light can also disrupt a user’s circadian rhythm affecting their productivity in the long run.
To activate, head to the “Settings” icon or click the show applications icon and search for ‘Settings’ in the search bar. Once open, scroll through to find Displays and select it on the left side of the window. On the Displays Window, select the Night Light tab and activate it. Set the timing you want night light, then close the settings.
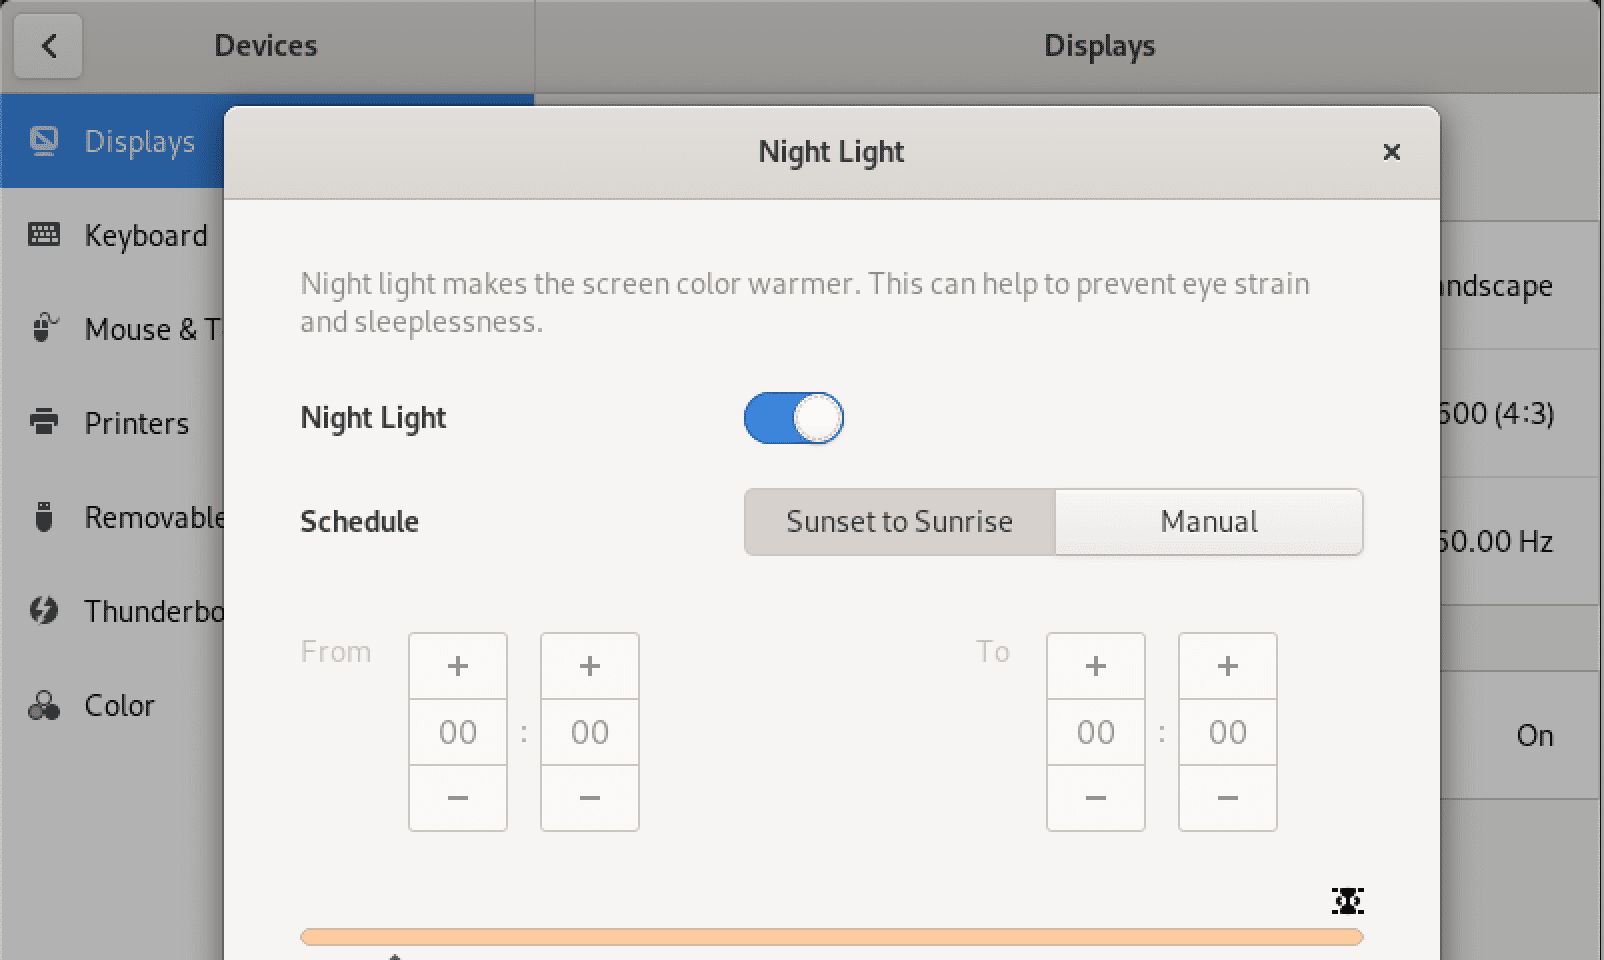
Night light
6. Play your favorite music
On the Desktop menu, select the icon that looks like a speaker. If you hover the mouse pointer over, it displays Rhythmbox, the default media player for Ubuntu. If you have any music in your library, you can play and listen as you do other things on your computer.
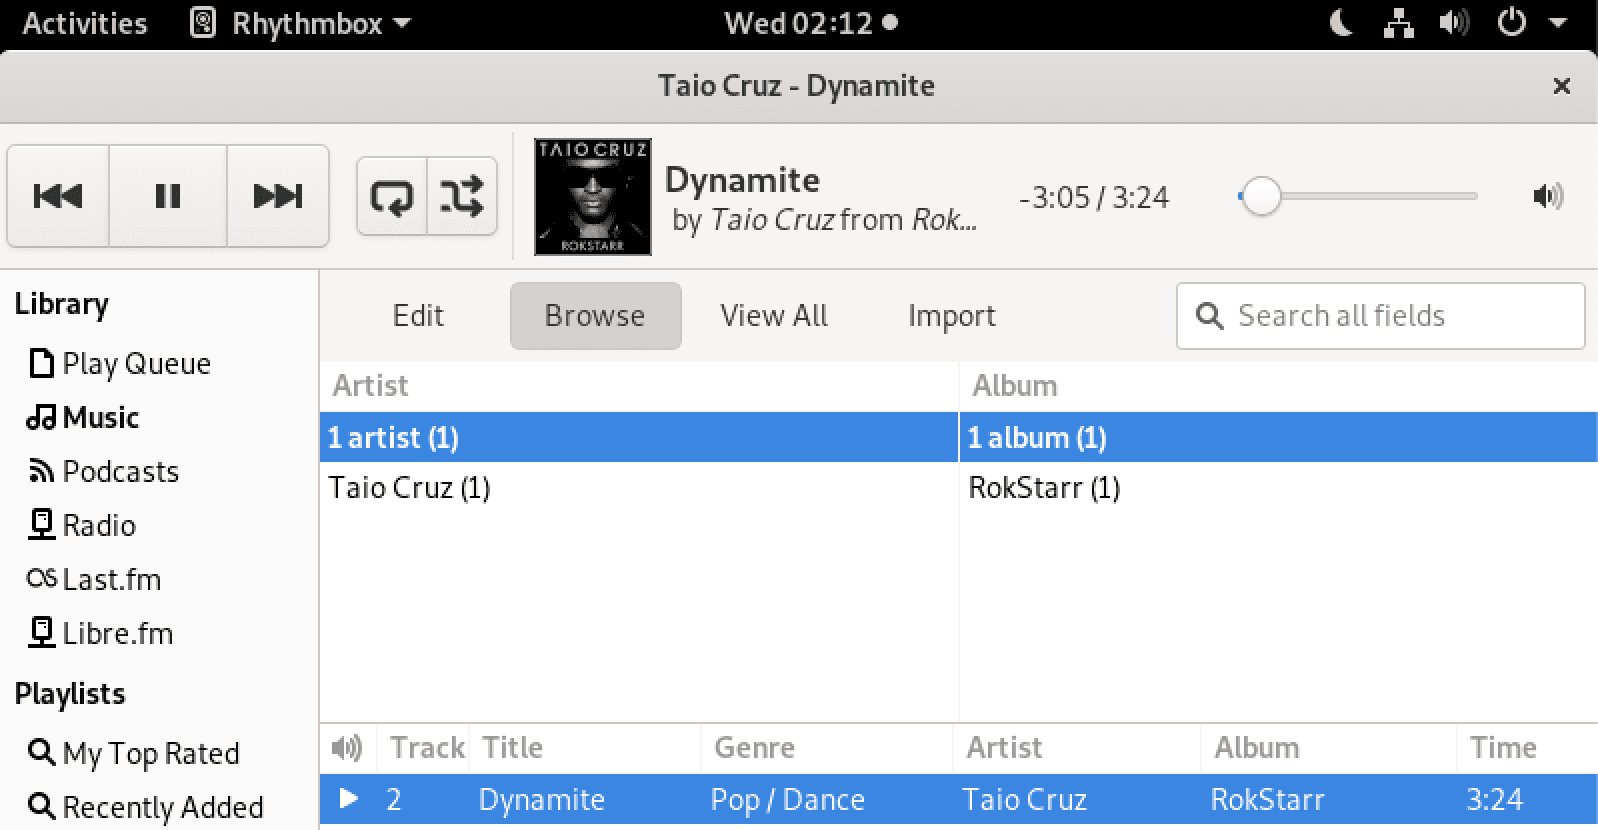
Rhythm box
7. Using the LibreOffice application
LibreOffice is an office productivity suite similar to Microsoft Office on the Windows OS. The bonus is that LibreOffice is open source. By office productivity, we mean stuff like typing documents, creating tables and slides for presentations, etc. Well, let’s open LibreOffice and see how it looks:
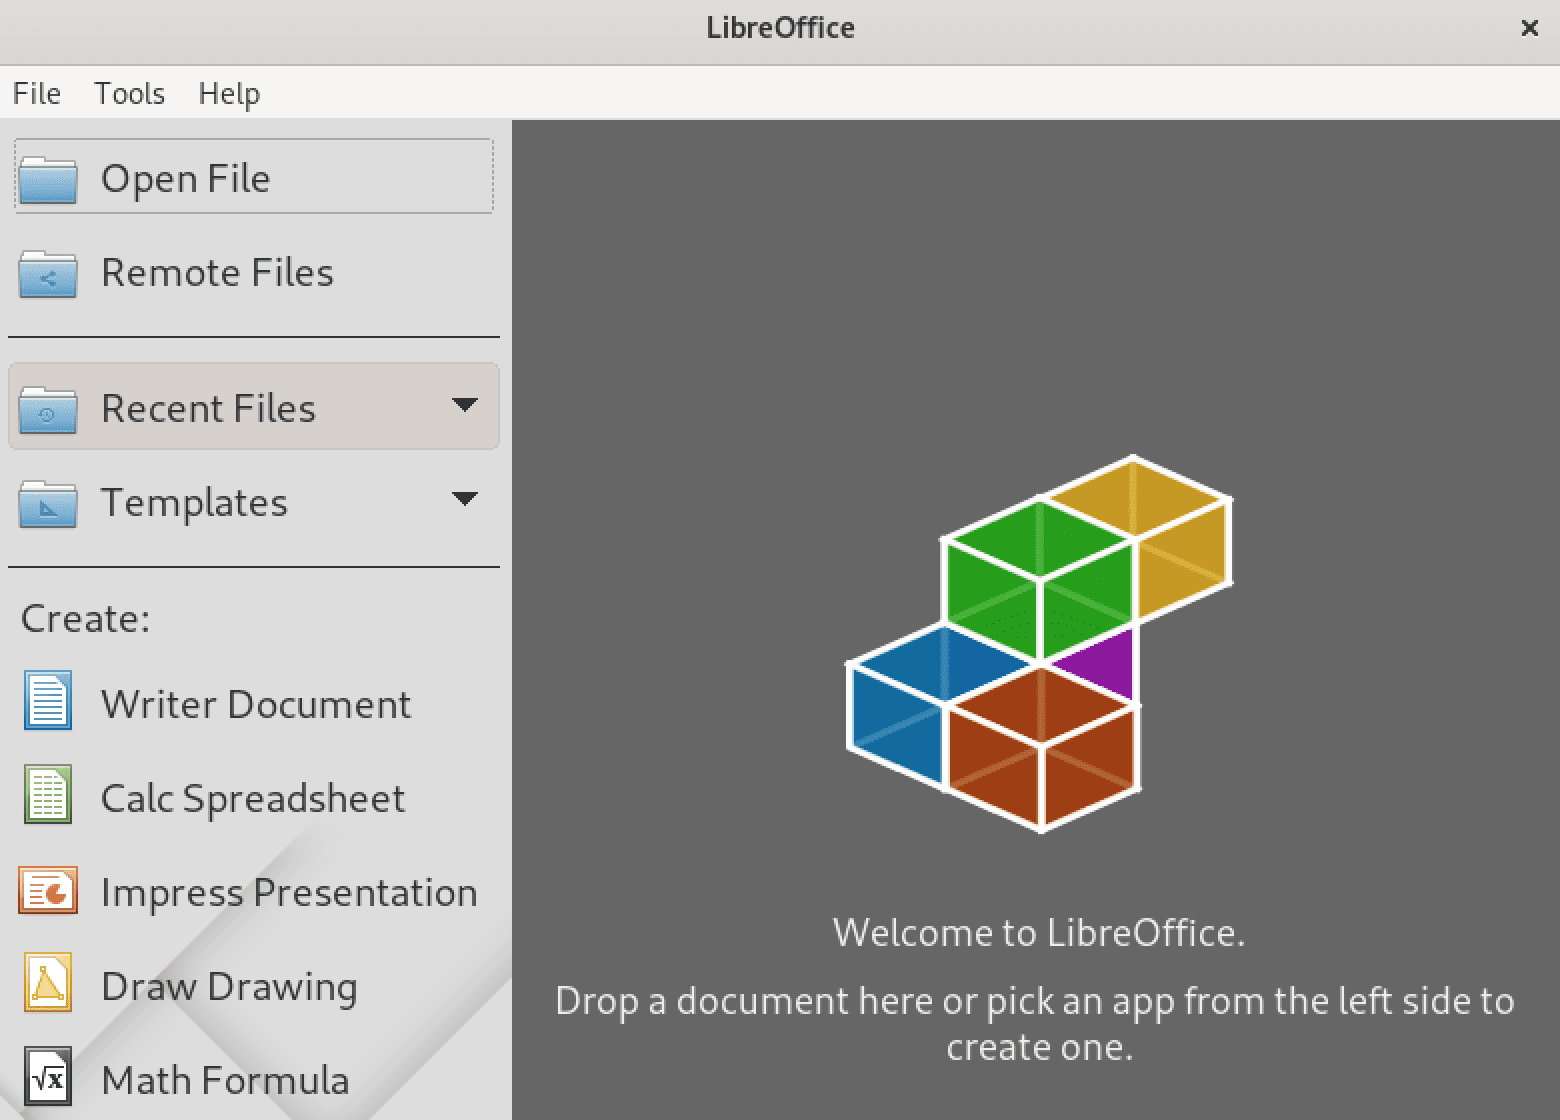
Libre Office
If you want to access Text Document, spreadsheet, or any other office suite, go to File at the top left corner and click. Hover over New; a drop-down menu will appear, then choose the office suite you want to work with.
8. The terminal
A terminal is a text-based interface that allows users to accomplish tasks without using the GUI. As power users, we cannot duck the CLI(Command Line Interface) in our daily routine… I should have put it first on our TODO list. Tasks we can accomplish as a power user:
- Updating our OS, making it super healthy with the latest release of packages
- Removing and updating packages.
- Creating files and folders as we have seen earlier.
- Installing and enabling the firewall, which we are going to look at.
- Running python without the need of an editor.
So, Let’s fire up our terminal and see what it looks like:
Click the Show applications icon (or hit the Windows key), type Terminal, and select it in the search result. And we’re in; this is what the terminal looks like. For now, it’s pretty much plain and boring. But once you start keying in commands, it becomes alive, okay, not literally, but you’ll get the hang of it as we explore it.
The most basic of commands any superuser should know it’s the update command. The purpose of updating our OS is to provide the latest features and fix any security vulnerabilities hence improving the performance of a machine. It’s our tradition to constantly update to the latest release before installing any new program. Type the following command:
sudo apt update
sudo apt upgrade
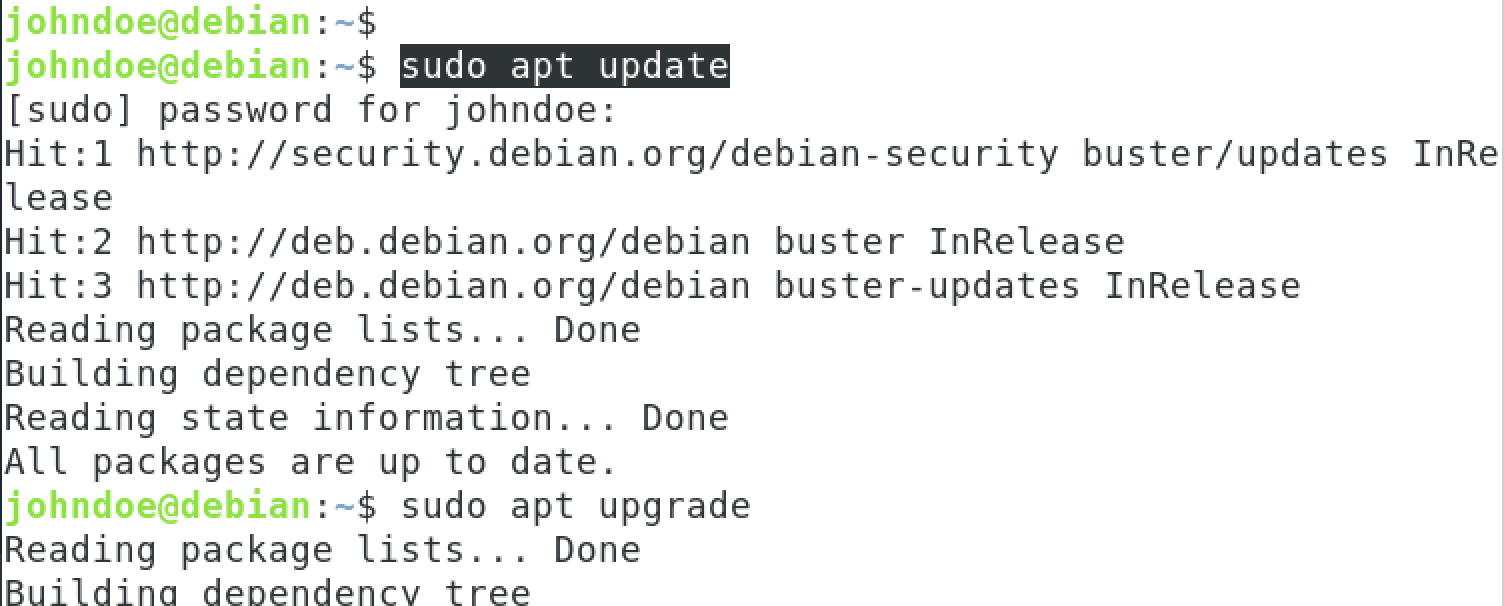
Update System
Note that we run most commands or scripts as the root user(a user with administrator privileges). Always start with sudo before running any command. Sudo(means superuser do) means that we are telling the current shell to run as a different user, i.e., root for that particular instance.
9. Installing a firewall
I bet you’ve probably come across or heard that Linux OS doesn’t need anti-virus or firewall since they’re immune to attacks, unlike Windows OS. But this is a big myth that I also used to believe sometimes back. Now that we have demystified the myth let’s look at how we install one. The firewall in Ubuntu is known as the UFW(uncomplicated firewall). Indeed, it’s not as complicated as we will see. Fire up the Terminal, and let’s get straight into it.
First, we check if we have a firewall activated by running the command below.
sudo ufw status verbose
The status will either be active if it’s enabled or inactive if disabled. Let’s install our firewall with the command below.
sudo apt install ufw
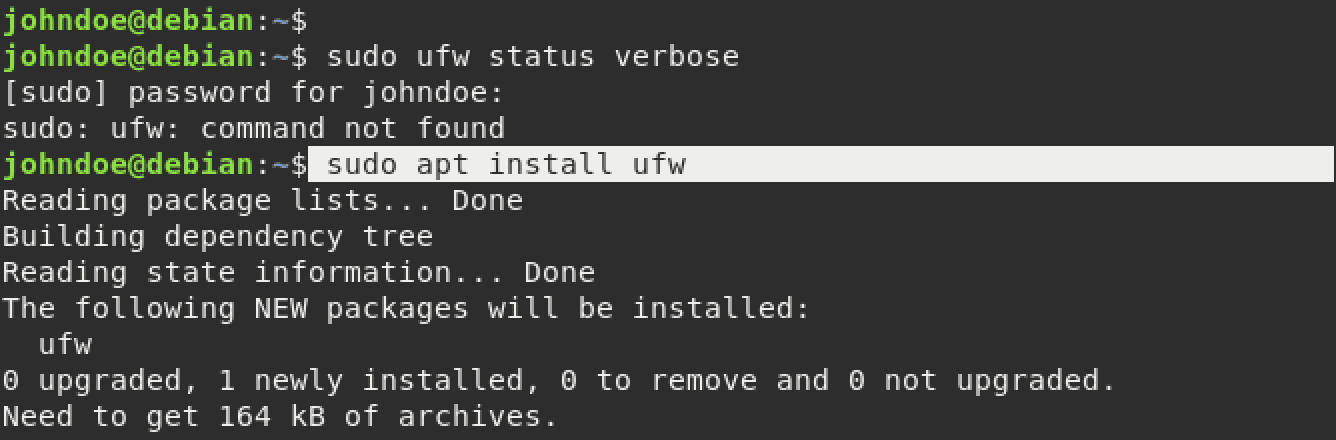
Install firewall
The next step is to enable our ufw to an active state. One thing to note is that firewall might be installed but may not be active. That’s why we need to enable it. Run the command:
sudo ufw enable
You will get the message “Firewall is active and enabled on system startup.” We confirm the status of ufw by running the command below.
sudo ufw status verbose.
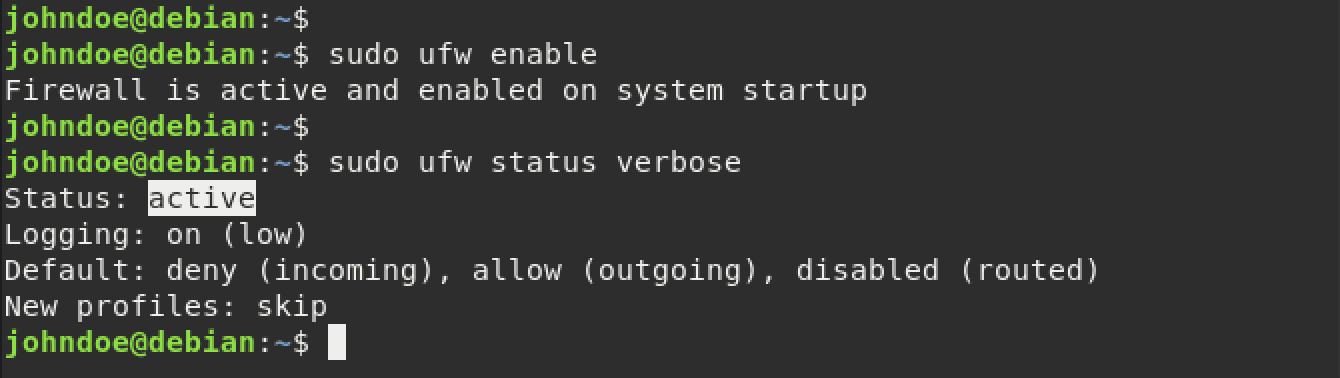
Firewall status
Now that firewall is active; we can filter traffic either inbound or outbound. An example is allowing traffic from port 22, i.e., SSH traffic. We achieve this by running the command:
sudo ufw allow ssh.
”Rule added” will be displayed if the rule was successfully added. This rule allows remote communication with a remote computer.

Allow SSH firewall
A recap of what we’ve done; we checked the status of our ufw, then installed our ufw, enabled it, rechecked its status to confirm if it’s enabled, and created our first rule to allow SSH traffic.
A firewall is excellent for resource usage as it keeps traffic in check through filtering, only allowing traffic that has been configured to be genuine. This prevents unauthorized access into a system, consequently reducing losses.
10. Using Python to program
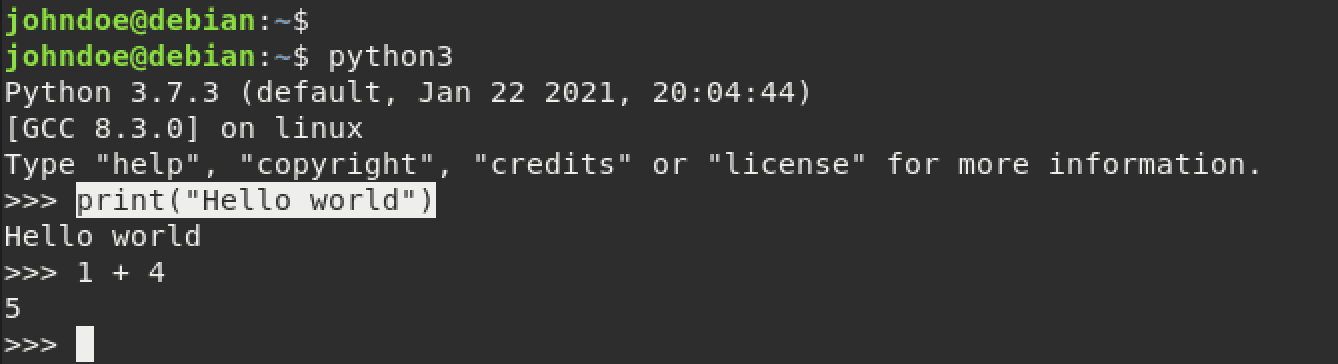
For those who love programming, especially with Python, then Linux has your back. Almost all distros come with Python preinstalled. We confirm by running the command python3 on the terminal as shown below.
python3
If python is installed, then the above message should display showing the version of the python installed. After that, a prompt(>>>) appears, and we can start creating programs. And what better way to show us a demo than the “Hello World” program.
So let’s go ahead and accomplish this by using the print function The print() in python prints any argument passed to it. Here we’re passing a string “hello world” as an argument to be displayed on the terminal when the print()function is run. We give the terminal input, and it replies with an output. You can also perform arithmetic operations like subtraction, addition, division, and modulus.
print("Hello World")
Python3
Conclusion
This is a gist of the 10 most basic things that you can do on Debian, but there is so much more we could showcase. My challenge to you is to explore Debian and research more, especially the terminal, and you’ll enjoy using Debian.
2 comments
Frankly, a trivial and superficial topic and unnecessary steps that are not worth reading.
unsuccessful topic.
i got this problem with debian that when i use sudo it gave me an error, thank to this i resolved thanks!