
Discord channels are created daily, which makes sense, and it is also advisable to have a way of welcoming new users to your servers and whatnot have an automated approach. If you have been looking for a guide on welcoming new users to your Discord channel and general knowledge of how to institute a welcome channel, then you are at the right place, mate. We will share some simple approaches to make your welcome channel creation easy.
If you are a Discord newbie, you probably have no idea how to create a welcome channel that would generate an individual private or custom message that welcomes a new user to your channels but all that is covered in this guide.
Manual welcoming of new members is exhaustive and time-consuming. Still, a complete read-through of this guide will help you forget this tiring process and spontaneously perform the whole process by sending an automatic welcome message. This guide will share a nifty trick to make a default automatic welcome message. This message will always pop up whenever a person joins the channel for the first time; it would act like a welcoming message in this instance. Of course, you can always customize the message as you see fit.
Here are some things we will cover:
- Understanding Welcome Channel in Discord.
- How to create a “Welcome Channel” on Discord.
- What is the “MEE6” Discord bot?
What is a Discord welcome channel?
A welcome channel in Discord refers to an individual or group of channels that welcome new users by displaying an automated welcome message.
Although creating a welcome channel in Discord is not imperative, it is advisable if you want the new members to have a clear image of how your channel works.
These welcome messages are pretty varied, and you should intend to create one that matches your server’s intent.
For example, let us say that you watch movies with other users but on weekends only. In such an event, it is best if you would include this in your new welcome channel message so that when a new user joins, they will know how to go about things on your server.
It is also a personal initiative first to understand Discord channels before you start interacting with the community.
What is the “MEE6” Discord bot?
MEE6 Discord bot gives you complete control to create commands of your dream by providing practical features for facilitated moderation for busy servers and channels on Discord. It can create commands, set search functions, integrate Twitch and YouTube, and greet users.
Also, MEE6 can help you get efficiently generated servers and allow you to modify your Discord profile banner and manage all sorts of things related to server members. As such, we will have to enable this third-party bot(MEE6) on our system to develop the welcome message functionality on our Discord app. And remember, we are not saying that you cannot deploy another bot – you are free to interact with other different bots as long as you are okay working with them.
We are only saying that MEE6 is one of the most reliable for managing your Discord server without major setbacks.
With that said, let us see how we can make a Welcome channel on our Discord server.
Creating a “Welcome Channel” on Discord
To make a welcome channel in Discord, you are bound to have two things; your own Discord server and the earlier mentioned MEE6 bot.
So, download Discord and log into your account and proceed.
If this is your first time creating, there is no reason to panic- just follow the steps mentioned here, and you will be able to set up one for yourself in no time.
Step 1: Open Discord and click on “Create channel”
First things first, open the Discord app on your PC. In our event, we are using the Ubuntu version of Linux; as such, we will click on “Activities,” then type in Discord in the search bar and click on the icon that appears as shown below:
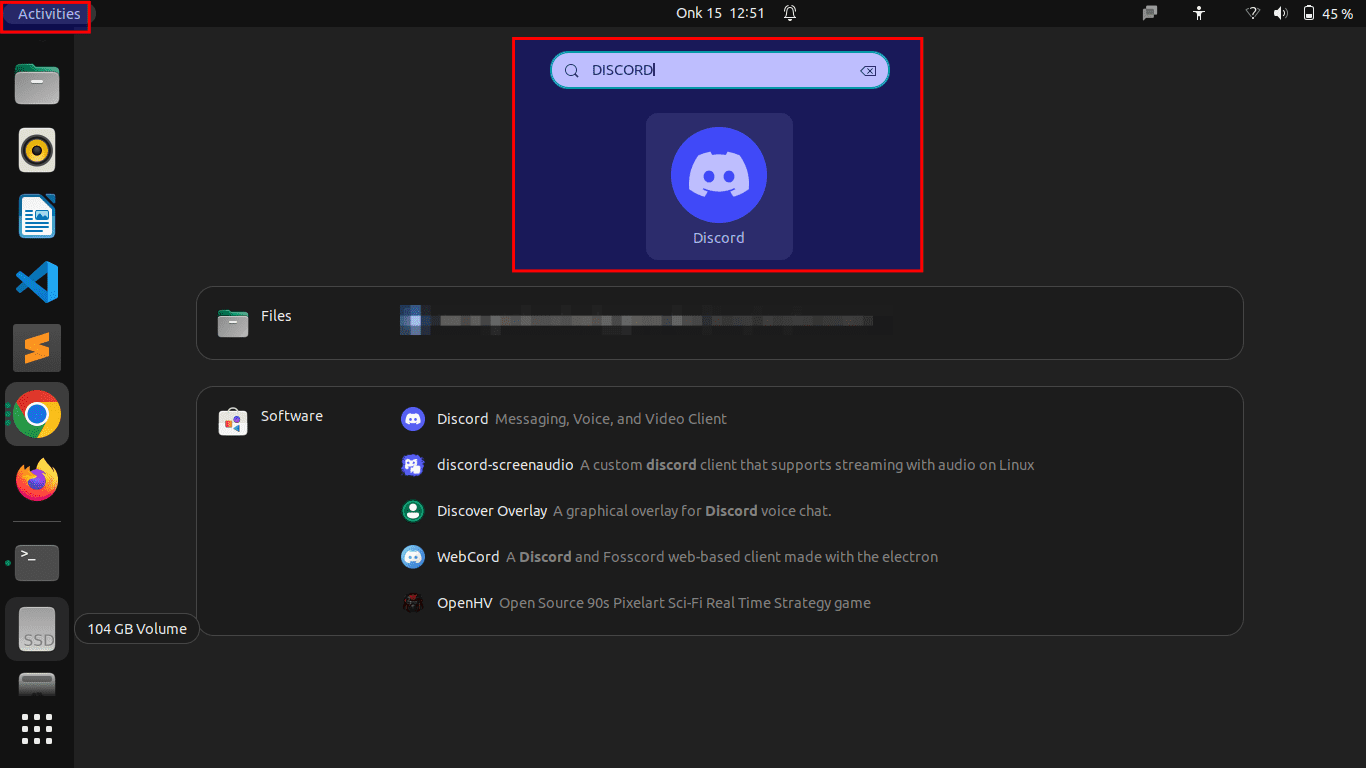
Open Discord
Note: You can open the desktop app, like us, or Discord on a web browser- it is entirely up to you.
On the overview page’s left side, you will see your servers, select one server, right-click on it, and select “Create Channel ” on the context menu that pops up:

Right-click on the server
Step 2: Set up Discord’s channel details
In this section, you will begin setting up a Welcome channel in your Discord app. First, you may need to set up the Discord server name and description if you don’t have one.
After clicking the “Create channel” option, you will be presented with such a window:
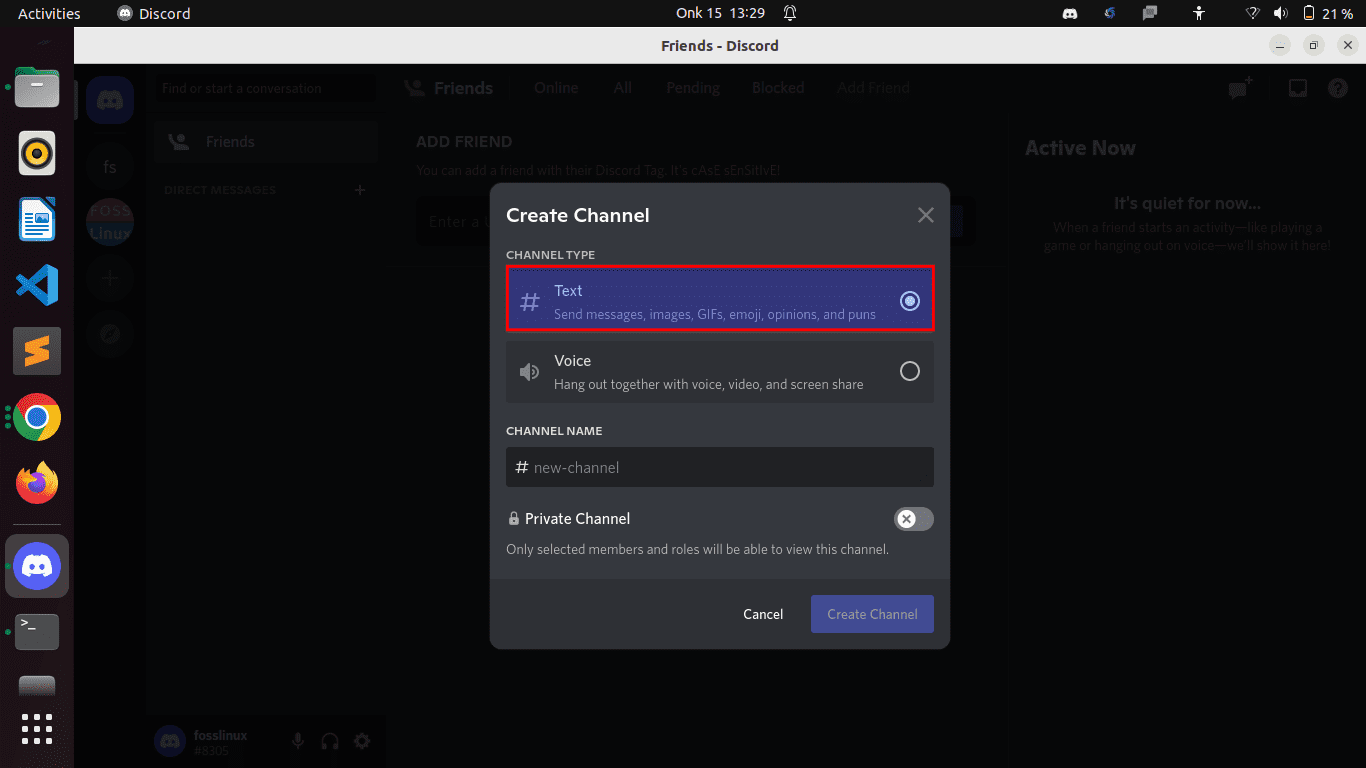
Select text channel
Go ahead and select the “Text” option, as highlighted above.
There are two chief requirements for an excellent welcome channel:
- It has to be a text channel – text channels only display text messages as you imagine. Don’t select “Voice Channel” – members won’t like to hear a voice message when joining a channel.
- The private channel option must be disabled – Ensure you enable the public option whenever you create your welcome channel. Otherwise, the new users won’t see the channel when they decide to join.
After that, Give your channel a name. This can be anything. We opted for “fosstuts,” but you can select whichever term you prefer:
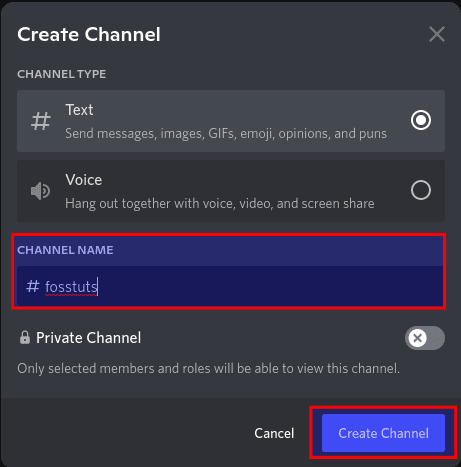
Write your channel’s name.
Once done typing the name, proceed and select “Create Channel,” as highlighted in the snapshot above.
The channel should be created:

fosstuts channel created
Also, you can read How to stream on Discord.
Step 3: Open server settings
After that, navigate to the Discord server settings, and ensure that everything is as intended.
In our event, we will go to “Edit Channel>Permissions>Advanced Permissions” to modify the channel. We will turn on the “View Channel” and the Read Message History options in this list. We will then switch off the “Send Message” option, which means that everyone can see the channel view of the message history but cannot send the message on the Welcome channel.
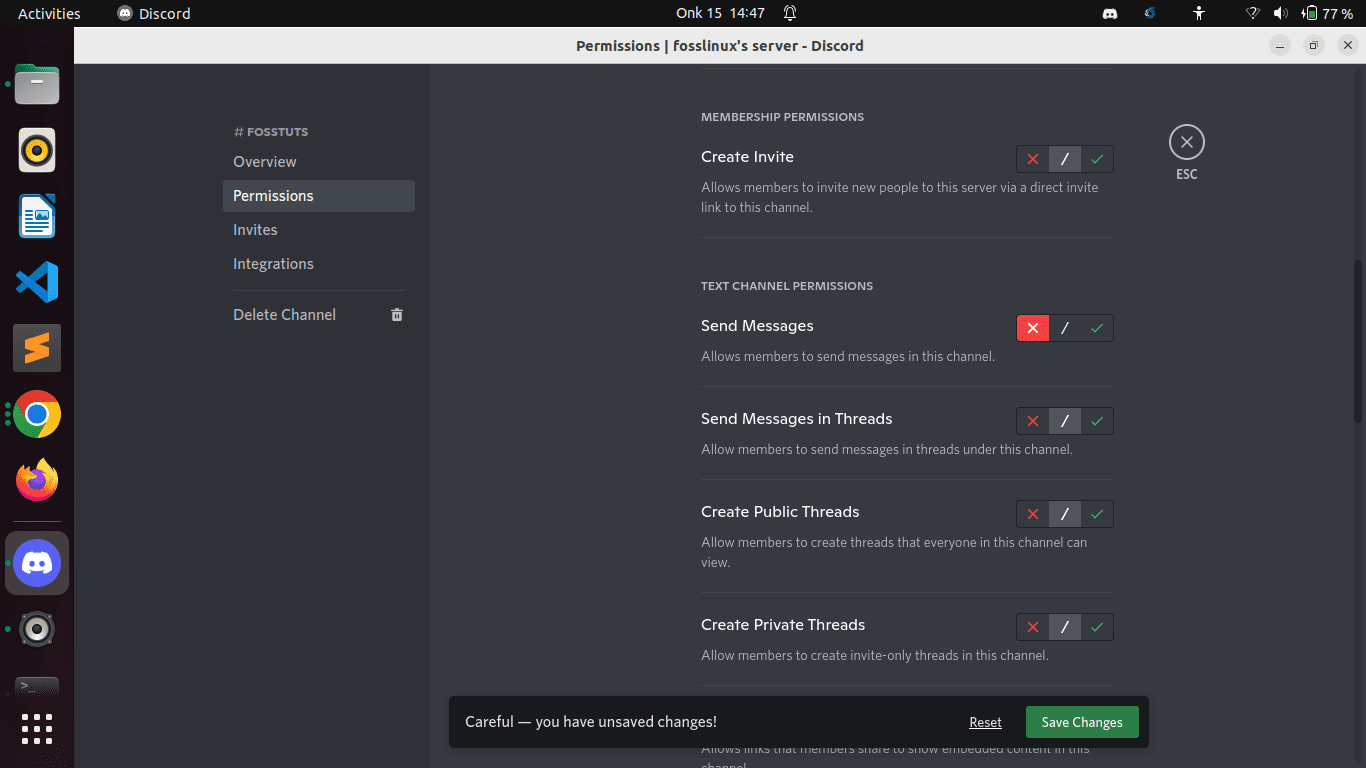
Settings
After that, click “Save changes” if you think that the Welcome Channel has all that it needs to be called a proper and complete setup, as shown here:

Click on Save changes.
You can also study how to install and uninstall Discord on Linux here.
Step 4: Append the MEE6 bot to your Discord server
You must open the MEE6 bot using the given link. After which, you will select “Add Discord server.” This will automatically interlink your account to the bot.

Add MEE6 bot
It will then request you to authenticate before adding the bot to your server. Click on “Authorize.”
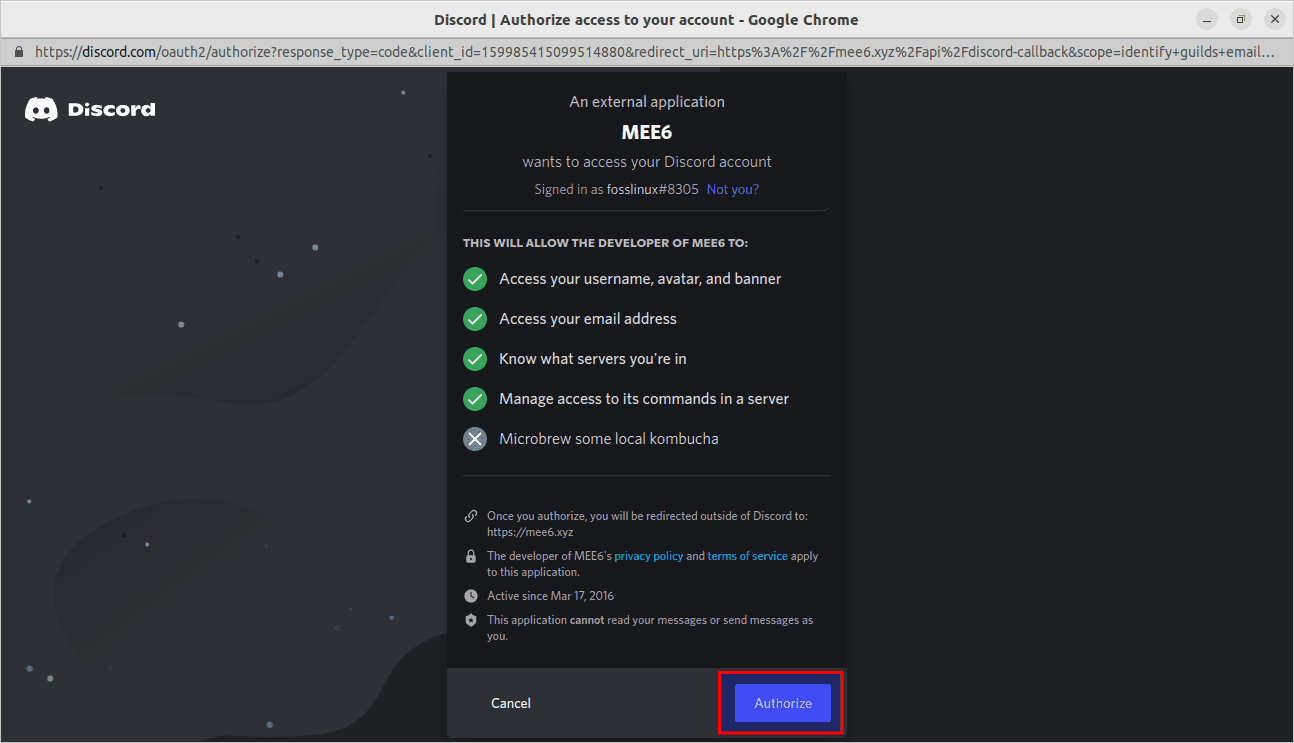
Authorize MEE6
You can now access the plugin gallery from its official website after adding the MEE6 bot to your server.
Next, select the server on which you want to create a Welcome channel, as highlighted below:
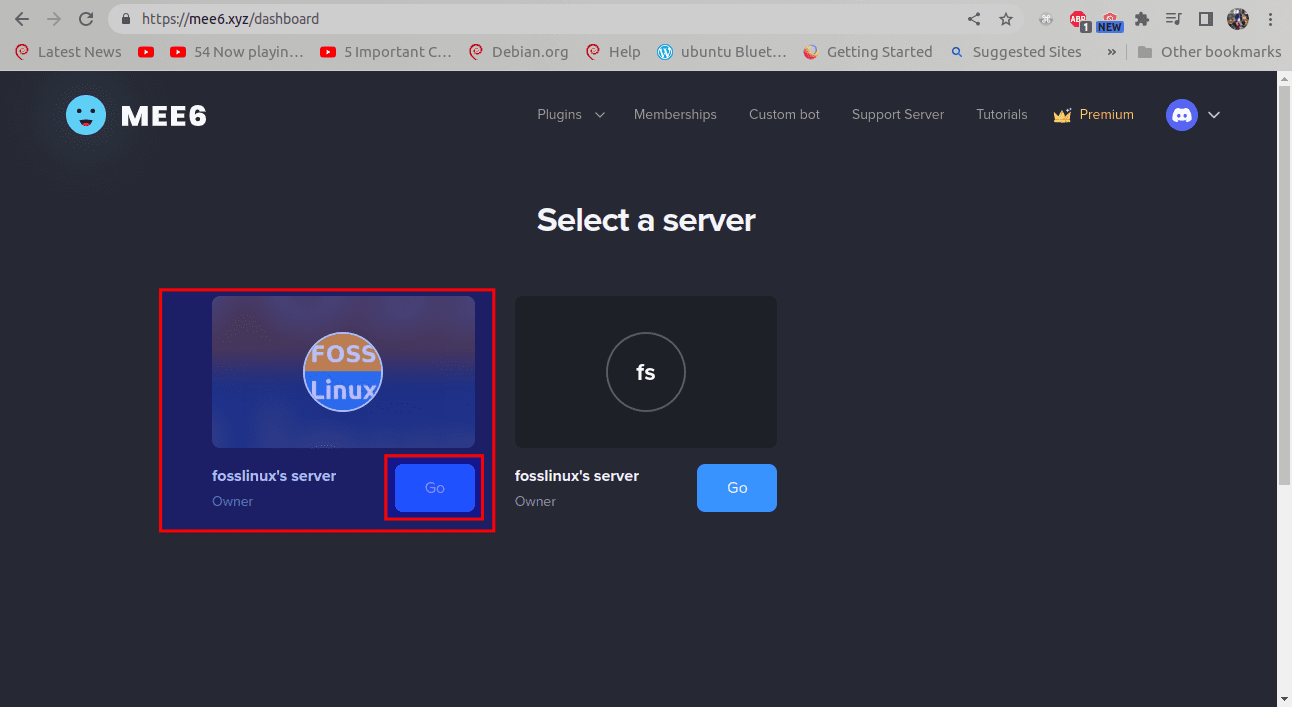
Select a server
Step 5: Open “Server Management” and select Welcome
Upon selecting the server, head to the MEE6 Dashboard, and look for the option that states “Server Management.”
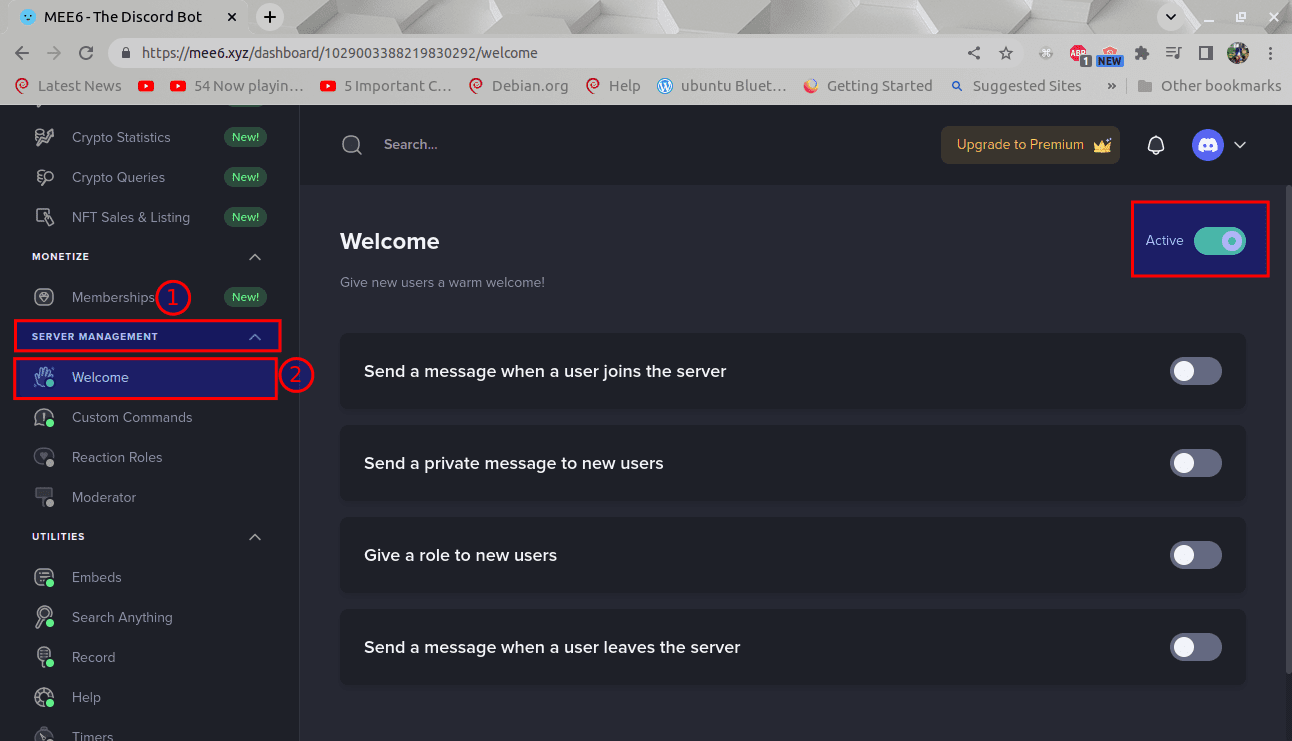
Select Welcome
Ensure you enable a button that says “Welcome,” as shown above. This is the first step to setting up the Welcome channel with a customized message using the bot.
Step 6: Edit your welcome channel information
Enable “Send a message when a user joins.” You can also set up a server to send a message whenever a user leaves, which is a story for another day.
On this screen, you will see multiple options to greet a new user joining the server:
- Make a simple message like “Hey (user)! Welcome to our server on Discord!
- Explain the rules your server is guided on, such as “Hey(user)! Welcome! Please, don’t spam the chat!
- Customize your message to what you like- you are free to do so!
In our case, we will go simple and turn on the first option for sending a message when a user connects to our server.
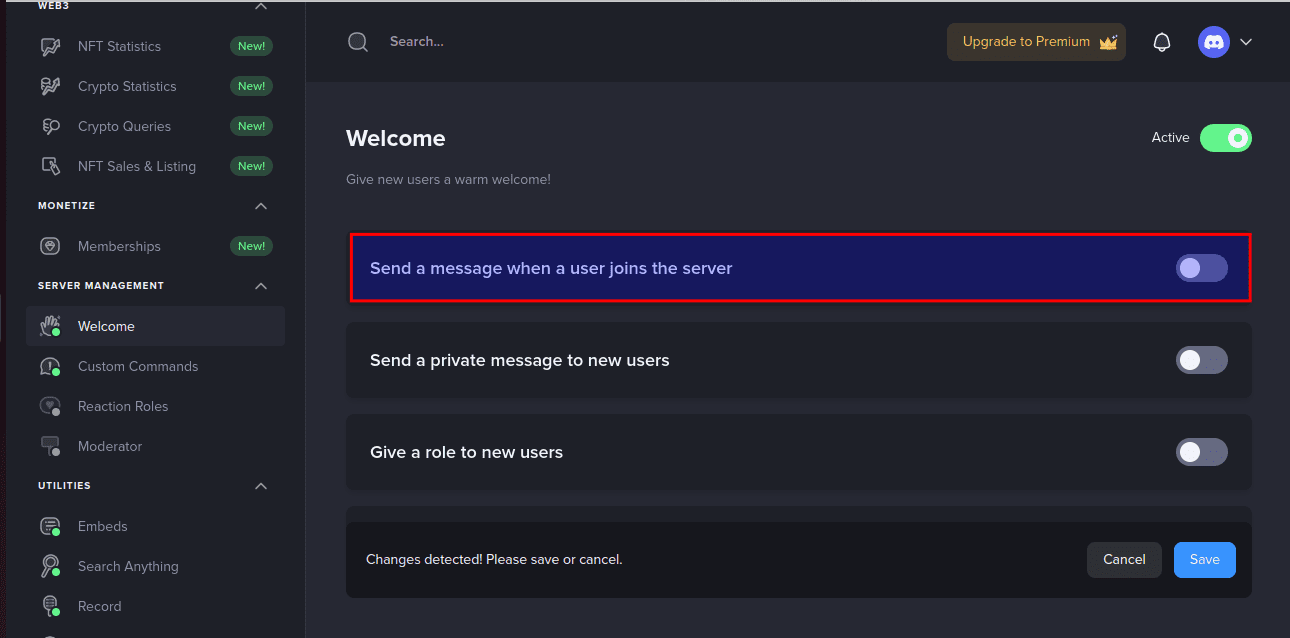
Turn on the first option.
Step 7: Select a channel
Upon turning on the option, select your channel:
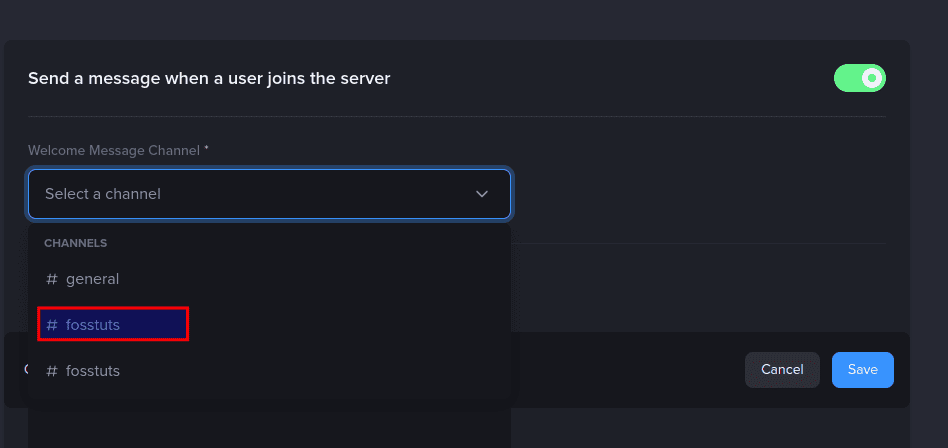
Select channel
Step 8: Edit the message
After that, edit your welcome message to fit your preference, as shown below:
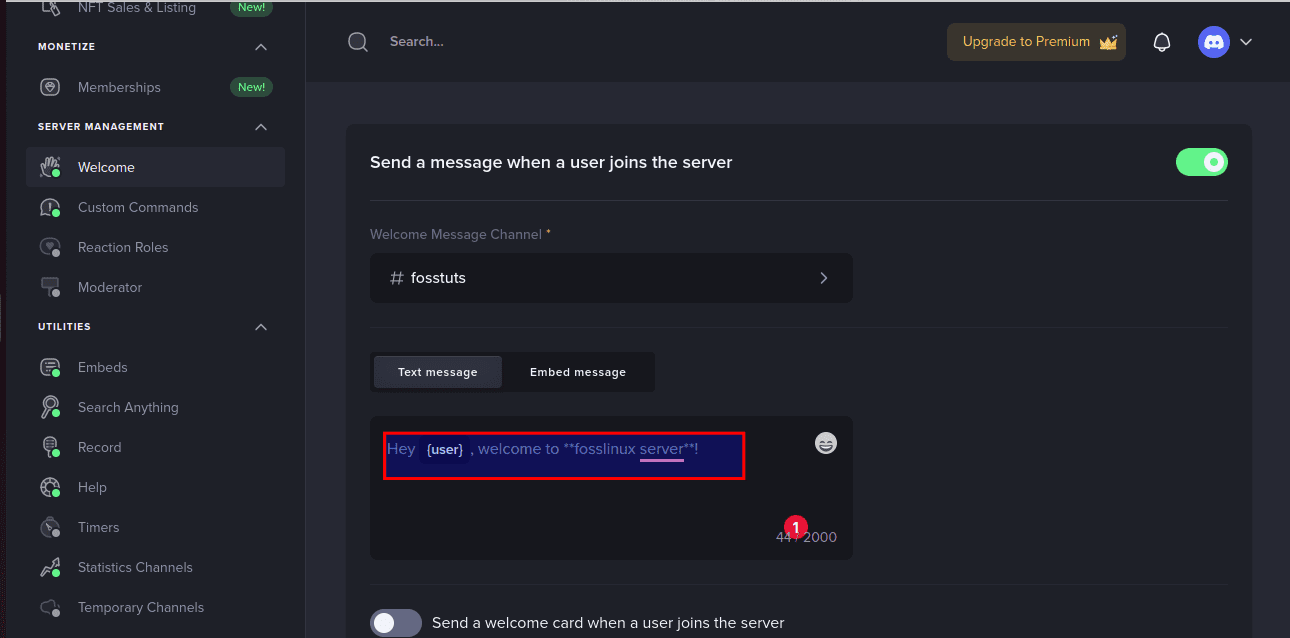
Edit the welcome message
Step 9: Save the made changes
After that, you will have to save the changes made to the server for them to take effect. To do this, click on “Save” as highlighted below:
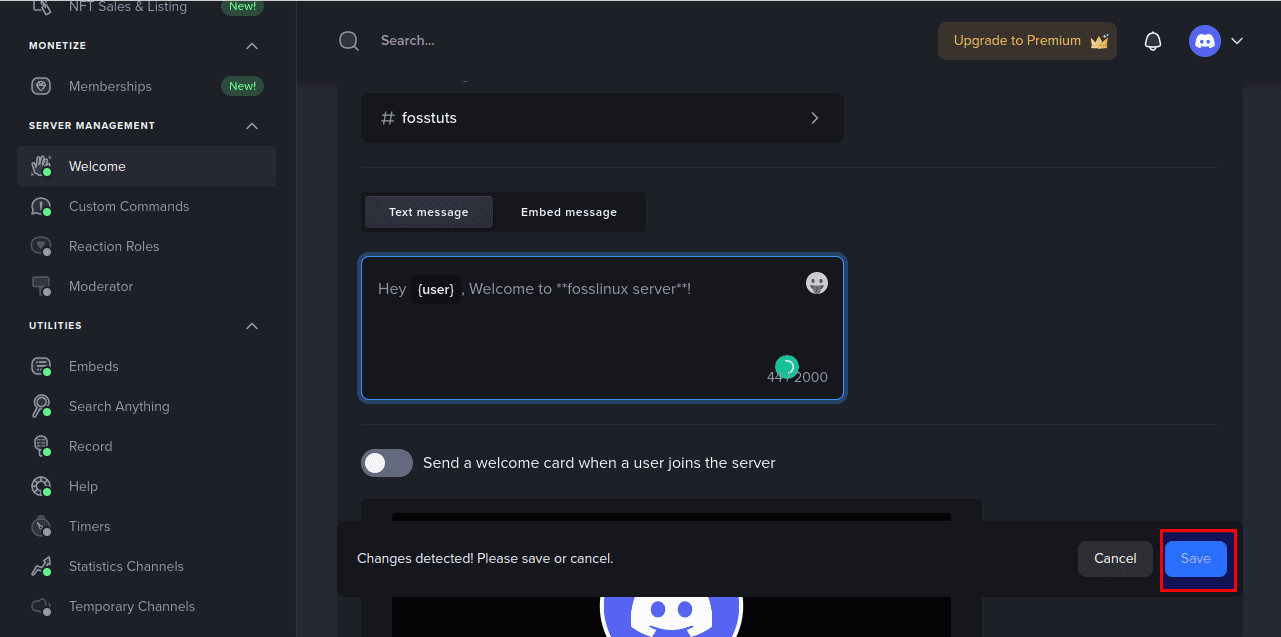
Click on save
Invite people to the just created channel by sending them the invitation link, and check how the message functions:
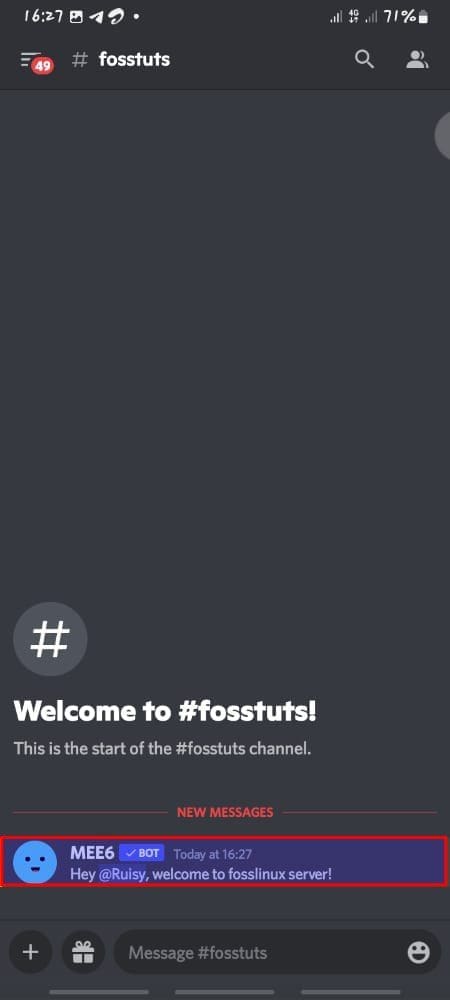
An invite message
And that is how you make a Welcome channel on Discord!
Can you create a Welcome channel, Discord, via the mobile app?
No, you can’t use the Discord app for mobile devices if you want to create a Welcome channel. Use the desktop version instead!
Wrapping up
This article has discussed how you could make a welcome channel and use it on your Discord application. We also covered how to add a MEE6 bot to send automated messages whenever someone joins the server, which we believe you are okay with now. There are several other bots that you can implement for the Welcome change, but MEE6 is the most preferred as it contains the most straightforward ways to automate the welcome message.