
Have you been wondering how you can have several multiple time zones in your elementary OS? Or do you have a family member, colleague, or client in another country and want to keep track of the time difference? You need not worry since this article will cover all there is on adding multiple time zones in elementary OS. At times this will aid you to know the time well and avoid cases where you wake someone up at 3 AM without knowing.
Situations like these can be managed better if you have multiple clocks, as you can set one clock to your local time and sync other clocks (s) to other time zones(s). This helps to ease keeping an eye on the different times easier as it is just a glimpse away. Some Linux users also keep a tab on the UTC because most servers use UTC.
This comprehensive tutorial will show you how to add additional clocks or time zones in your elementary OS and other Linux distro that uses the GNOME desktop environment.
Adding multiple time zone clocks in elementary OS and other Linux using GNOME DE
The first thing is to check the desktop environment since this tutorial is suitable for GNOME desktop only. If you don’t know which Desktop environment you are using, then here is how to find out.
If you are a new Linux user seeking help in the Linux forums, you may be asked this question: “Which desktop environment are you using?” Many get confused as they know what a desktop environment is, but they don’t know which one they are using. Here, we will show you the command line and Graphical User Interface (GUI) methods for checking the desktop environment. The methods are also applicable to all other kinds of Linux distributions.
Check which desktop environment you are using
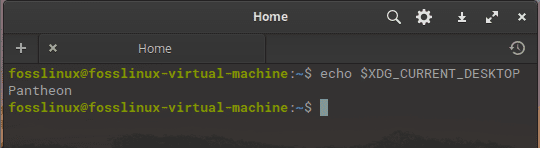
You can use the echo command in Linux to display the value of the XDG_CURRENT_DESKTOP variable in the terminal. To attain this, copy and paste the following command in your terminal:
echo $XDG_CURRENT_DESKTOP
check desktop environment
This should tell you if you are using GNOME or not. Our system is using the Patheon Desktop environment: however, this does not stop you from installing the GNOME Desktop environment. To install the GNOME environment, copy and paste the following command to your terminal:
sudo apt-get install gnome-shell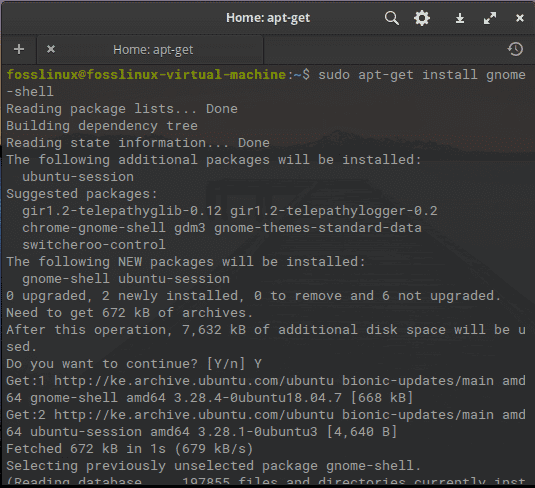
install gnome-shell
After that, run this:
sudo apt-get install ubuntu-gnome-desktop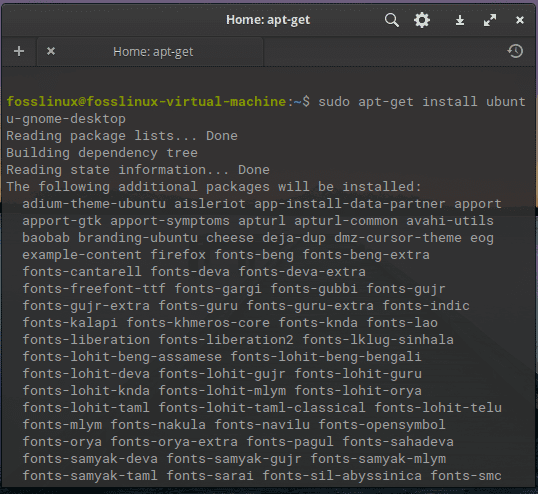
install gnome tools
Note: During the installation process of the two commands above, you will at some point be asked to affirm if you want to proceed with the installation or not, type “y or Y” to affirm, and then press “Enter.”
While installing the gnome desktop, you will encounter several configurations questions. For instance, while installing the software, a package configuration file that provides graphical login capabilities for the window system will appear; here, you will click on “OK” to proceed.

Click OK
After that, the default display package manager window will appear; using your keyboard keys, navigate to gdm3 and click on “OK” to allow the installer command to finalize the installation of the gnome software to your elementary OS.
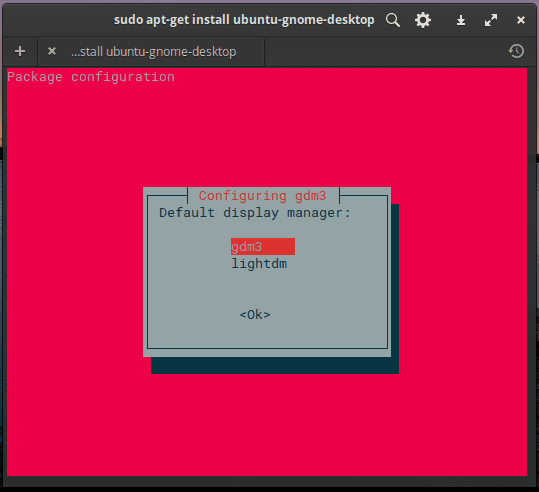
select gdm3
Knowing the desktop environment version (also known as DE) could prove vital in some cases. Each new version of the software brings new features or removes some. For instance, GNOME 3.36 comes with a ‘Do not disturb’ option to toggle off all the desktop notifications.
Sometimes, you might verify that you are using GNOME, yet you don’t see this option on your GNOME desktop. In such cases, you could check the GNOME desktop version you have installed on your system to make things clear for you.
Here, we will show you the desktop environments version commands first because you can apply them on any Linux running on the desktop environment.
Checking the desktop environment version
Unlike getting the name of the desktop environment, getting its version number is not that straightforward because there is no standard command or environment variable that could give this information.
One way to get the desktop environment information in Linux is by using a tool like Screenfetch. These command-line tools help display the logo of your Linux distribution in asci format besides other basic system information, among them the Desktop environment version.
In elementary based distro, you install Screenfetch by enabling Universe repository and then using the following command:
sudo apt install screenfetch
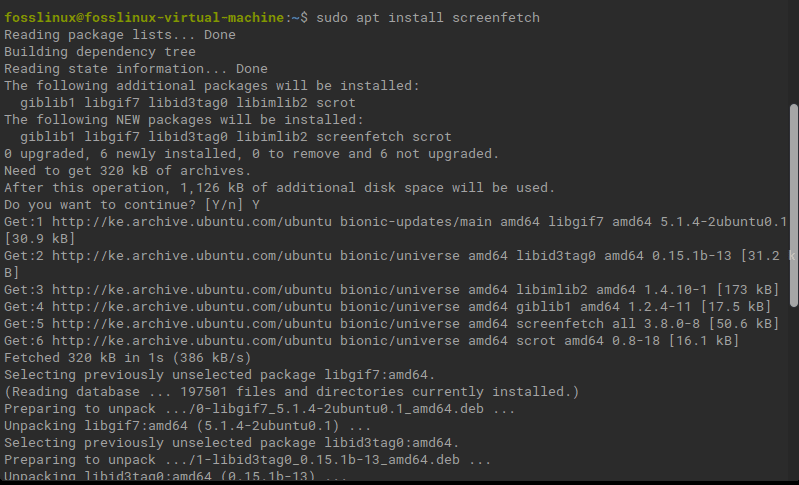
install screenfetch
Once installed, type screenfetch in the terminal, and you should see the desktop environment version and other system information.
screenfetch
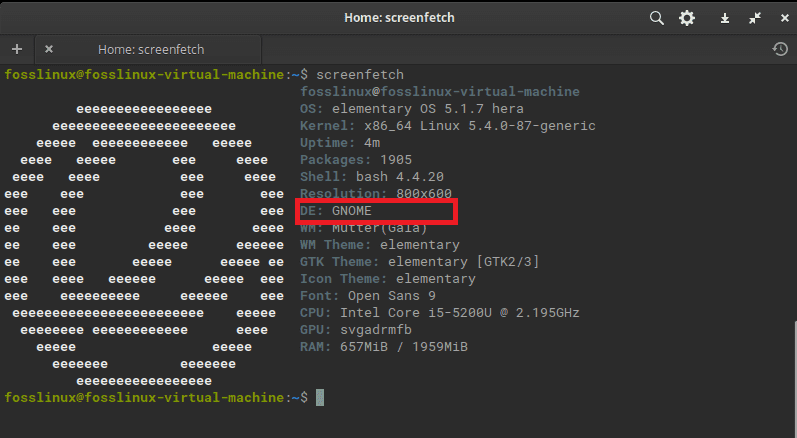
screenfetch command
As you can see in the image above, our system is now using GNOME despite not allocating the version.
Note: Please keep in mind that it is not guaranteed that screenfetch will display the desktop environment version. If it cannot find anything on the version, it will just show the DE name.
Using GUI to change elementary timezone
Nearly all desktop environments provide basic system details in their settings-about selection. The one major issue is that most DEs look different, so we will not display the exact steps. We will alternatively show you for on GNOME and let you discover it on your desktop.
If you used the screenfetch command and did not see GNOME, go to the application menu on your PC and search for about and click on it. After that, an about window containing details of the machine you are running will appear. You should find the GNOME version in this section.
And that is all there is on checking the desktop environment for GNOME desktops.
Let us now tackle adding additional clocks; you can unsurprisingly use a nifty little app called the GNOME clocks.
GNOME Clocks is a simple application that shows the time and date in multiple locations. You can additionally use it to set alarms or timers. The stopwatch feature is also included. To install the GNOME clocks, open your terminal and type in the following command:
sudo apt install gnome-clocks
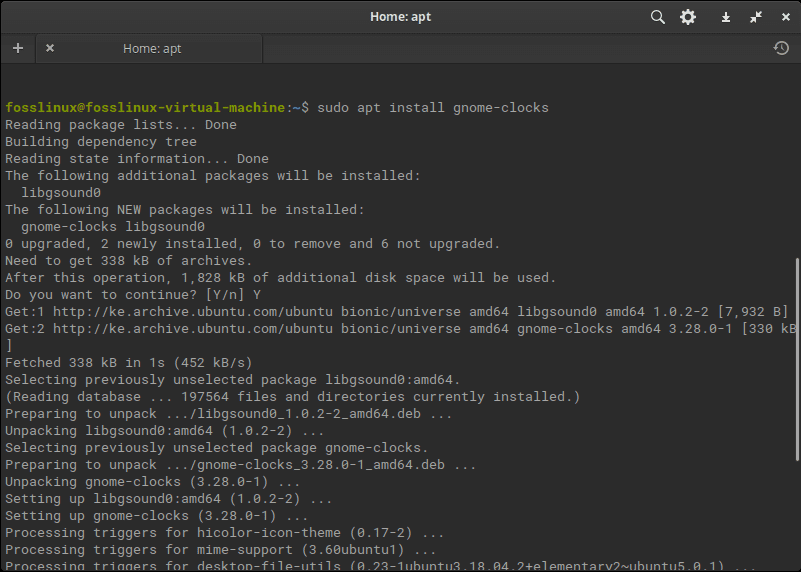
install gnome-clocks
Once you have it installed in your system, search it by going to applications>search bar> and type clocks.
clocks window
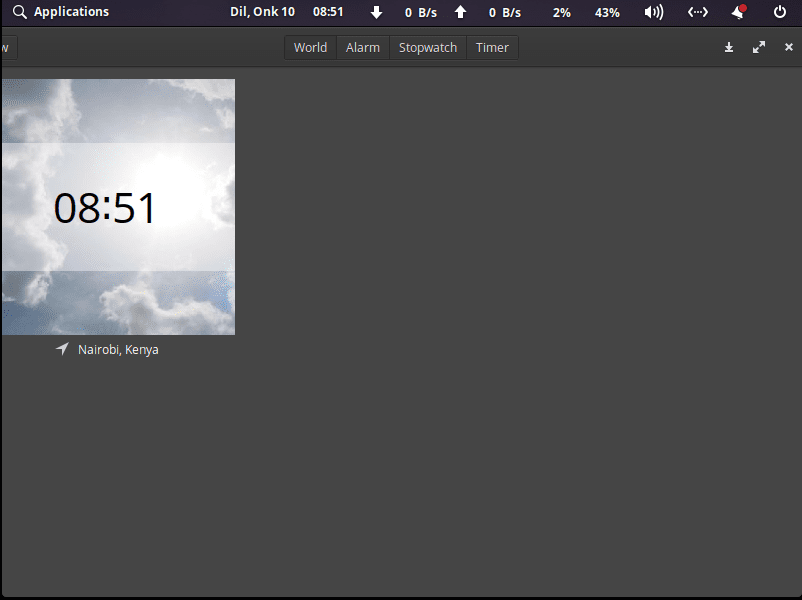
After that, start the application, and you should see an interface that provides you with a few options like adding a world clock, setting alarms, and using a stopwatch and timer.
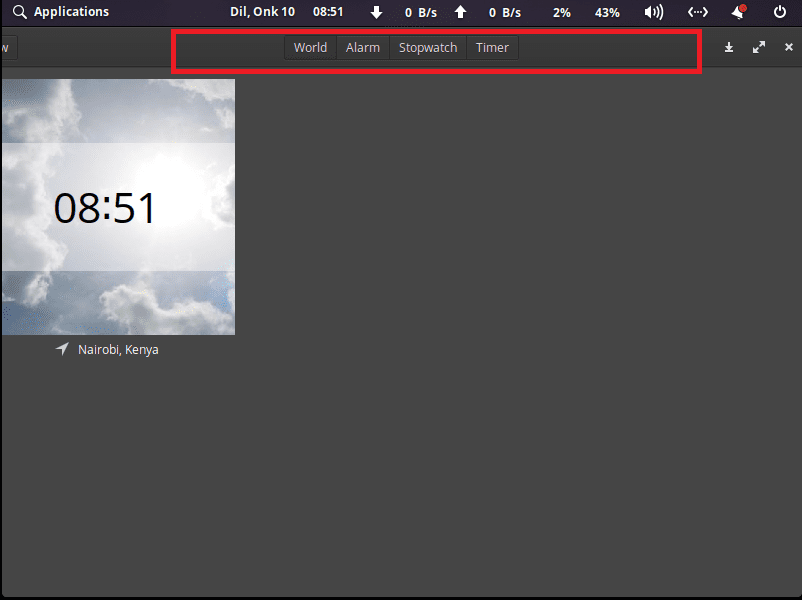
you should see the world, alarm, stopwatch, and timer
To add a city or location, click on the “new” button at the top left corner, and it will give you an option to search for a geographical location. So, search for the intended city and click on the “add” button to add it to the display page.
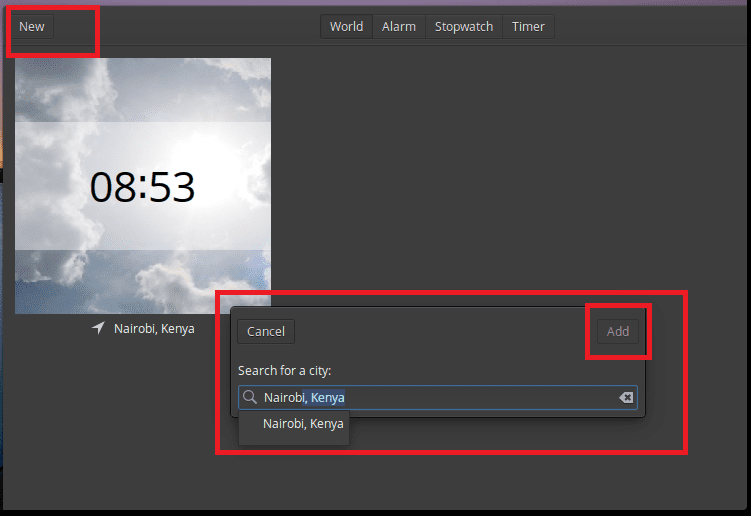
click on new and search for the city
Once you have added the intended time zone(s) via its graphical location, you should then be able to see that the new clock displaying the time difference between your local time and other time zones.

multiple timezones
If you fade up with the additional clocks and want to remove them, you can do that from the GNOME clocks application interface. However, many come across a flaw here because they cannot delete their current time zone and set it to something else. Despite all that, we can help you find another way to change your current time zone in Linux.
Here, we will cover two steps (both the GUI that is suitable for desktop users and the command line method that works for both desktop and servers)
Method 1: changing the elementary OS time zone via terminal
elementary or any other distro using the systemd can use the timedatectl command to set the time zone in the Linux terminal. You can check the terminal’s current date and time zone setting using the timedatectl command without any option
timedatectl
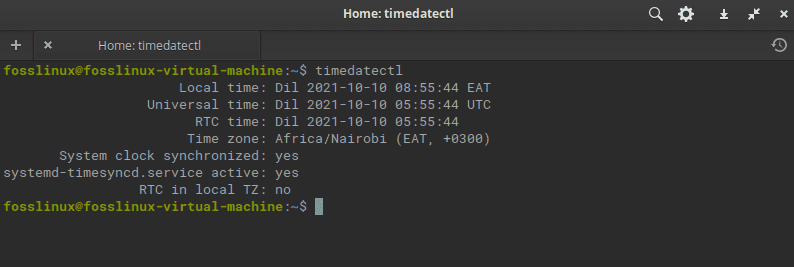
timedatectl command.
As you can see in the above output, our system uses Africa/Nairobi. It also tells that the time is 3 hours ahead of Greenwich Mean Time (GMT), now referred to as Coordinated Universal Time or Universal Time Coordinated (UTC). It is generally a coordinated time scale maintained by the Bureau International des Poids et Mesures (BIPM).
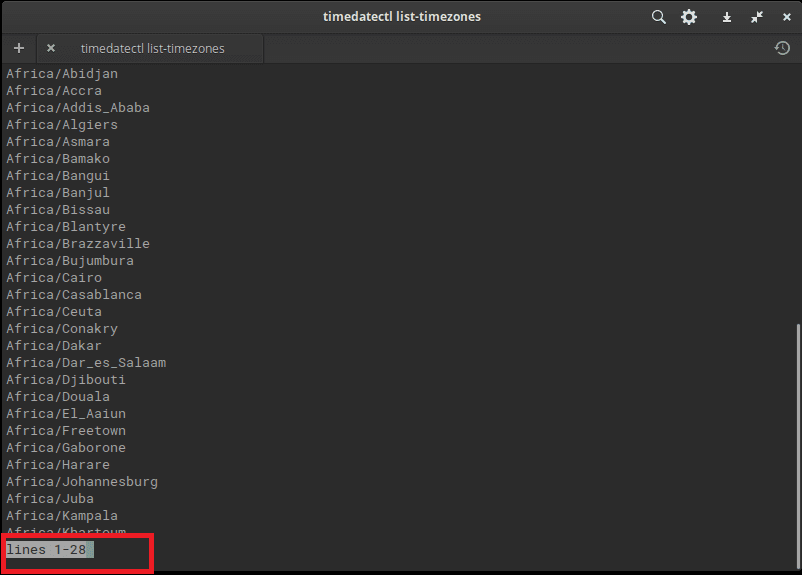
To set a time zone in Linux, specifically elementary in our case, you need to be aware of the exact time zone. Additionally, you must use the correct format of the time zone, which is Continent/city. To get the time zone list, use the list-timezones option of the timedatectl command:
timedatectl list-timezones
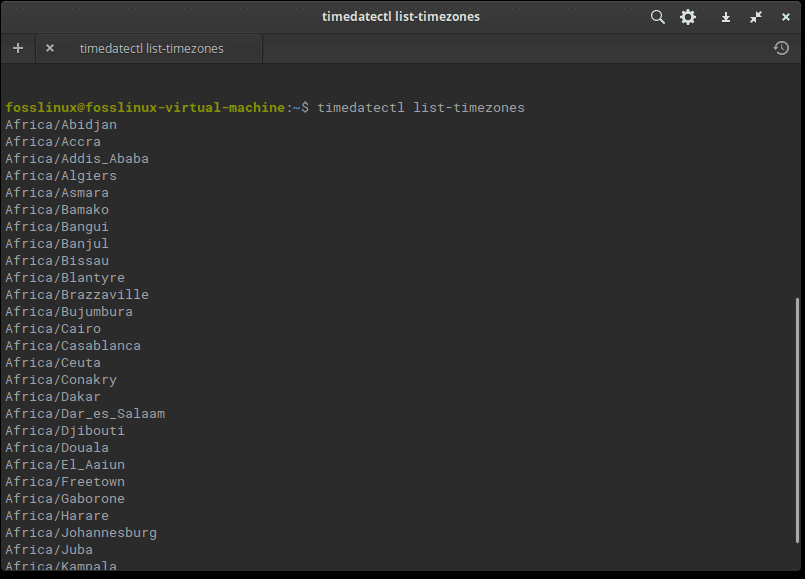
timezones command
Upon running the command, you should see a massive list of the available time zones. You can use the up and down keyboard arrow keys or the PgUp and PgDown keys to move between the pages.
use your keyboard keys to navigate
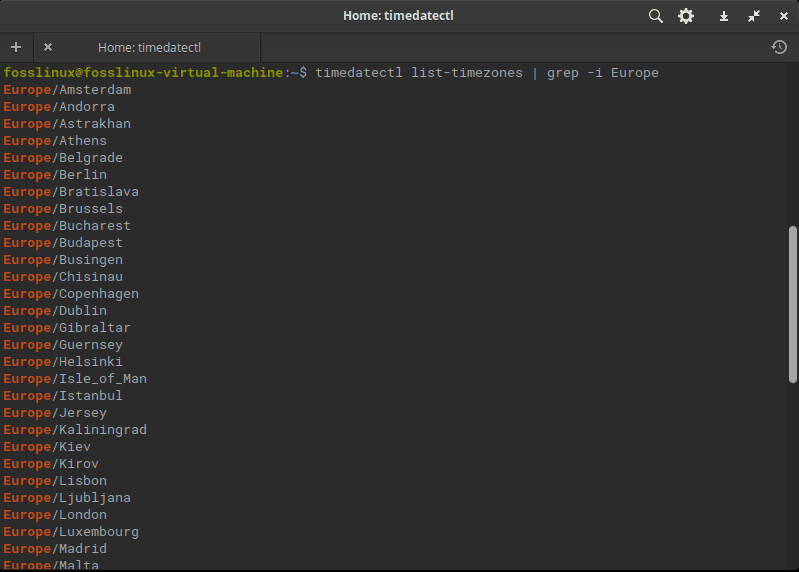
You may also grep the output and search for your time zone. For instance, if you are looking for time zones in Europe, you may try to check it out this way:
timedatectl list-timezones | grep -i Europe
Europe timezones
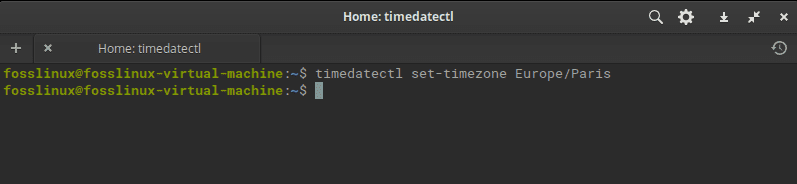
Say you want to set the time zone to Paris. The time zone value to be used here is Europe/Paris:
timedatectl set-timezone Europe/Paris
set timezone to Paris
Upon running the set time zone like in our case, to Paris, it won’t show any success message in nearly all instances, but the time zone is changed instantly. Therefore, you don’t need to reboot or log out. So, from now on, we will be using the Paris time zone.
Note: Keep in mind that although you don’t need to become a root user and use the sudo privileges with the command, your account still needs admin rights to change the timezone. Our elementary OS will display days of the week, the name of the month, and year in the Oromo language as that was how it was configured earlier, so no need to freak out.
You can verify the changed time and timezone by using the date command:
date

date command
With that being said, let us take you through several Date command instances in Linux and specifically elementary OS in our course.
7 examples of date commands in Linux
The date command gives you the current date and time of your Linux system. Nonetheless, the command can do a lot more than that. Let us check out these practical examples to prove this. First things first, below is the syntax of the date command:
date [option] [+format]
Here, the option is essentially a flag like –d, for debug, which we will later tackle in the article. Additionally, the format allows you to control the output by adding your string and specifying the values you want in the output. The article has also included some examples below, which will help shed some light on what we earlier explained on the date command above.
Step 1: Display the current date and time in elementary OS
To begin with, you only need to enter the command “date” to display the date and time. Let us take a look at how it looks with the input and output:
date

date command
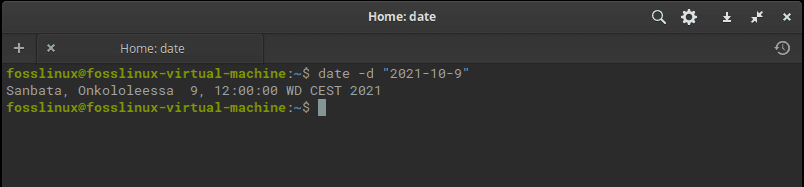
As you can see, the command also shows the time zone alongside the system time. Suppose you have a specific date, but you want to display the weekday for that date, then you need to specify the date using the –d flag, for instance:
date -d "2021-10-9"
Timezone alongside the system time
A point worth noting is the format of the input as “YYYY-MM-DD.” As such, if you type the date in the command in a different order, you will encounter an error that looks like the following snapshot:
date -d "9-10-2021"

invalid date
Note: When you encounter an invalid date error while using the date command, check the date format of the data you keyed in.
In addition to these use-cases, you can also control what you want in the output using the date command. For example, if you’re going to only display the current time in elementary OS, then make use of the following format:
date +%T
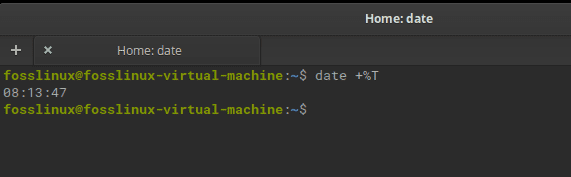
the current date in Linux
Another instance is the command that can be used to show the control over the output format includes:
date +"Weekday: %A Month: %B"

control what you want
In the above command, we added a string after “+” inside the inverted commas and then passed some pre-built sequences like %A or %B to control whatever you want to be displayed.
When you do this, then expect such a similar output:
date +"Week: %V Year: %y"

expected output
In case you encounter any issue while running the date command, you shall find a list of information associated with the date command using the following command:
date --help
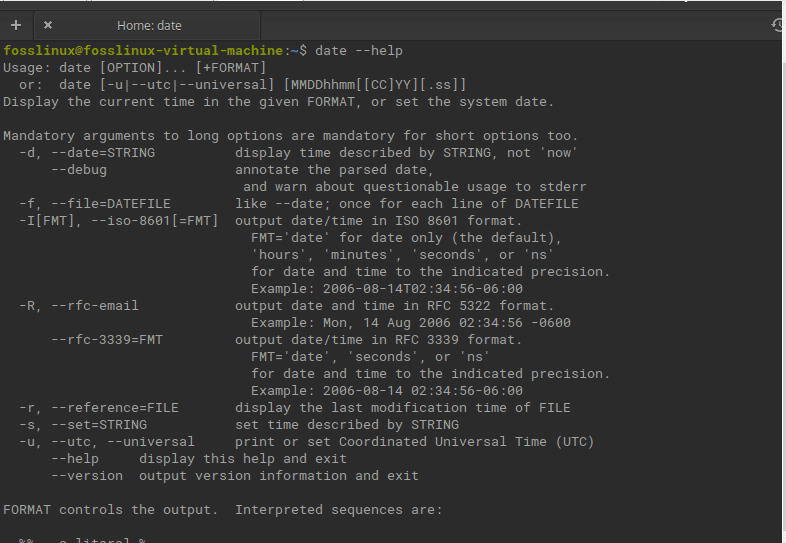
date help command
You should find such a similar screen upon running the command; you can scroll down through the instructions after the help command:
2. Using the date command to display a time/date for past/future
In case you want to know what the date was last week, then you can achieve that using the following date command:
date -d last-week

date last week
Better still, you can use “last-year”/ “next-year”/ ”tomorrow”/ “next-month” and so on.
3. Use the date command to identify a specific day
If you have a specific date, but you want to identify the day of the week, then you can quickly achieve t by typing in the following command:
date -d "2021-10-9"+"%A"
The output for this when you type in the following command:
date -d "2021-10-9"+"%A"
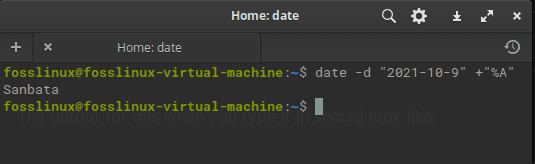
day command
Here, %A aids to specify the date; you can alternatively change it to %B to display the month name. And the right after the flag –d, you type the date you want to identify.
4. Calculate the time from epoch time
Another fascinating use of the date command is calculating the time in seconds since epoch time or Unix time.
In other words, you will be able to know how many seconds have elapsed from, let us say, 1st of January 2021 00:00:00 UTC to the present time. To attain this, type in the following command:
date +%s
At the time of writing this article, we got the following output:
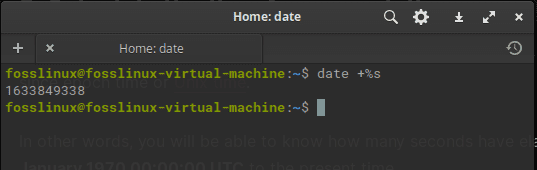
epoch time
This may not prove to be that useful for anyone, but it is an interesting use-case for the date command in the elementary OS. Alternatively, you can also try specifying a point of time since the epoch time to calculate the number of seconds elapsed. For example, if you want to calculate the number of seconds that have elapsed until December 2021, type in the following command:
date -d "2021-12-01" +"%s"
Below is the result that should be seen in the terminal after execution:
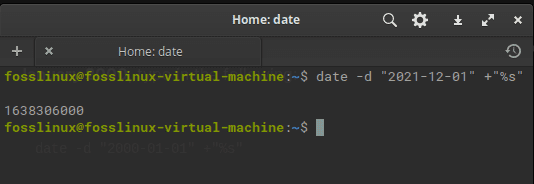
time elapsed to December
5. Use the date command to set the timezone
While installing your Linux distro, you should set your timezone during the installation process. You can alternatively change it from the settings using the GUI. However, you can use the date command to see the time for a timezone without changing system settings. All you need to type is:
TZ=PDT date
Upon running the command, you will be shown the time in that specific zone as seen below:
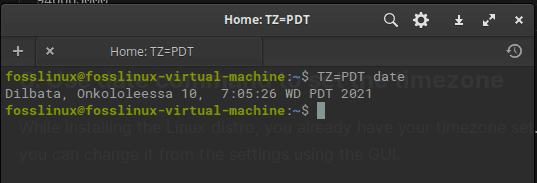
use date command to set the timezone
6. Change the system date from the terminal
At times you may not need to change your system date from the terminal as you can always use the Graphical User Interface (GUI). Nevertheless, if you want to utilize the date command through the terminal, you can achieve this by typing the following command in your terminal:
date --set="202101105 19:00"
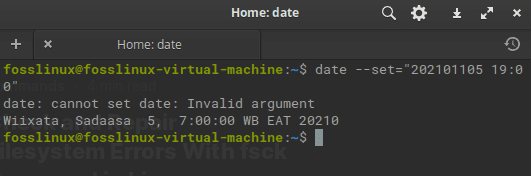
set date and time
When you type in this command, it will set the time to November 5th, 2021, at 19:00 as the time.
Other uses of date command
When you refer to the information about the date command using the date –help in the command line, you will discover all the vital sequences that you can combine to use the date command in more ways than we have mentioned here. You can also check out the complete documentation at GNU.org for more information to explore the date command.
Method 2: Change elementary OS timezone using GUI
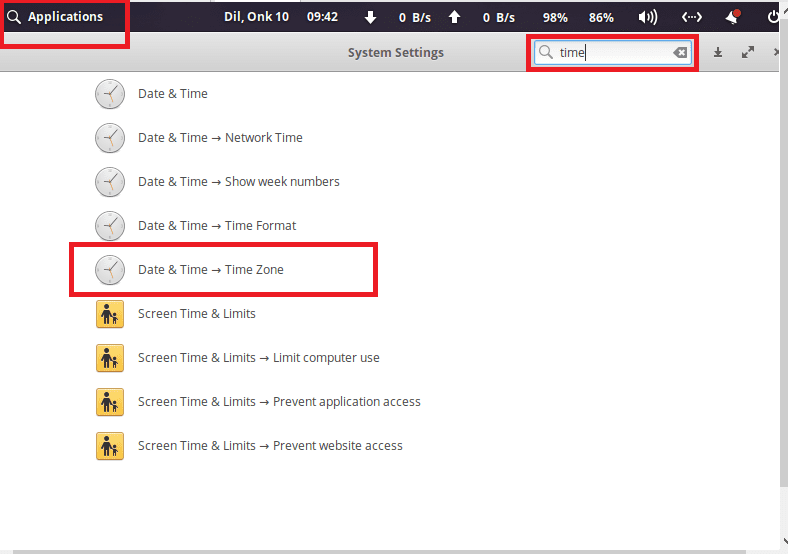
The first step here is opening the time feature. To do this, go to the Applications and type in time using the search bar. After that, several time options will appear. Select Date & Time – timezone.
Search for date-time
After that, you need to turn on the “Automatic Time Zone” option (if it is disabled), and to do this; you will select the arrow-like object at the end of the Timezone option
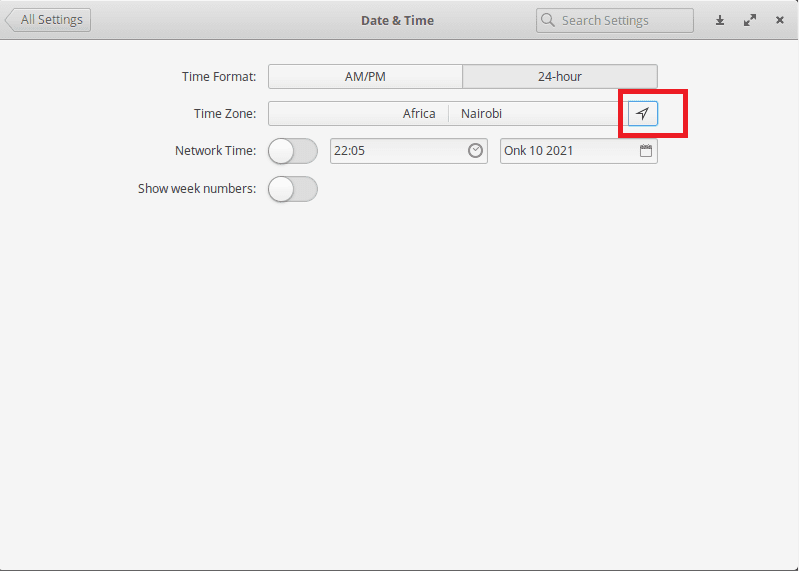
activate the timezone
If you keenly look, you will notice two options in front of the timezone; one is the continent while the other is the city. So, in our case, by default, the map is on the Africa continent and Nairobi as the city. To change this, click on Africa, and a list of all continents and their cities will appear.
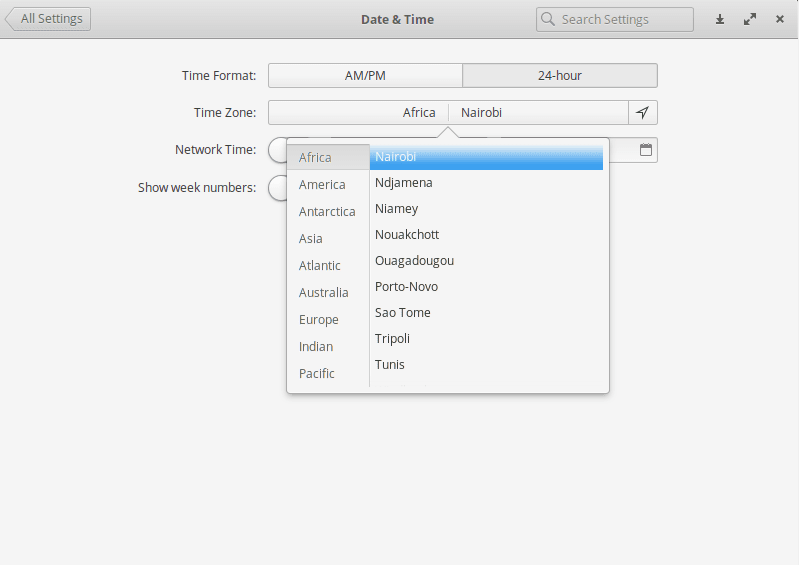
select your preferred location
Select your preferred continent and city of your choice. For instance, let us change our timezone from Africa/Nairobi to Atlantic/Madeira.
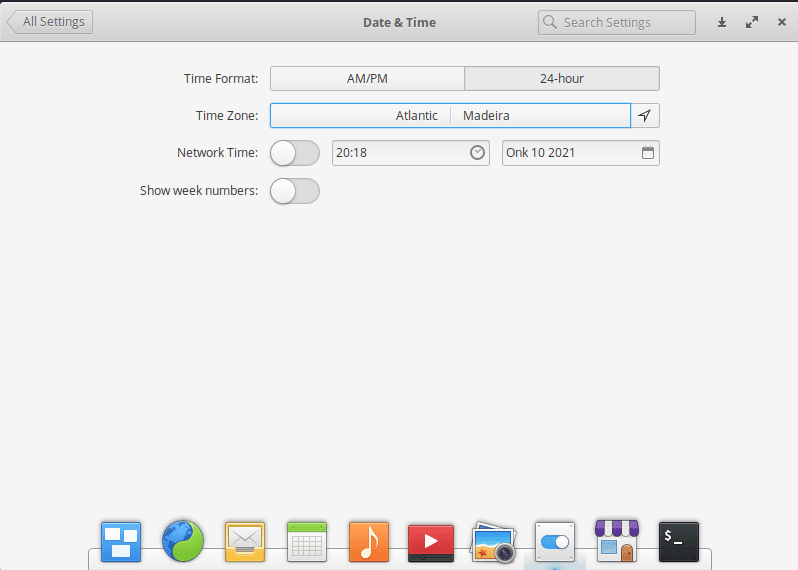
time zone changed
Once you have selected the timezone of your preference, close the window.
Note: you don’t have to do anything besides closing the time window after selecting the new timezone. This, therefore, means no need to log out or shut down your elementary machine for the OS to detect the timezone change.
Conclusion
Having multiple timezones on your PC proves to be an added advantage to any user trying to keep track and has an idea of the time difference between his nation and several other nations located in different continents and cities. This article has diversely covered the Graphical User Interface method of adding multiple timezones on your PC, where we achieved this by installing the gnome clocks.
After that, we looked at the seven date commands with examples to clarify the date command functionality. Finally, we looked at how to change the timezone using the two methods (command prompt and GUI). To this end, the article has covered an extensive section on adding multiple timezones in the elementary OS. Thanks for reading! And don’t hesitate to reach out in case of anything.
1 comment
Hi,
I have Elementary OS Loki.
I tried exactly same steps but on dconf editor screen, com>canonical>indicator, there is only option of “sound”, “datetime” and other options do not appear.
Any clue what to do next?