
Text files are an essential and integral part of any given computer system. Configuration files, programming scripts, and even documents created by users are all simple text files. Also though now there are several document formats, in the initial days of Linux, there were mostly plain text files in use. Consequently, there had to be several ways of reading text files in Linux.
In this article, we are going to show different ways in which simple text files can be read on a Linux system. The first is a simple GUI way and the other five methods are command-line methods.
Viewing the content of Files in Linux
1. Graphical Text Editor
All graphical systems have to have a graphical text editor. You can simply launch a text file from the graphical file manager, and by default, the graphical text editor will open that file. This editor differs according to the desktop environment in use, as the text editor is a part of the DE’s package. These are the default editors of some of the popular DEs:
- GNOME – Gedit
- Xfce – Mousepad
- KDE – KWrite
- Cinnamon – Xed
- MATE – Pluma
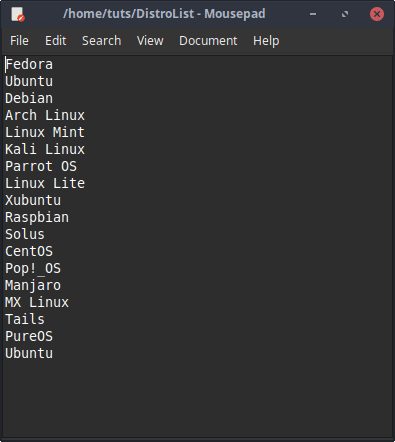
Xfce default reader
Command-Line based Readers
Using the Terminal, there are several ways in which users can read files. We are going to show specific goal-oriented tools at first, and then the most powerful file reader Linux offers.
2. cat
The cat command is the most used command to read files. It just displays the contents of the file in the Terminal window and provides the prompt again. It shows the complete file. As mentioned earlier, since it outputs the file and returns the prompt, it is clearly non-interactive. The simple syntax command is:
cat [Filename]
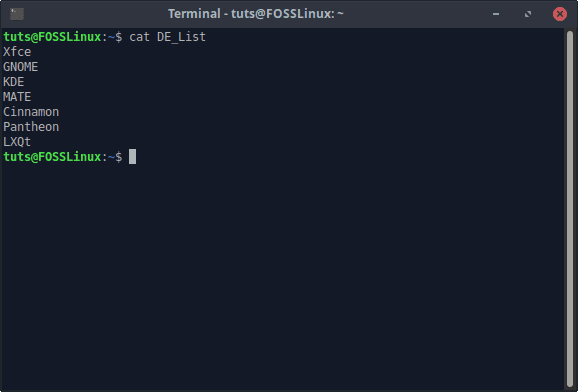
cat usage
cat can also be used to write to a new file. It can either use another file to do so or standard input. Even the conjunction of the two is possible.
Writing from another file
To write from another file, use the following command:
cat [Input file] > [Output file]
Writing from standard input
Writing from standard input means to write to a file by providing the input after the command is executed. The command to do that is:
cat - > [Desired filename]
It is important to remember that the hyphen will have space on each side of it to denote standard input. After running the command, the cursor will move to the next line, and you can now enter the required input. When you are done, hit CTRL+D to exit the input mode.
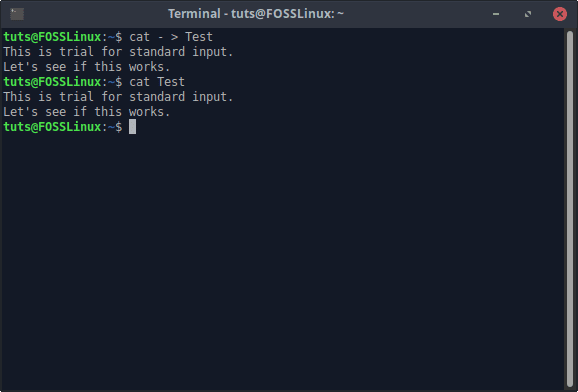
cat writing from standard input
Combination of input from a file and standard input
The two previous command styles can be combined into one. The command has to be structured according to your requirements. For example, if you want to add the standard input content before the file content, the command will look like this:
cat - [Input file] > [Output file]
But if you’re going to add the standard input content after the file input:
cat [Input file] - > [Output file]
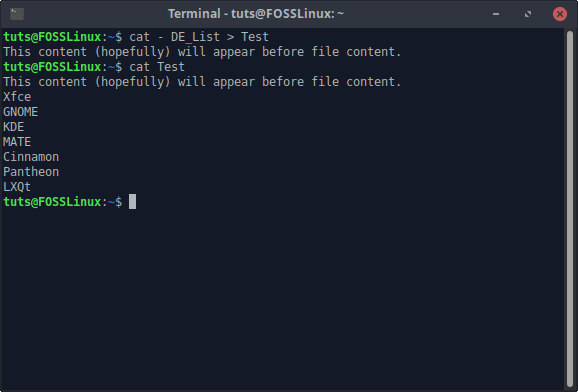
cat writing from another file and standard input
Numbered lines
You can also have the lines numbered in the output of cat. All you need to do is add the -n flag. The command becomes:
cat -n [Filename]
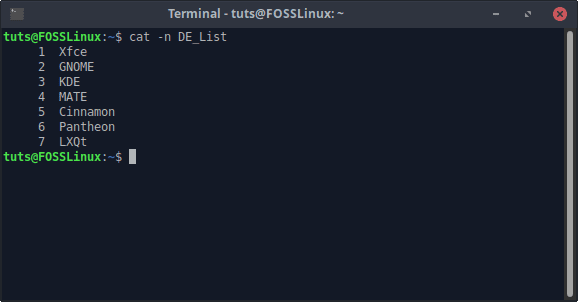
cat numbered display
3. head
The head command reads only the top portion of a text file. By default, head reads only the first ten lines of a file. The command syntax is simple:
head [Filename]
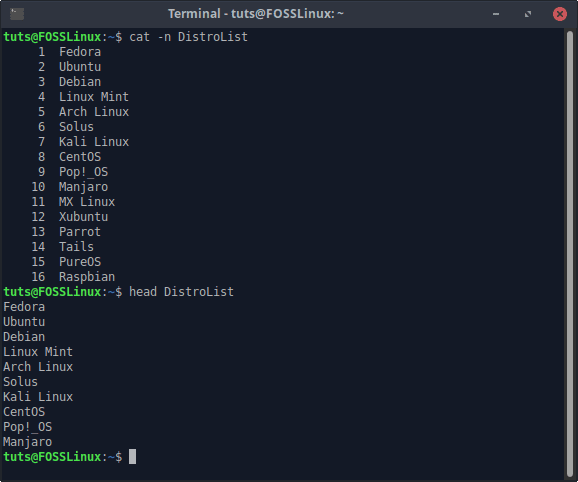
head usage
Read first N lines
You can also read any desired number of lines from the beginning using head. This is achieved through the -n flag. The command looks like:
head -n [Number] [Filename]
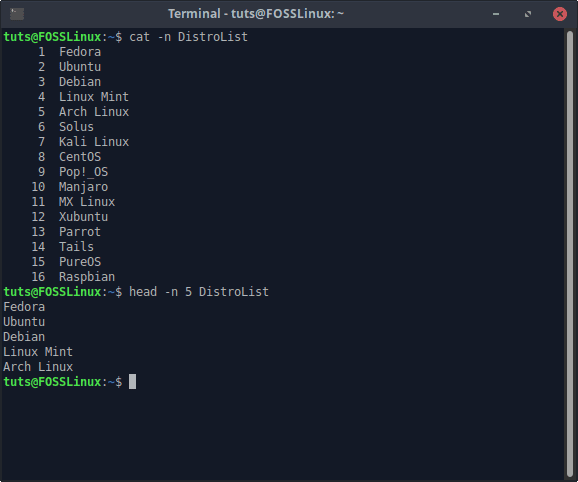
Displaying first N lines
4. tail
As you can guess from head, the tail command reads the last ten lines of any text file. Unlike head, tail has several more options that can be used to get the desired output. Simple usage looks like this:
tail [Filename]
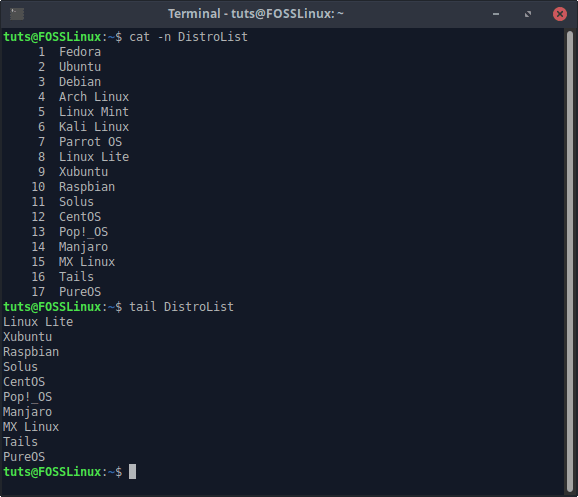
tail usage
Read last N lines
Similar to the -n flag of head, tail also has that flag that can be used to read a custom number of last lines of a file.
Syntax:
tail -n [Number] [Filename]
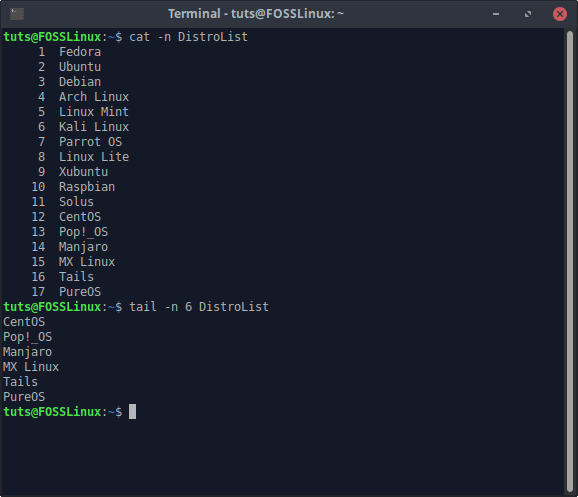
Read last N lines with tail
Reading a file in real-time
tail command is often used to read log files, as the latest updates are always in the last lines. Files like those keep getting appended continuously too. As the data keeps growing, reading it once will not be enough, and running tail repeatedly is tedious. The solution to this problem is the -f flag, which makes tail command read the file in real-time. This flag allows tail to display new lines as they are being added to the file. The command to use looks like:
tail -f [Filename]
tail in real-time
To exit the -f mode, hit CTRL+C.
Read rotating files
A file is called rotating if it keeps creating new versions of itself. This is often the case with log files. For example, if there is a file x.log, as soon as any limitation (length or size) is reached, it will be renamed to x.log.1, and the newly created log file will be named x.log. If you run the tail -f command on that file, it will be terminated as soon as the file changes the name, and for that momentary period, there exists no file with the name x.log.
To prevent this and switch to the new x.log, you can use the –F flag. The command looks like:
tail -F [Filename]
5. nl
nl command outputs a text file with the line numbering. Well, cat with the -n option does that as well. What’s the difference here? There are a lot more configurations available. First off, the simple syntax looks like this:
nl [Filename]
nl usage
Numbering formats
nl provides several numbering options, which can be accessed using the -n flag. It is helpful to understand that the nl command assigns the first six spaces for the numbering of the lines. Two options available are for the alignment of the serial numbering.
To align the numbering to the left, the command looks like:
nl -n ln [Filename]
To align the numbering to the right:
nl -n rn [Filename]
This might be easier to understand if you look at it:
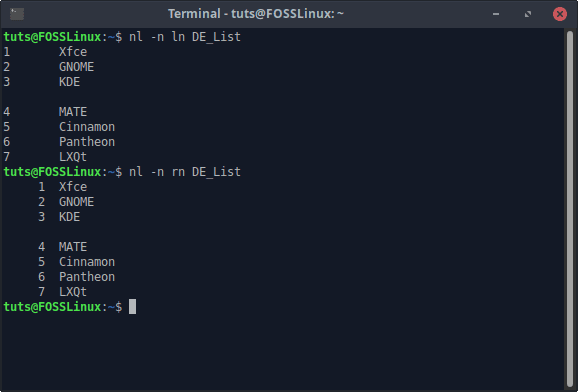
nl numbering alignment
The other option is to add trailing zeroes to the numbering. So instead of just ‘1’, the numbering appearing would be ‘000001’. The command to achieve that is:
nl -n rz [Filename]
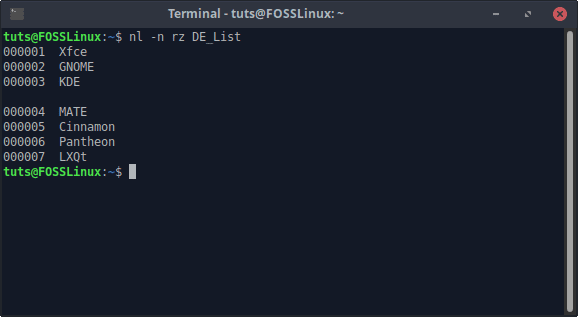
nl with trailing zeroes
Numbering selectivity
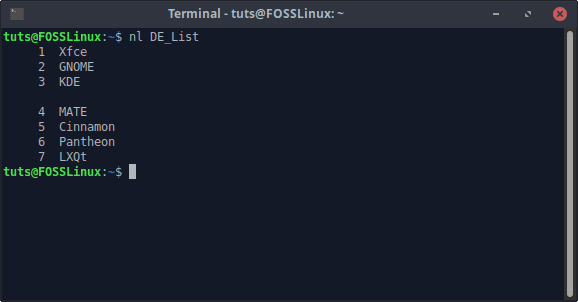
The numbering selection can also be configured. Usually, only non-empty lines are numbered, as seen here:
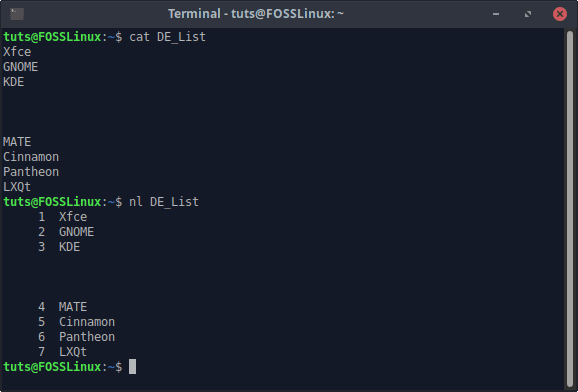
nl default numbering
This can be changed around with the -b flag.
Numbering all lines
Numbering all lines can be done with the value ‘a’ of the -b flag. These flags numbers all lines, empty and non-empty alike. The command looks like this:
nl -b a [Filename]
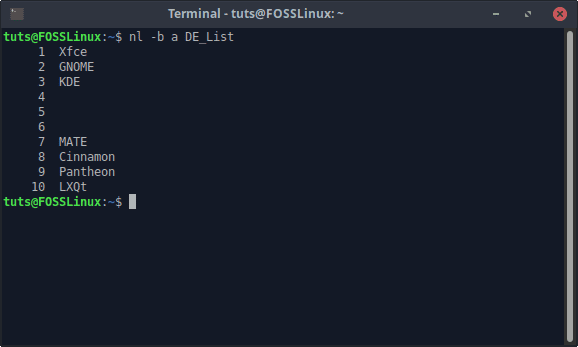
nl numbering all lines
Numbering lines by a pattern
This is a particularly helpful option. The lines that have a particularly given pattern will only be numbered. The command looks like this:
nl -b p[Pattern] [Filename]
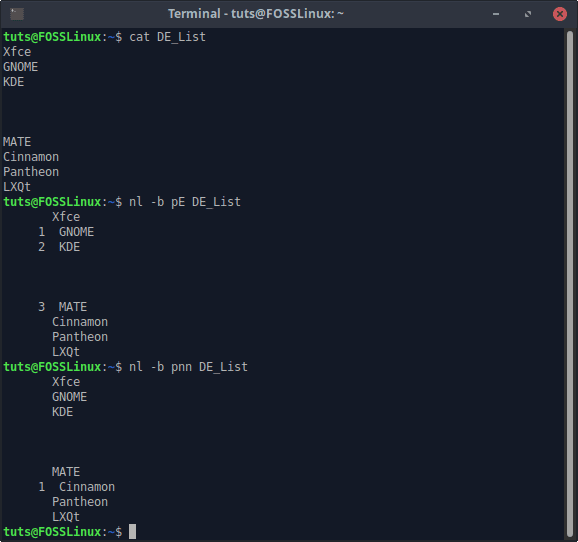
nl according to pattern
For example, in the screenshot above, in the first part, the nl command is asked to recognize ‘E’ character and number the lines that contain it. In the second part, the command is requested to acknowledge ‘nn’ characters.
6. less
Now, less is the most advanced reading tool that Linux provides. It has a massive amount of features, which are not all very relevant at the moment, but we will tell you all about the useful ones. First off, launching a file into less is pretty easy, and the command structure is:
less [Filename]
less usage
As you can probably guess from the output, less is interactive. It opens up a window of its own to read the file. Here, you can navigate through the file with ease, and this also opens up the possibilities to issue specific commands while the file is open.
Exit less window
To exit the less window, press the “Q” key.
Navigation
File navigation in less is easy. You can simply use the arrow keys to navigate around the file. Up and Down keys move one line upward and downwards, and Right and Left keys move the view half the Terminal width to the right or left, respectively. While less does wrap the lines, it also shows it as a continuation when the Right or Left arrow keys are used. For example, here is a comparison view of Right arrow key usage:
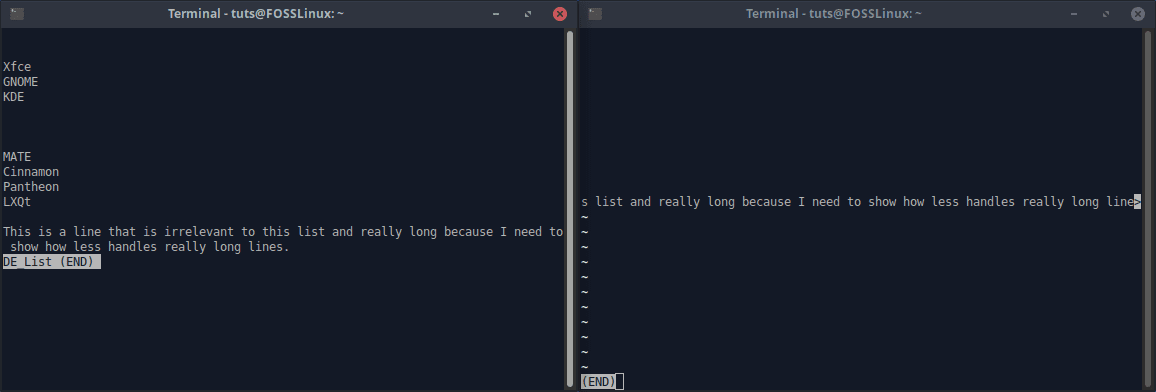
less sideways navigation
Alternatively, the J and K keys can also be used for navigation. J moves the view downward and K upward, which is how less was traditionally worked. Even by default, scrolling using the mouse is also enabled.
Moving to the End or Beginning
There are shortcut keys to move directly to the beginning and the ending of the file. To jump to the end of the file, press the “G” key, and to move to the beginning, use Shift+G.
Jump scrolling
The “Spacebar” can be used to jump scroll, which is scrolling multiple lines at once. Hitting the Space Bar moves the file one window forward.
Otherwise, you can also use “Page Up” and “Page Down“ keys to move up or down one window.
Moving to a specific line
You can move to a specific line in the document in less. To do that, first press the “G” key (which brings you to the beginning of the document) and put in the line number (which will appear at the bottom of the window as you type it) and press the “Enter” key. You will reach that line.
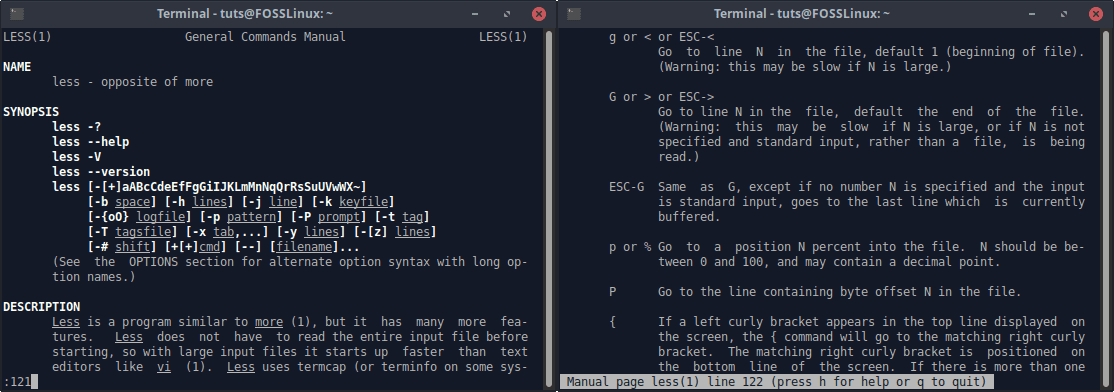
Jumping to a line number in less
Searching
Searching is pretty easy on less. Simply put, when the less window is open, enter the search term in the following way:
/Search_Term
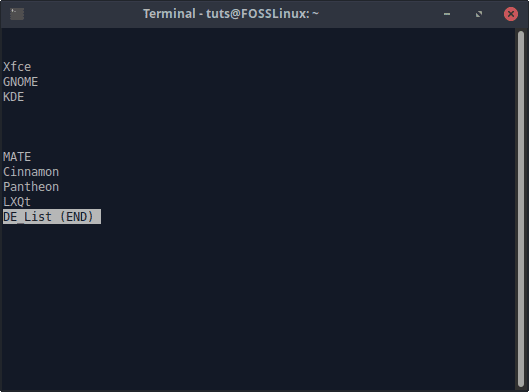
For example, I search here for ‘MATE’.
As evident from the image, the searched terms are highlighted. You can also search for a combination of words. For example, the command
/hello there
is also valid and will search for the instances where the words ‘hello there’ are placed together.
Moving between search results
After having issued the search command (/SearchTerm), less is now in what you can call a ‘search mode’. In this search mode, navigation can be done using:
Move to the following result: N key.
Move to previous result: Shift+N keys.
Clearing searches
Searching in fewer highlights the searched terms. To clear the highlighting, press the ESC+C key combination.
Handling Multiple Files
less can be used to open up multiple files at once. The command would look like:
less [File 1] [File 2] [File 3]
Navigating between multiple files
Switching between those files is also easy enough. To move to the next file, type in:
:n
To jump to the previous data, enter:
:p
This happens instantaneously.
To move to the first file mentioned in the command:
:x
To remove the current data from the list:
:d
Opening a new file
less also supports opening another file while a file is already open. The command used is this:
:eFileURL
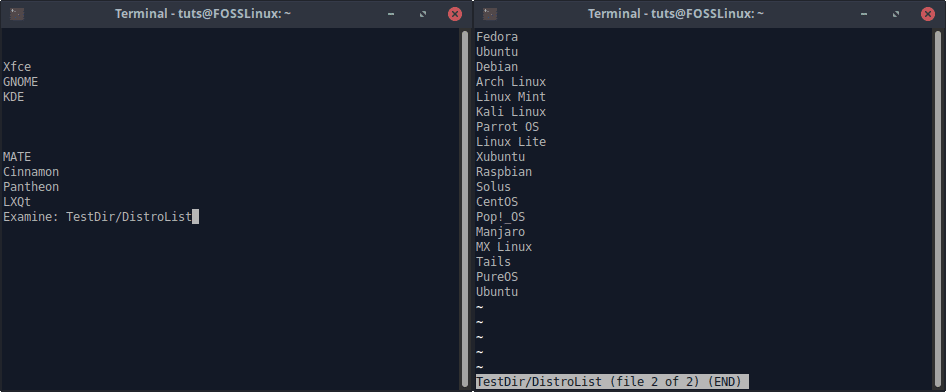
As soon as e: is typed in, the prompt will change into ‘Examine’. Then the file location needs to be entered.
Opening another file in less
NOTE: The file location that is entered will be relative. For example, if you enter Test, it will look for a file named Test in the directory same as that of the file that is already open.
For example, a file named DE_List is open here in the home directory. I want to open a file named DistroList that is in a directory named TestDir, placed in the home directory.
The file is thus opened. As can be seen, it opens the file in addition to the file already open, as if it was opened using less command with multiple input files.
Search across multiple files
To search across multiple files, all that needs to be done is a slight modification of the search command. The command now will be:
/*Search_Term
Yes, the addition of the asterisk(*) is the only difference.
Pattern
less can be configured only to show the lines which contain a specified pattern. The command to do so is:
&Pattern
For example, I only want to see those lines which contain ‘Linux’ in this list of distributions.
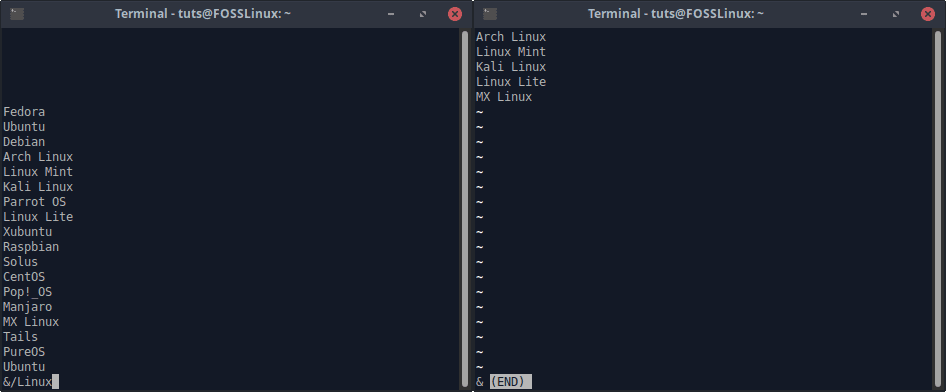
less displaying lines according to patterns
Marking
less allows the addition of ‘marks’, which is a handy feature. For instance, if there is a part of the document that you want to come back to, but for the moment you have to move on to another part, you can use the feature of marks to mark that part and visit it later.
Adding marks
To add a mark, just visit the line that you want to mark, and enter the command in the following format:
m[Alphabet]
In place of [Alphabet], you have to add any alphabetical character, either uppercase or lowercase. Thus, the identifier of that mark becomes the alphabet that you use, which makes a total of 52 possible mark identifiers.
Moving to marks
To move to an already created mark, use this command:
'[Alphabet]
Insert the identification character of the desired mark after the ‘ character, and you will be transferred to the line that had been marked with that character.
Removing marks
To remove any mark, visit the line that has been marked, and enter the key combination ESC+M.
Command parameters
Numbered lines
To open a file with the less command with the lines numbered, the command must be entered in the following way:
less -N [Filename]
Read file in real-time
To read a file in real-time with less, use the -F flag. If the file is changed while reading it, the changes will be continuously updated while it is open in the less window. Command:
less -F [Filename]
Saving marks
Marks were described earlier. It is a handy feature, and you might want to keep them for later usage or sharing. Well, less enables that too. To achieve that, open the file in the following way:
less --save-marks [Filename]
Invoking command line
While a file is opened in less, even a Terminal command can be executed! To do that, enter the command in the following way:
![Command]
For example, I run ls here in the less window.
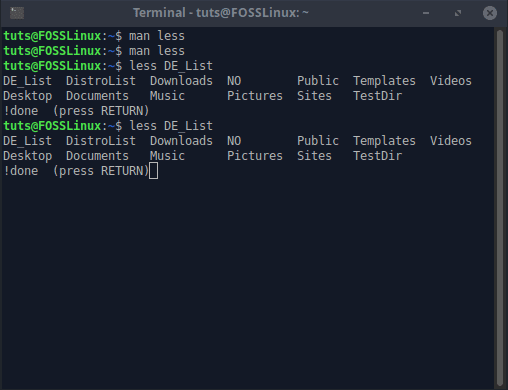
Running Terminal command in less
Invoking editor
While a file is opened using less, you can directly invoke the editor from there. To do that, press V. The file will be opened in the default Terminal-based text editor, which will most probably be Nano. This feature can be beneficial at times.
Conclusion
There are small file readers, some with particular purposes. Then there are readers like less, which are just a little less than an operating system. Suffice it to say, Linux lets you choose from multiple options even to read a file, so one can imagine the range of possibilities Linux has overall everything. We hope you found this article informative and intriguing.
2 comments
You should add to the ‘Tail’ section of the article (for those not familiar with or comfortable using a terminal or command-line) that when using ‘tail’ with the ‘dmesg’ a pipe is needed between the two:
$ dmesg | tail
or
$ dmesg | tail -n 50
That is indeed a great addition! Unfortunately, we were not talking about any specific commands, so the question of dmesg didn’t come into the image at all. Thank you for the tip, though.