
Configuring a dual boot system with Pop!_OS and Windows offers the flexibility to enjoy the best of both worlds. Whether you want to harness the power and versatility of Linux or rely on the familiarity of Windows for specific tasks, a dual boot setup allows you to switch between operating systems on a single machine seamlessly. This detailed guide will walk you through setting up a dual boot configuration with Pop!_OS, a popular Linux distribution, and Windows, the ubiquitous operating system.
Configuring a dual boot
This article will delve into the intricacies of dual booting, exploring the necessary steps to ensure a smooth and successful setup.
Configuring a dual boot with Pop!_OS and Windows
We will cover the installation procedures for both Pop!_OS and Windows and the configuration of a dual boot manager to switch between the two systems seamlessly. Additionally, we will discuss various optimization techniques, file-sharing methods, and maintenance practices to enhance the overall dual boot experience. If you are setting up a dual-boot system or installing Windows on another machine, you might need to create a bootable Windows USB stick using a Linux system. Learn how to do so in this detailed guide.
Preparing for dual boot
Dual booting allows you to have two or more operating systems installed on your computer, allowing you to choose between them when you start your machine. This concept is beneficial when you want to leverage the strengths of different operating systems for various tasks. By configuring a dual boot system with Pop!_OS and Windows, you can harness the power and versatility of Linux while still retaining the familiarity and compatibility of Windows. However, before diving into the installation process, it is crucial to prepare for dual booting adequately.
Dual booting and its benefits: Dual booting provides several benefits to users. It allows you to have multiple operating systems on a single machine, enabling you to access different software, tools, and applications based on your needs. For example, you can utilize Pop!_OS for development, programming, or system customization while relying on Windows for gaming, specific software, or compatibility with certain hardware devices. Dual booting offers the best of both worlds, providing a versatile computing environment.
Dual booting and its benefits
System requirements: Before proceeding with the dual boot configuration, ensuring that your system meets the necessary requirements is critical. Both Pop!_OS and Windows have specific hardware requirements, and checking if your computer meets these criteria is essential. Consider CPU, RAM, storage space, and graphics card compatibility for both operating systems. Ensure that your machine has sufficient resources to simultaneously handle the demands of both Pop!_OS and Windows. Refer to each operating system’s official documentation or websites for detailed system requirements.
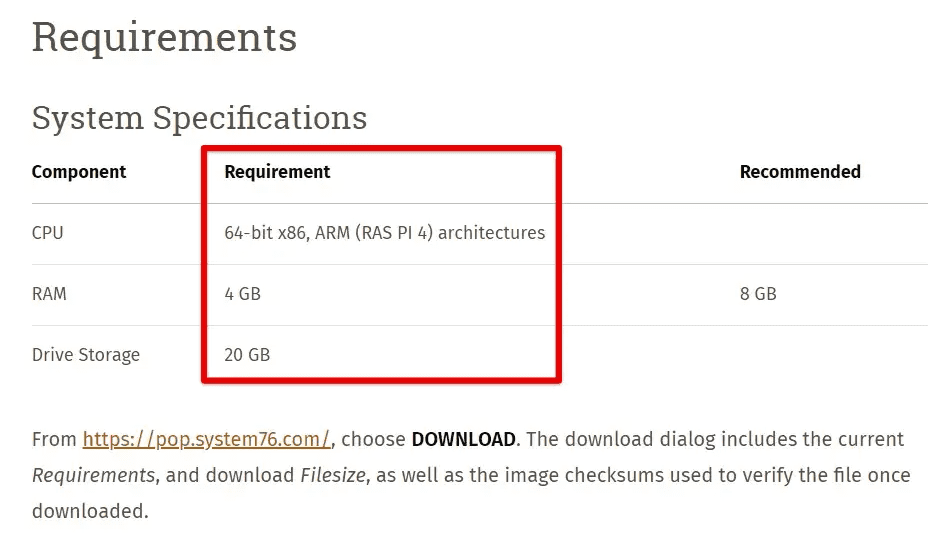
System requirements
Backing up important data: Whenever you modify your system configuration or install new operating systems, it is crucial to back up your important data. Dual booting involves partitioning your hard drive or using separate drives for each operating system. While the installation process is designed to minimize risks, there is always a slight chance of data loss or unintended consequences. Therefore, creating a backup of your critical files, documents, and personal data is recommended for an external storage device, cloud storage, or another computer. This precautionary measure ensures you will still have a copy of your valuable data, even if something goes wrong during installation or configuration.
Backing up important data
Limitations and potential risks: Dual booting has limitations and potential risks. One of the primary challenges is managing disk space effectively. Partitioning your hard drive to accommodate multiple operating systems requires careful planning and consideration of storage needs for each OS. Another limitation is the possibility of compatibility issues between the two operating systems, particularly with hardware drivers or specific software applications. Additionally, dual booting may introduce complexities regarding system updates, as updates for one operating system might affect the other. It is essential to be aware of these limitations and plan accordingly.
Limitations and potential risks
Moreover, there are potential risks associated with dual booting, such as the accidental deletion or corruption of data during the installation or configuration process. The interaction between the two operating systems can lead to conflicts or booting issues if improperly managed. Understanding these risks allows you to approach the dual boot configuration process cautiously and take appropriate measures to mitigate them.
Installing Pop!_OS
Pop!_OS, developed by System76, is a popular Linux distribution known for its user-friendly interface, stability, and focus on productivity. This section will guide you through installing Pop!_OS as part of your dual boot configuration.
Introduction to Pop!_OS: Pop!_OS is based on Ubuntu and provides a polished desktop environment with various features and optimizations. It offers a clean and intuitive user interface to enhance productivity and workflow. Pop!_OS also includes powerful customization options, allowing users to tailor the system to their preferences. Additionally, it comes with a curated set of software applications and utilities that cater to different user needs, such as developers, gamers, and creative professionals.
Introduction to Pop!_OS
Downloading the Pop!_OS ISO file: To install Pop!_OS, you need to download the ISO file from the official System76 website. Visit the website and navigate to the download section. Select the appropriate version (e.g., 64-bit or 32-bit) based on your system architecture and requirements. It is recommended to download the latest stable release of Pop!_OS for optimal performance and compatibility with your hardware.
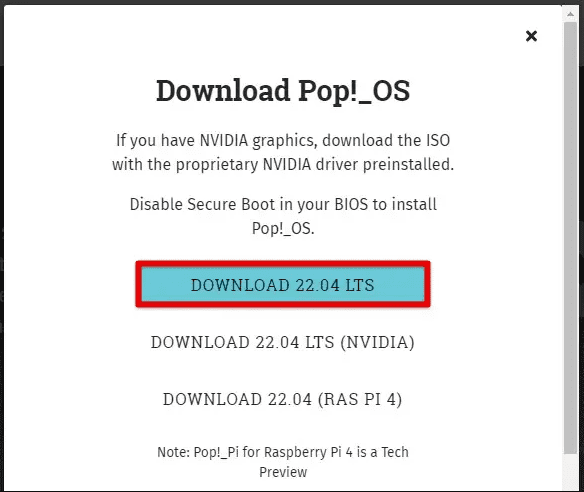
Downloading the Pop!_OS ISO file
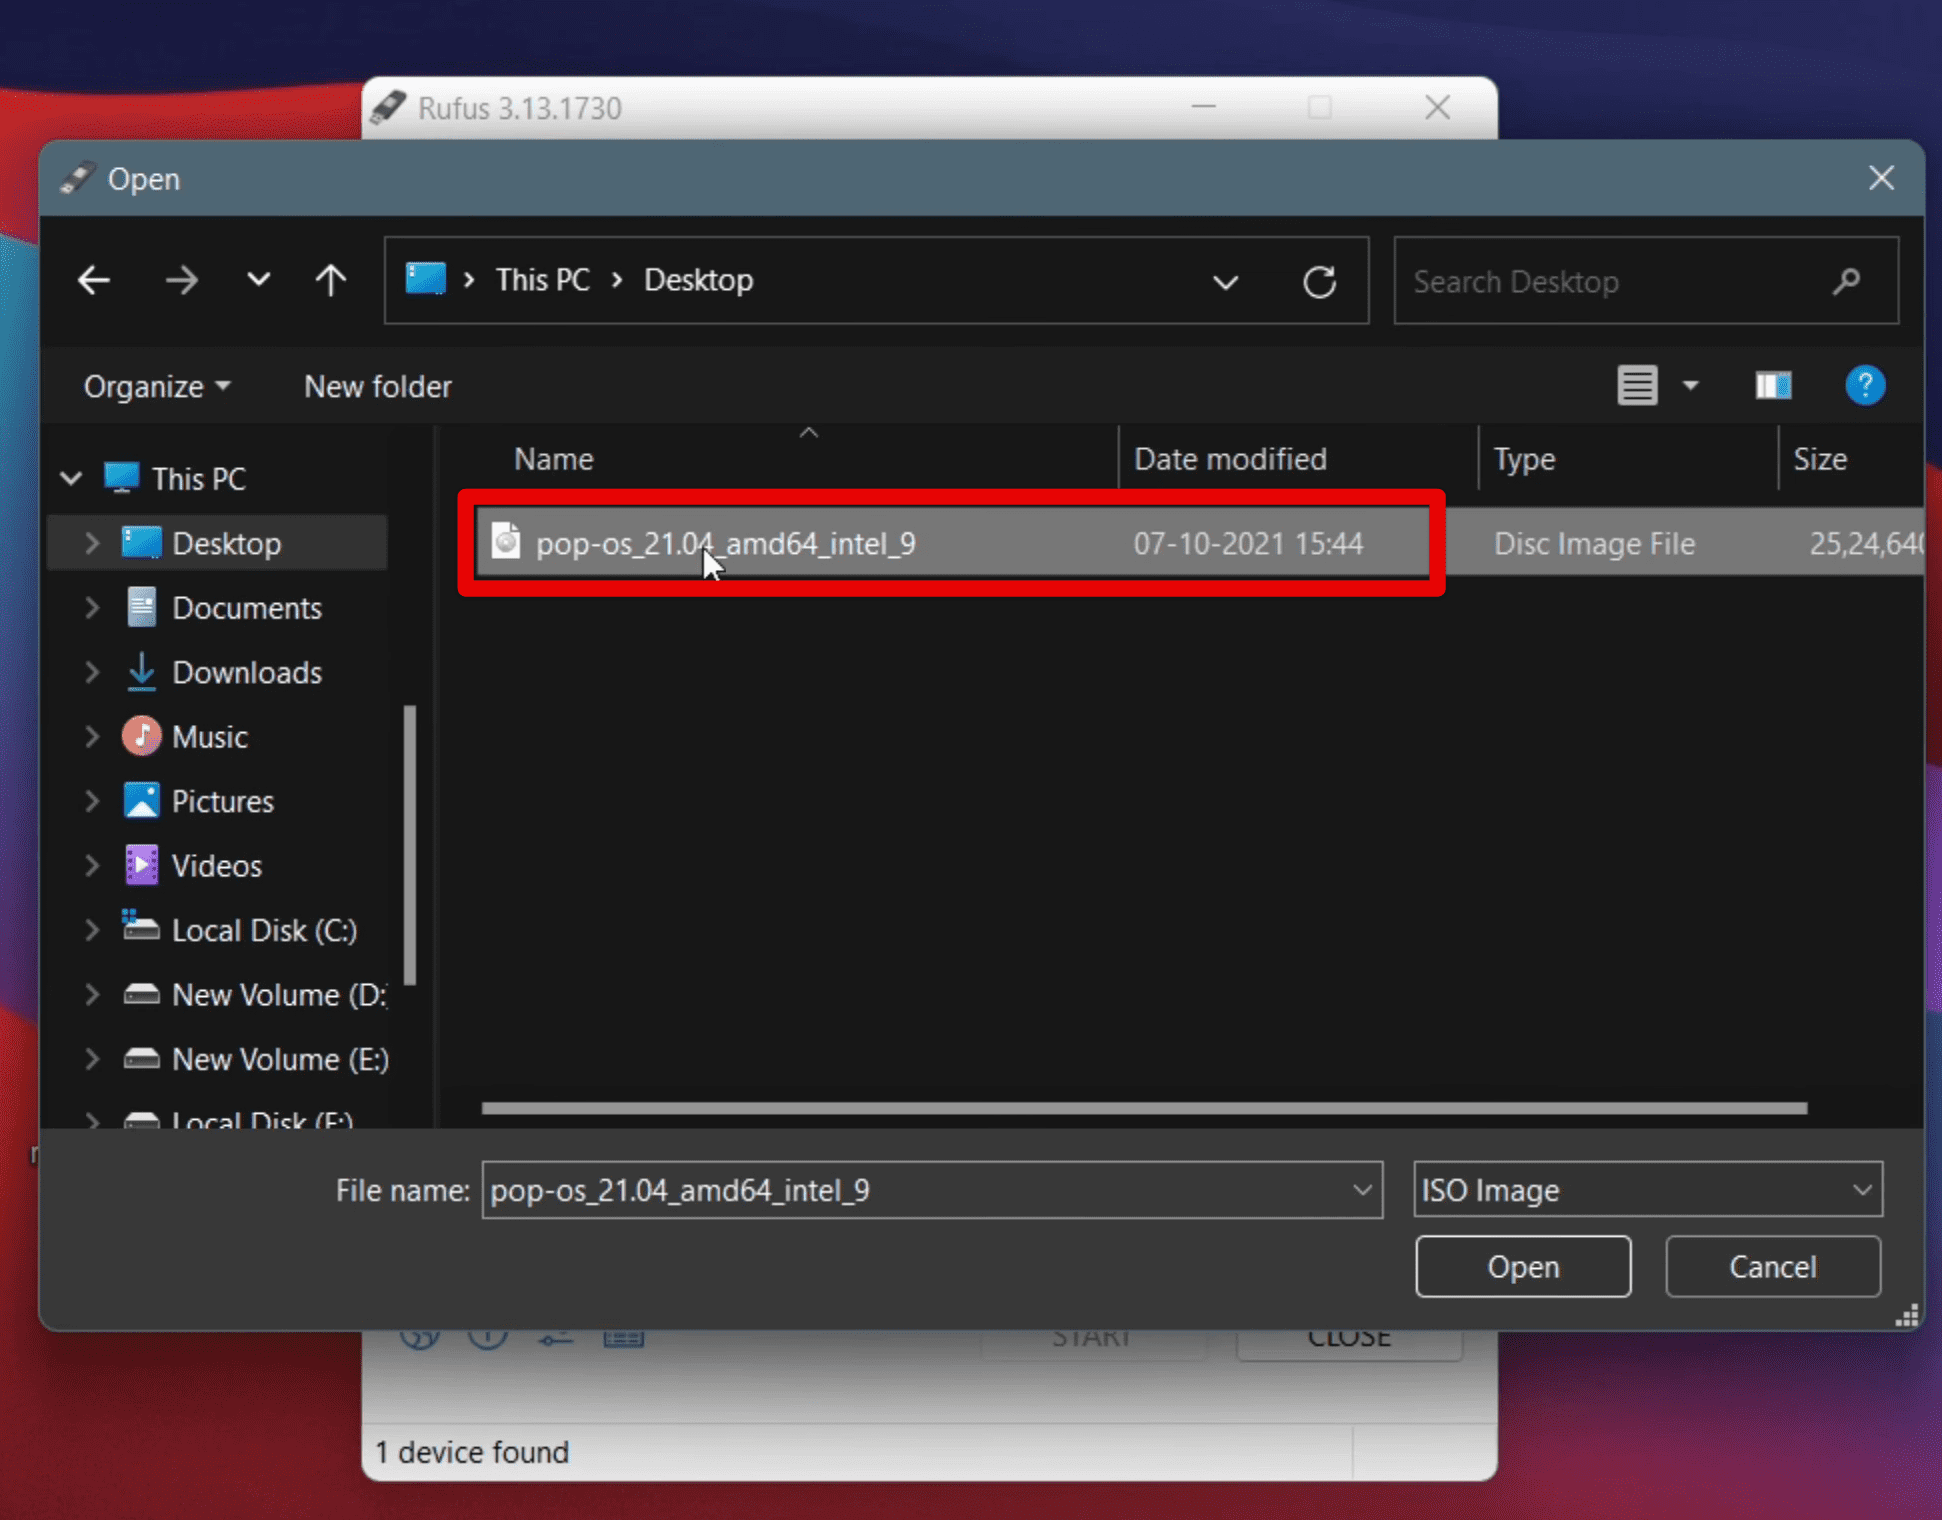
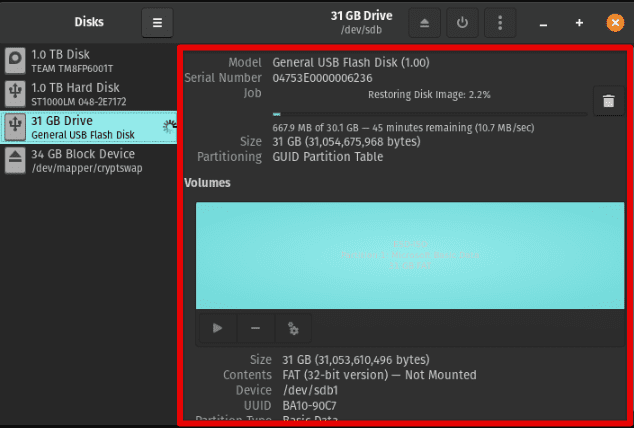
Creating a bootable USB drive: Once the Pop!_OS ISO file is downloaded, you must create a bootable USB drive to install the operating system. This requires a separate USB flash drive with sufficient storage capacity. To create a bootable USB drive, you can use dedicated tools like BalenaEtcher, Rufus, or the built-in Startup Disk Creator (for Ubuntu-based systems). Launch the tool, select the downloaded Pop!_OS ISO file, choose the USB drive as the target, and follow the on-screen instructions to create the bootable USB drive. If you want to try out Pop!_OS on another computer, creating a bootable USB is an essential first step. Here is our ultimate guide on creating a Pop!_OS bootable USB drive.
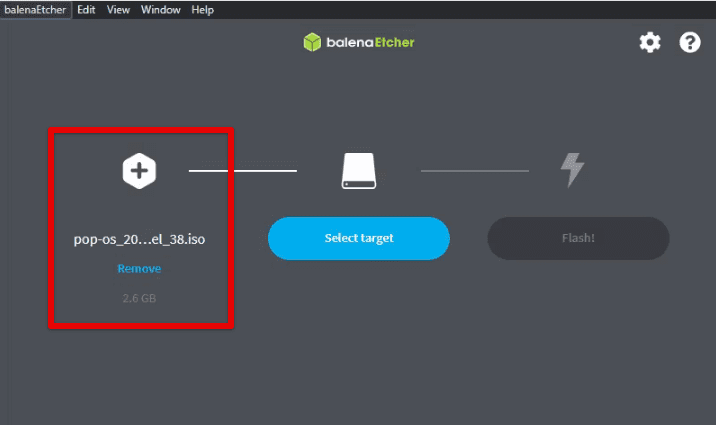
Creating a bootable USB drive
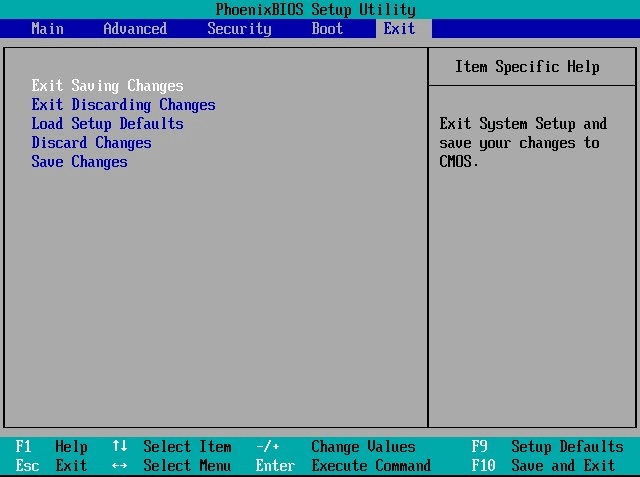
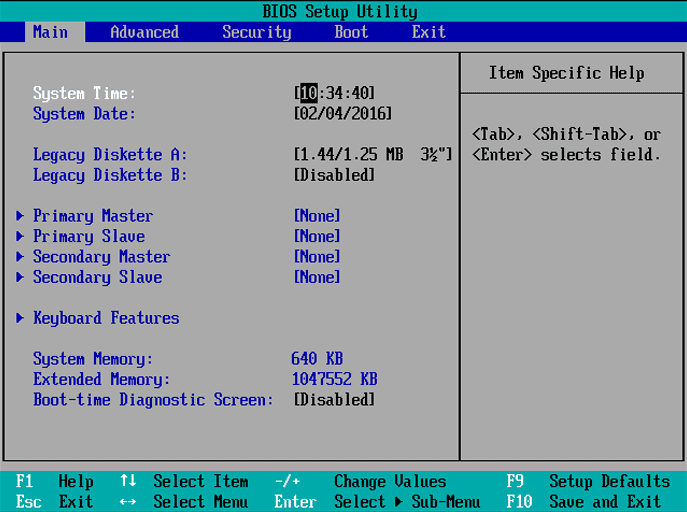
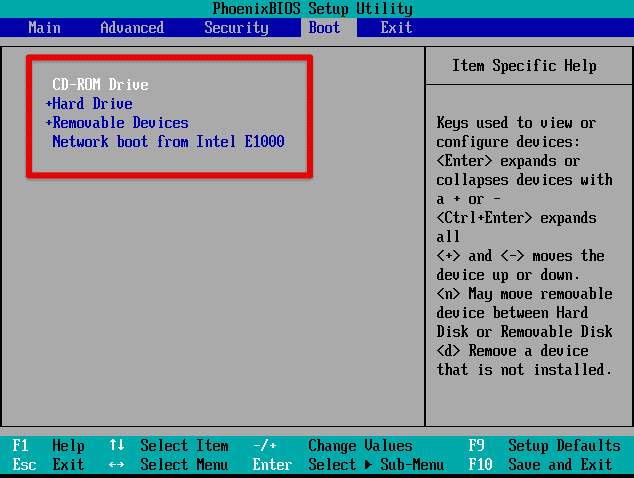
Configuring BIOS for Installation: Before installing Pop!_OS, it is essential to configure your computer’s BIOS/UEFI settings to prioritize the boot from the USB drive. Restart your computer and access the BIOS/UEFI settings by pressing the designated key during startup (usually Del, F2, or F12). Navigate to the Boot menu and change the boot order to ensure the USB drive is listed as the first boot option. Save the changes and exit the BIOS/UEFI settings.
Configuring BIOS for installation
Step-by-Step installation guide: Now that the bootable USB drive is prepared, and the BIOS/UEFI settings are configured, you are ready to install Pop!_OS. Insert the bootable USB drive into your computer. Restart the computer and allow it to boot from the USB drive. The Pop!_OS installation wizard should appear. Select your preferred language and click “Install.”

Installing Pop!_OS
Choose whether to install proprietary software, such as drivers and codecs, during installation. Select the installation type. Select the “Install alongside” option to install Pop!_OS alongside Windows if configuring a dual boot. Customize the partitioning scheme if needed. Ensure you allocate sufficient space for Pop!_OS while leaving enough room for Windows. Select the target disk or partition for the installation.
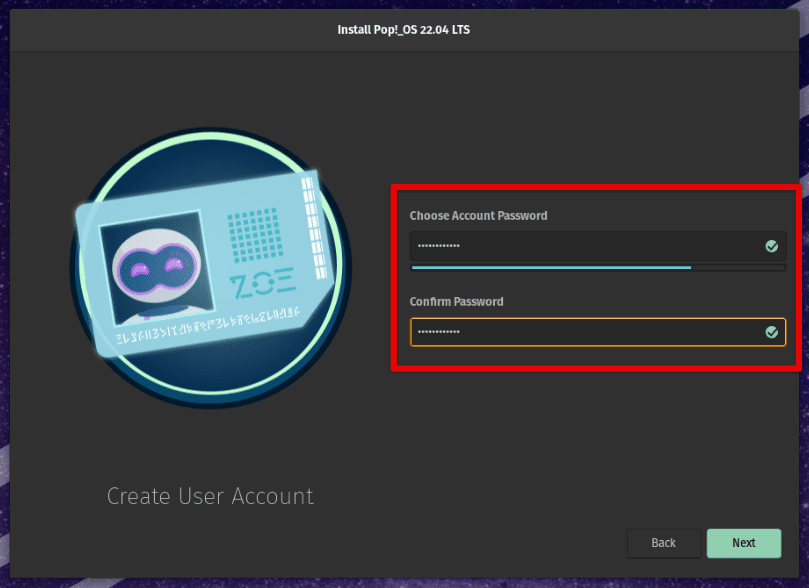
Create a username and password for your Pop!_OS user account. Review the installation settings and click “Install” to proceed. The installation process will begin. Please wait for it to be complete. Once the installation is finished, you will be prompted to restart the system. Remove the USB drive and restart your computer.
Installing Windows
This section will guide you through installing Windows as part of your dual boot configuration with Pop!_OS.
Downloading Windows: To install Windows, you must download the appropriate ISO file from the official Microsoft website. Visit the Microsoft website and navigate to the download section. Select the desired version of Windows (e.g., Windows 10 Home, Windows 11 Pro) and choose the appropriate architecture (32-bit or 64-bit) based on your system requirements. Ensure that you download the ISO file for the version of Windows that you have a valid license.
Downloading Windows
Creating a bootable USB drive: Once the Windows ISO file is downloaded, you must create a bootable USB drive to install the operating system. This requires a separate USB flash drive with sufficient storage capacity. You can use tools like Rufus, Windows USB/DVD Download Tool, or the built-in Disk Utility (for macOS) to create a bootable USB drive. Launch the tool, select the downloaded Windows ISO file, select the USB drive as the target, and follow the on-screen instructions to create the bootable USB drive.
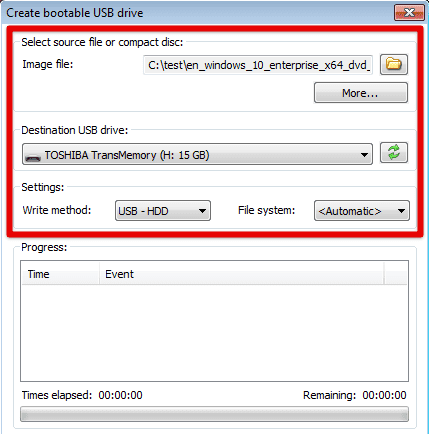
Creating a bootable USB drive for Windows
Configuring BIOS for installation: Before installing Windows, it is important to configure your computer’s BIOS/UEFI settings to prioritize booting from the USB drive. Restart your computer and access the BIOS/UEFI settings by pressing the designated key during startup (usually Del, F2, or F12). Navigate to the Boot menu and change the boot order to ensure the USB drive is listed as the first boot option. Save the changes and exit the BIOS/UEFI settings.
Configuring BIOS for installing Windows
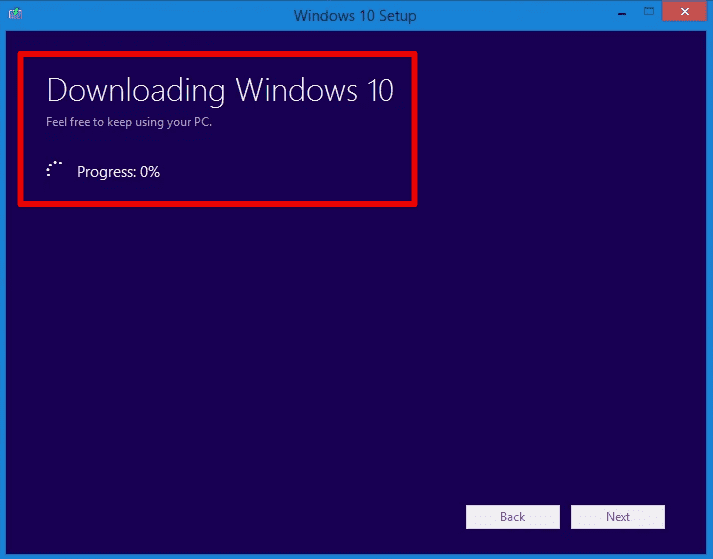
Step-by-Step installation guide: Now that the bootable USB drive is prepared, and the BIOS/UEFI settings are configured, you are ready to install Windows. Insert the bootable USB drive into your computer. Restart the computer and allow it to boot from the USB drive. The Windows installation wizard should appear. Select your preferred language, time zone, and keyboard layout, then click “Next.” Click “Install now” to begin the installation process.
Installing Windows
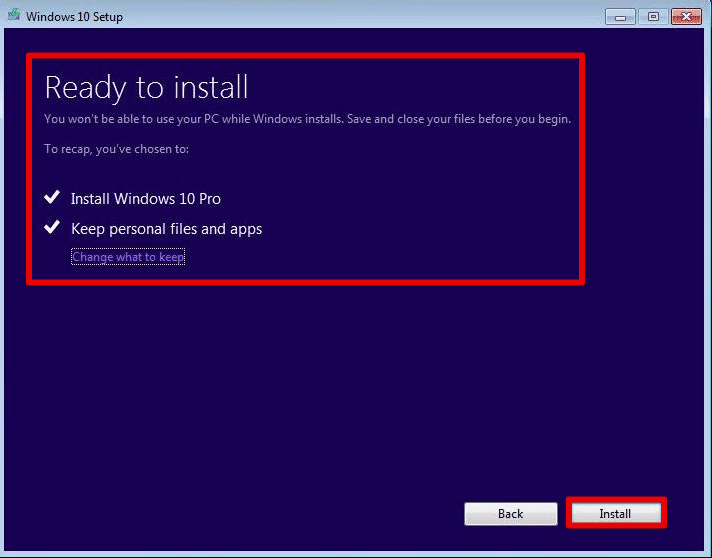
Enter the Windows product key when prompted. If you have a digital license or product key, enter it accordingly. Accept the terms and conditions, and click “Next.” Select the installation type. If you are configuring a dual boot, choose the custom installation option. Next, select the disk or partition where you want to install Windows. If you have unallocated space, you can create a new partition for Windows.
Select the partition, click “Next,” and wait for the installation process to complete. Follow the on-screen prompts to personalize Windows settings, including account creation, privacy preferences, and network configuration. Once the setup is finished, Windows will finalize the installation and may restart your computer several times. After the final restart, Windows will complete the installation process, and you will be prompted to set up user preferences.
Configuring boot order and dual boot manager
Properly configuring the boot order and dual boot manager in a dual boot configuration is crucial for seamless switching between Pop!_OS and Windows. This section will provide a detailed guide on configuring these aspects to ensure a smooth and efficient dual boot setup.
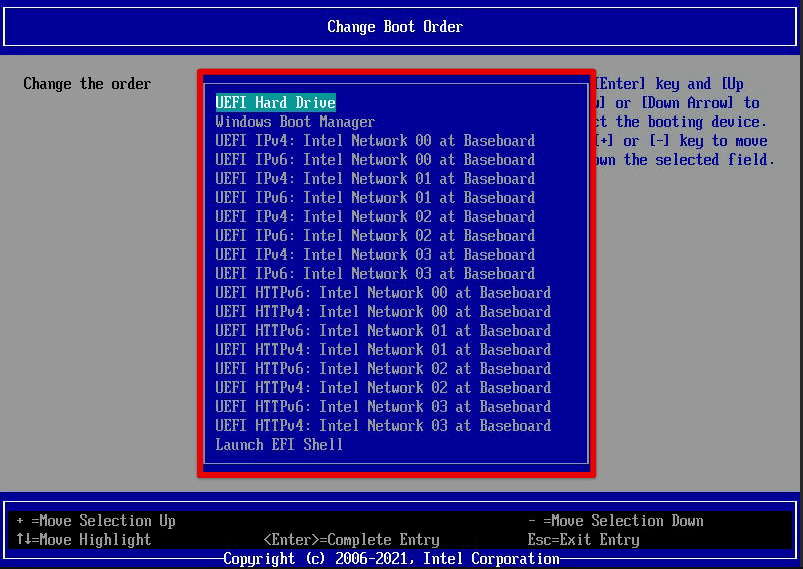
Boot order: Boot order refers to the sequence in which the computer searches for an operating system to load during startup. When you power on your computer, it checks the boot order to determine which device or partition to boot from. In a dual boot setup, you must ensure that the boot order is correctly configured to prioritize the dual boot manager, allowing you to choose between Pop!_OS and Windows.
Boot order
Modifying boot order: To modify the boot order, you must access the BIOS/UEFI settings. The process may vary depending on your computer’s manufacturer and model. Restart your computer and look for the key to access the BIOS/UEFI settings. The key is typically displayed during startup (e.g., “Press Del to enter Setup”). Press the designated key repeatedly until the BIOS/UEFI settings menu appears. Navigate to the Boot menu or a similar section that controls the boot order.
Modifying boot order
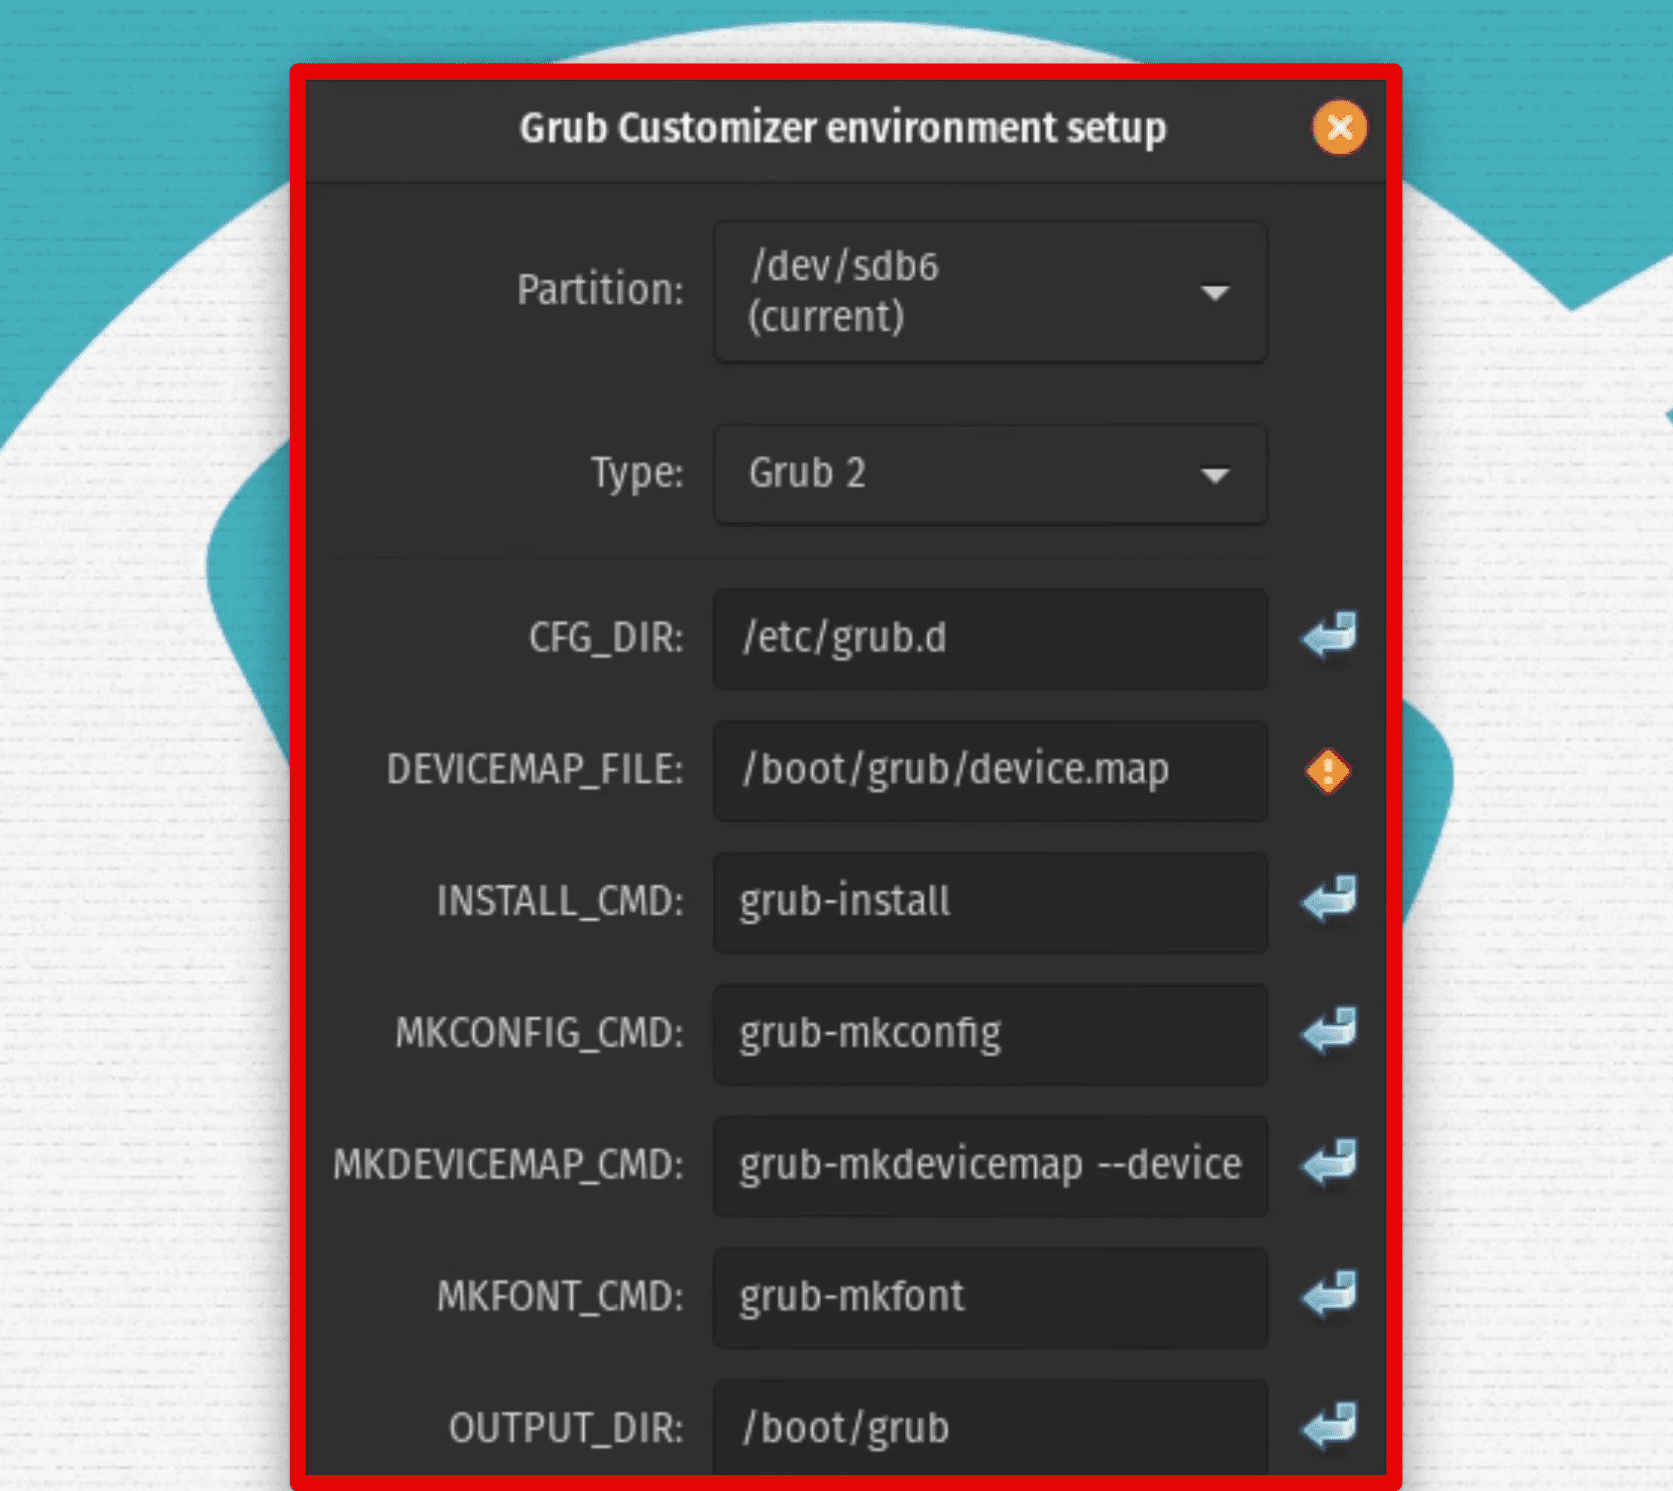
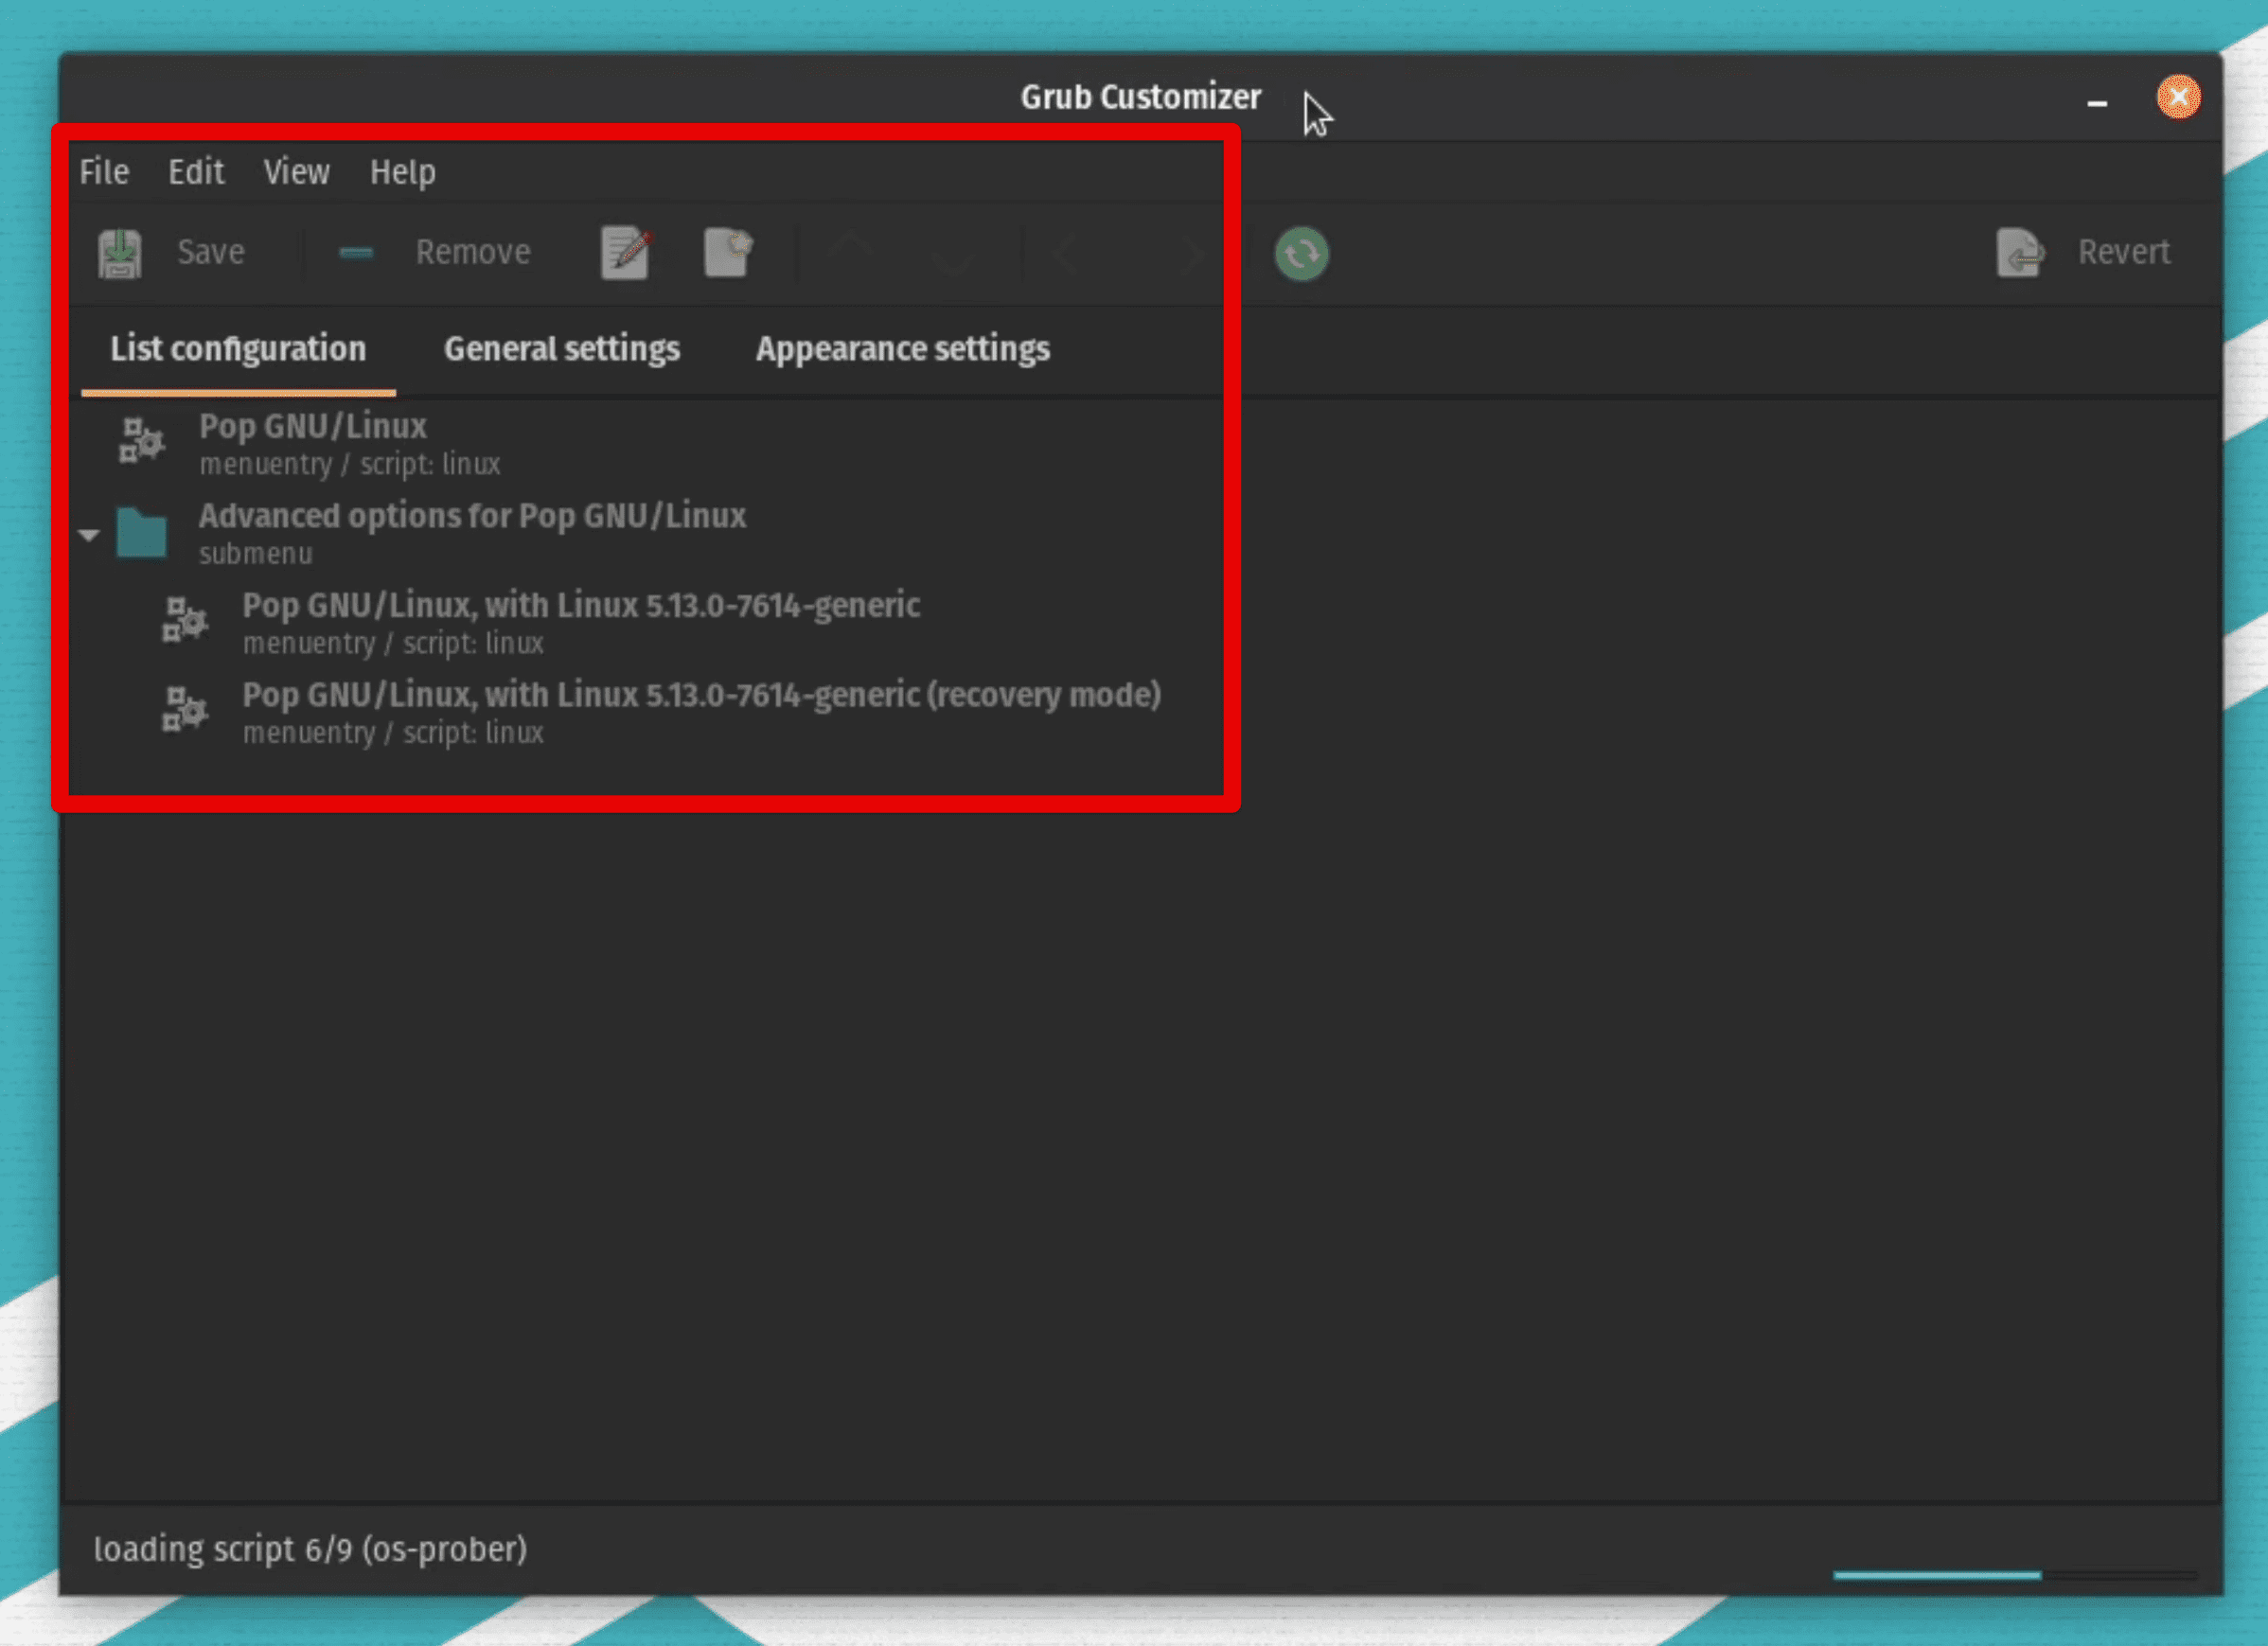
Configuring the dual boot manager: In a dual boot setup, a dual boot manager presents a menu allowing you to select between Pop!_OS and Windows during startup. Different dual boot managers are available, such as GRUB (Grand Unified Bootloader) and systemd-boot. The specific configuration steps may vary depending on the dual boot manager. If you use GRUB as your dual boot manager, open a terminal in Pop!_OS. Use the following command to edit the GRUB configuration file:
sudo nano /etc/default/grub
Locate the line starting with GRUB_DEFAULT and set the value to the desired operating system entry. The entries are usually numbered, with the first entry being 0. Save the changes and exit the text editor. Update the GRUB configuration afterward.
Configuring the dual boot manager
The GRand Unified Bootloader, or GRUB, is a crucial component that manages the boot process for Linux systems. Learn how to troubleshoot boot problems by reinstalling GRUB on Linux.
Managing boot entries: When configuring the dual boot manager, managing the boot entries for both Pop!_OS and Windows is essential. The dual boot manager should detect both operating systems and present them as options during startup. If any changes or updates are made to the boot configuration, such as installing system updates or adding/removing operating systems, it may be necessary to update the boot entries.
Optimizing Pop!_OS for dual boot
To ensure a seamless dual boot experience with Pop!_OS, optimizing the system for hardware compatibility, smooth operation, and synchronization with Windows is necessary. This section provides a detailed guide on optimizing Pop!_OS for your dual boot configuration.
Installing necessary drivers: Installing the required drivers for your specific hardware components is recommended to optimize hardware compatibility. Pop!_OS often includes a wide range of drivers out of the box, but some proprietary drivers or specific hardware drivers may need to be installed manually.
Installing necessary drivers
Pop!_OS provides an Additional Drivers utility that can be accessed through the system settings. Launch the utility, and it will scan for any additional drivers available for your hardware. Install any recommended drivers for optimal performance. Next, visit the manufacturer’s website for your hardware components (such as graphics cards or network adapters) and download the appropriate drivers. Follow the instructions provided by the manufacturer to install the drivers on Pop!_OS. Utilize package managers like apt or snap to install drivers from official repositories or third-party sources. Research the specific driver you need and use the appropriate command to install it.
Configuring system settings: To optimize Pop!_OS for smooth operation in a dual boot setup, consider the following configuration adjustments. First, adjust the power management settings to optimize battery life or performance according to your needs. You can access power management settings through the system settings or power management utilities.
Configuring system settings
Configure the software update settings to ensure regular system updates. Also, check the software sources and repositories to enable additional software and updates. To provide seamless connectivity, Configure network settings, including Wi-Fi, Ethernet, and VPN connections. Set up any required network protocols or proxy settings.
Setting up user accounts and permissions: Creating user accounts and managing permissions is essential to ensure safe and efficient usage of Pop!_OS. Create user accounts for each individual using Pop!_OS. Assign appropriate usernames and passwords during the account creation process.
Setting up user accounts and permissions
Configure user permissions and groups to control access to files, applications, and system settings. Assign users to appropriate groups based on their needs. Grant administrative privileges to specific user accounts using the sudo command. This allows authorized users to perform administrative tasks by entering their passwords.
Customizing the desktop environment: Pop!_OS offers a range of customization options to personalize the desktop environment and appearance. Install and apply custom themes and icons to change the look and feel of the desktop environment. You can find various themes and icons from the official Pop!_OS repositories or third-party sources.

Customizing the desktop environment
Use GNOME Shell extensions to add additional functionality to the desktop environment. Popular extensions include Dash to Panel, Workspace Grid, and Night Light. Customize the behavior and appearance of the dock and app indicators to suit your preferences. Adjust the dock’s position, size, and behavior, and enable or disable specific app indicators.
Optimizing Windows for dual boot
To optimize Windows for a smooth dual boot experience, it is crucial to update the operating system, install essential drivers, configure system settings, manage user accounts, adjust partition sizes, and address potential issues. This section provides a detailed guide on optimizing Windows for your dual boot configuration.
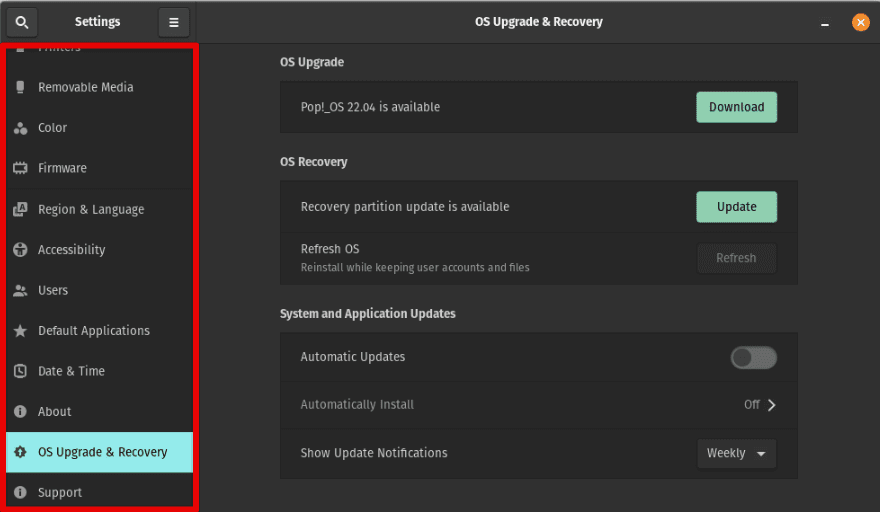
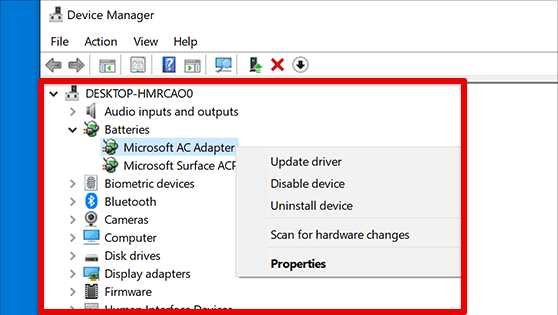
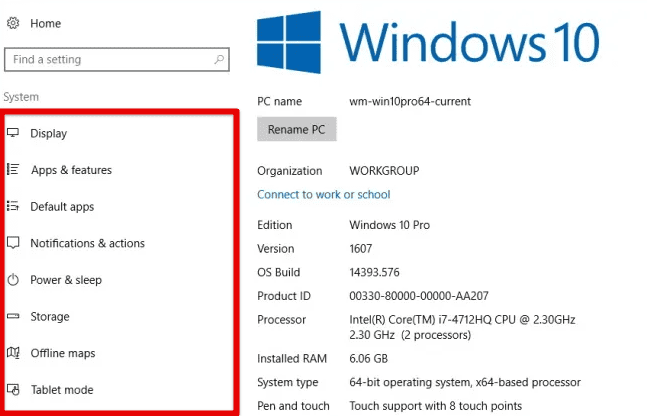
Updating Windows and installing essential drivers: To optimize Windows for dual boot, ensure the operating system is up-to-date. Go to Settings > Update & Security > Windows Update and check for updates. Install any available updates for your version of Windows. Visit the manufacturer’s website for your hardware components (e.g., graphics card, network adapter) and download the latest drivers. Install the drivers according to the manufacturer’s instructions.
Updating Windows and installing essential drivers
Open the Device Manager by right-clicking the Start button and selecting “Device Manager.” Check for any devices with missing or outdated drivers. Right-click on the device and select “Update driver” to install the latest drivers.
Configuring system settings: To configure system settings on Windows for dual boot compatibility, disable Fast Startup, as it may interfere with the dual boot process. Go to Control Panel > Power Options > Choose what the power buttons do. Click on “Change settings that are currently unavailable” and uncheck “Turn on fast startup.”
Configuring system settings in Windows
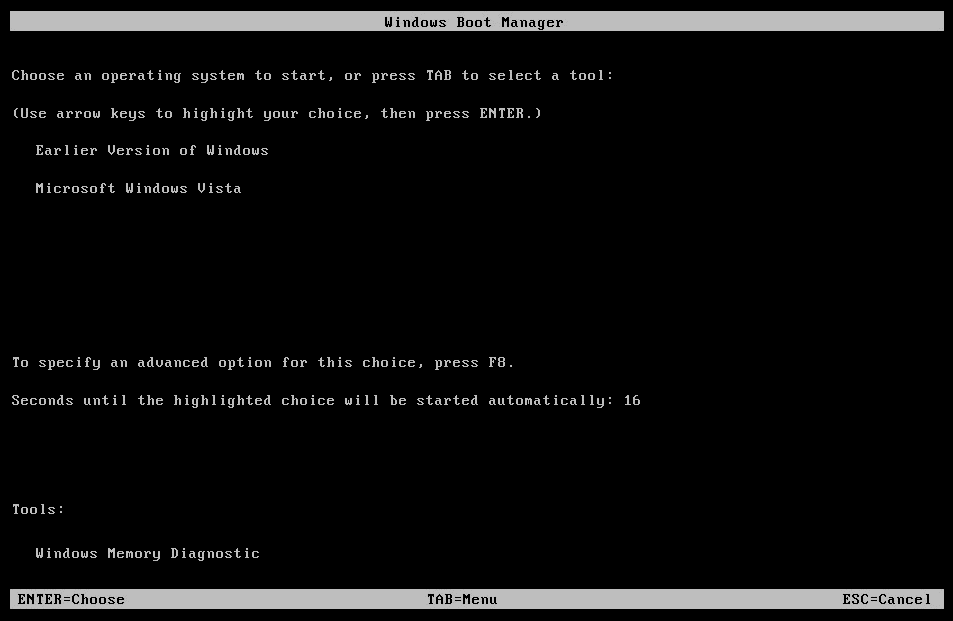
If your system has Secure Boot enabled in the BIOS/UEFI settings, ensure it is compatible with Windows and Pop!_OS. Some systems may require you to disable Secure Boot for successful dual booting. In the Windows Boot Manager, you can set the default operating system and adjust the timeout for selecting the default OS during startup. Use the “System Configuration” utility or a third-party boot manager tool to make these changes.
Managing user accounts and permissions: Windows allows you to create and manage user accounts with different levels of permissions. Create user accounts for each individual who will be using Windows. Assign appropriate usernames and passwords during the account creation process.
Managing user accounts and permissions in Windows
Configure user permissions and groups to control access to files, applications, and system settings. Assign users to appropriate groups based on their needs. Ensure you have an account with administrative privileges to perform system-level tasks. Use this account to install software, modify system settings, and manage other user accounts.
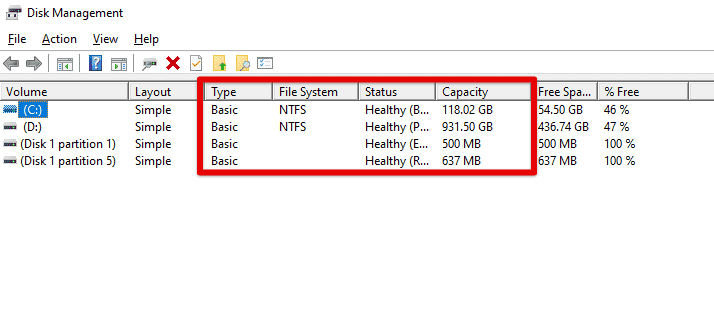
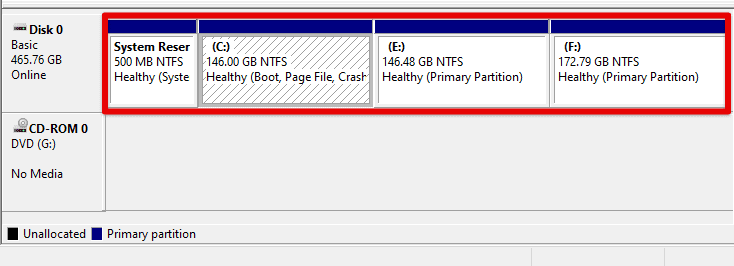
Adjusting partitions: To optimize the storage allocation for dual booting, consider changing partition sizes. Open the Disk Management tool by right-clicking the Start button and selecting “Disk Management.” Identify the partitions and their sizes.
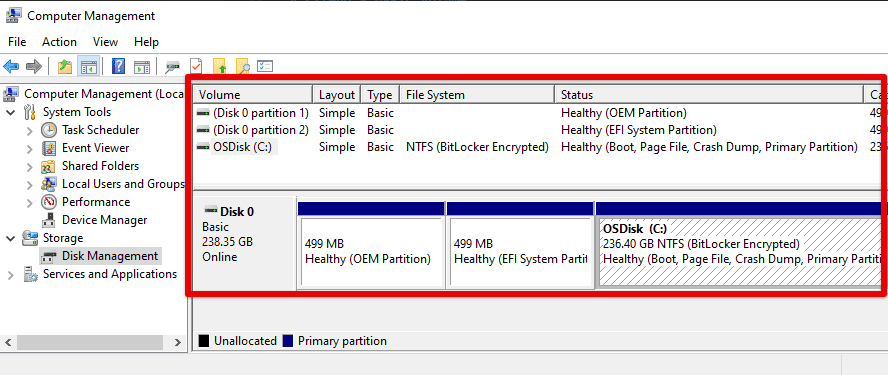
Adjusting partitions
If necessary, right-click on a partition and select “Shrink Volume” to reduce size. Allocate the desired space for the dual boot partition. After shrinking a partition, right-click on the unallocated space and select “New Simple Volume.” Follow the on-screen prompts to create a new partition.
Sharing files and data
Sharing files and data between Pop!_OS and Windows is an important aspect of a dual boot setup. This section provides a detailed guide on understanding file system compatibility, accessing partitions, configuring shared folders or network file sharing, using cross-platform applications and file formats, and ensuring data integrity and backup practices.
Understanding file system compatibility: File systems like NTFS (used by Windows) and ext4 (used by Pop!_OS) have different compatibility levels. While Windows can read NTFS and FAT32 file systems, it cannot natively read or write to ext4 partitions. On the other hand, Pop!_OS can read and write to NTFS partitions, but it requires additional setup to access ext4 partitions.
Understanding file system compatibility
Accessing partitions: To access Pop!_OS partitions from Windows and vice versa, install a third-party driver or utility that provides ext4 file system support for Windows, such as Ext2Fsd or Paragon ExtFS. These tools allow Windows to read and write to ext4 partitions. After installation, restart your computer, and the ext4 partitions should be accessible from Windows Explorer.
Accessing partitions
NTFS partitions can be accessed natively in Pop!_OS without any additional setup. Open the file manager and navigate to the NTFS partitions to read and write files.
Configuring shared folders: To facilitate file sharing between Pop!_OS and Windows, you can configure shared folders or set up network file sharing. Identify a folder/directory on your Pop!_OS or Windows system that you want to share. Right-click on the folder and select “Properties” or “Sharing Options.”
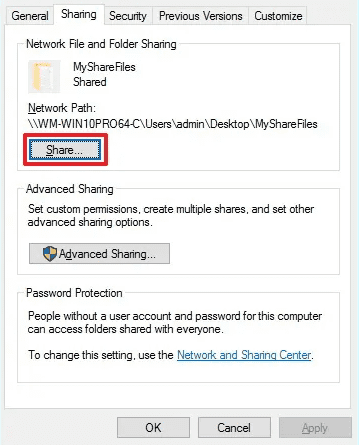
Configuring shared folders
Enable folder sharing and configure the desired permissions (read-only or read-write) for other users or devices. Access the shared folder from the other operating system by entering the network address (e.g., \ip_address\shared_folder) in the file manager or Windows Explorer.
Conclusion
This comprehensive guide explored the intricacies of setting up and maintaining a dual boot system, specifically focusing on Pop!_OS and Windows. Following the detailed instructions provided in each section, you should now understand how to install both operating systems, configure boot order, optimize each OS for dual booting, and share files between them.
Dual booting offers the advantage of having two operating systems on a single machine, allowing you to enjoy the strengths of both Pop!_OS and Windows. It lets you enjoy the flexibility and customization of Linux and Windows’s familiarity and software compatibility. A dual boot-enabled machine allows you to switch seamlessly between these useful operating systems without a hitch.