
When talking about network scanning tools, we refer to software that identifies and tries to solve various loopholes in our networks. Furthermore, it plays a significant role by safeguarding you from dangerous habits that may threaten the entire system. These devices provide the user with a diverse way to help secure their computer networks.
Regarding safeguarding we talked about earlier, it denotes preventing someone who manages a wide range of computers and other devices from network vulnerability. When handling a lot of stuff, you probably have many IP addresses to keep track of, making it critical to have reliable IP address scanning and network management tools.
With the help of these IP scanner tools, you can keep track of all the addresses on your network. In addition to that, you will have an easy time ensuring that all your devices are connected successfully. This also makes it easy for you to troubleshoot any arising conflicts in the network.
There are various types of IP scanning tools that aid in providing a database of your IPs. This is a vital aspect to IP address managers as they ease their tracking job.
IP Scanner Tools for Network Management
In this article, we have handpicked a list of the best IP Scanner tools for you. We have also incorporated popular features to help you understand them well.
1. OpUtils
ManageEngine OpUtils offers a diverse insight into an advanced network infrastructure. The device provides a real-time IP address for tracking and network scanning. Scanning, in this case, means that the device can examine your network across numerous routers, subnets, and switch ports. After running the scan, the tool will effectively detect network issues and troubleshoot them since the device helps diagnose, troubleshoot, and monitor resources professionally.
The tool scans IPv6 and IPv4 subnets to detect the used and available IP addresses. Additionally, OpUtils also runs a scan of the switches that are available in your network. After that, it maps the devices to the switch ports and views crucial details, for instance, the users and locations. This, in turn, aids in detecting the device intrusions and later work as a barrier to their access.
Download and install OpUtils
There are two methods to install this application. The first method is to download and install manually using the following link, Download OpUtils. The second method is to install the app using the command line that we will focus on in our case.
To add to its performance, you can use this device to track your network’s bandwidth usage and create a report on the used bandwidth.
How to install OpUtils in Linux:
This is a quick-dry run of the console installation mode of the OpUtils on a Linux system.
Prerequisites
Before installation, make sure you have downloaded the binary for Linux using the link given above
Installation steps:
- The first step is executing the file with the sudo permissions and -i console option.
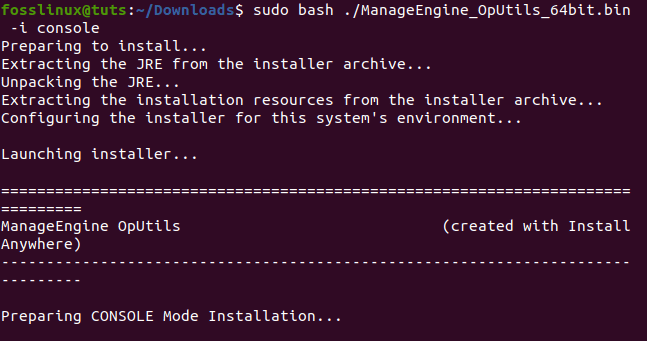
executing ManageEngine using the -i console
- In the License Agreement section, which comes second, press “enter” to proceed.
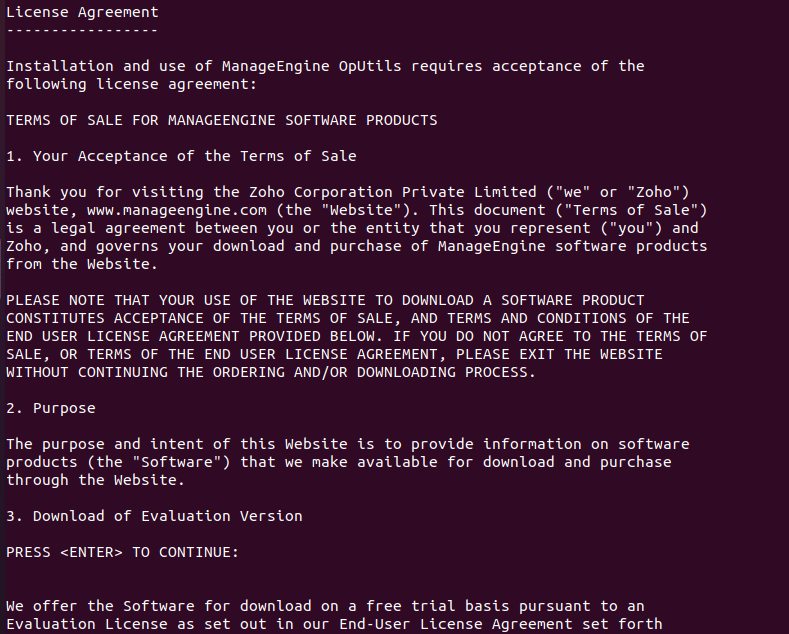
Go through the license part
- Additionally, you can sign up for technical support by providing the required credentials such as Name, Business E-mail, Phone, country, and Company Name.
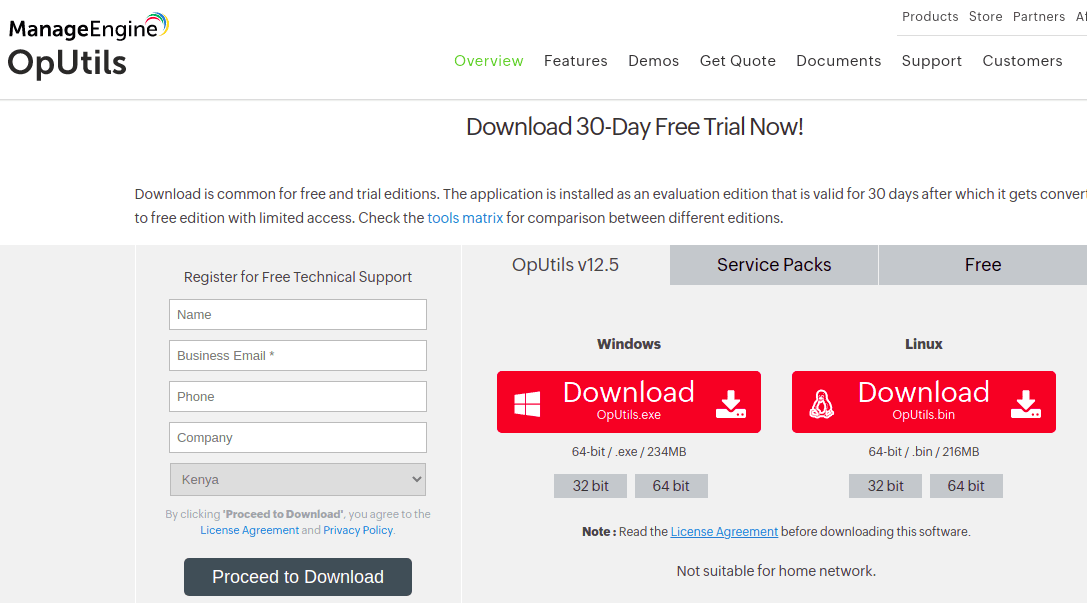
technical support GUI sign up
Alternatively, you can sign up using the command line. However, in our case, we will not sign up.
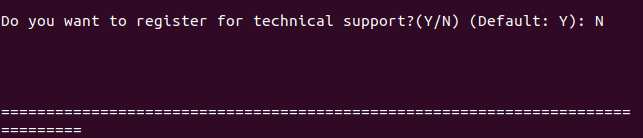
technical support console sign up
- Select the location in the next step
- Upon selection of the location, choose the installation directory
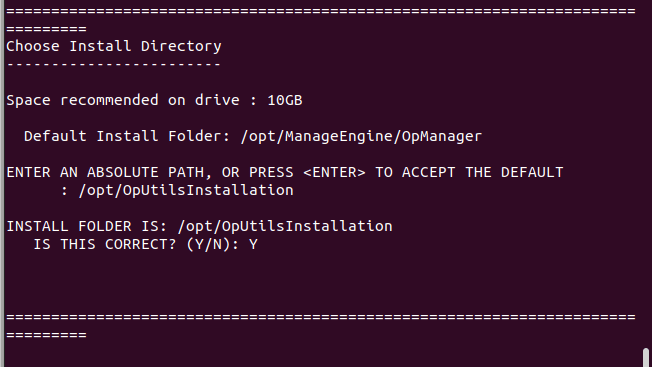
choosing an installation directory
- Thirdly, you will be allowed to configure the Web server port
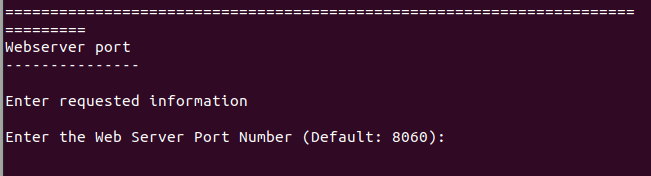
configuring the web-server port
- In the subsequent steps of the installation, verify the installation credentials and press “Enter” to sum up the installation.
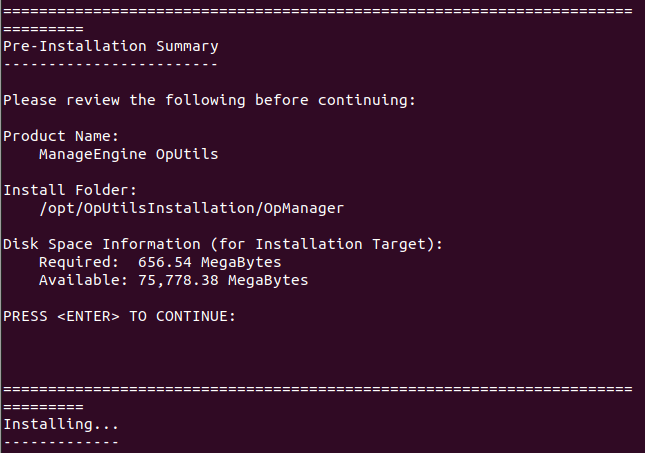
verifying the installation credentials

the installation is completed after carrying out all the above steps
Starting OpUtils on Linux
Here, you will go to the folder that has opt/ManageEngine/OpManager/bin
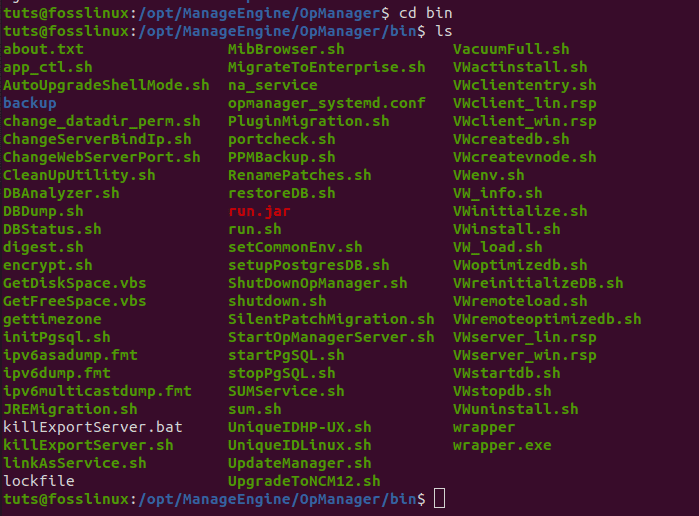
after opening the bin file, use the run.sh file with sudo privileges
After reaching the /bin file, you will execute the run.sh file with sudo command to give it admin privileges as seen below, and you will be done.
sudo sh run.sh
sudo sh run.sh command
Features:
- Detects rogue devices and boosts network security through network scanning
- Automates network scanning with programmed scan procedures.
- The tool generates in-depth reports that can be utilized in conducting network audits.
- The device offers scalability with support for several subnets.
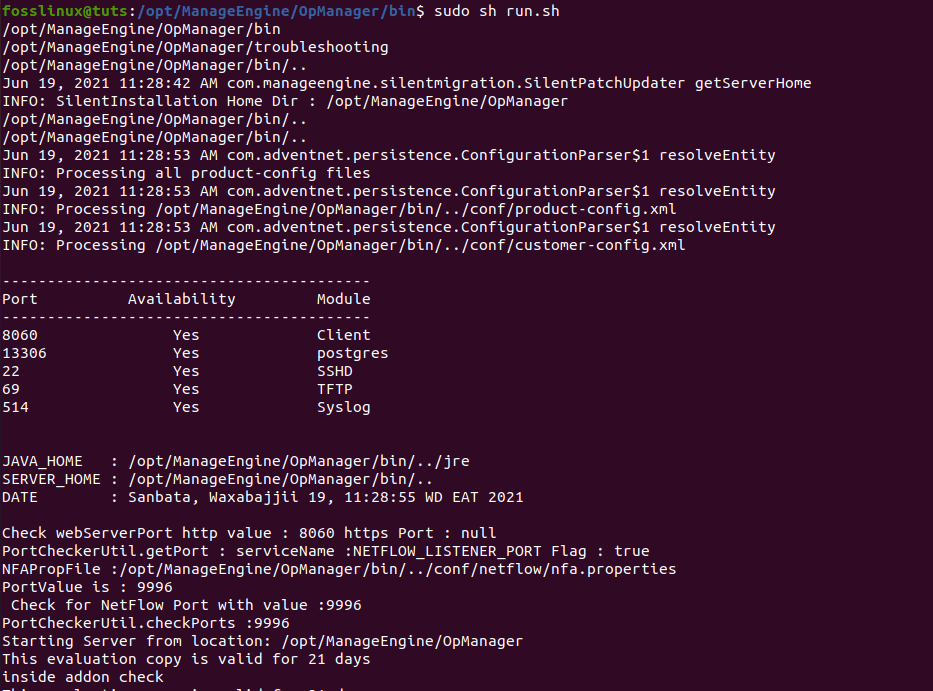
Below is a snapshot displaying OpUtils running on the server
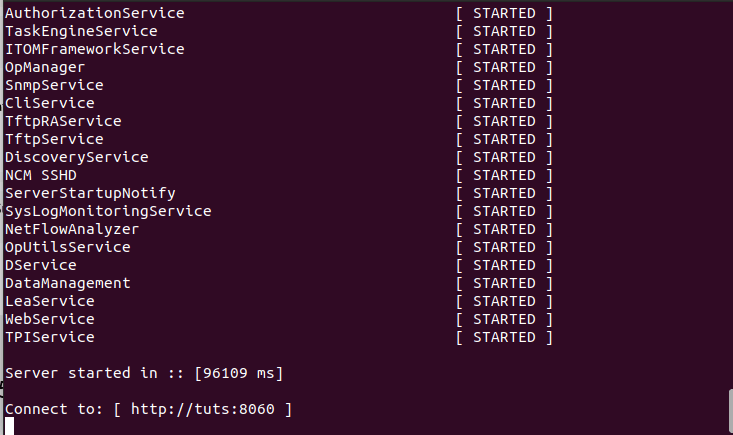
OpUtils running in the server
The screenshot below shows OpUtils running in the browser
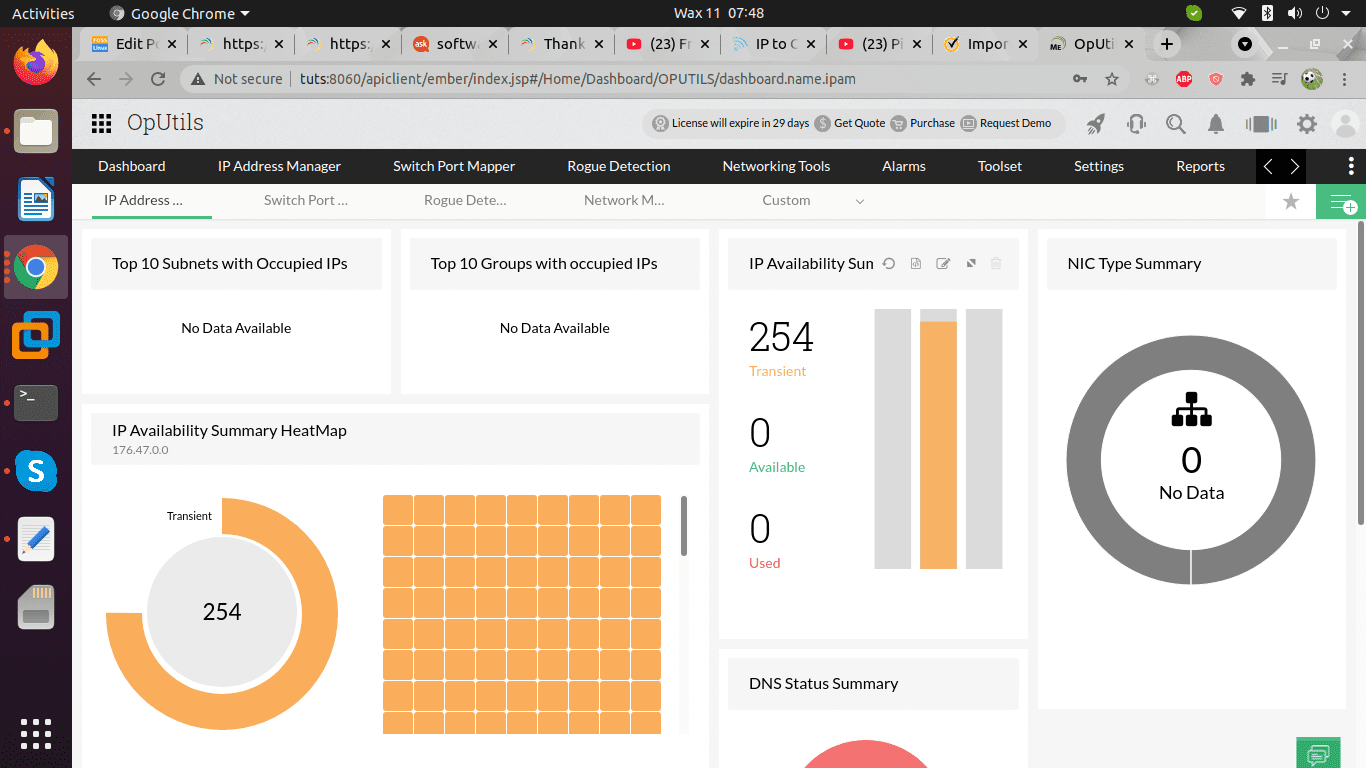
Oputils running in the browser
2. Angry IP Scanner
This is an open-source and cross-platform compatible IP scanning tool that is free. However, there is only one requirement of installing java to the device before it is up and running. The device works exemplary well by scanning your local network as well as the internet.
When selecting a scan, you can choose the extend of the scan, either a local network scan that scans the whole network or specific subnets or IP ranges. Some of the generally covered information includes MAC addresses, ports, NetBIOS information, and hostnames. Suppose you are asking yourself how you can get more information from the captured data using this device, then all you have to do is installing extension plug-ins, and you are done.
Despite Angry IP Scanner being a GUI tool, it also has a command-line version that allows system admins to integrate its capabilities into custom scripts.
This device saves scans in various file formats such as TXT, XML, and CSV. Some of the reasons for using or rather buying this tool is that it is free, an open-source tool, cross-platform compatible, has GUI and command-line options.
Download and install Angry IP Scanner
The application can be installed using two different procedures. The first procedure entails manual download and installation of the app using the Download Angry IP Scanner link. The second procedure is installing via the command line that we will use in this article.
Installing Angry IP Scanner
To have Angry IP Scanner in your Linux system, open up your terminal and copy-paste the following command to allow you access the PPA repository.
Download and install the .deb file in Ubuntu using the following command:
sudo wget https://github.com/angryip/ipscan/releases/download/3.6.2/ipscan_3.6.2_amd64.deb
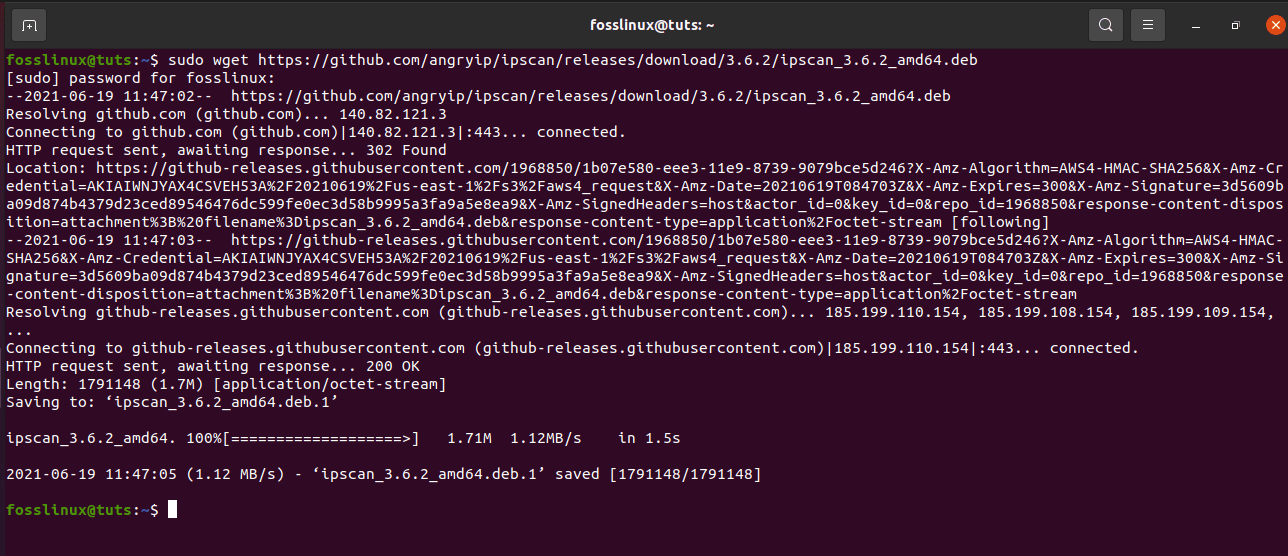
Downloading Angry IP from git
After that, run the dpkg command to install the application using the command below
sudo dpkg -i ipscan_3.6.2_amd64.deb
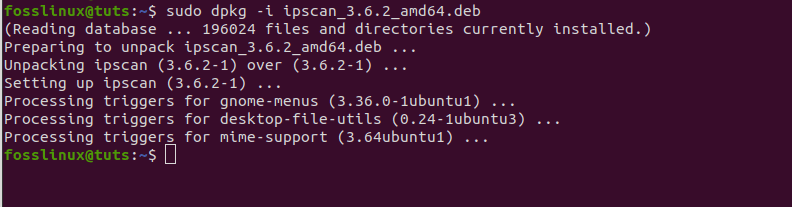
run the dpkg install command for Angry IP
Thereafter, go and open the application in the main application menu. After launching the app, the following window will pop up, click on the close button and start enjoying yourself.
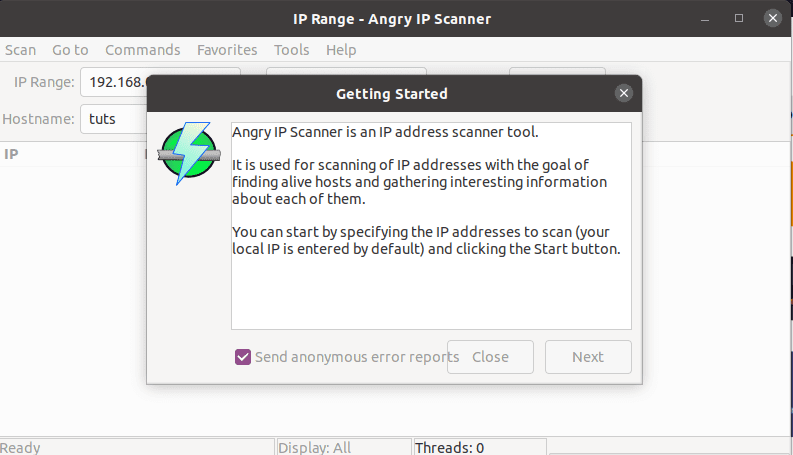
getting started with Angry Ip
If you click the close button, you will view a default window that selects the IP range depending on your PC’s network. Nonetheless, you can change the IP address if that does not satisfy you. After that, click the start button to initiate the scan.
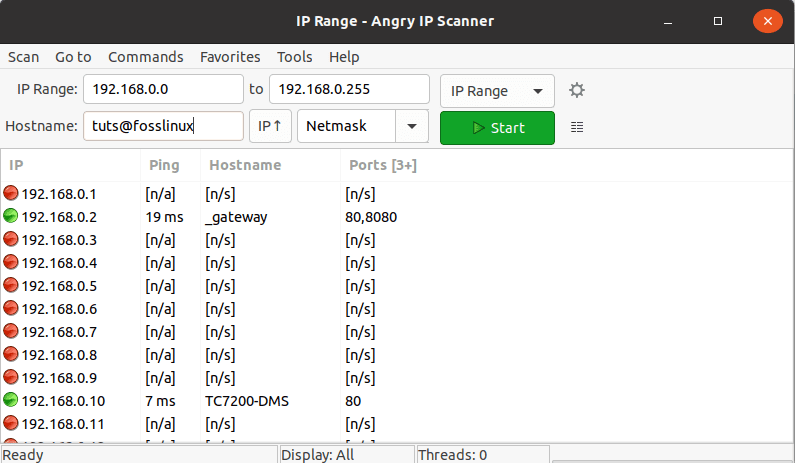
Angry IP Scanner
After completing the scan, the software will pop a window with a “scanning completed” status, as shown below.
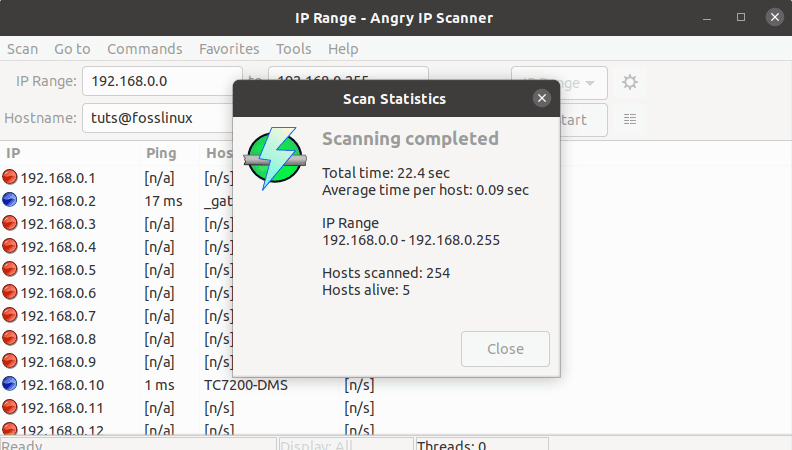
After scanning, a complete status scan is displayed
Features:
- It is used for faster scanning since the device uses the multi-threading approach.
- It can import the scan results into different formats.
- It comes with default and common fetchers such as hostname, ping, and ports. However, you can append more fetchers with the aid of plug-ins to have diverse information.
- Has two running options (GUI and command-line)
- It scans both private and public range of IP addresses. To add on, it can also get NetBIOS information of a device
- It detects web servers
- It allows opener customization.
You can also remove the scanner from your PC with the following command:
sudo apt-get remove ipscan
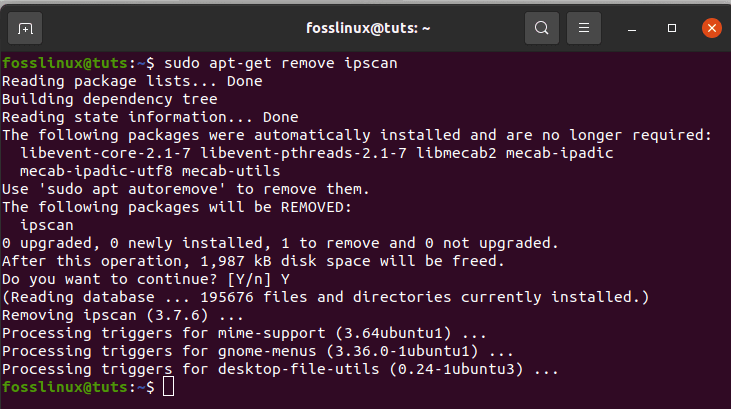
removing Angry IP scanner
3. Wireshark scanner
Wireshark is an open-network protocol analyzer program brought to life in 1998. The application receives updates from a worldwide organization of network developers that help in making new network technologies.
The software is free for use; this means that you need no money to access the software. Besides the scanning capabilities, the software also aids in troubleshooting and teaching purposes in educational institutions.
Are you asking yourself how this sniffer works? Don’t stress yourself up since we will give the finer details on how this scanner works. Wireshark is a packet sniffer and an analyzing tool that captures network traffic on a local network and stores the captured data for online analysis. Some of the device signals that this software captures data from including Bluetooth, wireless, Ethernet, Token Ring, and Frame Relay connections, plus many others.
Earlier, we mentioned that a packer refers to a single message from any network protocol, be it a TCP, DNS, or other protocol. There are two options to get Wireshark: download it using the following link Download Wireshark or install it via the terminal as shown below.
How to install Wireshark on the terminal
Since we are installing Wireshark on our Linux distro, it will be slightly different from windows and Mac. Therefore, to install Wireshark in Linux, we will use the subsequent steps enlisted below:
From the command line, copy and paste the following commands:
sudo apt-get install wireshark
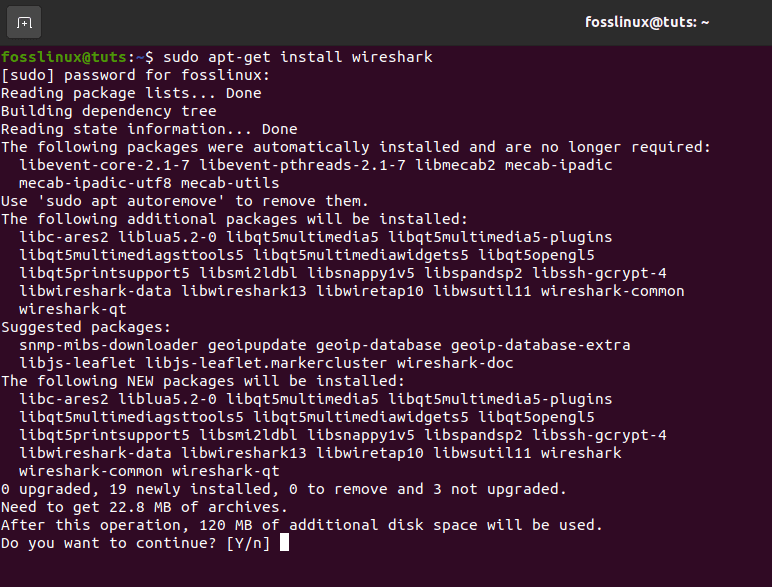
installing Wireshark
sudo dpkg-reconfigure wireshark-common

masscan reconfiguration
sudo adduser $USER wireshark

adding fosslinux user to wireshark
The commands given above will aid in downloading the package, updating them, and adding user privileges to run Wireshark. When running the reconfigure command in the terminal, you will be prompted with a window that says, “should non-superusers be able to capture packets? Here, you will select the “Yes” button and press enter to proceed.
Data packets on Wireshark
Since we have Wireshark installed on our PC, we now go over how to check the packet sniffer and then analyze the network traffic.
To fire up the application, you can go to your applications menu and click on the app, and it will start running. Alternatively, you can type “wireshark” on your terminal, and it will start up the application for you.
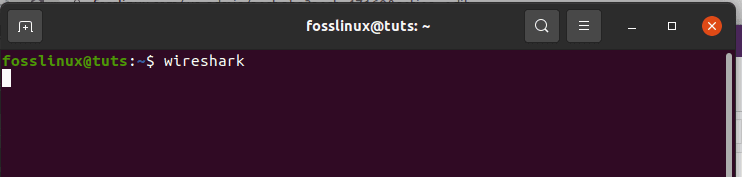
starting wireshark
Wireshark started by the terminal command
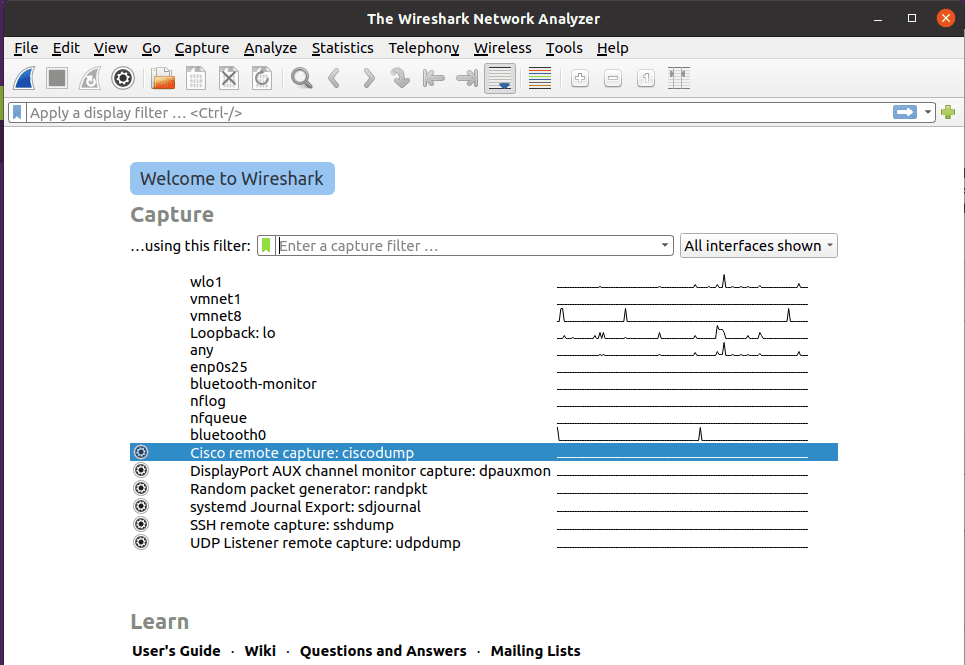
First, to initiate the process, click on the first button on the toolbar named “Start Capturing Packets.”

the capture button of Wireshark
After that, you can maneuver to the select capture button in the menu bar above the toolbar, a drop-down menu containing the Options, Start, Stop, Restart, Capture Filters, and Refresh Interfaces will appear. Select the start button in this step. Alternatively, you can use the “Ctrl + E” button to select the start button.
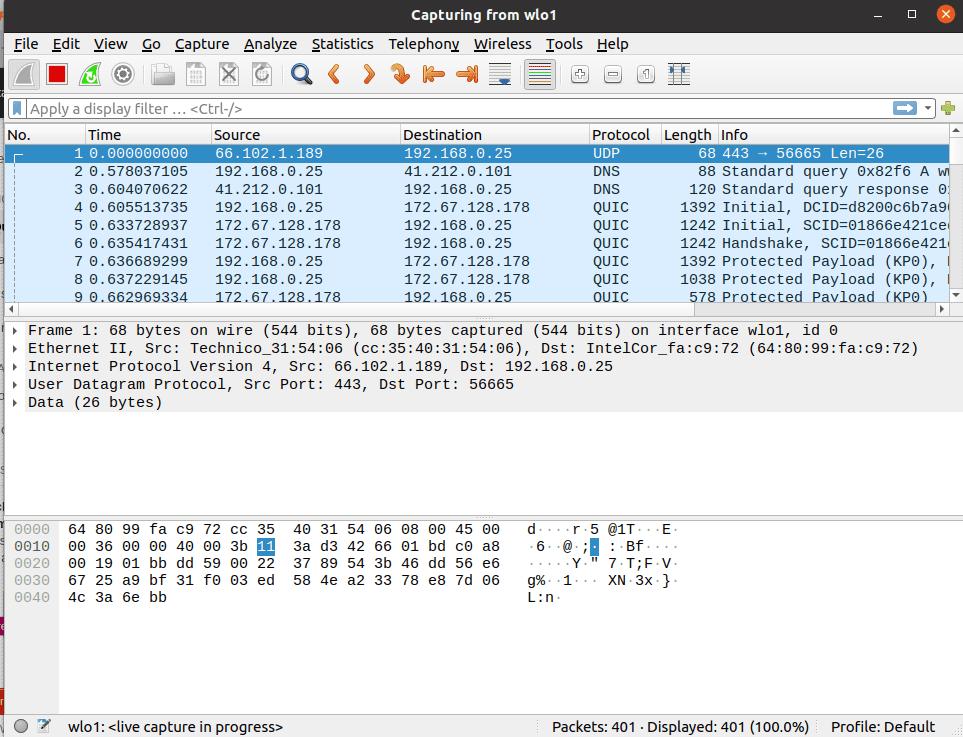
A window displaying Wireshark at work after clicking the start button
During the capture, the software will display the packets it captures in real-time.
Once you have captured all the needed packets, you will use the same button to stop the capture.
Best practice says that the Wireshark packet should be stopped before any analysis is done. To this point, you can now do any other scanning you want with the software.
4. Netcat
Netcat is a software application used to write and read info or data across TCP and UDP network connections. This works well or is rather a must-have utility if you are a system admin or responsible for network or system security. Interestingly, this software can be used as a port scanner, a port listener, a back-door, a port director, and many more.
It is a cross-platform available for all major distros, Linux, macOS, Windows, and BSD. Alternatively, the software is used for debugging and supervising network connections, scanning for open ports, transfer data, proxy, and many others.
The software comes pre-installed on macOS and famous Linux distros such as Kali Linux and CentOS.
Netcat is diversified from only being an IP scanner to working as a tiny Unix networking analyzer software to be used by and against hackers for several reasons depending on the wishes of the organization or user.
Features:
- It can be used in file transfer from the target.
- It creates a back-door for easy target access.
- Scans, listen, and forward open ports.
- Can connect to a remote system through any port or service.
- Has banner grabbing to detect the targets software.
Let us get this app running by applying the following commands on your computer’s terminal. Alternatively, you can download it using the link Download Netcat to install this software on your PC manually.
First, install using the following command:
sudo apt-get install -y netcat
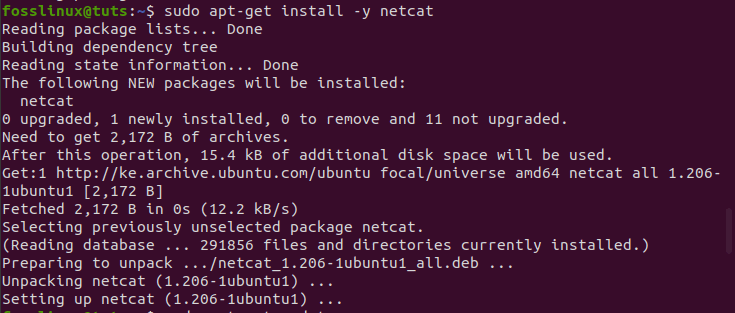
installing netcat
There is a command that works as a useful option as it displays all the choices you can use in this app. To achieve this, copy and paste the following command.
nc -h
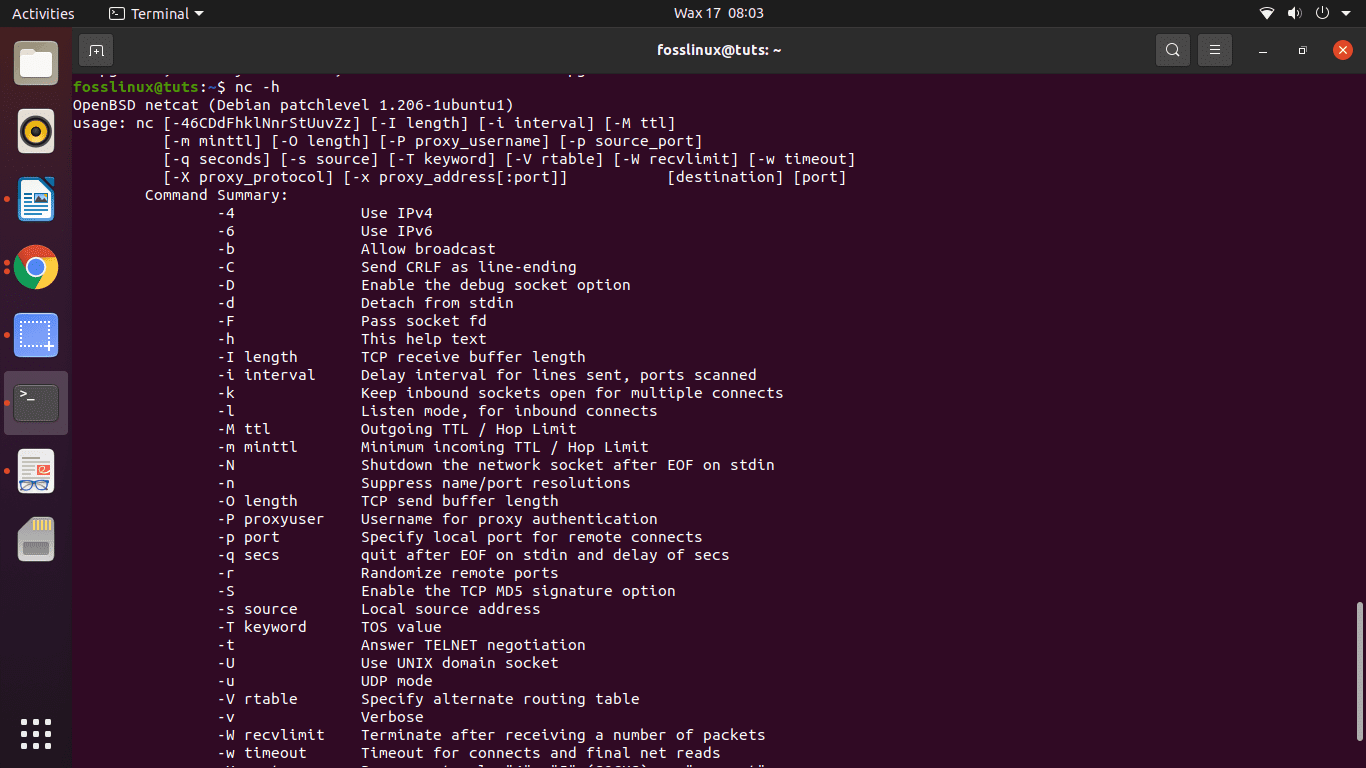
nc -h help command
Thereafter, we can go to this scanner’s main function, looking up IP and TCP addresses. Finally, you can use the nc command-line tool for scanning the domain or IP for checking ports. Look at the following syntax for a better understanding.
nc -v -n -z -w1 <DomainName> <StartPortNo-EndPortNo>
For instance, in our example, we had the following:
nc -v -n -z w1 192.168.133.128 1-100
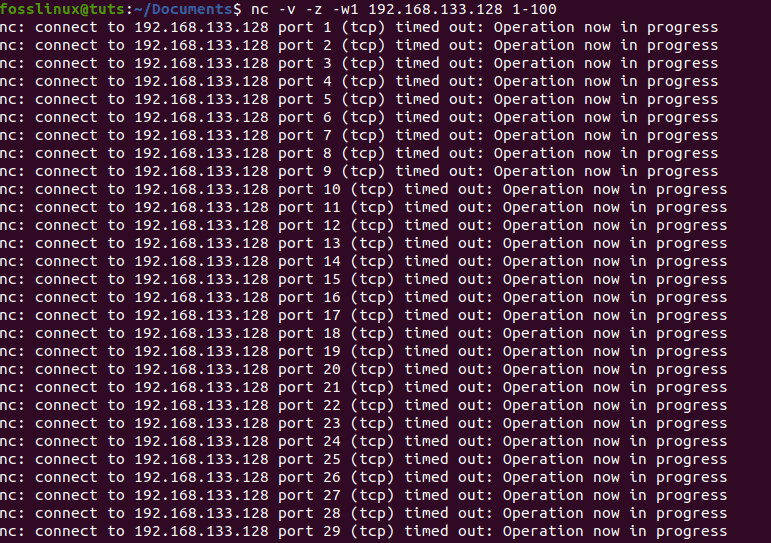
checking IP ports using netcat
5. Nikto
Nikto is an open-source scanner that scans for vulnerabilities on any website that uses Nikto. The app scans (examines) a website and gives feedback of vulnerabilities it found that could be exploited or used to hack the website.
It is among the most diversely used website scanning tools in today’s industry. This software is very effective, albeit not being concealed at all. This means that any site with an intrusion-detection system or has put security measures in place will discover that its system is being scanned. This brings us to the original concept of this app- the app was designed only for security testing; concealing was never an interest.
Downloading and installation
There are two ways you can follow to install this scanner on your PC. First, you can use the following link, Download Nikto, to download and install the software manually. However, in our case, we will use the second option, which is installing via the command line.
How to install Nikto
If you use Kali Linux, you don’t need to worry about the installation process since Nikto comes pre-installed. In our case, we are going to install Nikto using the command below on Ubuntu:
sudo apt-get install nikto -y
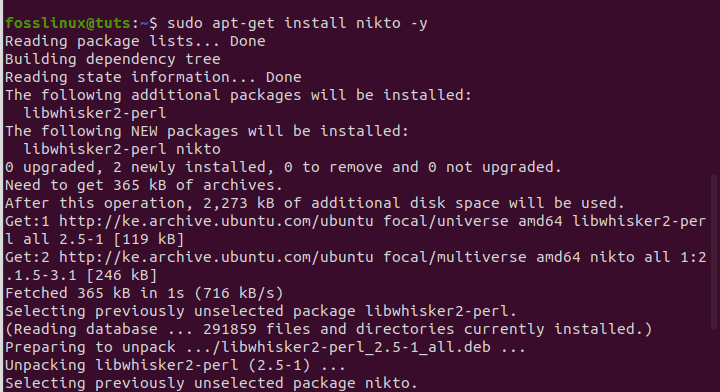
installing nikto
Before going deep into scanning with Nikto, you can use the -Help option to give you everything that Nikto can do.
nikto -help
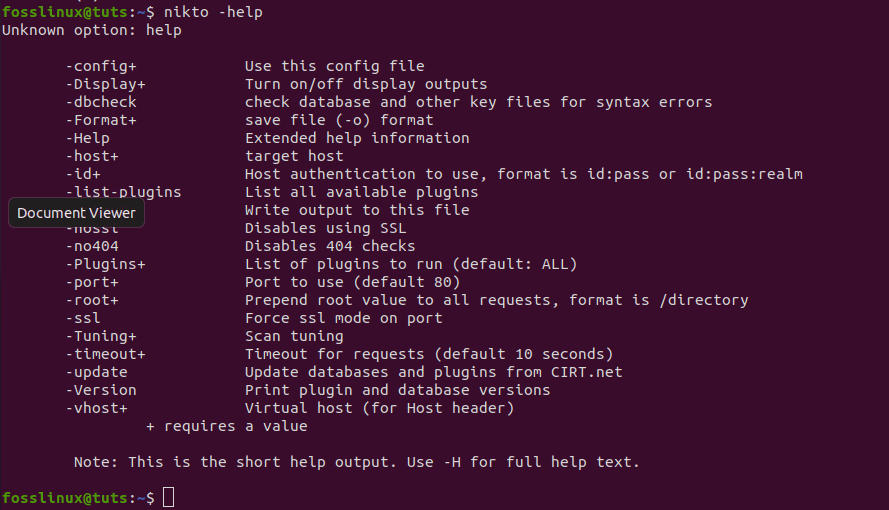
know more about nikto
From the snapshot above, you will realize that Nikto has so many options for you, but we will go with the basic ones. First, let us dive into looking for IP addresses. We will replace the <IP or hostname> with the actual IP address or hostname in the syntax below.
nikto -h <IP or hostname>
Nonetheless, this software can do a scan that can go after SSL and port 443, the port used in default by HTTPS website since HTTP uses port 80 by default. This, therefore, means that we are not limited to scanning old sites, but we can also do the assessments on SSL-based sites.
If you are sure that you are targeting an SSL site, you can use the following syntax to save time:
nikto -h <IP or hostname> -ssl
Example:
We can run a scan on foss.org
nikto -h fosslinux.org -ssl
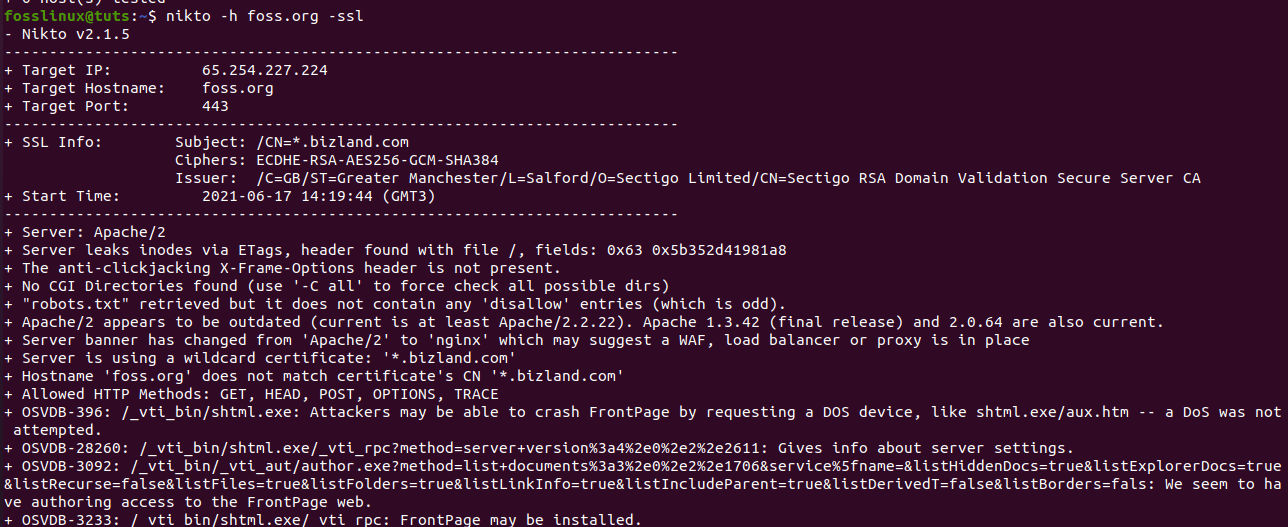
running the foss.org IP address
Scanning an IP Address:
Now that we have performed a website scan, let us take it a notch higher and try using Nikto on a local network to find an embedded server. For instance, a login page for a router or an HTTP service on another machine is just a server with no website. To do this, let us first begin by finding our IP address using the ifconfig command.
ifconfig
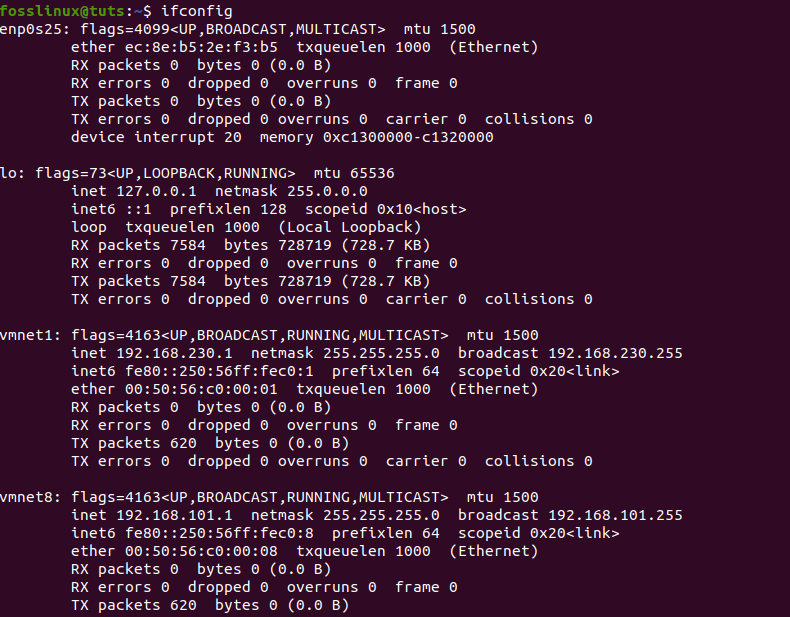
using the ifconfig command in Nikto
Here, the IP we want is the “network” one. So, we will run ipcalc on it to get our network range. For those who don’t have ipcalc, you can install it by typing in the following command, sudo apt-get install ipcalc, and try it once more.
sudo apt-get install ipcalc
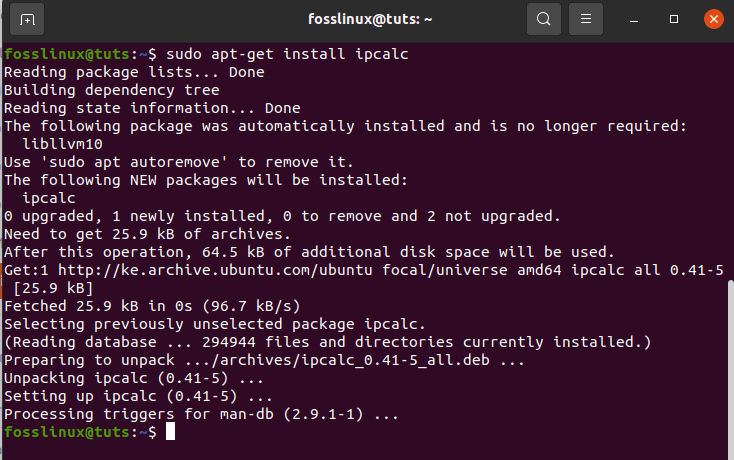
installing ipcalc
The network range will be next to “Network” in my case; it is 192.168.101.0/24.
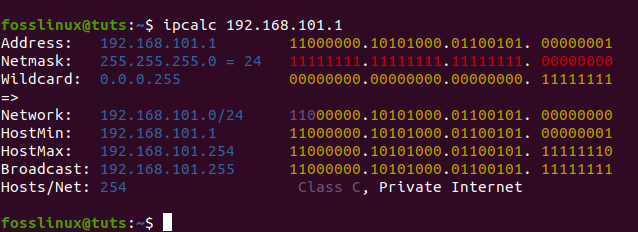
using the Ipcalc to find network range
Those are the basics stuff Nikto can do. You can, however, do great things besides those already mentioned.
6. Umit scanner
This is a user-friendly GUI interface to Nmap that allows you to carry out port scanning. Some of the significant features of this app are its stored scan profiles and the ability to search and compare saved network scans. The app is packaged for Ubuntu and also windows.
You can use the two available methods to have Umit on your PC, first is to use the Download Umit Scanner link that will allow you to download and manually install the app. The second is using the terminal that we will focus on in this article.
Upon clicking the Umit link, you will be redirected to a page similar to the one shown below:

Umit download page
The Umit software is coded in python and uses the GTK+ toolkit for its graphical interface. This means that you need python, GTK+, and the GTK+ python bindings to be installed alongside Nmap. Below is a downloaded package of Umit.
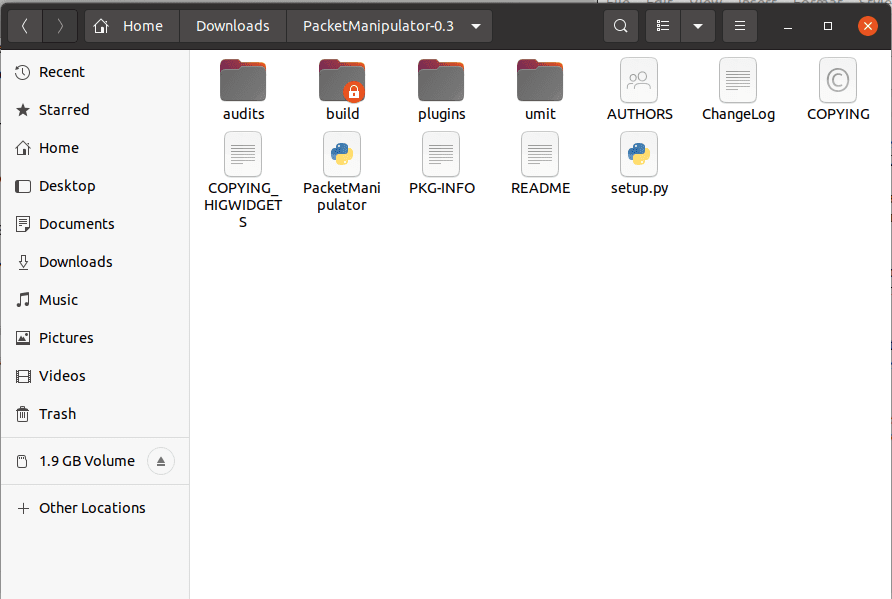
Umit downloaded package
To start testing Umit, you will go to the application menu, look for Umit, and click on it to start the application. Thereafter, type in localhost in the target field and press the scan button. The scanner will start running, and you will see a similar screen to the one displayed below.
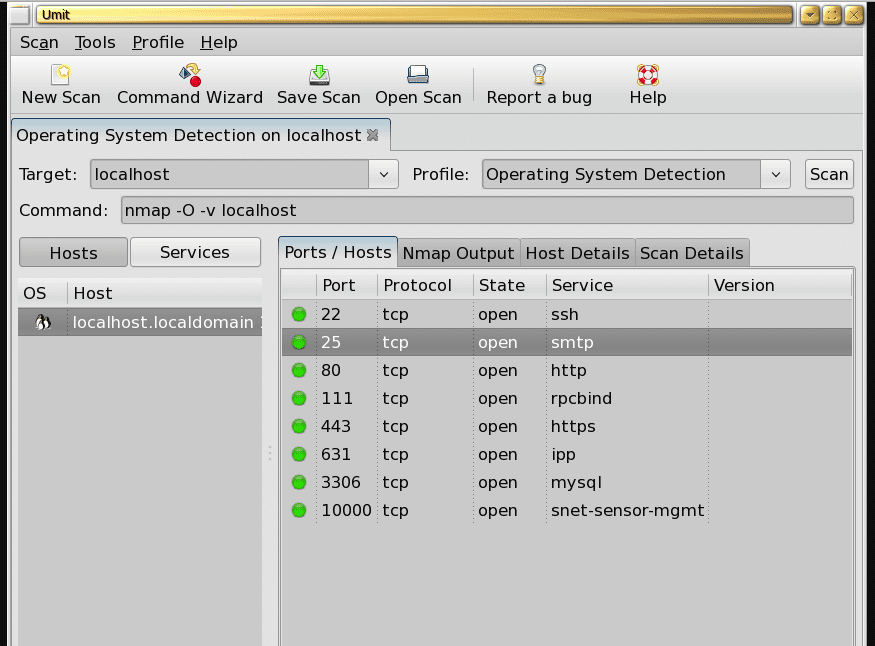
using Umit
If you want to run another scan, you will press the New Scan button. Here you can view the scan results either by host or service, but since we scanned localhost in our example, it makes sense to view the output by host.
If you want to view the results of an entire network scan, you can use the service by clicking the service button situated at the middle left side of the window.
Additionally, when you save a scan, Umit saves the host details and scan details info and the host’s list and ports found in the scan. The scan menu shows a list of recently saved scans, thus allowing you to switch to your recent scans.
7. Intruder

Intruder
This is a great device that performs vulnerability scanning to find a security weakness across your IT environment. The device works well by providing industry-leading security checks. To add on, it also allows or offers continuous monitoring and an easy-to-use platform.
Plus, what comes with this device is its ability to keep businesses safe from hackers. In addition, the Intruder allows the user to have an overview of the network. This means that you can quickly glimpse at how your system appears from an external point of view. It also provides notifications in case its ports and services are changed. To add on, you can also take a look at Linux server malware and rootkit scanners to diversify your scanning knowledge.
Features:
- It allows API integration with your CI/CD pipeline.
- The device prevents emerging threat scans.
- Supports AWS, Azure, and google cloud connectors.
- It also supports SQL injection and cross-site scripting that aid in checking configuration weaknesses and missing patches.
How to install Intruder
Intruder has two installation methods. The first is downloading the installation file using the Download Intruder link, redirecting you to the Nessus Agent official download page, as shown in the snapshot below. However, in our case, we will use the second method, which is the command-line method.
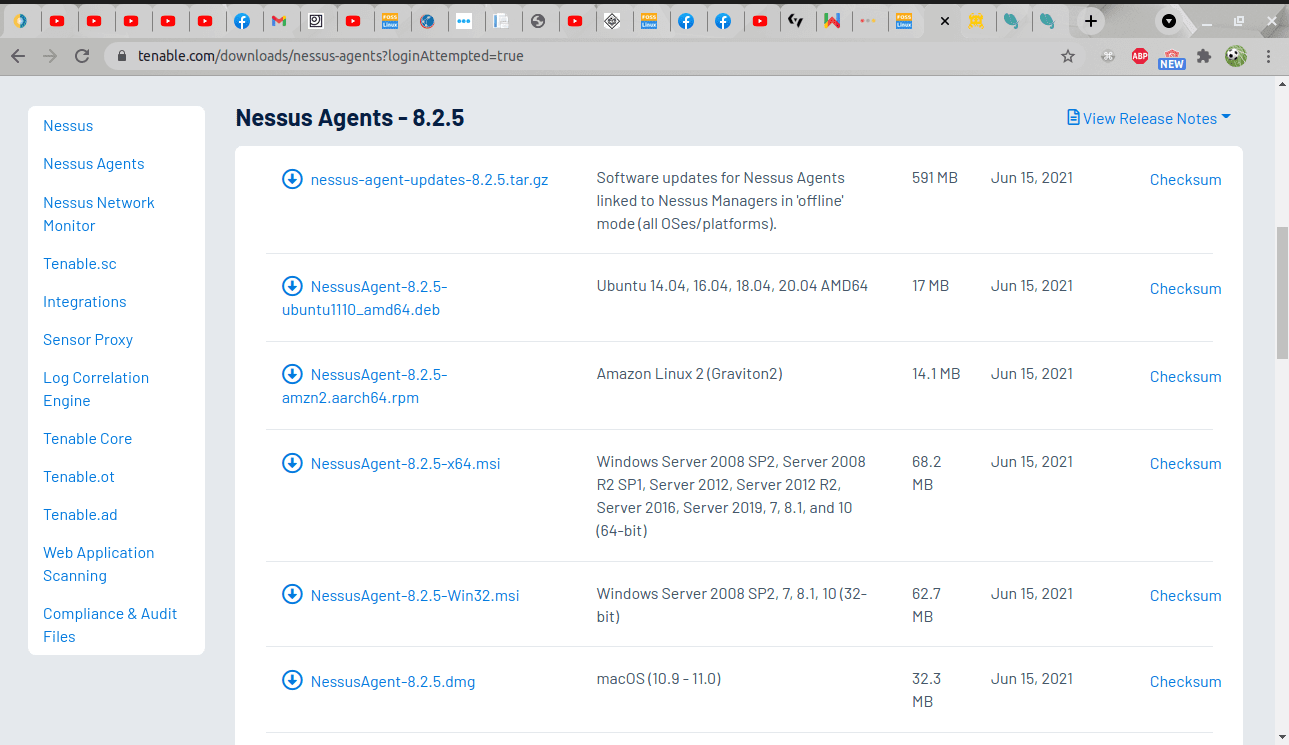
Nessus download page
Once you have opened the above link, please select the right installer packer for your Linux flavor and go ahead to download it.
You can now click on the installer you want to download the .deb file from or rather download using the following command:
curl -o Nessus-8.13.1-Ubuntu1110_amd64.deb "https://www.tenable.com/downloads/api/v1/public/pages/nessus/doownloads/12207/download?i_agree_to_tenable_license_agreement=true&file_path=Nessus-8.13.1-Ubuntu1110_amd64.deb"
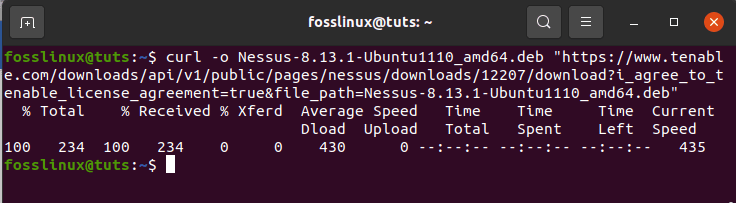
downloading nessus professional installer
Install the agent
To install the package, all you have to do is use the following syntax in your terminal, and you will be done.
sudo dpkg -i [NessusAgent package].deb
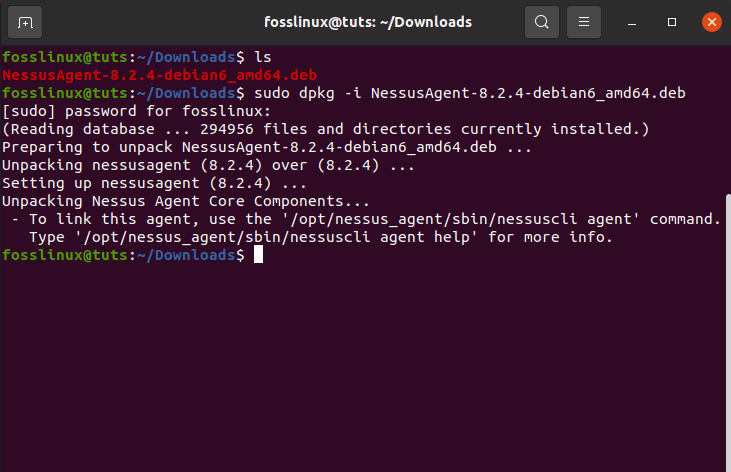
installing intruder (nessus agent)
8. Arp-scan
The Arp scanner is a fancy scanning tool sometimes referred to as ARP Sweep. It is a low-level network discovery tool used to link physical (MAC) addresses with logical (IP) addresses. The app also identifies active network assets that network scanning devices may not easily identify; it utilizes the Address Resolution Protocol (ARP) to do this.
In short, the fundamental purpose of the Arp-scan tool is to detect all the active devices within an IPv4 range. This applies to all devices in that range, including those protected by a firewall meant to conceal their proximity.
This is a very vital discovery tool that any IT and Cybersecurity expert should be well versed with. In addition, most, if not all, ethical hackers should have a solid comprehension of the fundamental networking protocols, of which ARP is at the top of the list.
Without the networking protocols, LANs would never function, which means that the users must have a proper understanding of how to check the contents of their ARP cache and know well how to perform the ARP scanning.
Since the Arp scanner has two installation methods, you will choose the most suitable method for you. The first is the manual installation using the Download Arp scan link, while the second method comprises the command-line installation process. We will go with the second method in our case.
Some of the advantages of using this software include:
- It isolates and discovers rogue devices
- It identifies duplicated IP addresses
- It can identify and map IP addresses to MAC addresses.
- It allows you to detect all IPv4 network-connected devices.
How to install arp-scan tool
Here, we will install Arp using the command line. To do this, copy and paste the following command into the terminal.
sudo apt install arp-scan -y
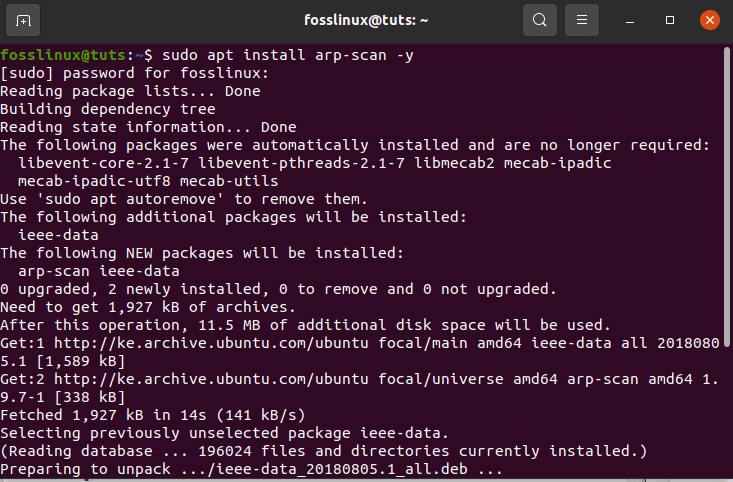
installing the arp-scan tool
How to scan a local Network Using the Arp scan
One of the most basic functions of the Arp tool is scanning local networks using a single option named –localnet or -l. This will, in turn, scan the whole local network with Arp packages. To use this tool well, we need to have root privileges. Let us run the following command to scan a local area network.
sudo arp-scan --localnet
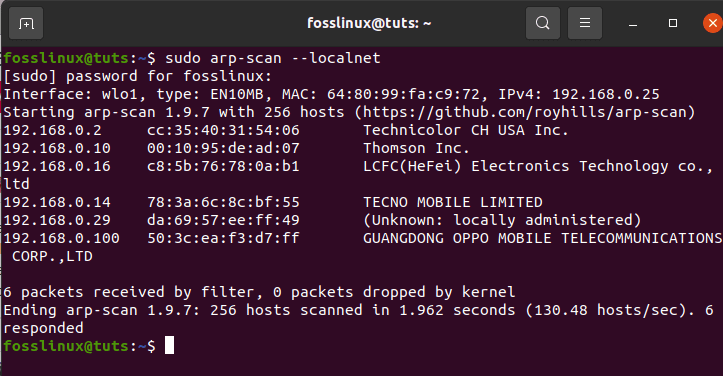
scanning the local area network using arp scanning tool
9. Masscan scanning tool
This is a network port scanner popularly known to be almost the same as Nmap. The prime objective of Masscan is to enable security researchers to run port scans on vast internet swathes ASAP.
According to its author, it only takes up to 6 minutes at around 10 million packets per second to thoroughly scan the entire internet, which is super-fast.
Port scanners are must-have tools for any researcher’s toolset. This is because the device provides the shortest way to detect running apps and services on remote open ports.
Masscan can be used for both defensive and offensive search functionalities. In addition, have you been interested in learning how to perform a port scan in Linux? If yes, refer to How to do a port scan in Linux for greater comprehension.
Features:
- The software is portable as it can also be installed in all the three major operating systems; macOS, Linux, and Windows.
- Scalability is another key feature of Masscan. This allows it to transmit up to 10 million packets per second.
- Besides performing port scans, the tool is also improvised to offer a complete TCP connection to fetch basic banner info.
- Nmap compatibility: Masscan was invented to create the tool’s usage and result similar to Nmap’s. This helps in translating user’s knowledge from Nmap to Masscan quickly.
- Despite many compatibility advantages between Nmap and Masscan, there are still several contrasting issues worth knowing.
- Masscan only supports IP addresses and simple address scans, while Nmap supports DNS names too.
- There are no default ports to scan Masscan.
To install the application, you can manually go to the Masscan download page using the Download Masscan link or use the command-line installation method that we used.
How to install Masscan on Ubuntu
One of the quickest and shortest ways to have Masscan on your Linux computer is to download the source code and compile the software. Then, use the subsequent guidelines to install Masscan.
Step 1) To begin with, you need to update your system using the following command:
sudo apt update
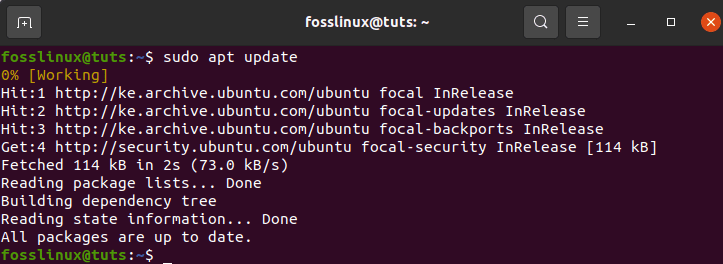
running the update command
sudo apt install git gcc make libpcap-dev
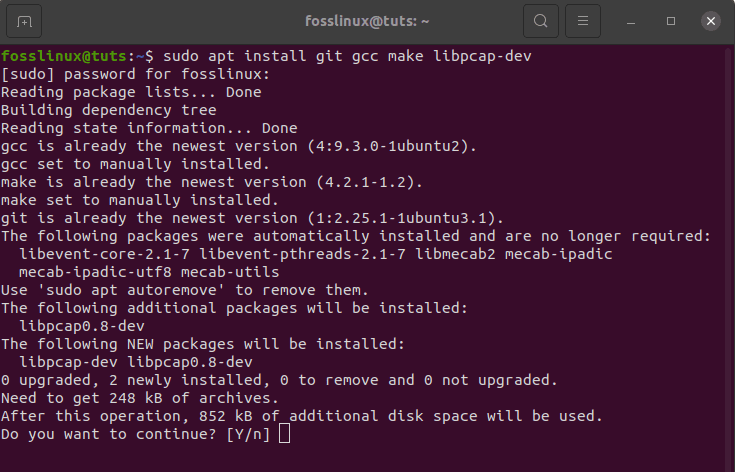
installing dependencies for masscan
Upon running the “sudo apt install git gcc make libpcap-dev” command, you will be prompted to enter your password; after that, at the bottom, you will be asked if you want to continue with the operation. Here you will type ” Y ” and press “Enter” to proceed.
The next step is to clone the official Masscan repo and compile the software using the command below:
git clone https://github.com/robertdavidgraham/masscan
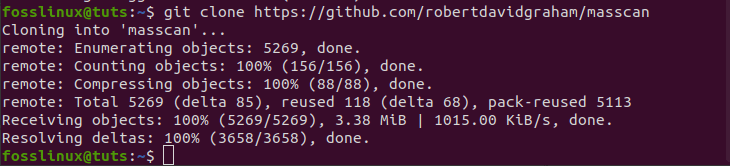
cloning the masscan repo from git-hub
Thereafter, navigate to the Masscan directory using the following command:
cd masscan
navigating to masscan directory
Finally, enter the following command to initiate the process
make

The make command in Masscan
During the installation, you might get 1 or 2 warnings. However, if the software compiled successfully, you will have an output like this:
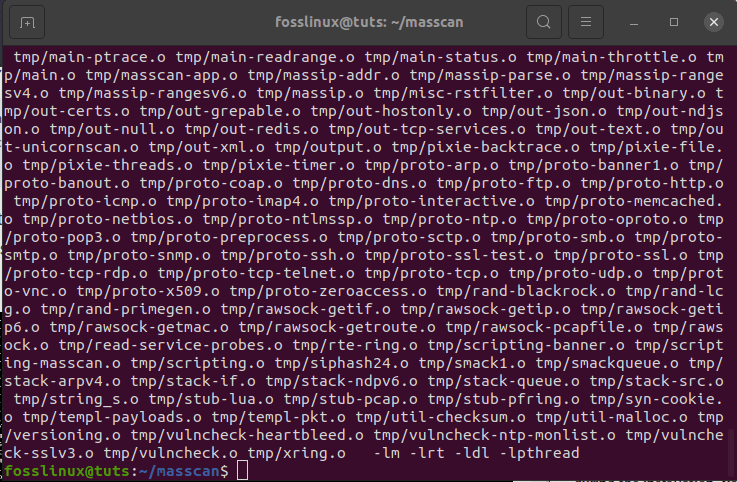
A correctly compiled output of masscan tool.
How to use Masscan
After looking at the installation guidelines, we now switch and look at how we can get Masscan in action. Sometimes, firewalls or proxies may block IPs that port scan; therefore, we will use hindsight to run our Masscan test.
Single IP port scan
Let us run our first single IP and single port scan using the command below:
sudo ./masscan 198.134.112.244 -p443
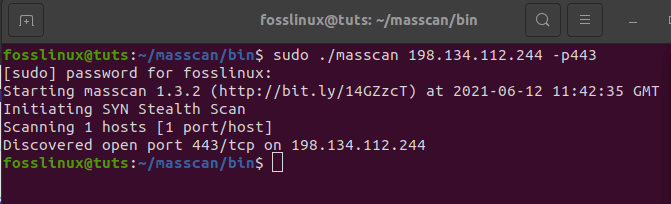
first single port masscan scan
Our scan detected that port 443 is open.
How to scan multiple ports
Multiple scans are used to execute several ports on an IP subnet. Let us put this into effect by running the following commands to set an example for a multi-port analysis. To carry out multiple scans, use the following command:
sudo ./masscan 198.134.112.240/28 -p80,443,25
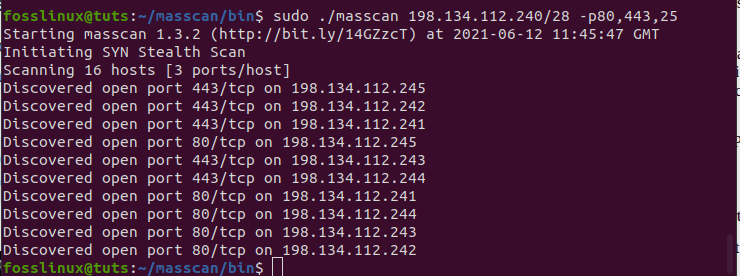
running a multi-port scan analysis with Masscan.
The scanner shows that 16 hosts were found, and it also displays which ports are open on which addresses, which is really cool.
10. NMAP

NMAP
As a matter of fact, this compiled list won’t be complete without including NMAP. NMAP is famously known as a network security tool finder. The device’s primary function is to help system administrators identify what devices are running on their systems, discover available hosts and the services they offer, find open ports, and detect security risks. However, this doesn’t mean that it cannot be used in other functionalities since Nmap can also be used to find IP address usage in a network.
Besides the scanners that we have already looked at in this article, you can also refer to this link to diversify your knowledge on The best Linux server malware and rootkits scanners.
Nmap has two installation methods. The first is using the Download Nmap link to manually download and install the app, while the second method uses the terminal. In our case, we prefer the terminal method.
How to install Nmap in Linux
Before exploring Nmap commands, the software must first be installed into your system. So let us get started by opening our terminal and running the command below.
sudo apt install nmap
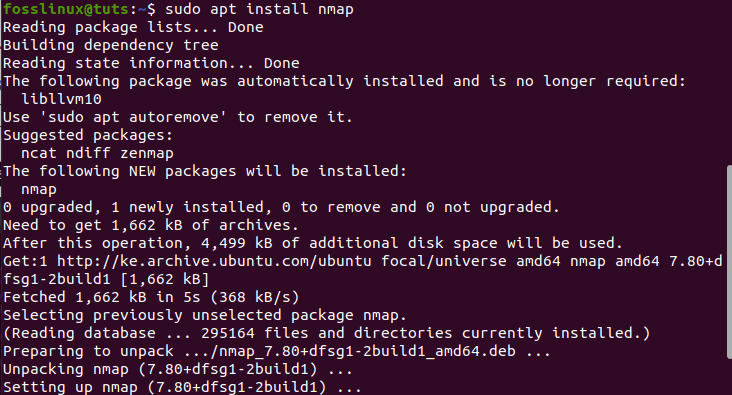
installing nmap
Upon downloading and installing the file, we can now look at several functionalities of the Nmap command with examples:
Scanning a hostname using the Nmap command
A scan using hostname and IP address is one of the best ways to run Nmap commands. For instance, let us try with “fosslinux.com”:
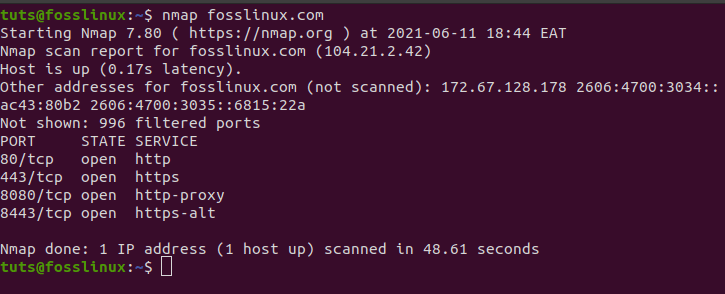
nmap running a hostname.
Let us now dive deeper into scanning an IP address using the Nmap command. To achieve this, use the command given below:
sudo nmap 192.168.0.25
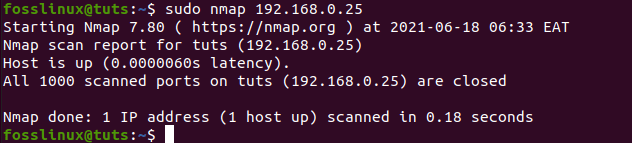
scanning IP address using Nmap
How to scan using the “-V” option with Nmap
This command is literally used to get detailed info about the connected machine. Let us try this out by typing in the following command in the terminal.
nmap -v fosslinux.com
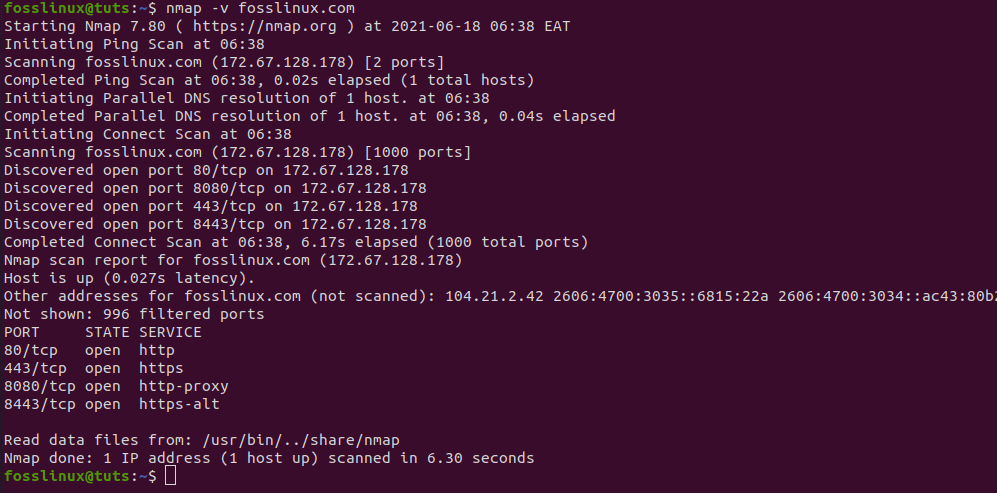
Using the -V command in Nmap
We can also look for an IP Address Range using the command below.
nmap 192.168.0.25-50
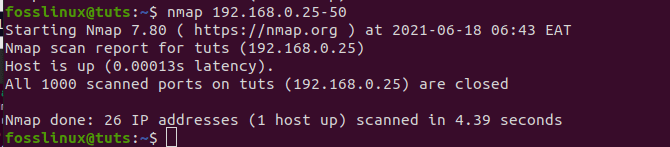
using Nmap to scan an IP address range
Finally, we can use Nmap to detect firewalls. To check this out, type “-A” in the terminal with “nmap”:
sudo nmap -sA 192.168.0.25
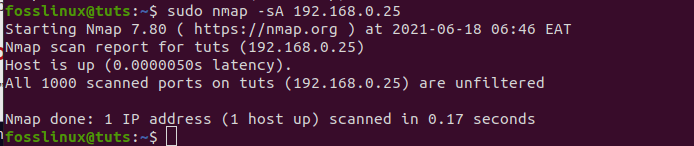
how to detect a firewall using Nmap
Conclusion
The article has compiled the 10 best IP Scanners and all the essential info you need about Network Management Scanner tools and managing them even better. However, we cannot say that we have exhausted all of these tools since there are many free online scanners out there. Have you tried any of these scanners? If yes, please share with us in the comment section to see how you are faring with them.